Welcome to an exciting culinary adventure! Today we’re diving deep into traditional Japanese cuisine to make our own natto. This fermented soya bean dish is as well known for its health benefits as it is for its unique aroma and distinctive texture.
It might seem a little daunting at first glance, but don’t worry: I’ll guide you through the process step by step. Are you ready to conjure up your own natto and discover the fascinating world of fermentation?

What exactly is natto?
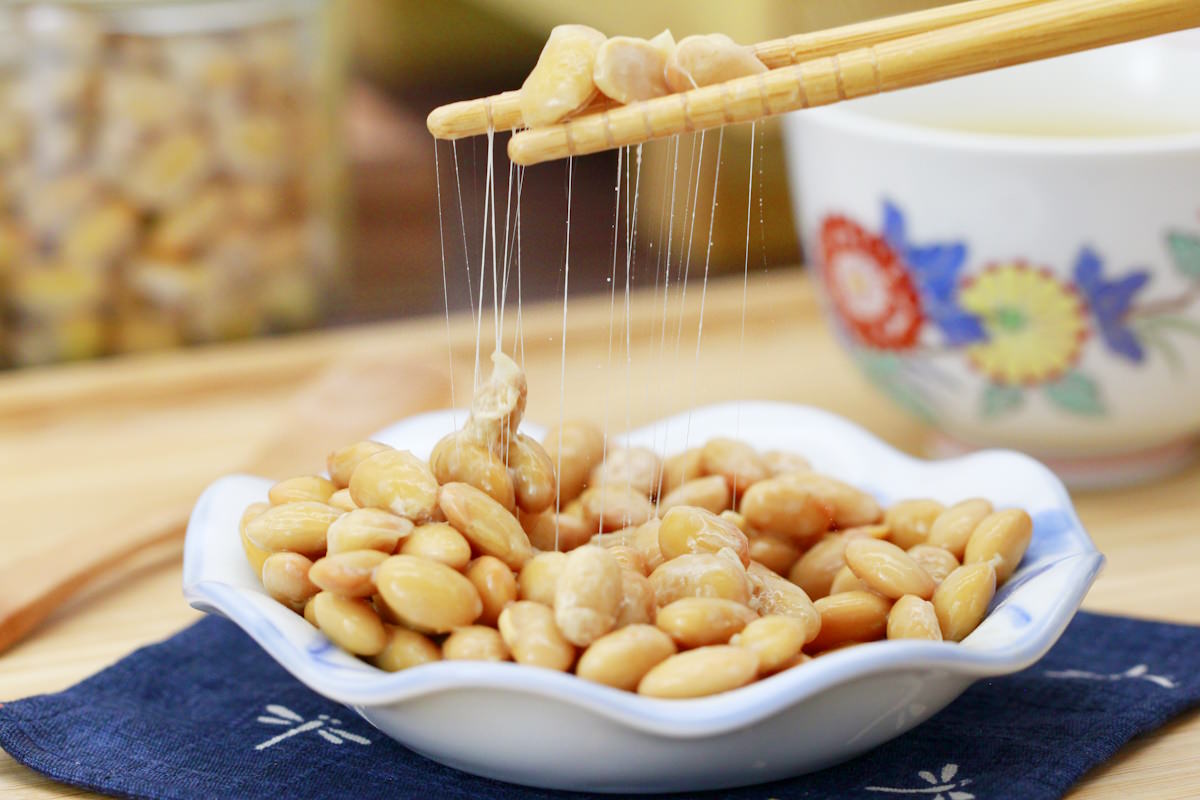
Natto, a traditional national dish from Japan, offers more than just a unique culinary experience. With its sticky consistency and strong aroma, natto is a bold challenge for Western palates, but one that is well worth it.
For this dish, made from fermented soya beans, is a true superfood that not only provides you with vitamins and valuable proteins, but also possesses health-promoting properties.
Yes, Natto may seem a little strange at first glance – its stickiness and strong smell may be unfamiliar. But it is precisely these characteristics that are part of its appeal and make it an incomparable taste experience. In Japan, natto is a very popular breakfast dish and is valued not least for its health benefits.
Fermentation is an ancient process that preserves food, intensifies its flavour and even makes it healthier. It aids digestion, is often free from preservatives and transforms simple soya beans into a tasty and nutrient-rich meal.
By the way!
With an average protein content of almost 17%, low fat, no cholesterol and a wealth of vitamins, including the important vitamin K2, natto is an ideal addition to any vegetarian or vegan diet. It also contains all eight essential amino acids that our bodies cannot produce themselves and which are normally only obtained through the consumption of meat.
The health-promoting effects of natto are also supported by the enzyme nattokinase, which is thought to dissolve blood clots and thus reduce the risk of strokes and heart attacks. Furthermore, natto contains a substance called mucin, which protects and repairs the mucous membranes and offers relief to hay fever sufferers.
So, how about embarking on a culinary adventure and taking on the challenge of trying homemade natto? The recipe below guides you through each passage of the fermentation process.
Making natto yourself: Here’s how:
What you’ll need:
- Dried soya beans (bei Amazon* kaufen)
- Natto starter (bei Amazon* kaufen)
- Rice cooker with steaming function (im Shop ansehen) or a saucepan with a steamer insert
- Yoghurt maker
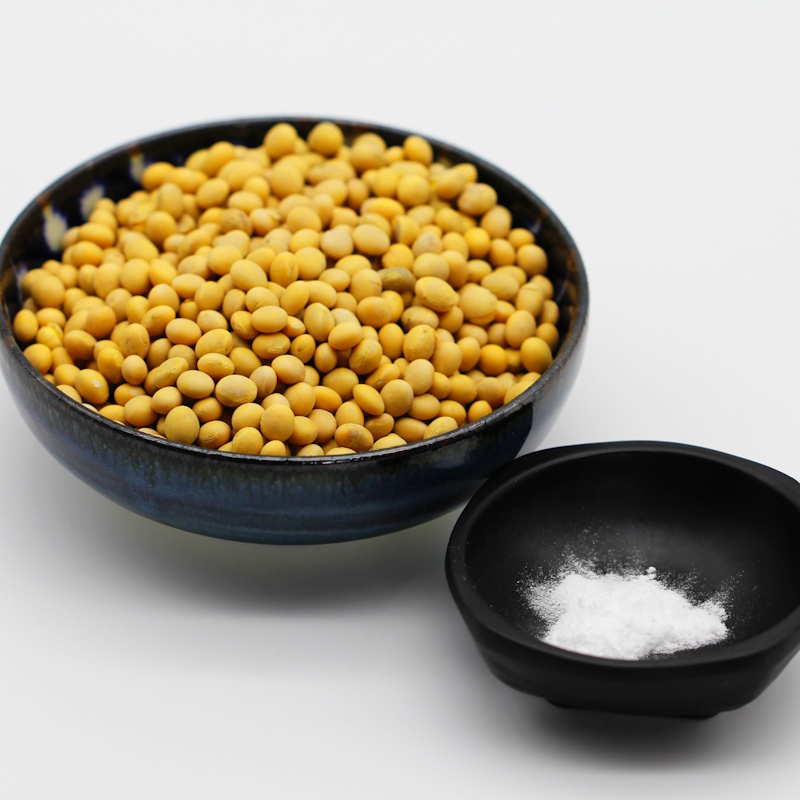
Dried soya beans are a versatile product derived from soya plants. They are usually pale yellow and about the size of peas, although their size and shape can vary. Dried soya beans are produced by naturally drying freshly harvested soya beans.
They are extremely nutritious, rich in protein and fibre, and represent an important source of protein, particularly in vegetarian and vegan diets. With their neutral flavour, they serve as a base for numerous dishes and products, including soya milk, Tofu and, of course, the traditional Japanese natto.
And this is how it works:
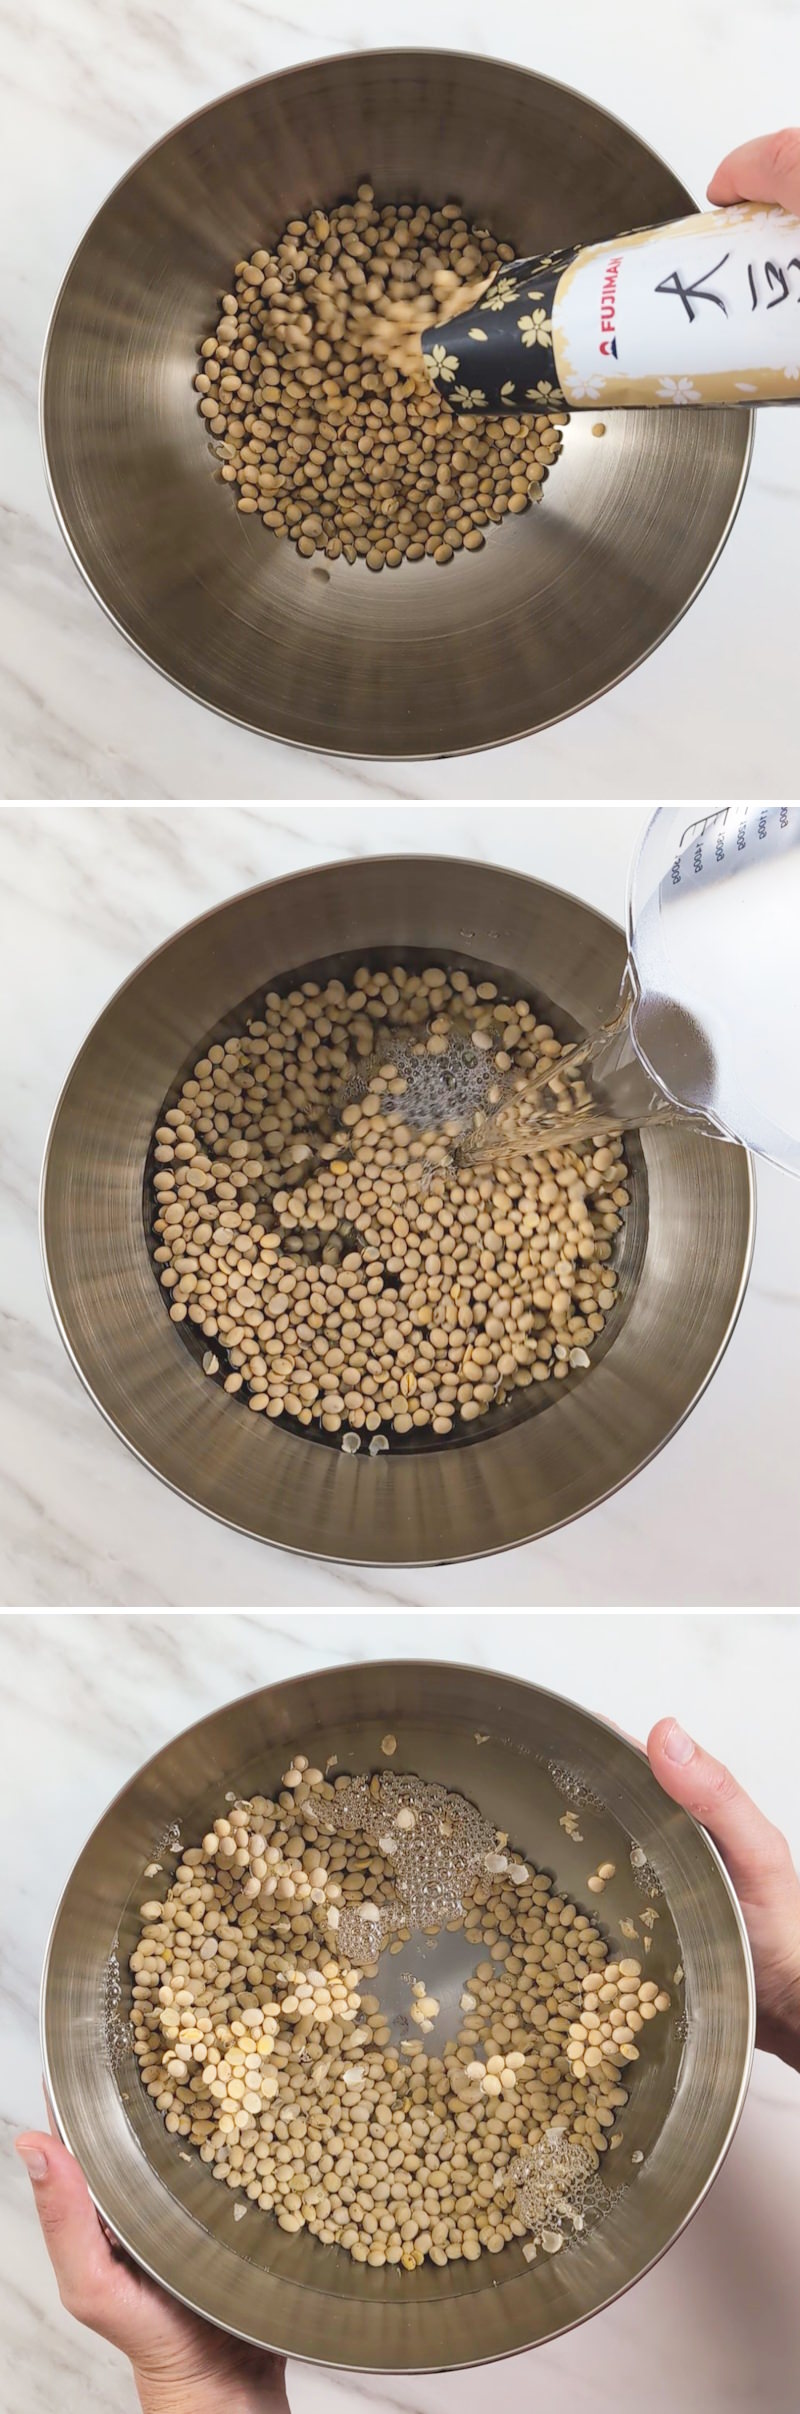
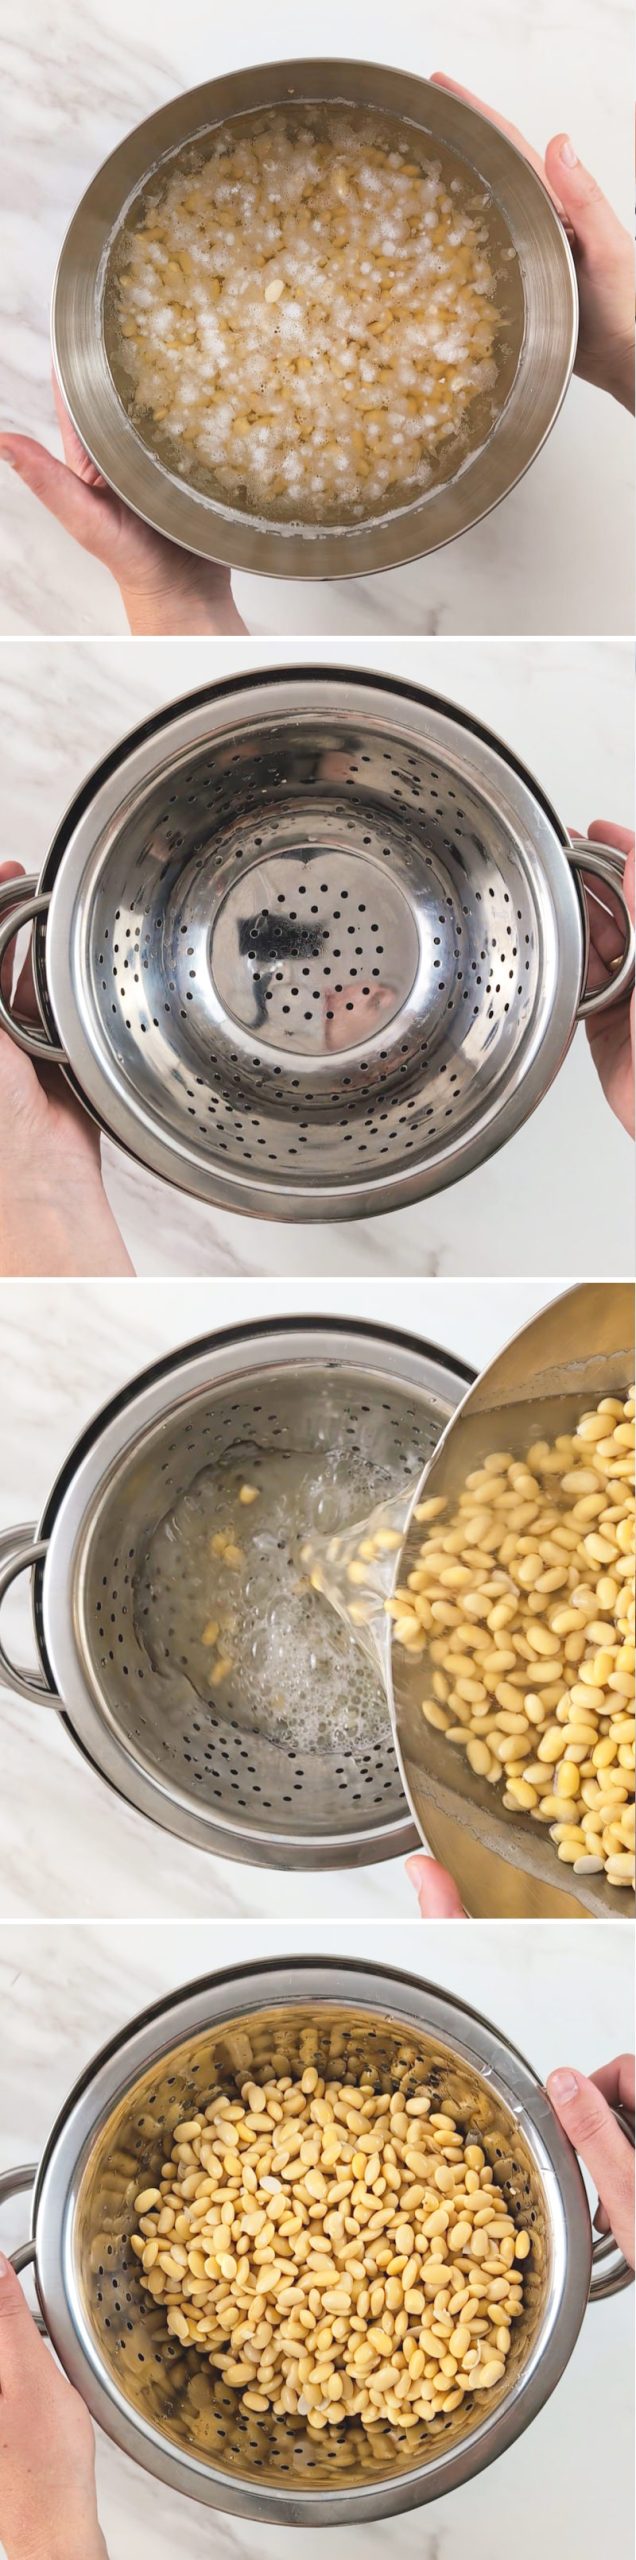
To make your own natto, you should first gather all the ingredients and bear in mind that the preparation takes several days. Start by covering the soya beans with water in a large bowl and leaving them to soak overnight, for about 12 hours. The next day, drain the water and cook the beans in a large saucepan with fresh water until they are soft – this takes about 3 hours. While cooking, you should occasionally skim off the rising foam.
Once the beans are soft, drain the water and let the beans cool briefly. Meanwhile, prepare the natto starter by dissolving it in lukewarm water and then pouring it over the beans. Stir everything thoroughly so that the starter is well distributed.
Now either divide the beans between the jars of the yoghurt maker and leave them to ferment there for 24 hours at 40°C, or line a baking dish with cling film, place the beans inside, cover them again and leave them to ferment in the oven at the same temperature. After fermentation, place the beans in the fridge, where they should rest and mature for two days.
Tip
A yoghurt maker is a special kitchen appliance that makes it easier to prepare fermented foods. It maintains a constant temperature, which is ideal for fermenting, for example, milk with yoghurt cultures. Furthermore, a yoghurt maker can be used to make not only yoghurt, but also other fermented products such as natto. I recommend this yoghurt maker (auf Amazon* kaufen).
The finished natto can be eaten straight away, for example with rice as nattodon, and will keep in the fridge for up to a week. Alternatively, you can freeze it and defrost it in portions.
I wish you every success and hope you enjoy making your own natto – if you have any questions or suggestions, please feel free to use the comments section below the recipe 😊.
How to make natto
serves 7 | 4 days | 212 kcal
🖨️ Print PDF 📌 Save pinToday we’re trying our hand at natto, the famous fermented soya beans that captivate with their distinctive aroma and fascinating texture. What may seem a bit daunting at first glance becomes an exciting adventure in the world of fermentation when you follow the right passaggi. Grab the ingredients and let’s conjure up this traditional dish together – your homemade natto is waiting for you!
Ingredients (serves 7)
300 g soya beans (dried) (bei Amazon* kaufen)
1 g or 2 capsules of natto starter (bei Amazon* kaufen)
Useful tools:
Rice cooker with accessories (im Shop ansehen)
Yoghurt maker (auf Amazon* kaufen)
Kitchen thermometer (auf Amazon* kaufen)
Tip #1:
I strongly recommend using a yoghurt maker to ensure a constant temperature during the fermentation process. An oven can also be used, but be careful: some ovens repeatedly heat up to over 60°C at intervals. This can destroy the beneficial bacteria in the natto and affect the success of the recipe.
Tip #2:
For all Thermomix owners, there is a handy alternative: you can also carry out the process in your machine! Simply set your Thermomix to 40°C to achieve the perfect temperature for the natto recipe!
Tip #3:
We are constantly striving to perfect our recipes. If you have your own experiences or tips on preparing natto, please let us know in the comments. Together, we can make this recipe foolproof for everyone!
Preparation (4 days)
Step 1
Prepare the ingredients for homemade natto. Tip: Please note that preparing natto takes several days – please allow for this time!
Passaggio 2
Let’s start with the soya beans: Place the soya beans in a large bowl and fill with enough water to cover them by about 5 cm. Leave the beans to soak for 12 to 24 hours, ideally overnight. They will absorb the water and swell to two or three times their original size.
Step 3
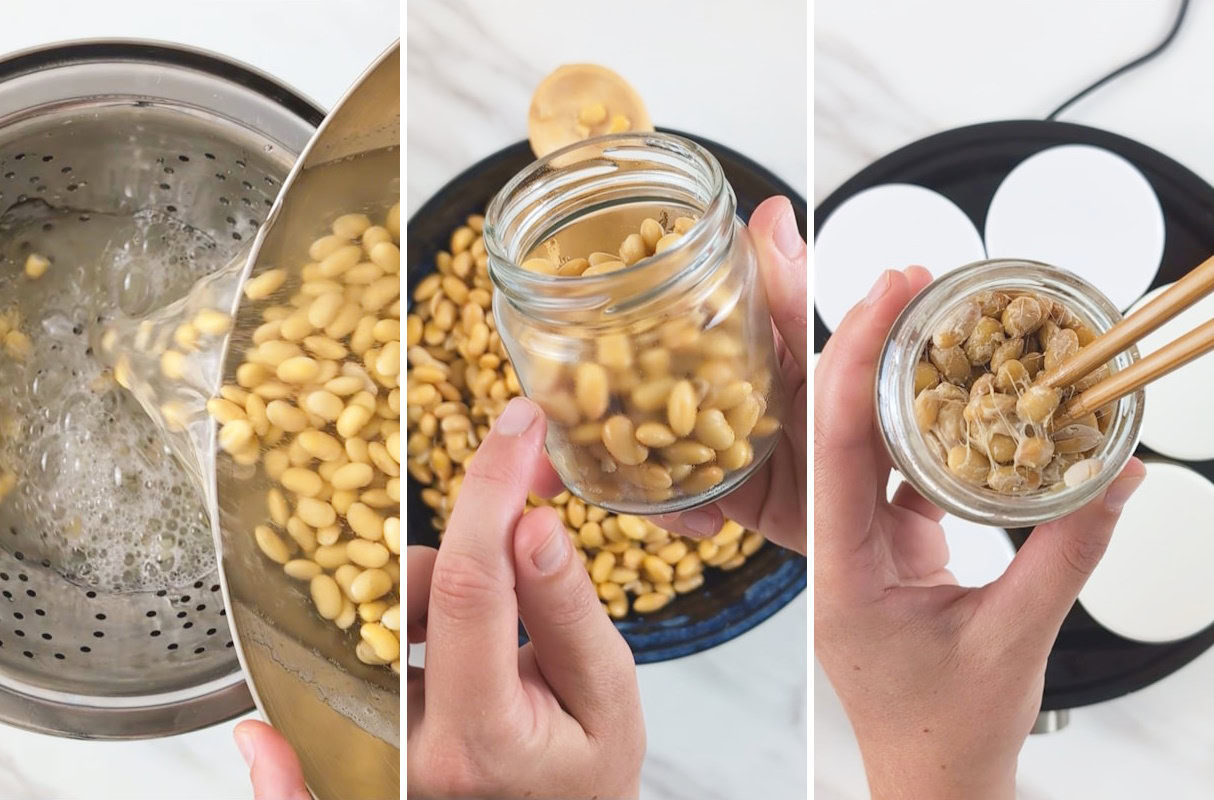
The next day, drain the soaked soybeans through a sieve and rinse briefly.
Step 4
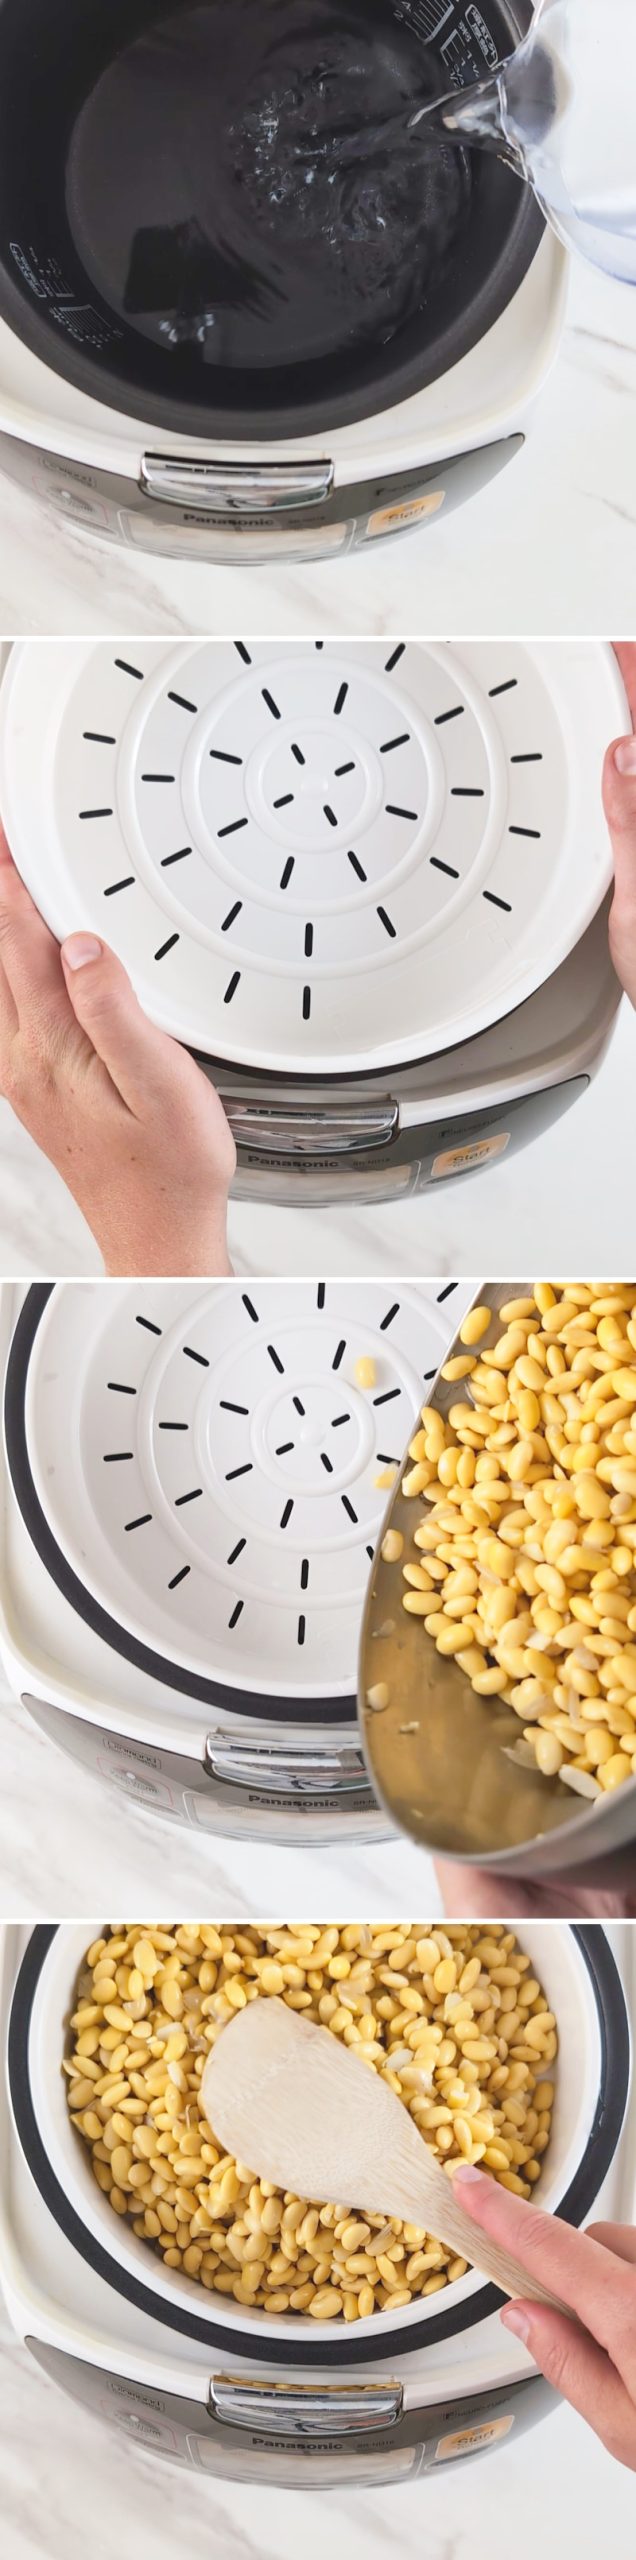
You now have two options for the steaming process: you can use a pot with a steaming lid or a rice cooker with a steaming lid. Here I’ll show you the method using the rice cooker.
Fill the inner pot of the rice cooker with enough water (preferably to just below the steaming basket). Place the appropriate steaming insert into the rice cooker and add the drained soya beans. Spread the beans out evenly, close the lid and start the steaming programme.

Passaggio 5
Steam the soya beans for 4–5 hours.
Passaggio 6
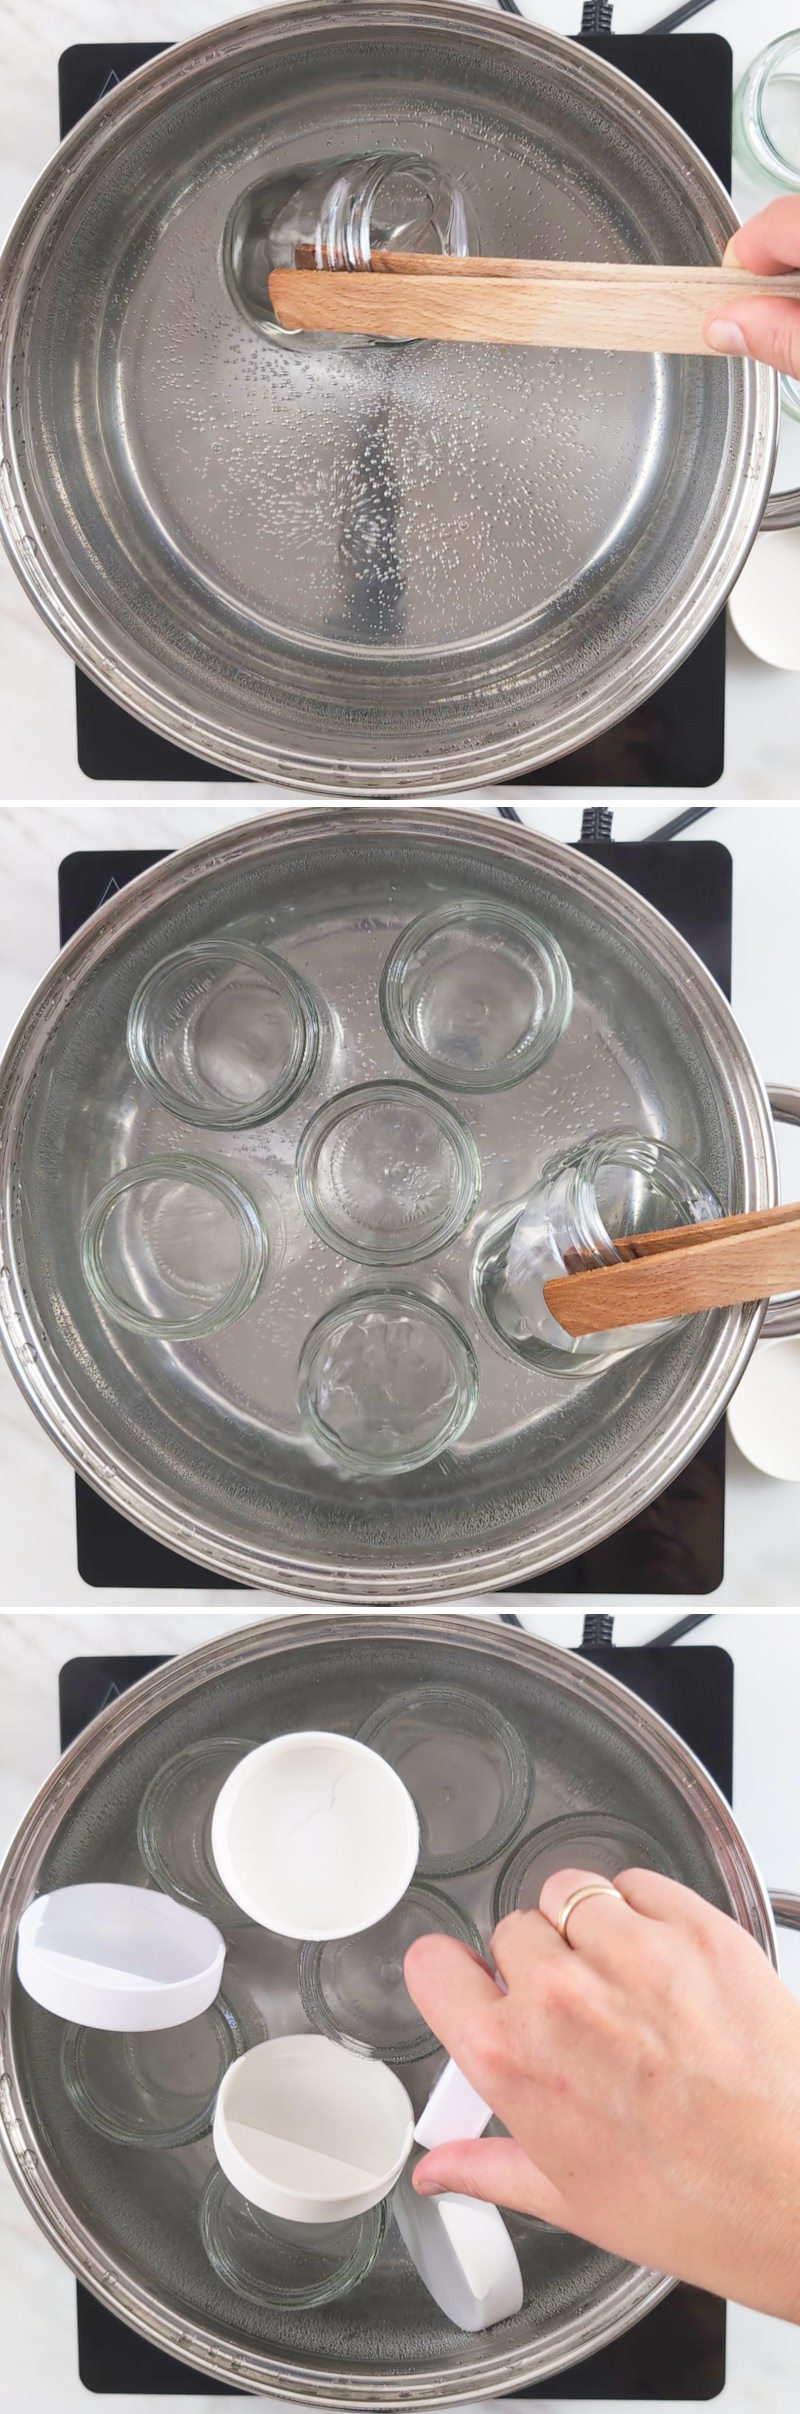
Just before the end, you can use your time to prepare your yoghurt maker . Rinse the jars and lids with boiling water to sterilise them (or place them in a large pan of boiling water). Then leave them to drain on a clean kitchen towel and set them aside until ready to fill.
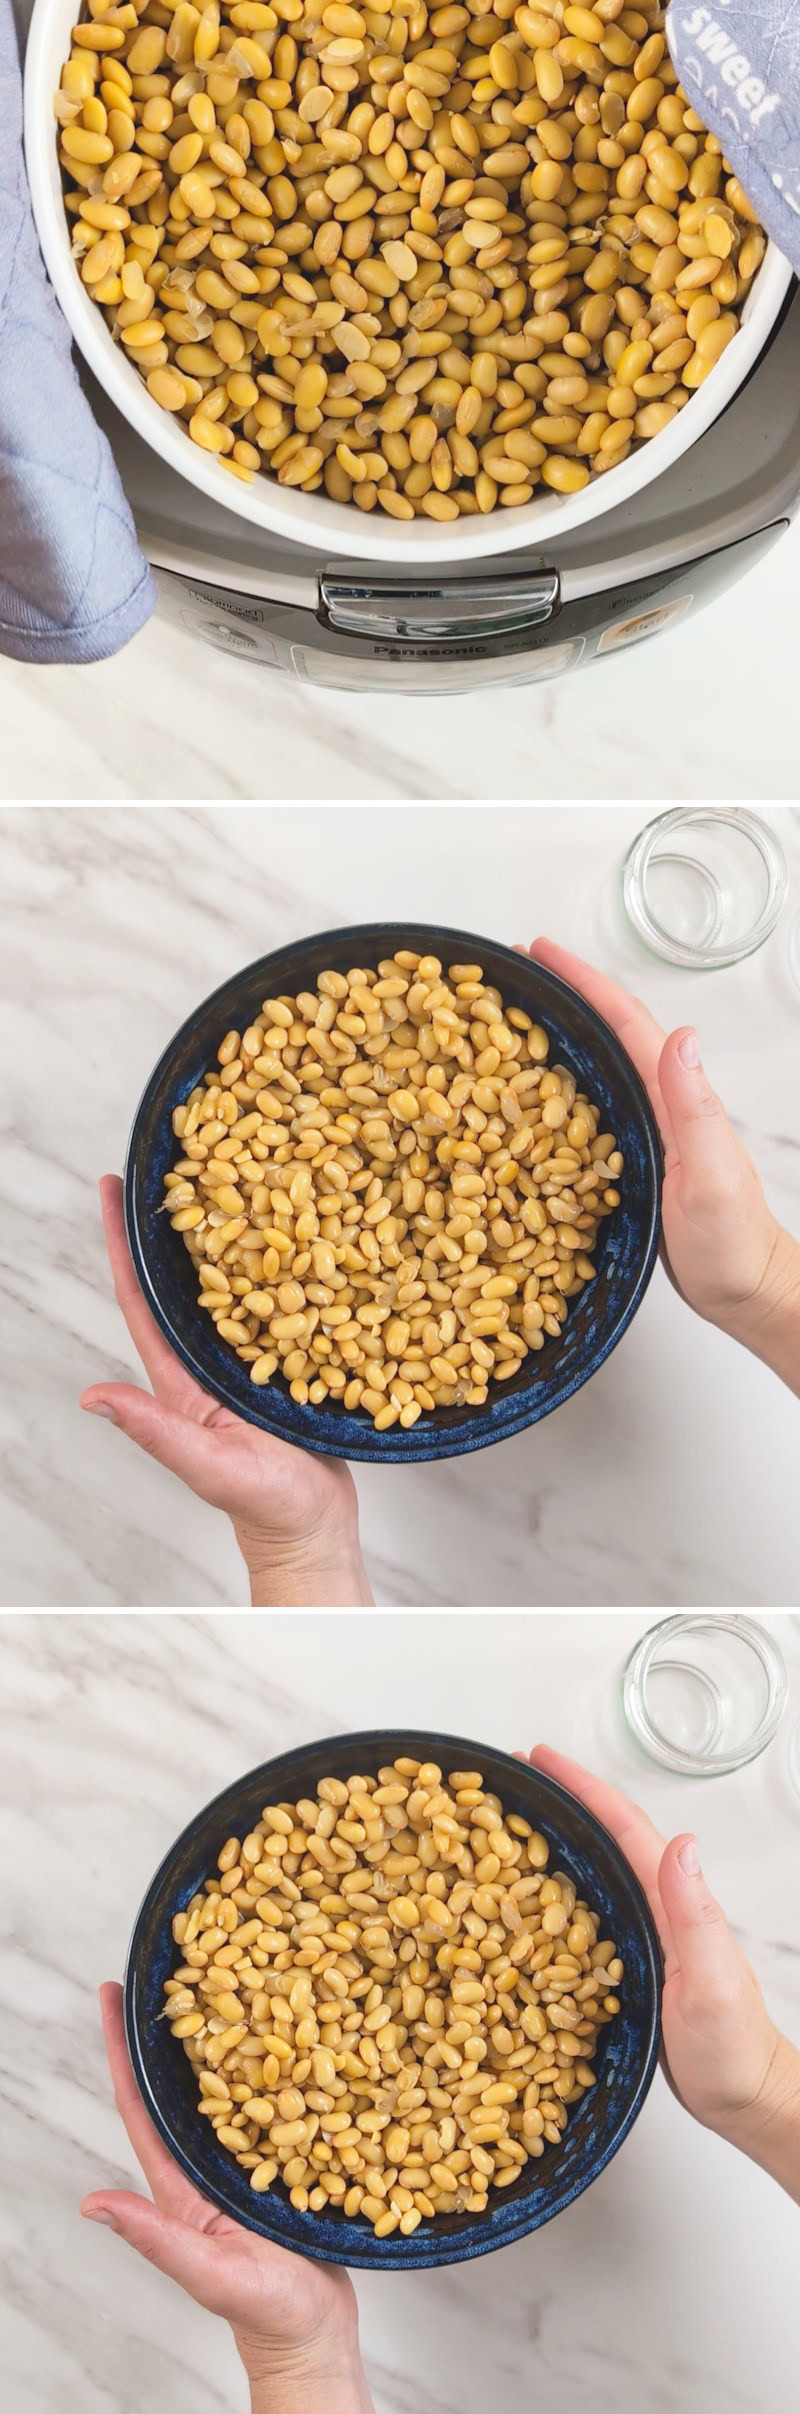
Step 7
Now take one of the beans out of the pot and let it cool briefly (Tip: You can tell if the beans are cooked enough by crushing one between your thumb and forefinger. If the bean is still hard or “grainy”, steam everything for a further 30 minutes. However, if it is nice and soft, switch off the cooker and lift out the steaming basket with the soya beans). Place the beans in a bowl and leave them to rest for 5 minutes to cool down a little.

Passaggio 8
Meanwhile (open the natto capsules if necessary) dissolve the natto starter in 6 tbsp of lukewarm water (this helps to distribute the starter more evenly). Then pour the liquid natto starter over the beans and stir everything well with a wooden spoon.
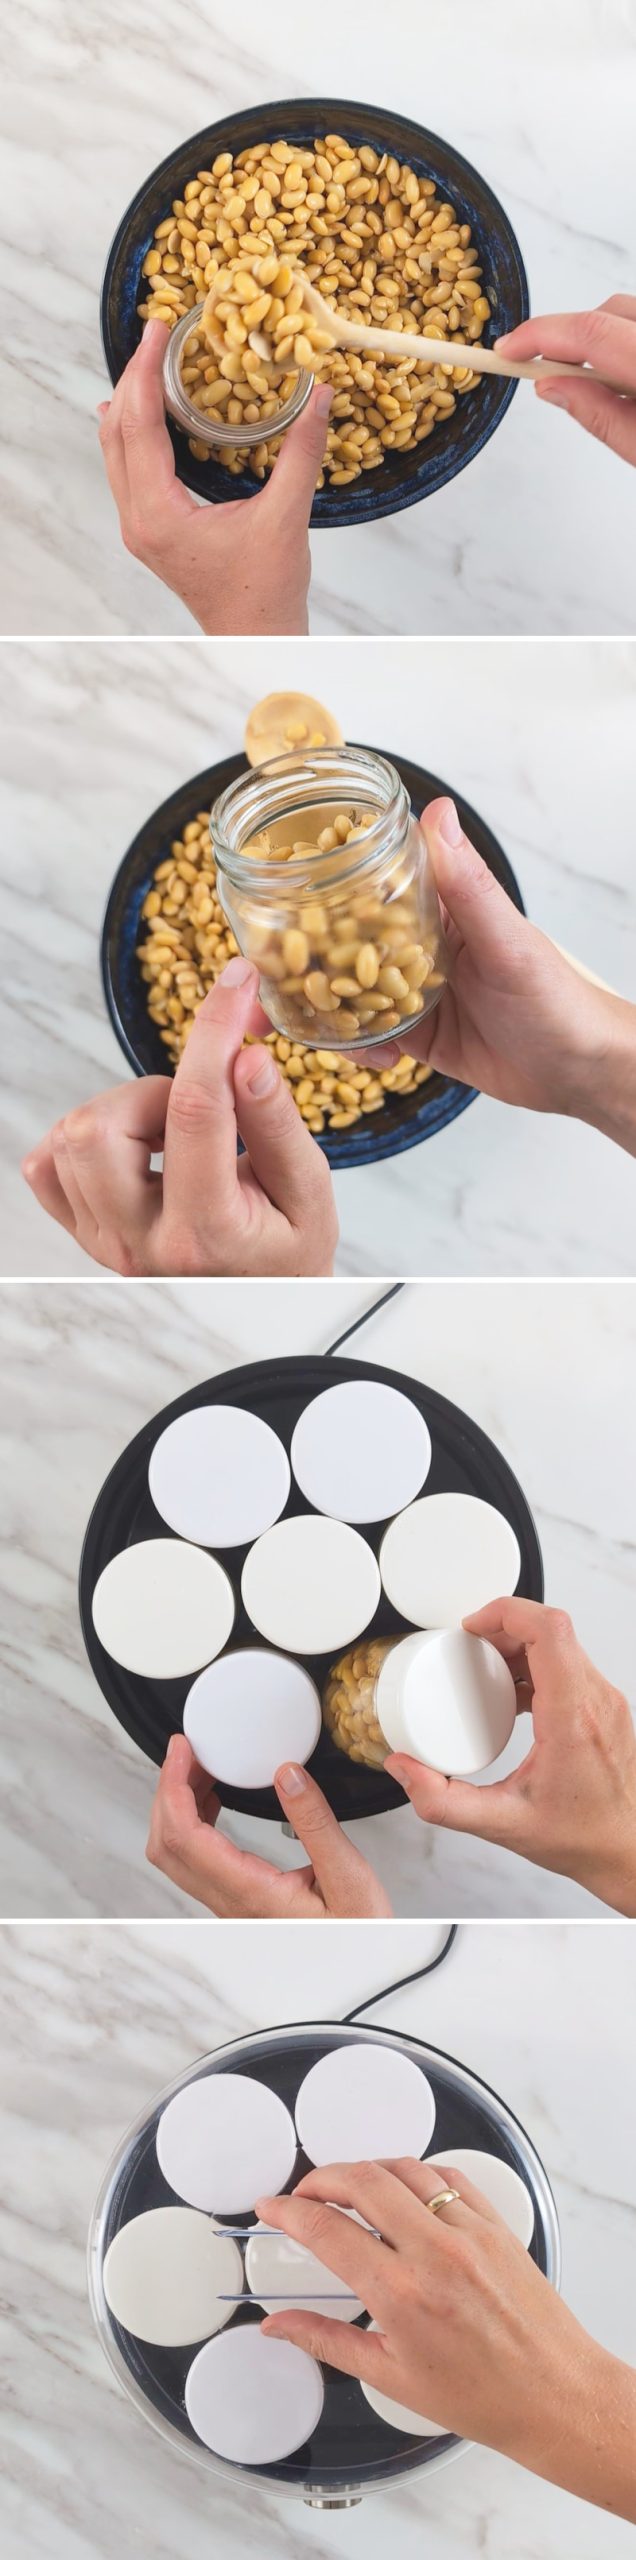
Step 9
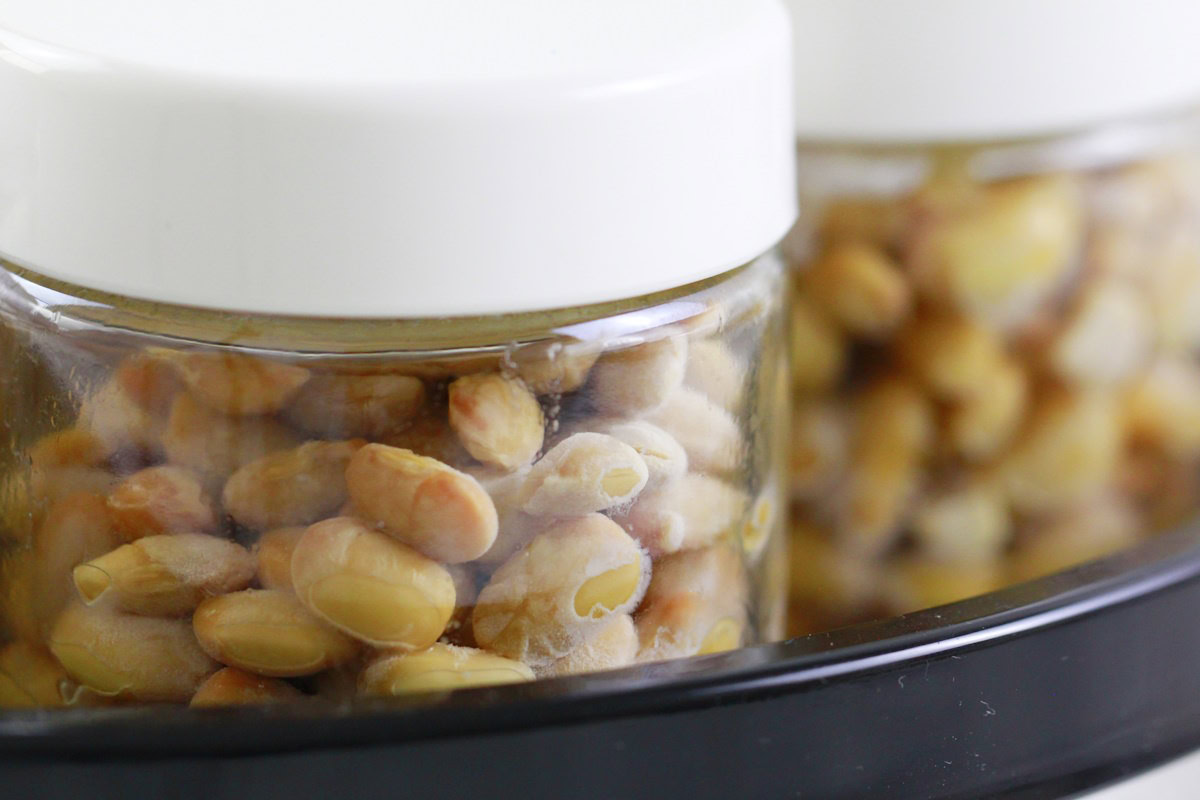
Next, divide the soya beans between the jars of the yoghurt maker, close the lids and place them in the machine.
Step 10
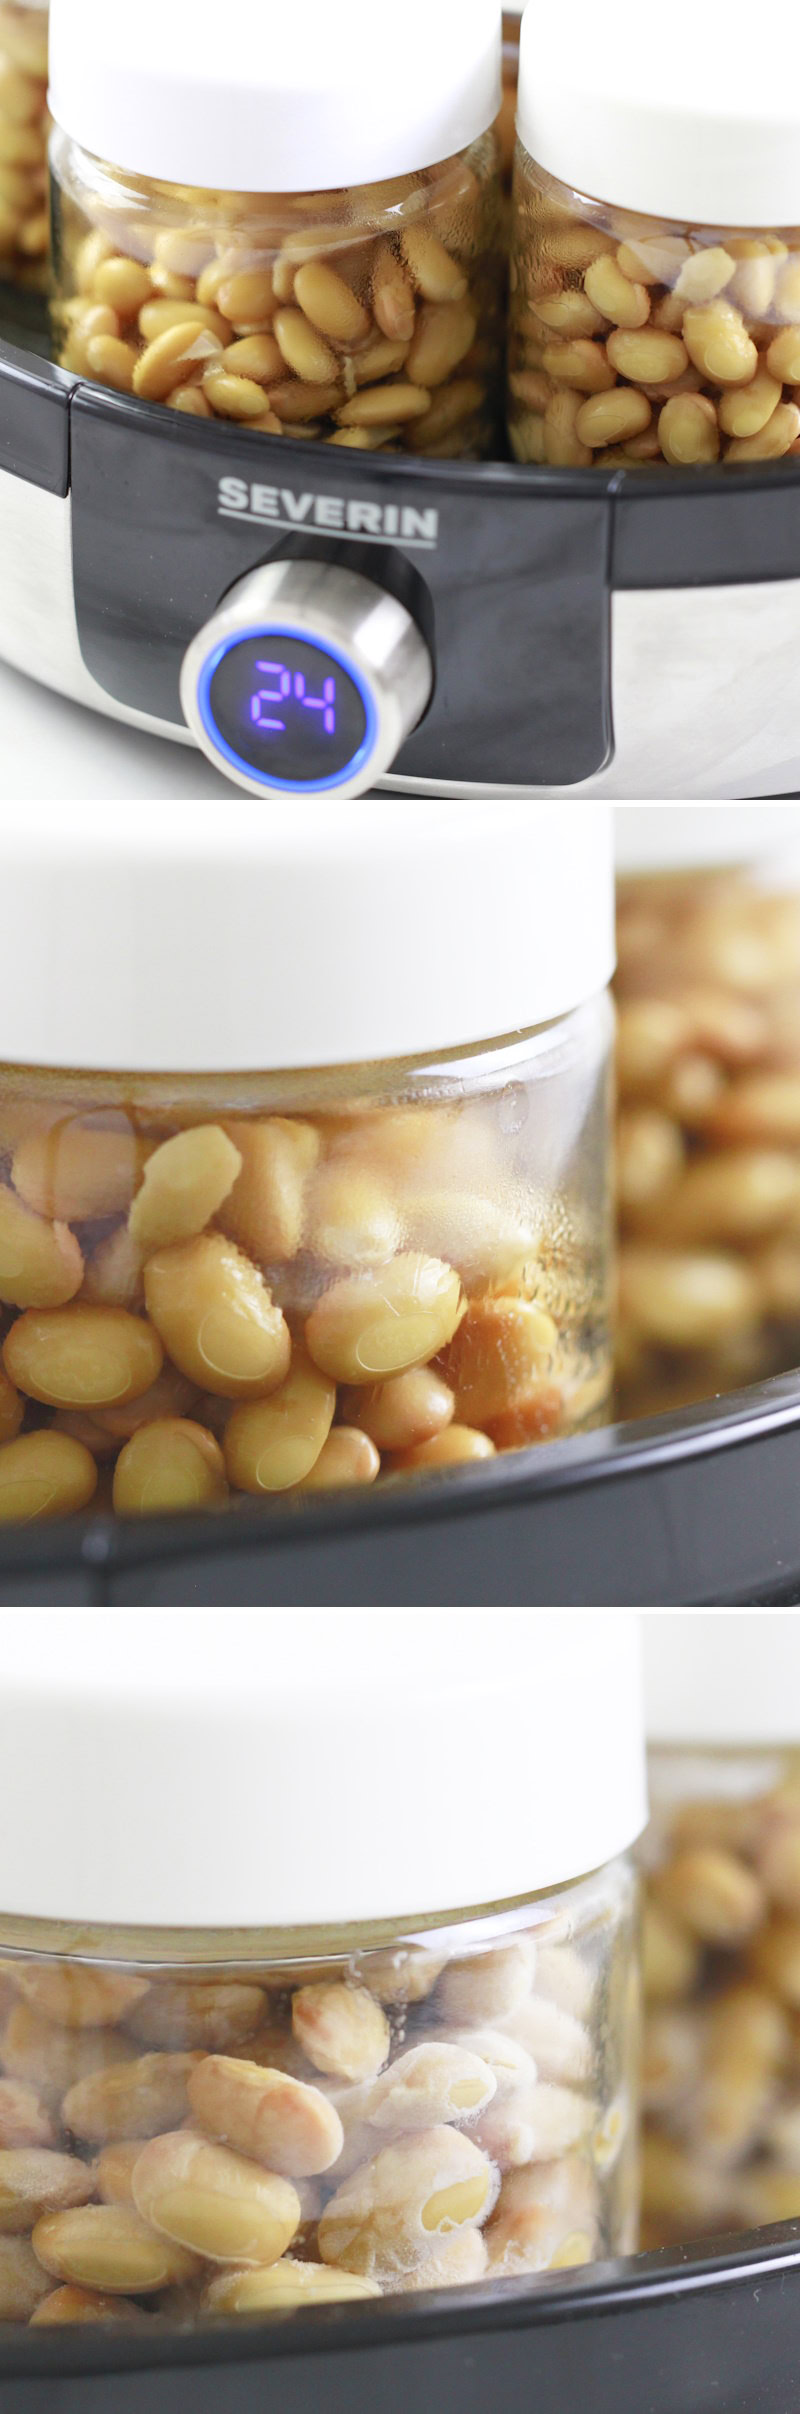
Switch on the yoghurt maker and leave the beans to ferment for 24 hours at a temperature of 40°C in a quiet place.
Tip: Alternatively, you can line a baking dish with cling film and place the soya beans inside. Then cover them again with cling film and leave them to ferment at 40°C on the middle shelf of the oven for 24 hours. Once you have taken them out of the oven, you can divide the soya beans into portions and fill sterilised jars.
step 11
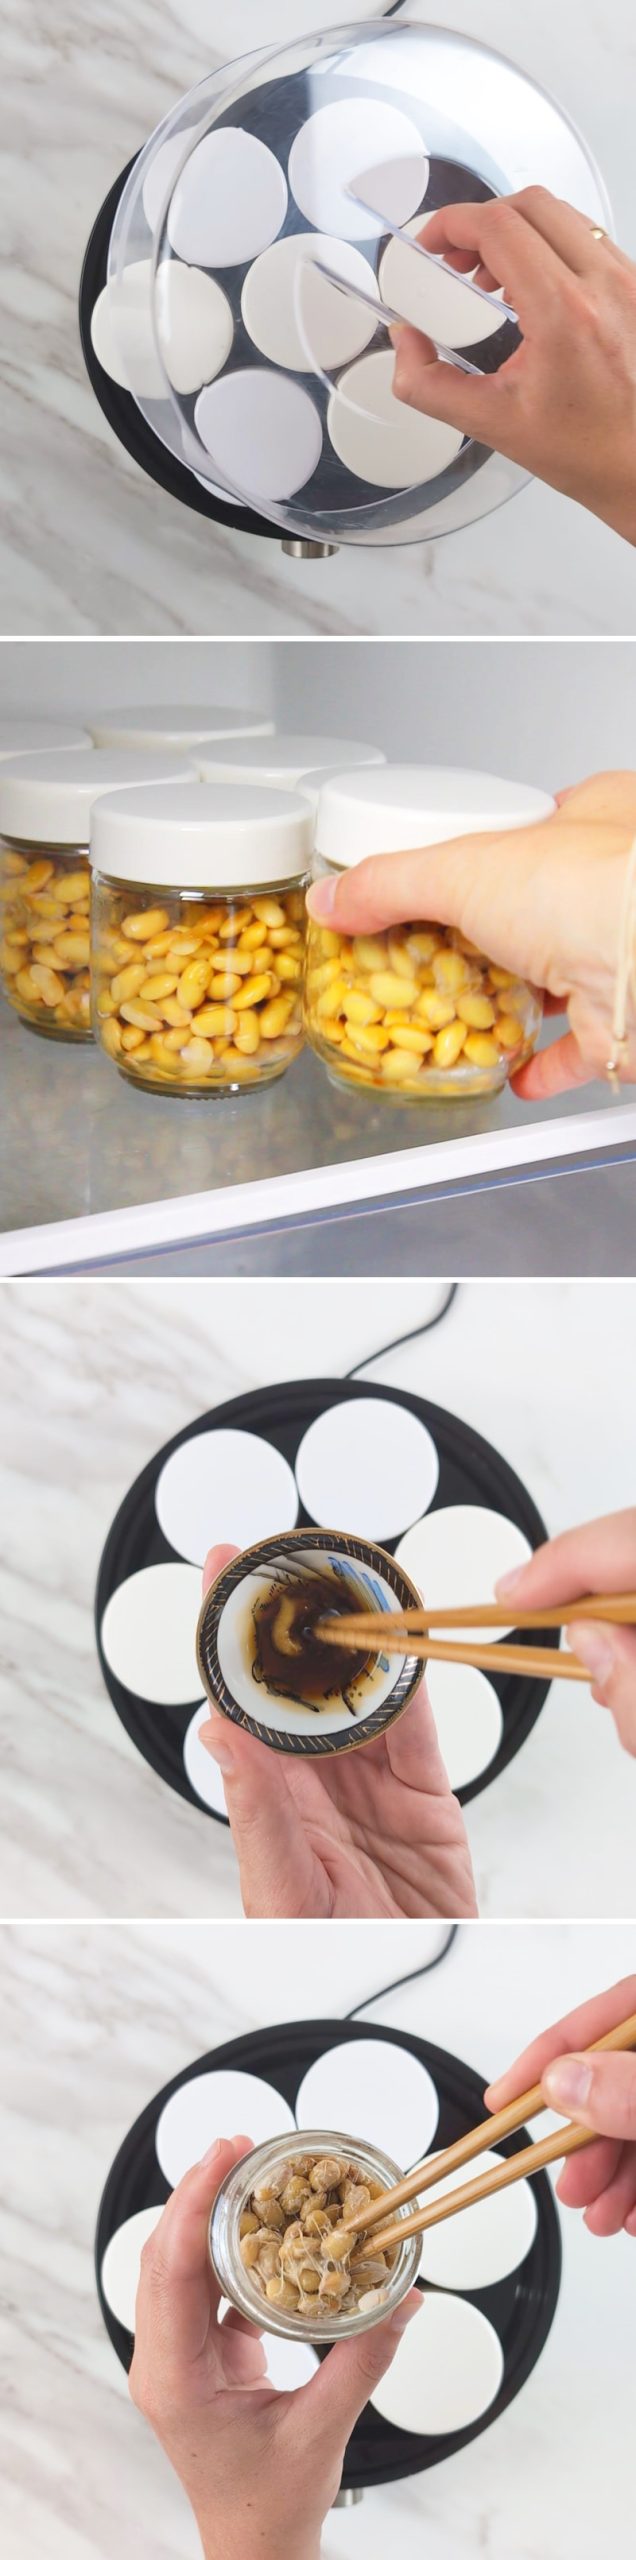
After 24 hours, your homemade natto is ready. You can put the natto in the refrigerator for an additional aging process and let it age peacefully for 2 days.
Alternatively, you can mix your natto immediately, serving it in portions with 1 tbsp of tsuyu and a little karashi mustard until it becomes stringy, and enjoy.

Passaggio 12
Your homemade natto will be ready after 2 days in the refrigerator at the latest. Find out how to turn it into a delicious dish with rice here in the recipe for Nattodon. Ready – Itadakimasu!
Tip: Natto can be kept in the fridge for up to a week. It also freezes very well and can then be defrosted in portions.