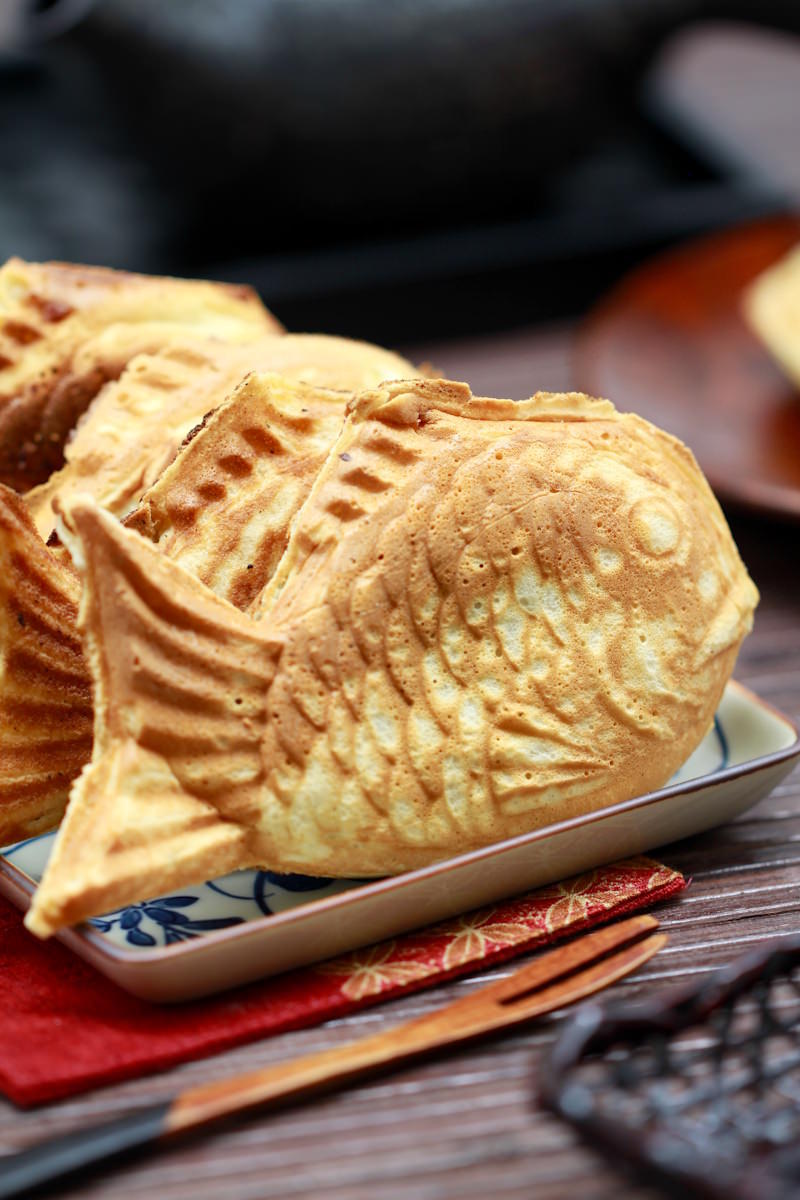
Taiyaki is a classic of Japanese street food and delights with its charming fish shape and variety of fillings. These sweet waffles are a particular highlight in winter, when their scent wafts through the streets, promising to warm hands and hearts. Originating in the Edo period, this pastry has a long history and remains a popular snack in Japan to this day.
During my time in Tokyo, I often passed a small shop run by an elderly couple. Their taiyaki were so fresh that I could hardly resist buying one every day. The crispy exterior, the fluffy texture of the batter and the warm, sweet filling – it was simply a delight. This experience inspired me to make taiyaki at home too, and I promise you: it’s easier than it looks!
What are taiyaki?
Taiyaki are a traditional Japanese sweet pastry that immediately catch the eye with their distinctive fish shape. Originally created in Tokyo in 1909, they were developed as a variation of Imagawayaki and quickly established themselves as one of Japan’s most popular snacks. Taiyaki are a staple of Japanese food culture, particularly at street festivals, market stalls or in small cafés.
The pastry is made from a batter reminiscent of pancake or waffle batter. It consists of a simple mixture of flour, eggs, baking powder, sugar and milk. It is baked in special, fish-shaped moulds, which give the pastry its characteristic appearance. Crispy on the outside and soft on the inside, taiyaki offer a wonderful balance of texture and flavour.
The classic filling is anko, a sweet paste made from red adzuki beans, which is particularly prized in traditional Japanese cuisine. Today, however, there is a wide variety of modern variations, ranging from vanilla or Matcha cream and chocolate fillings to savoury options such as cheese or small sausages. Seasonally inspired creations such as sweet potato or custard fillings are also popular and give the taiyaki a special twist.
Why fish-shaped?
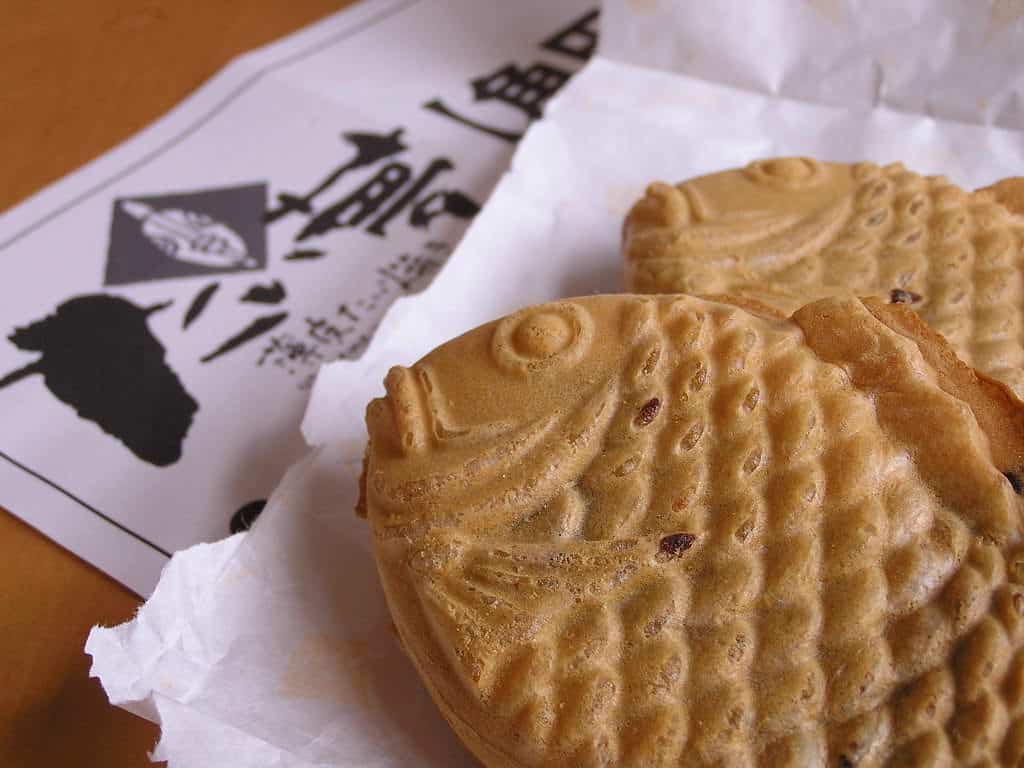
The origins of taiyaki lie in imagawayaki, a round pastry from the Edo period. But it was the fish shape, introduced during the Meiji period, that made taiyaki a real highlight. The ‘Tai’, a sea bream, is regarded in Japan as a symbol of good luck and prosperity, making the pastry not only delicious but also symbolic. Originally, taiyaki were a luxury item served on festive occasions, but today they are readily available throughout Japan.
Taiyaki represent indulgence and joy, bringing a piece of Japanese tradition and culture to the table. Whether classically filled with anko or creatively interpreted – these sweet fish-shaped waffles are a real eye-catcher and a delicious addition to any occasion.

Making taiyaki yourself: Here’s how
Making taiyaki at home is not only easy, but also a wonderful way to bring a little bit of Japan into your own kitchen. Whether filled with the classic sweet red bean paste or a creative variation such as chocolate or vanilla cream – homemade taiyaki are a real treat, perfect for special moments or simply as a snack.
The main ingredients are:
- For the batter: wheat flour, cornflour, baking powder, sugar, egg, whole milk and honey
- For the filling: Anko (sweet red bean paste) or alternative fillings such as vanilla cream, chocolate cream, Matcha cream
CUSTOMER FAVOURITE
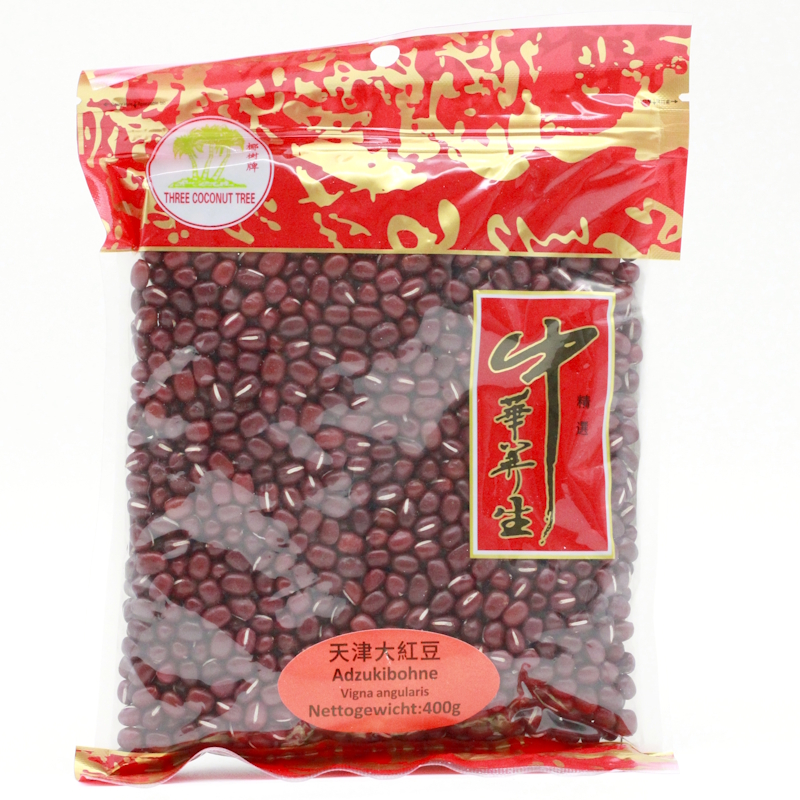
Adzukibohnen 400g (getrocknete rote Bohnen, für Anko, Mochi, Dango & Dorayaki), Three Coconut Tree
Diese getrockneten Adzukibohnen sind eine klassische Zutat der japanischen Küche und werden häufig für süße Bohnenpaste (Anko) verwendet. Sie eignen sich ideal für traditionelle Desserts…
In stock
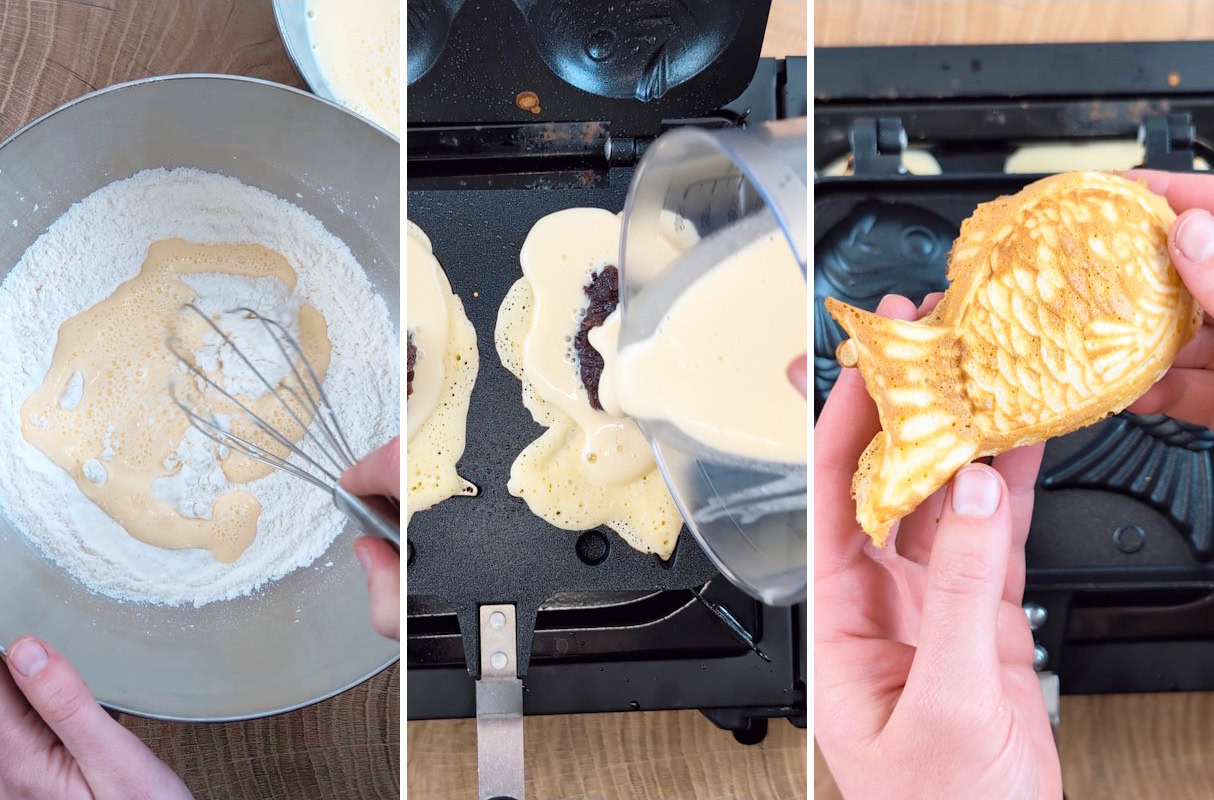
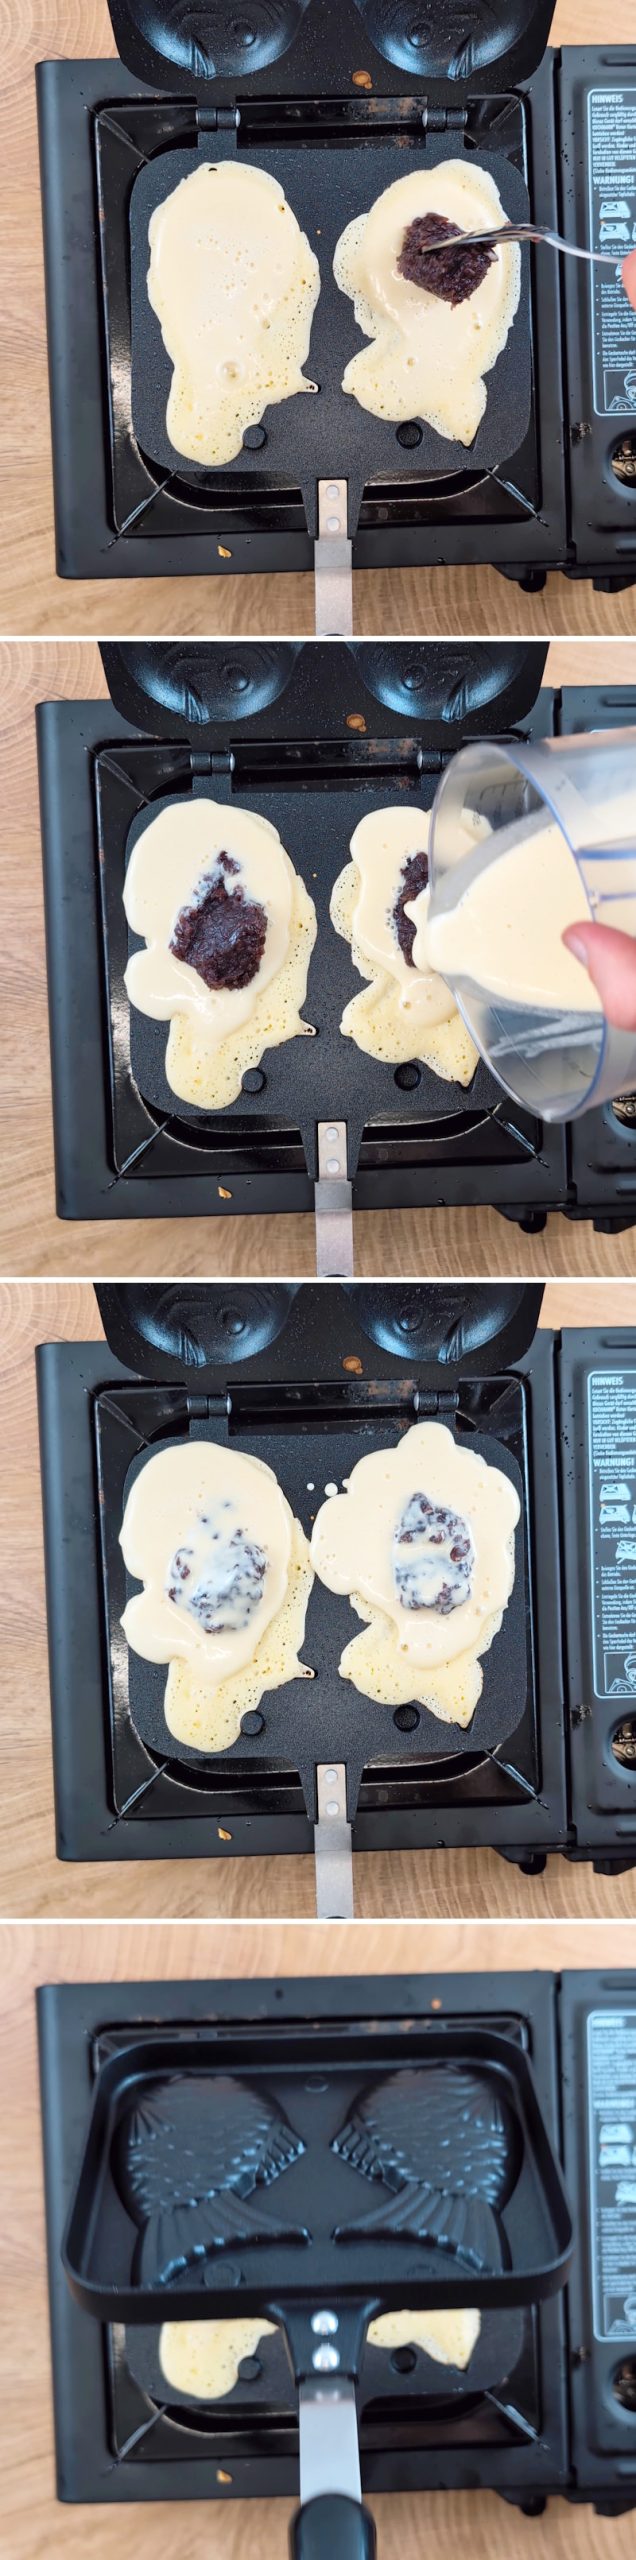
To make taiyaki, it all starts with preparing the batter, which, once mixed, should be left to rest in the fridge for about 30 minutes to reach its optimal consistency. Meanwhile, the filling can be prepared and divided into equal portions. The taiyaki mould is then preheated and lightly greased to prevent the batter from sticking.
The batter is poured into the preheated mould in portions, followed by the filling, which is placed in the centre. The mould is then sealed with another layer of batter. The mould is then heated on the hob and turned regularly until the taiyaki are golden brown and crispy on both sides. After a few minutes, the sweet fish-shaped waffles are ready and can be enjoyed warm straight away.
With a little patience and the right ingredients, it’s child’s play to bake taiyaki yourself. Whether you stick to the traditional version or experiment with new fillings – homemade taiyaki are not only fun to make, but taste heavenly too!
With my recipe, you can easily bake your own taiyaki. The basic ingredients are quickly mixed together, and after a short resting time, you can pour the batter into the preheated taiyaki mould. Whether you opt for the traditional anko filling or a modern creation – taiyaki are always a treat.
Fillings to suit every taste
Taiyaki are now available with a wide variety of unusual fillings that go far beyond the traditional red bean paste:
- Nutella
- Lemon cream
- Mango cream
- Caramel cream
- Kinder bar
- Chestnut paste
- Sesame paste
A particularly creative new addition is Taiyaki as ice cream cones: The fish-shaped pastry is baked with its mouth wide open and then filled with ice cream – a perfect summer treat. There are practically no limits to the creativity of Taiyaki fillings!
Do I need a taiyaki pan?
Although a traditional taiyaki pan is ideal, there are also alternatives to make these fish-shaped treats yourself at home. The pan not only gives taiyaki its distinctive shape, but also ensures crispy edges and provides enough space for generous fillings. A taiyaki pan is relatively inexpensive and easily available online, which is why it is highly recommended for an authentic result .
However, if you don’t have a special taiyaki pan, you can try some creative alternatives. A waffle iron serves a similar purpose, although the filling may leak out more easily. Another option is to use clean, cut-to-size aluminium tins as moulds to bake the batter in.
If the shape is less important to you, you can opt for classic Japanese sweet pastries such as dorayaki (filled pancakes) or imagawayaki (round filled pastries). These do not require a special pan and still remain true to the principle of taiyaki – a crispy pastry with a sweet filling.
Ultimately, the most important thing is the taste. Even if you have to do without the characteristic fish shape, with a little creativity you can conjure up the typical combination of crispy batter and delicious filling without the special pan.
Tips for preparation
For authentic taiyaki, you’ll need a special taiyaki mould, which gives you the characteristic fish shape and a golden-brown, crispy crust. It’s best to use a gas hob or gas cooker, as the open flame allows the mould to heat up evenly and optimally. If you don’t have access to a gas hob, you can also use an electric hob, although the results may be less consistent. A gas portable stove is an excellent alternative, especially if you want to make taiyaki frequently or outdoors.
What goes well with taiyaki?
Taiyaki are a treat in their own right, but with the right accompaniments they become even more irresistible. Serve them with a cup of freshly brewed Matcha or a glass of hojicha to perfectly balance the sweet taste of the filling. A scoop of vanilla ice cream or a fruity compote also go down a treat and add a special touch to your taiyaki experience.
Have you ever made taiyaki yourself? Which fillings are your favourites? Feel free to share your ideas and tips in the comments – I look forward to hearing from you! Have fun baking and bon appétit!
Taiyaki
Makes 6 | 45 minutes | 376 kcal
🖨️ Print PDF 📌 Save pinSweet, warm and simply irresistible! Taiyaki are crispy fish-shaped waffles, traditionally filled with anko (sweet red bean paste). Perfect for cosy afternoons or as a sweet snack between meals.
Ingredients (6 pieces)
115 g flour (e.g. wheat)
35 g cornflour
5 g baking powder (approx. 1 tsp)
25 g sugar
1 tbsp vanilla sugar
1 egg
150 ml milk
1 tsp honey
1 pinch salt
1 tbsp oil (e.g. rapeseed oil)
240 g Anko (sweet red bean paste – to the recipe)*
Useful tools:
Taiyaki pan (auf Amazon* kaufen)
Preparation (45 minutes)
Step 1 Step
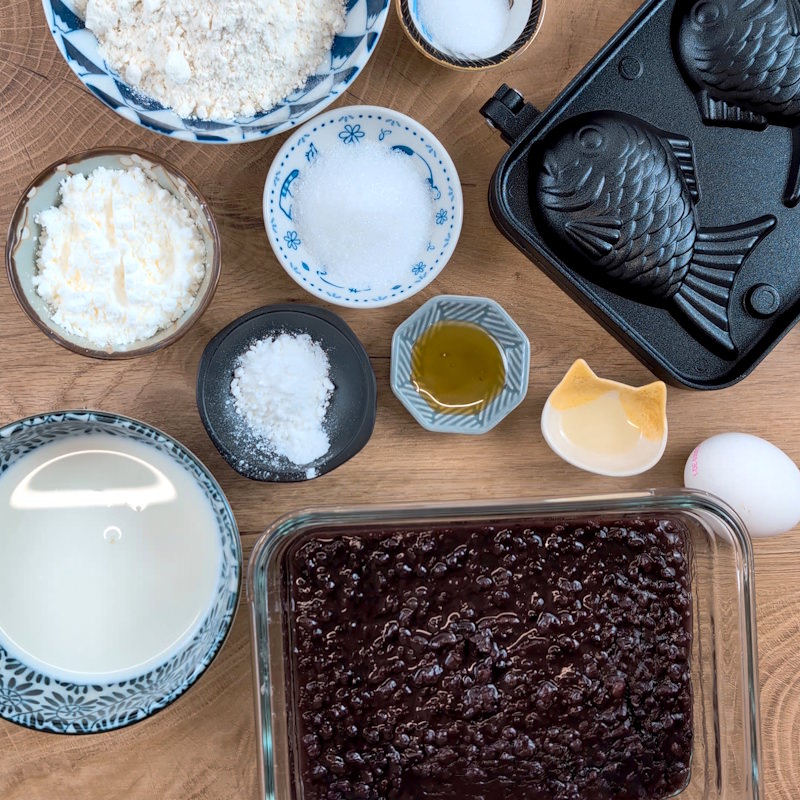
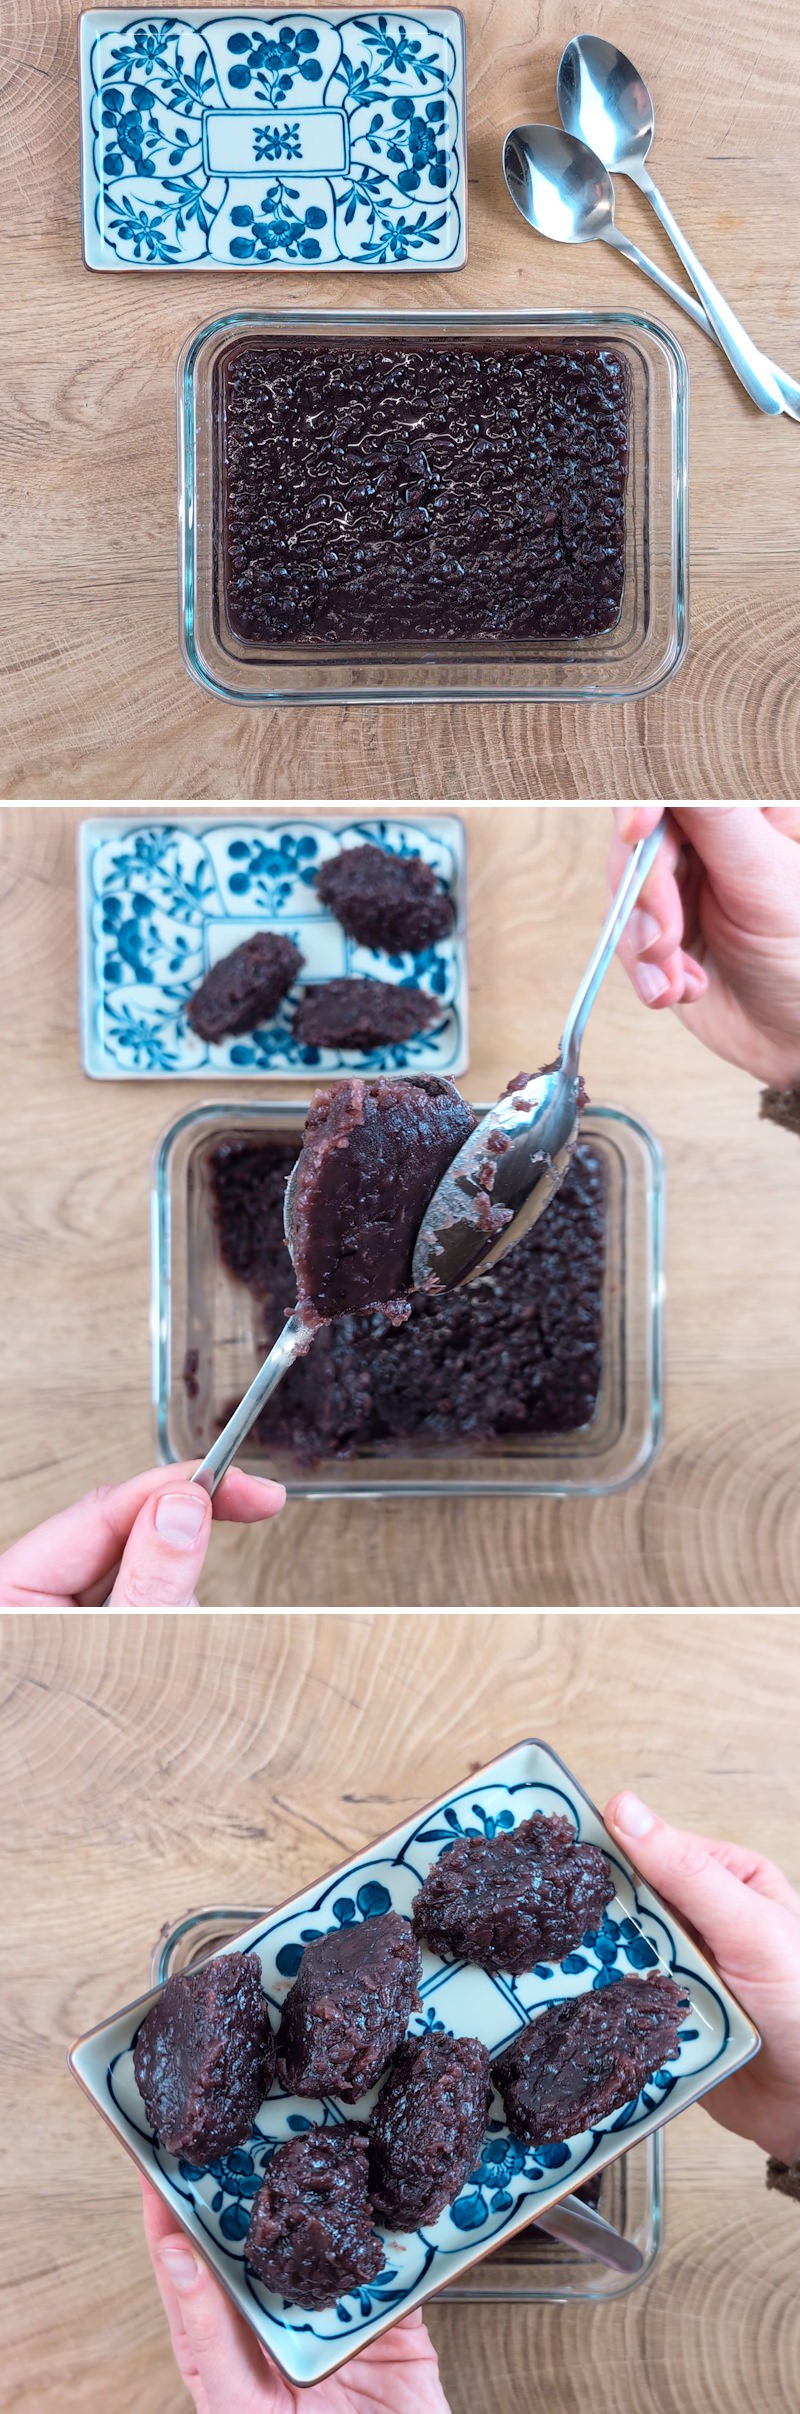
Make sure you have all the ingredients ready. Particularly important: Prepare the anko (recipe for sweet red bean paste), whether homemade or shop-bought. This will later be the filling for the taiyaki.
Step 2
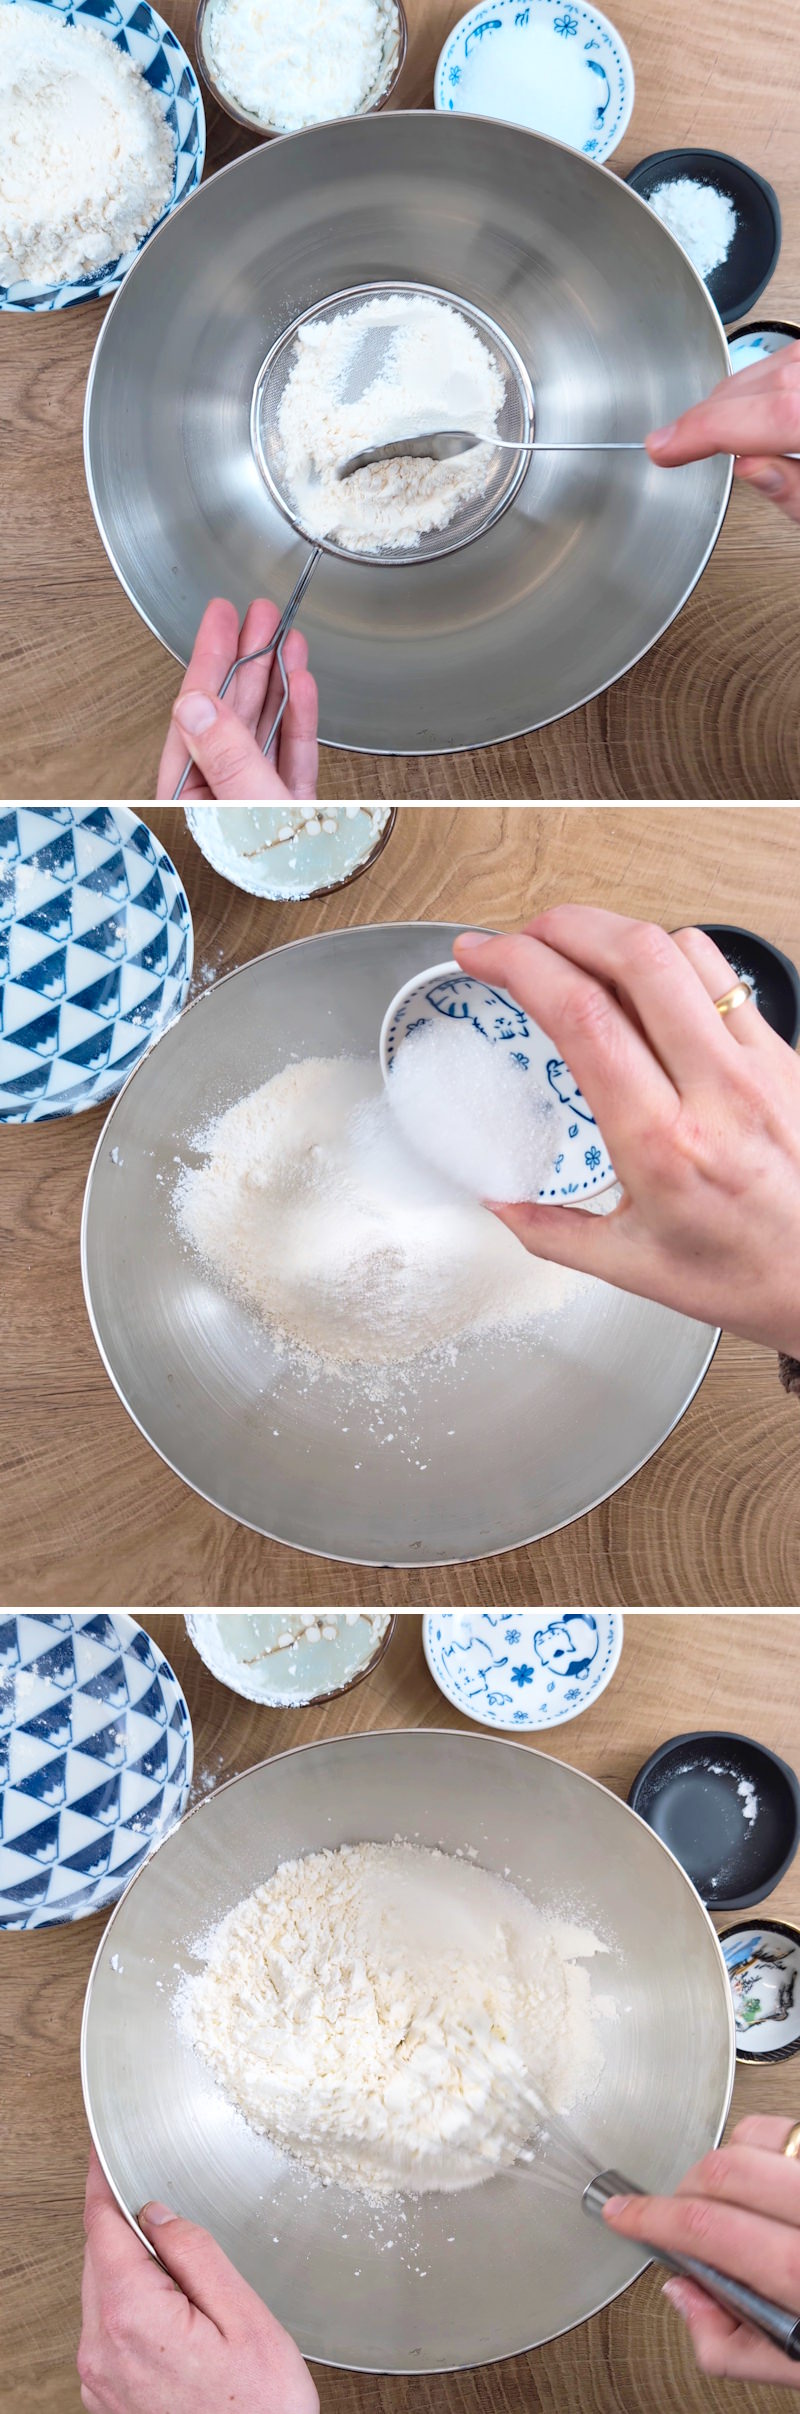
Sift the flour, cornflour and baking powder into a large bowl to ensure the mixture is lump-free. Add the sugar and vanilla sugar and mix everything together well.
Step 3
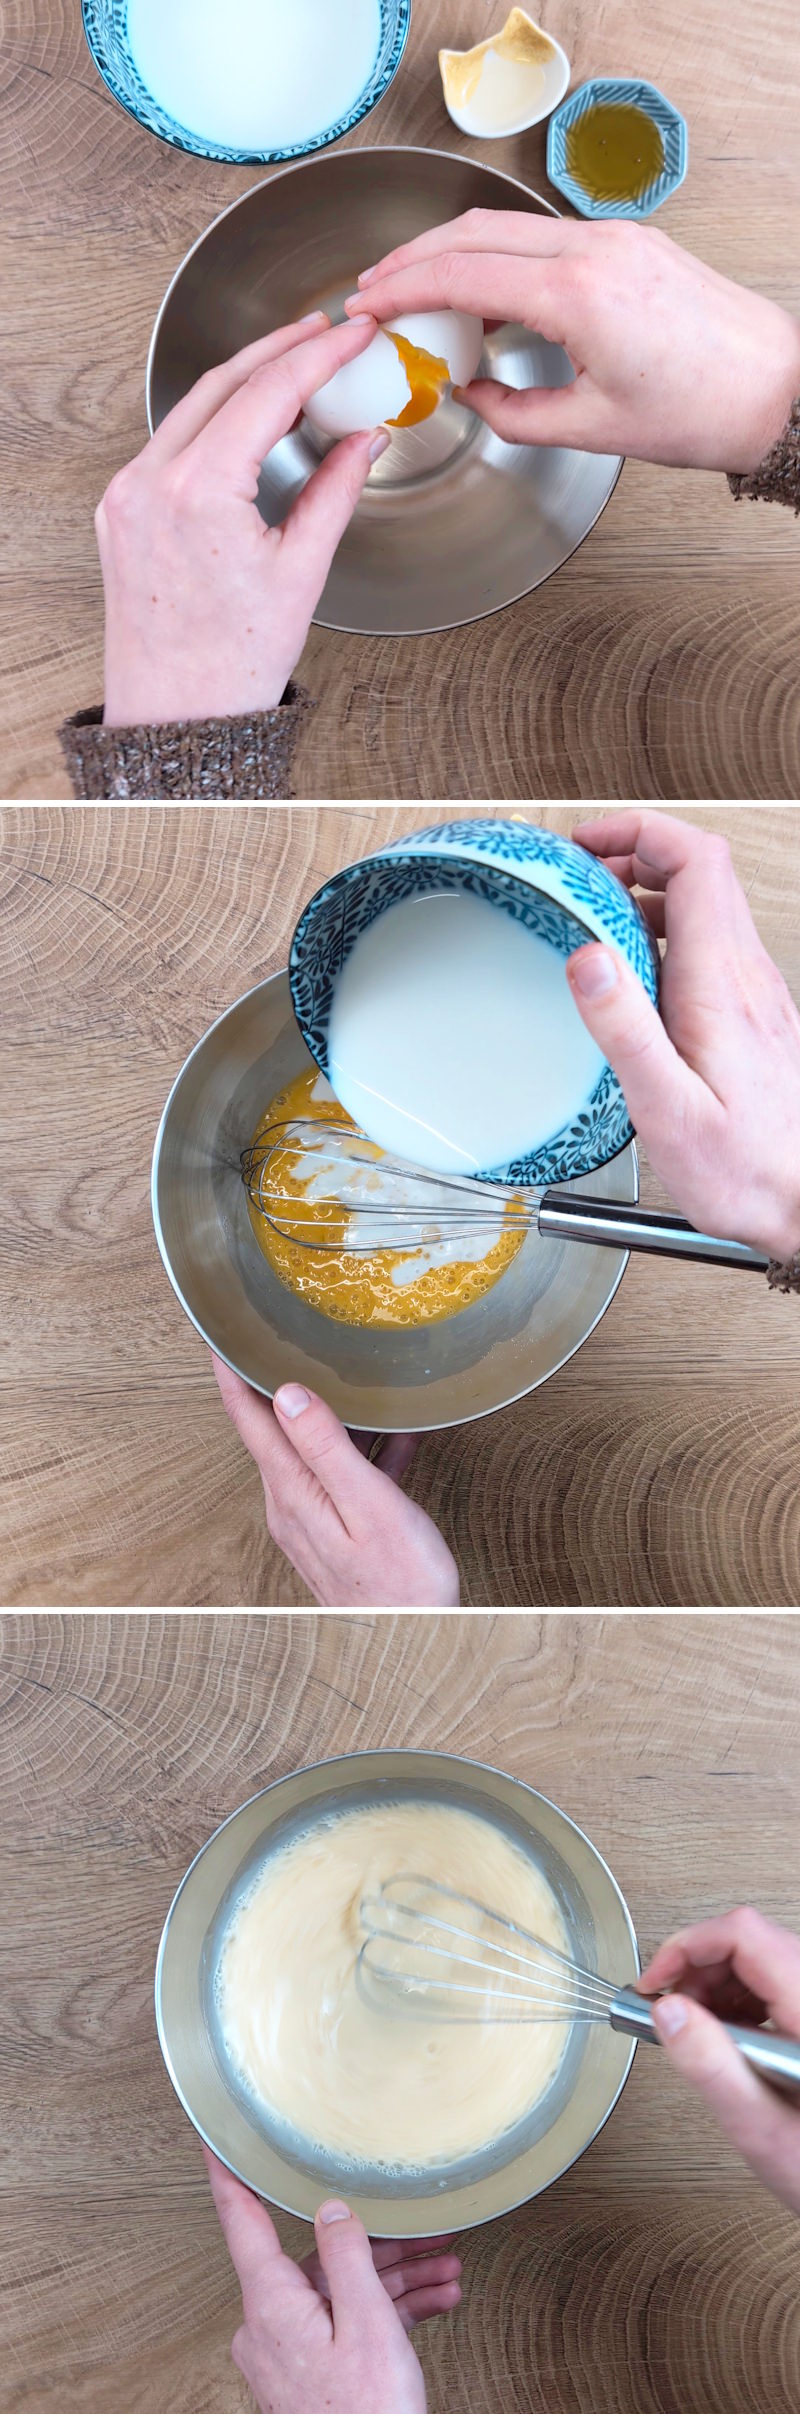
In a separate bowl, whisk the egg, honey, salt and oil until smooth. Then pour in the milk and mix the mixture thoroughly once more.
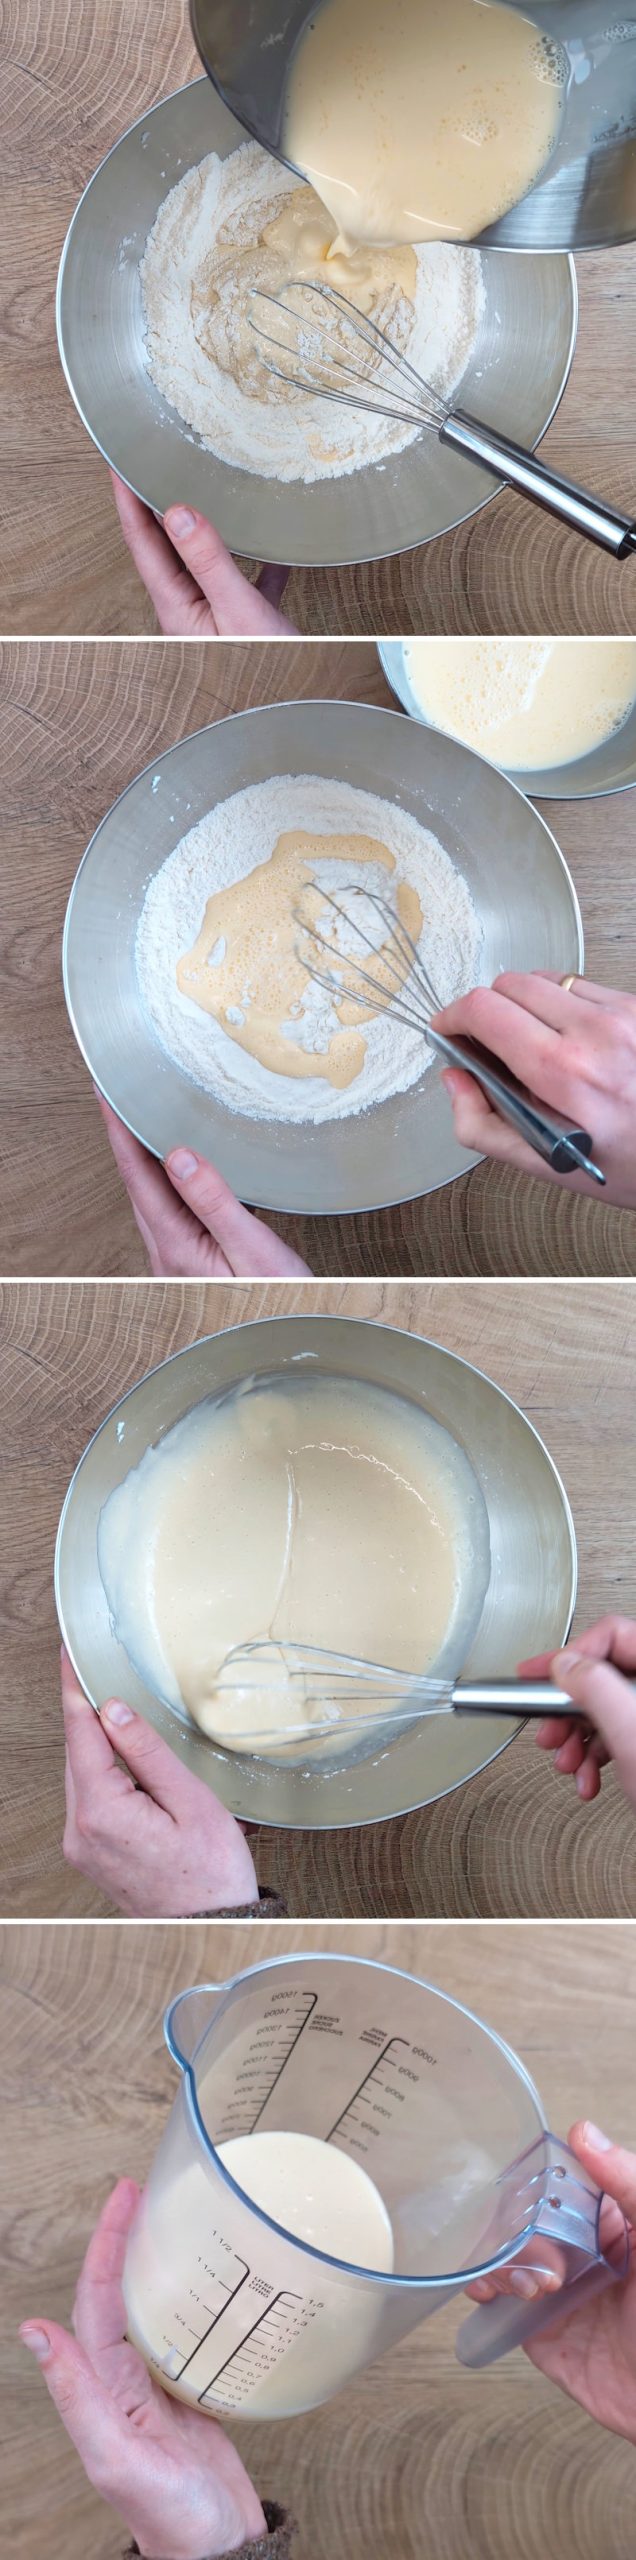
Step 4 Pour the liquid mixture gradually (in 3 stages) into the bowl with the dry ingredients. Stir everything carefully but thoroughly each time until you have a smooth batter. Transfer the batter to a measuring jug – this makes it easier to measure out precise portions when filling the moulds. Cover the measuring jug with cling film and leave the batter to rest in the fridge for about 20–30 minutes.
Gieße die flüssige Mischung nach und nach (in 3 Schritten) in die Schüssel mit den trockenen Zutaten. Rühre alles jeweils vorsichtig, aber gründlich zu einem glatten Teig. Fülle den Teig in einen Messbecher um – das erleichtert das genaue Portionieren beim Einfüllen in die Formen. Decke den Messbecher mit Frischhaltefolie ab und lasse den Teig für etwa 20 – 30 Minuten im Kühlschrank ruhen.
Passaggio 5
In the meantime, divide the anko bean paste into six equal portions, each weighing no more than 40 g. Shape them into small cylinders and place them in the fridge until needed.
Step 6
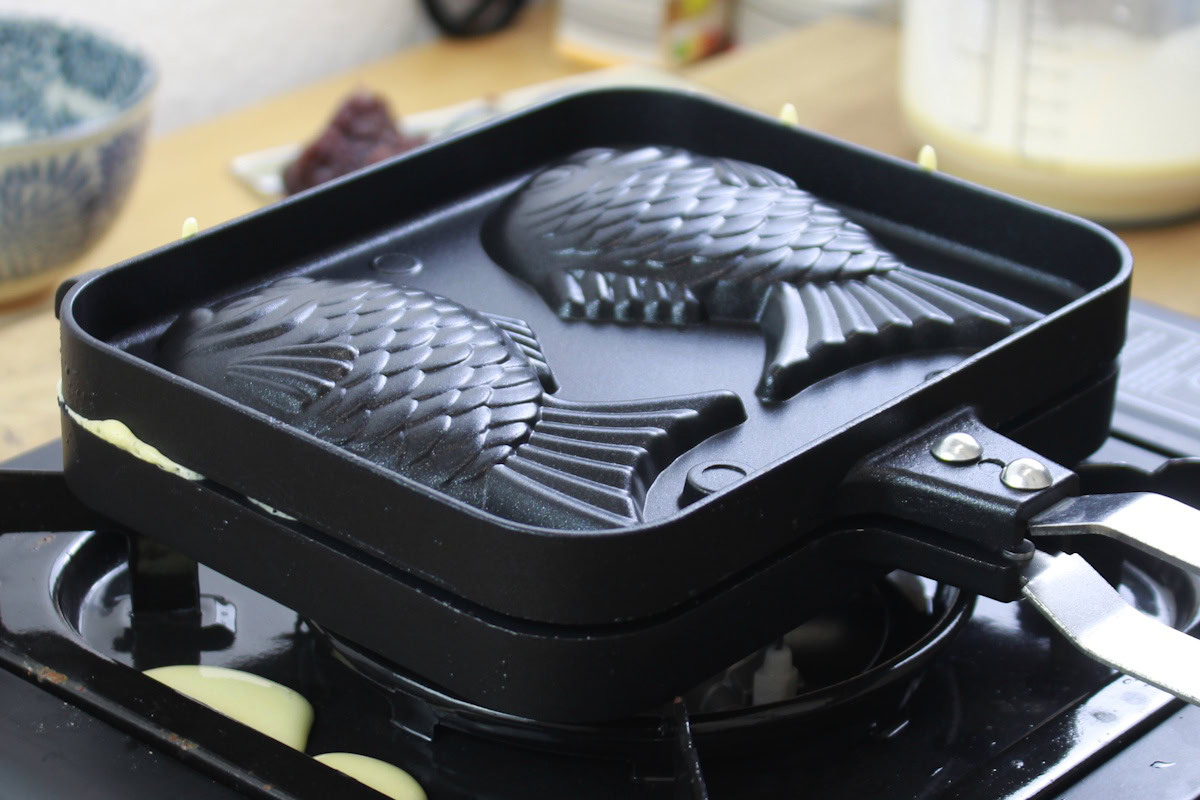
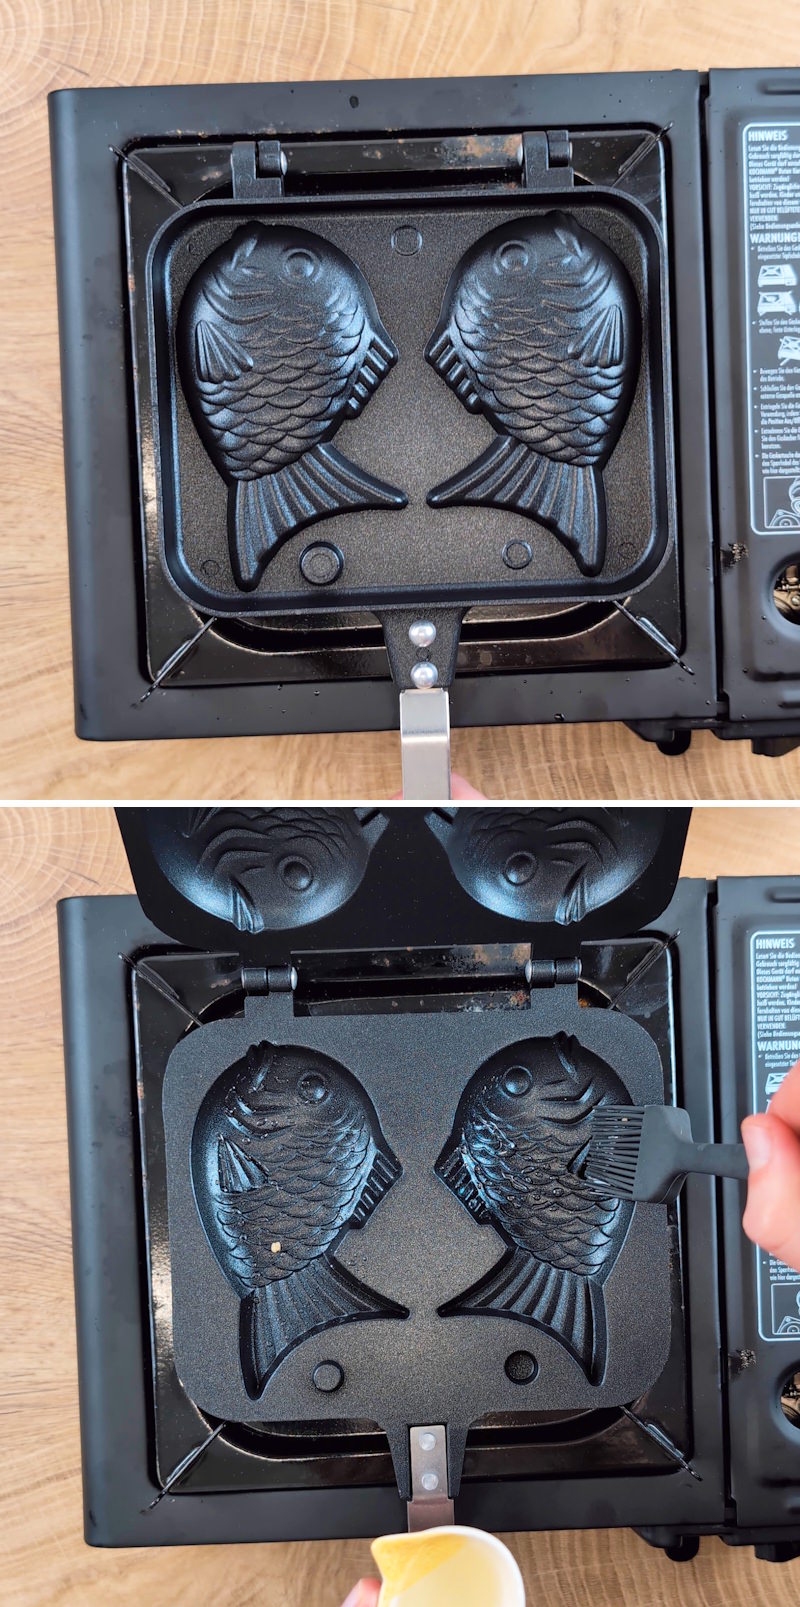
After the resting time: Grease both sides of your taiyaki pan with a little oil. Use kitchen paper to spread the oil evenly. Place the pan on a gas hob or gas cooker and heat it over a low to medium heat for a few minutes.
Now take the batter and the anko pieces out of the fridge.
Step 7
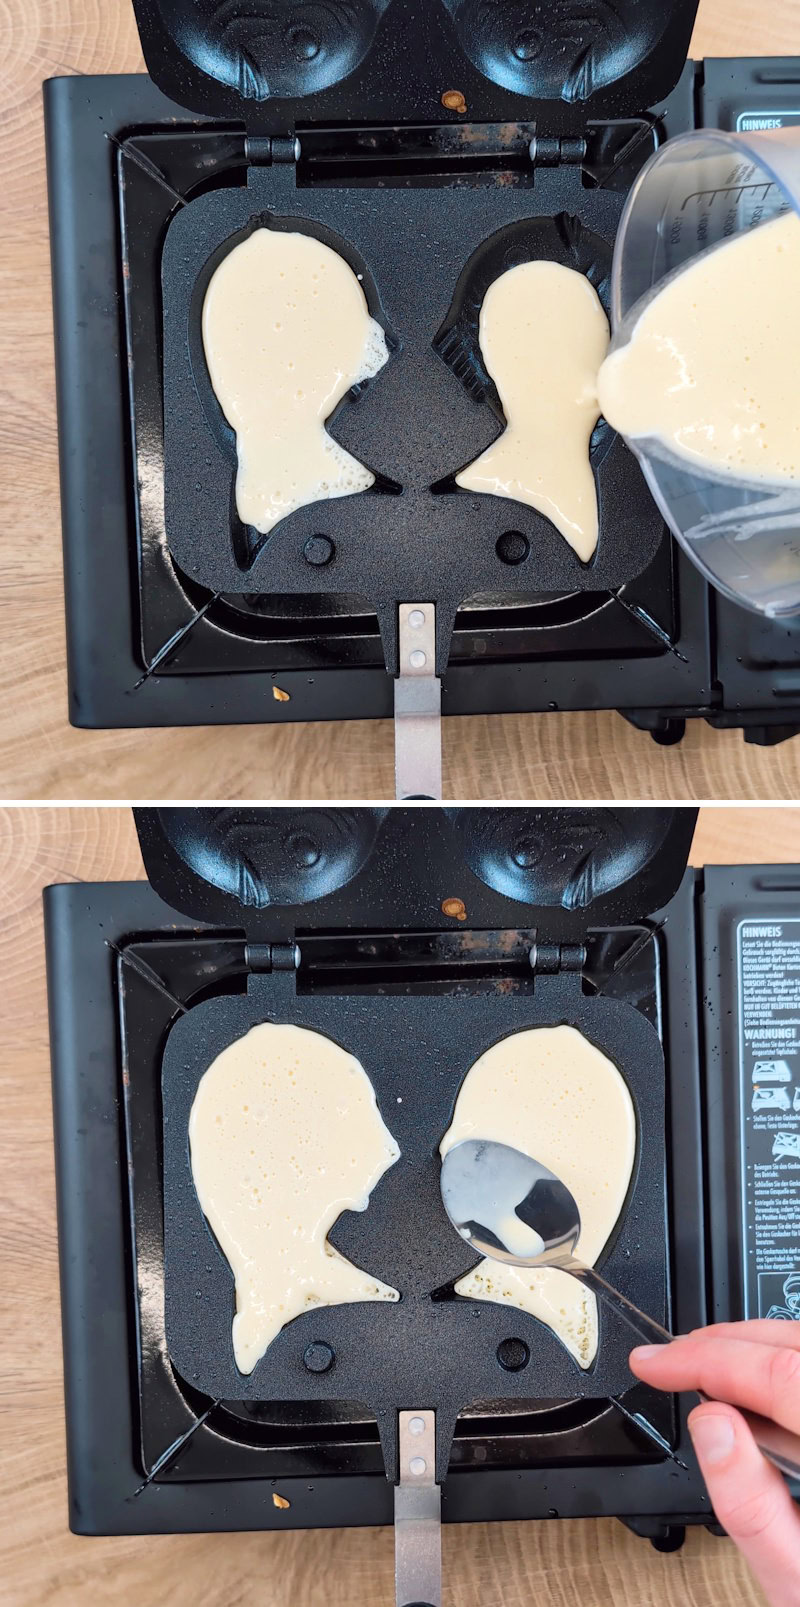
Using the measuring jug, pour a little batter into each heated mould and spread it with the back of a spoon so that the batter reaches the edges of the mould and flows slightly over them. Make sure the batter is spread evenly to create a stable base for the filling.
Step 8
Once the batter in the pan has set slightly (it should no longer run, after about 2 minutes), place some anko in the centre of this layer of batter. Pour another tablespoon of batter over the anko filling and spread it carefully so that the filling is completely covered. This seals in the filling and keeps the taiyaki firm.
Close the pan, turn it over and cook the taiyaki for about 1.5 to 2 minutes on this side.
Step 9
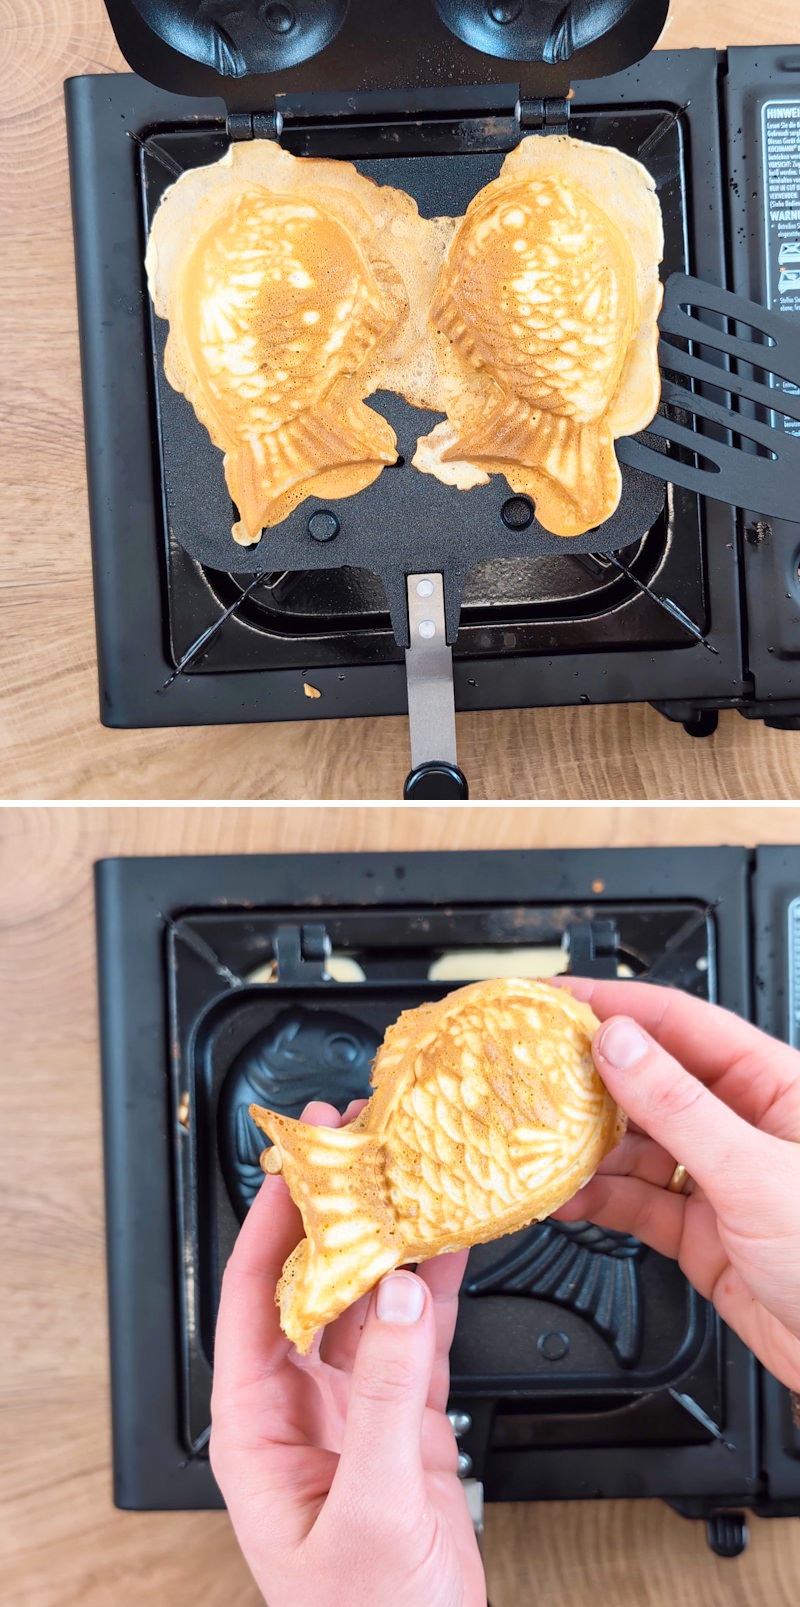
Then carefully flip the pan again so that the other side is also heated and becomes crispy. Make sure not to set the heat too high, and do not leave the taiyaki unattended – as soon as the sweet, baked aroma rises, they are almost ready.
Carefully remove the finished taiyaki from the mould and repeat the process until all the batter and filling have been used up.
The taiyaki taste best fresh from the pan, whilst they are still warm and crispy. Itadakimasu!
Fancy some more delicious inspiration from Japan? You can find our best recipes here:
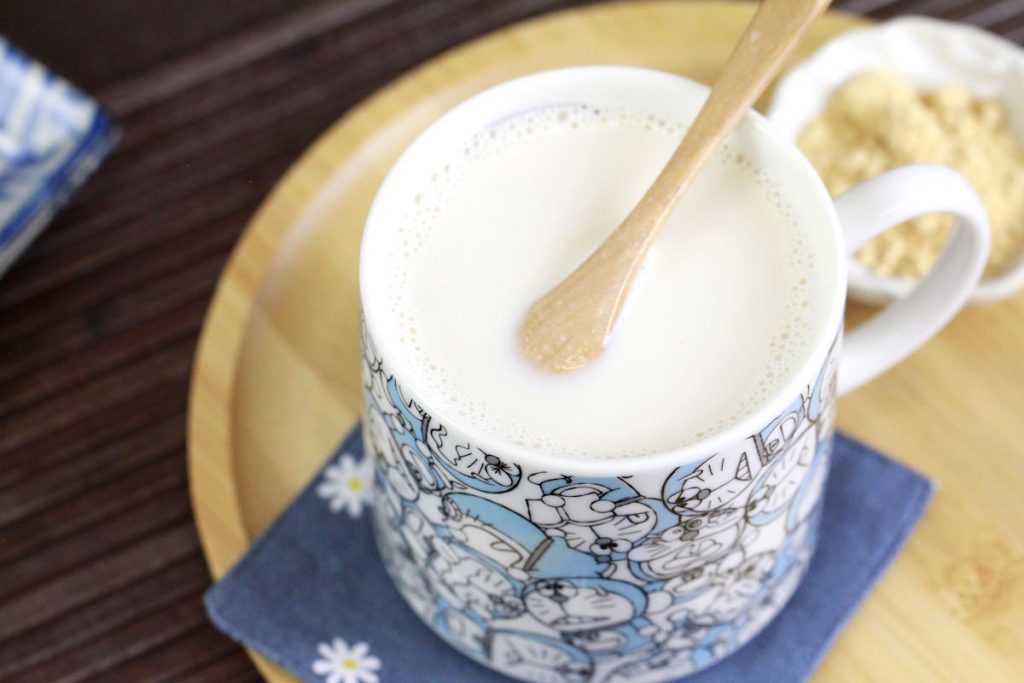
Warming Kinako milk: a quick recipe with roasted soya flour – nutty, creamy & easy to make
There are days when you just want to treat yourself to a little break. And…
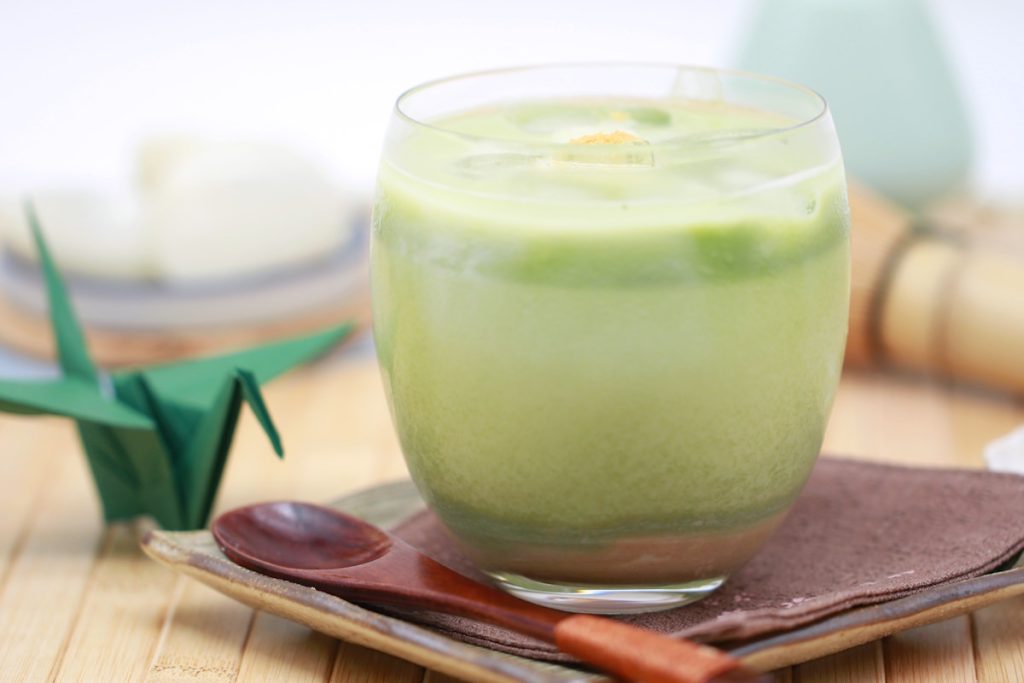
Iced Matcha Latte with Kinako: Make your own refreshing iced green tea with roasted soya flour
On hot days I need something cold in a glass, but please make it tasty!…

Make your own amazake: a traditional sweet rice drink from Japan
Amazake is a traditional, sweet rice drink that has been enjoyed in Japan for centuries….

Cold Brew: Japanese iced coffee – a refreshing treat for hot days!
Experience the freshness of summer with a sip of Japan: Cold Brew Iced Coffee –…

Cold Brew Mugicha: How to make this refreshing Japanese barley tea!
Are you ready to embark on a refreshing journey through Japan? Mugicha, also known as…
Shogayu: Japanese ginger tea with honey & lemon – for cosy days
Imagine how a steaming cup of Japanese ginger tea deliciously envelops your senses and warms…
Have you tried the recipe yet? Let me know in the comments – I can’t wait to hear from you.