Amazake is a traditional, sweet rice drink that has been enjoyed in Japan for centuries. It is pleasantly sweet, creamy and contains many important nutrients such as B vitamins, amino acids and natural enzymes. Amazake contains no added sugar and is rich in natural probiotics thanks to the fermentation process. Whether served warm or cold, this drink is a nutritious treat that is popular in both winter and summer.
Making amazake yourself might sound complicated at first glance, but in fact it requires only a few ingredients and a little patience. With a rice cooker, a yoghurt maker or a similar appliance, this traditional drink can be easily made at home. In my recipe, I’ll show you step by step how to prepare the rice porridge, use the Koji correctly and how to control the fermentation process perfectly.
The best part is: you have full control over the sweetness and consistency and can tailor the amazake exactly to your taste. Let’s get started together and try our hand at traditional fermentation!
What makes this amazake recipe so special?
Amazake is one of Japan’s oldest drinks and a true cultural treasure. Its roots date back to the Kofun period (3rd to 7th century), when it was already prized by Buddhist monks as a nutritious food. Translated, Amazake means “sweet Sake” , although – contrary to what the name suggests – this drink contains no alcohol when made with rice Koji. It is a prime example of how, in Japanese cuisine, natural ingredients are transformed into something unique through patience and precision.
Thanks to the Koji fungus, which converts the starch in the rice into natural sugars during fermentation, amazake develops a pleasant sweetness without any added sugar. This ancient technique demonstrates how Japan used fermented foods from early on, not only for preservation but also to enhance flavour and nutritional content.
Amazake not only provides valuable B vitamins and amino acids, but is also easily digestible, which traditionally made it a drink for children, the sick and the elderly in Japan.
For me, amazake is not just a piece of Japanese history, but also a wonderful example of sustainable, healthy eating. It is easy to make yourself and can be used in many ways – whether on its own, in smoothies or as a natural sweetener in desserts.
Making your own amazake: Here’s how!
For anyone who wants to try their hand at traditional Japanese fermentation, this amazake recipe is the ideal place to start. It requires just a few ingredients and a simple process – no complicated procedures or special prior knowledge needed.

With a rice cooker and a yoghurt maker, the individual passages almost take care of themselves, whilst the Koji fungus does the work for you. The result is a mildly sweet drink that you can adapt entirely to your taste – whether thick and pure or diluted as a refreshing drink.
Ingredients:
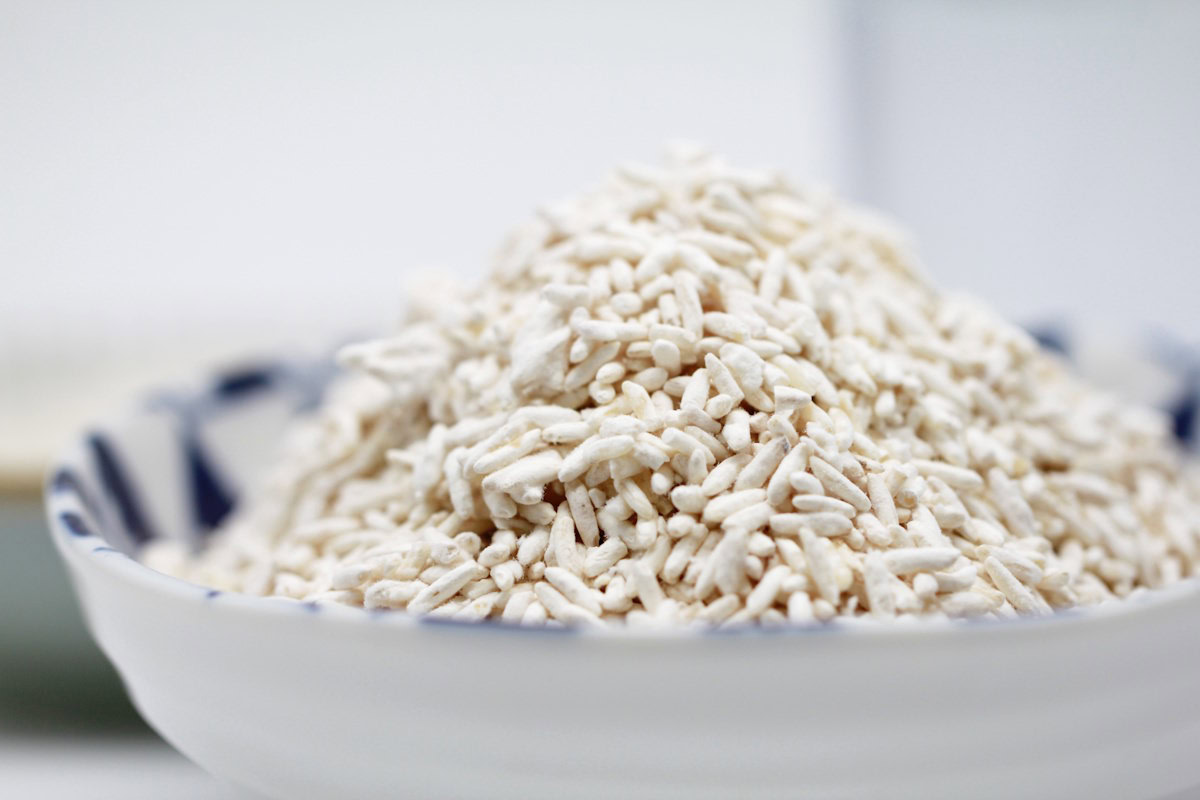
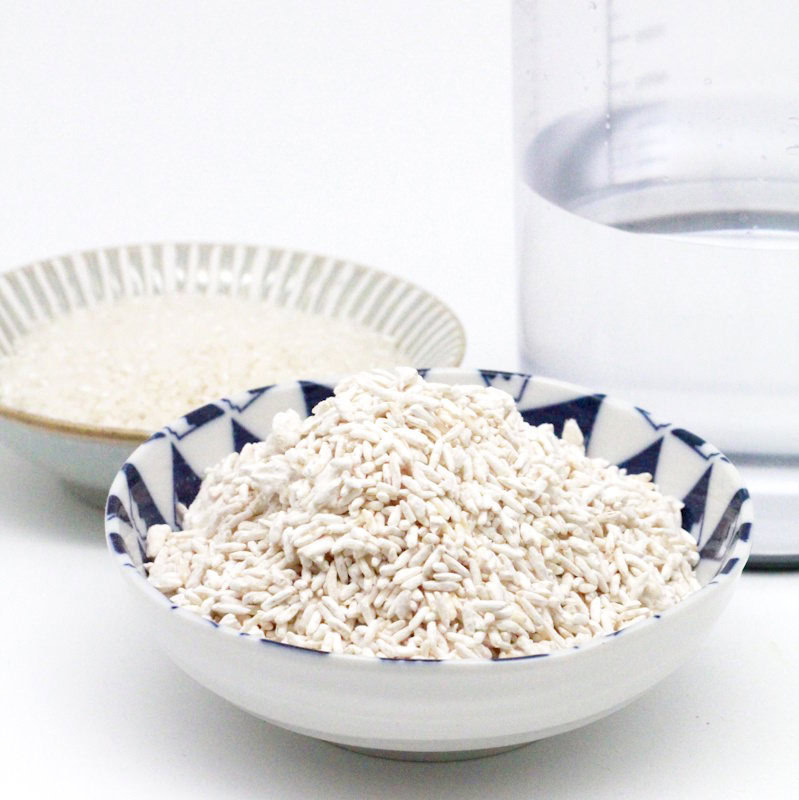
- Japanese short-grain rice: The basis for amazake. This rice is used because of its high starch content, which is converted into simple sugars during fermentation.
- Water: Used for cooking and cooling the rice.
- Rice Koji: The ‘heart’ of the fermentation process, containing the enzymes needed to convert the starch into sugar.
No yoghurt maker?
No problem! Keep the mixture in a pan of warm water (55–60°C) or use the oven on the lowest setting. A kitchen thermometer will help you keep the temperature constant.
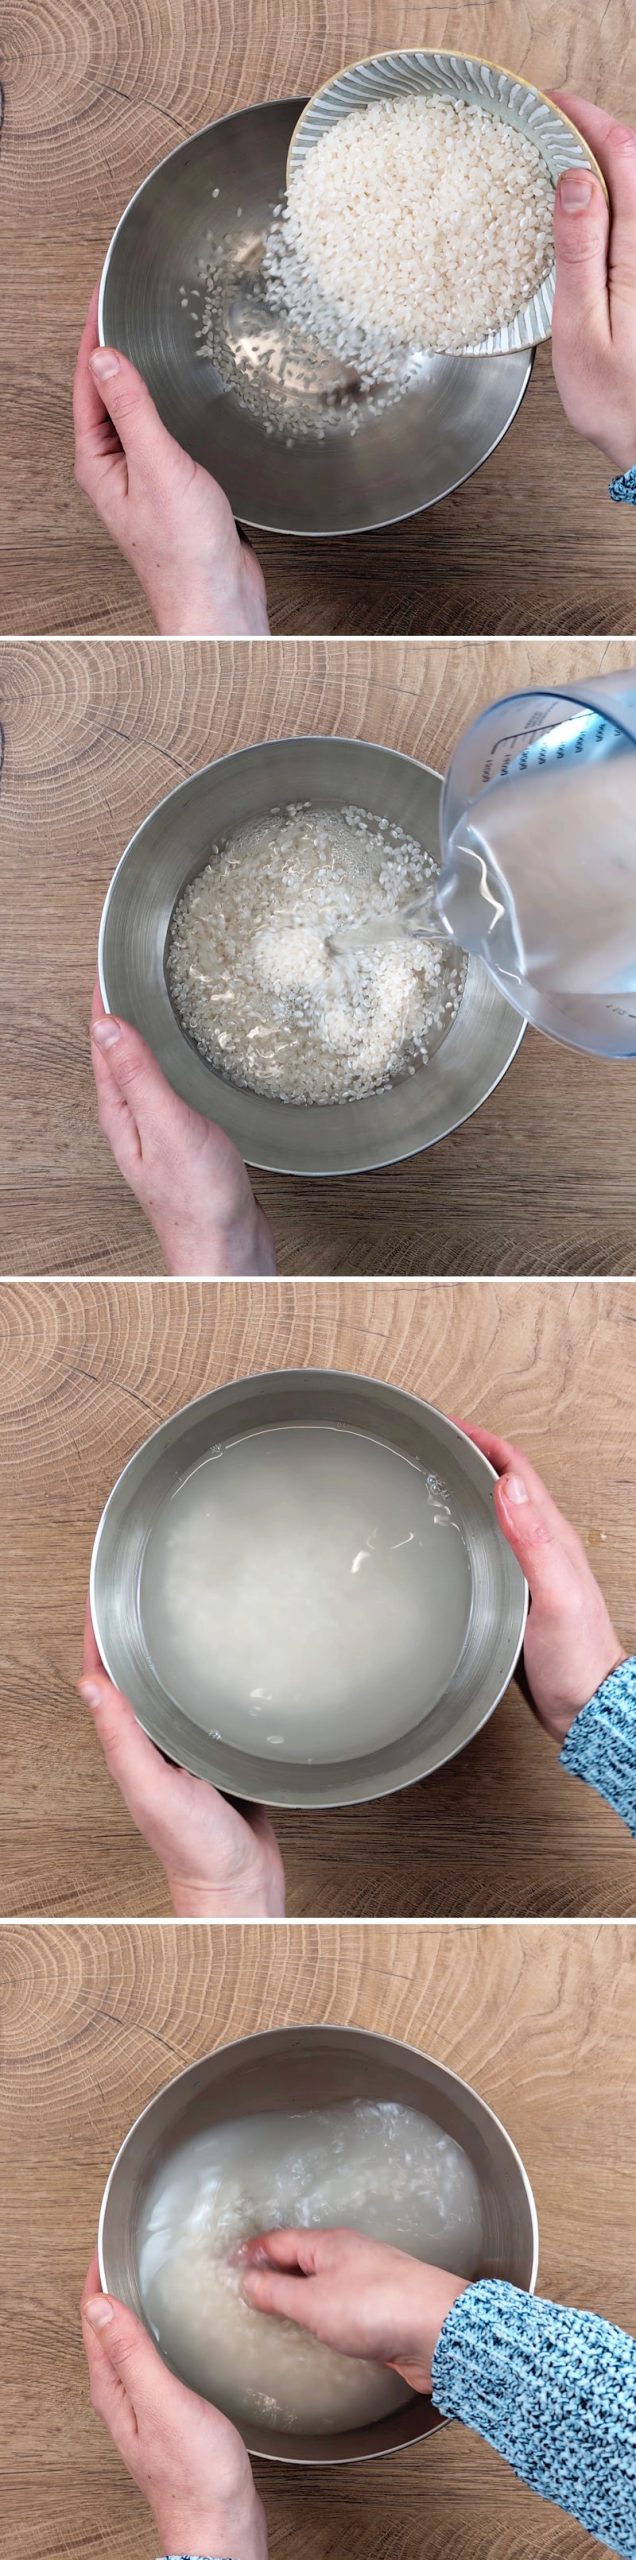
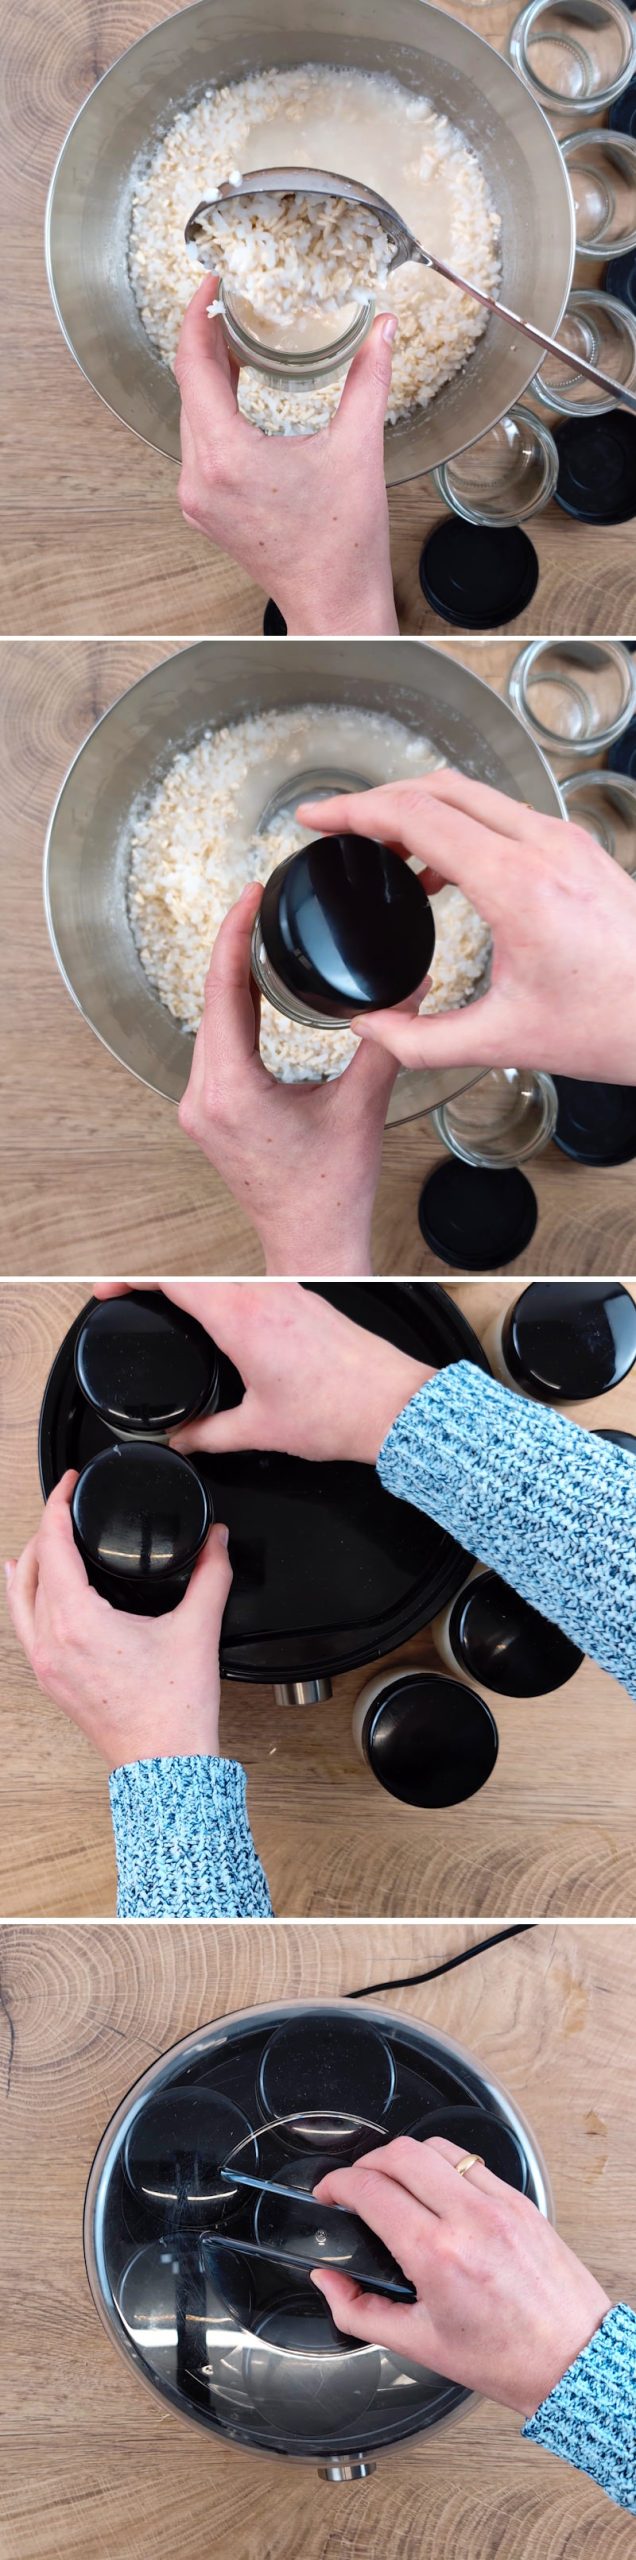
To make amazake yourself, start by washing the unhusked Japanese short-grain rice thoroughly until the water runs clear. Then cook the rice in plenty of water in a rice cooker or a saucepan until it has turned into a soft porridge.
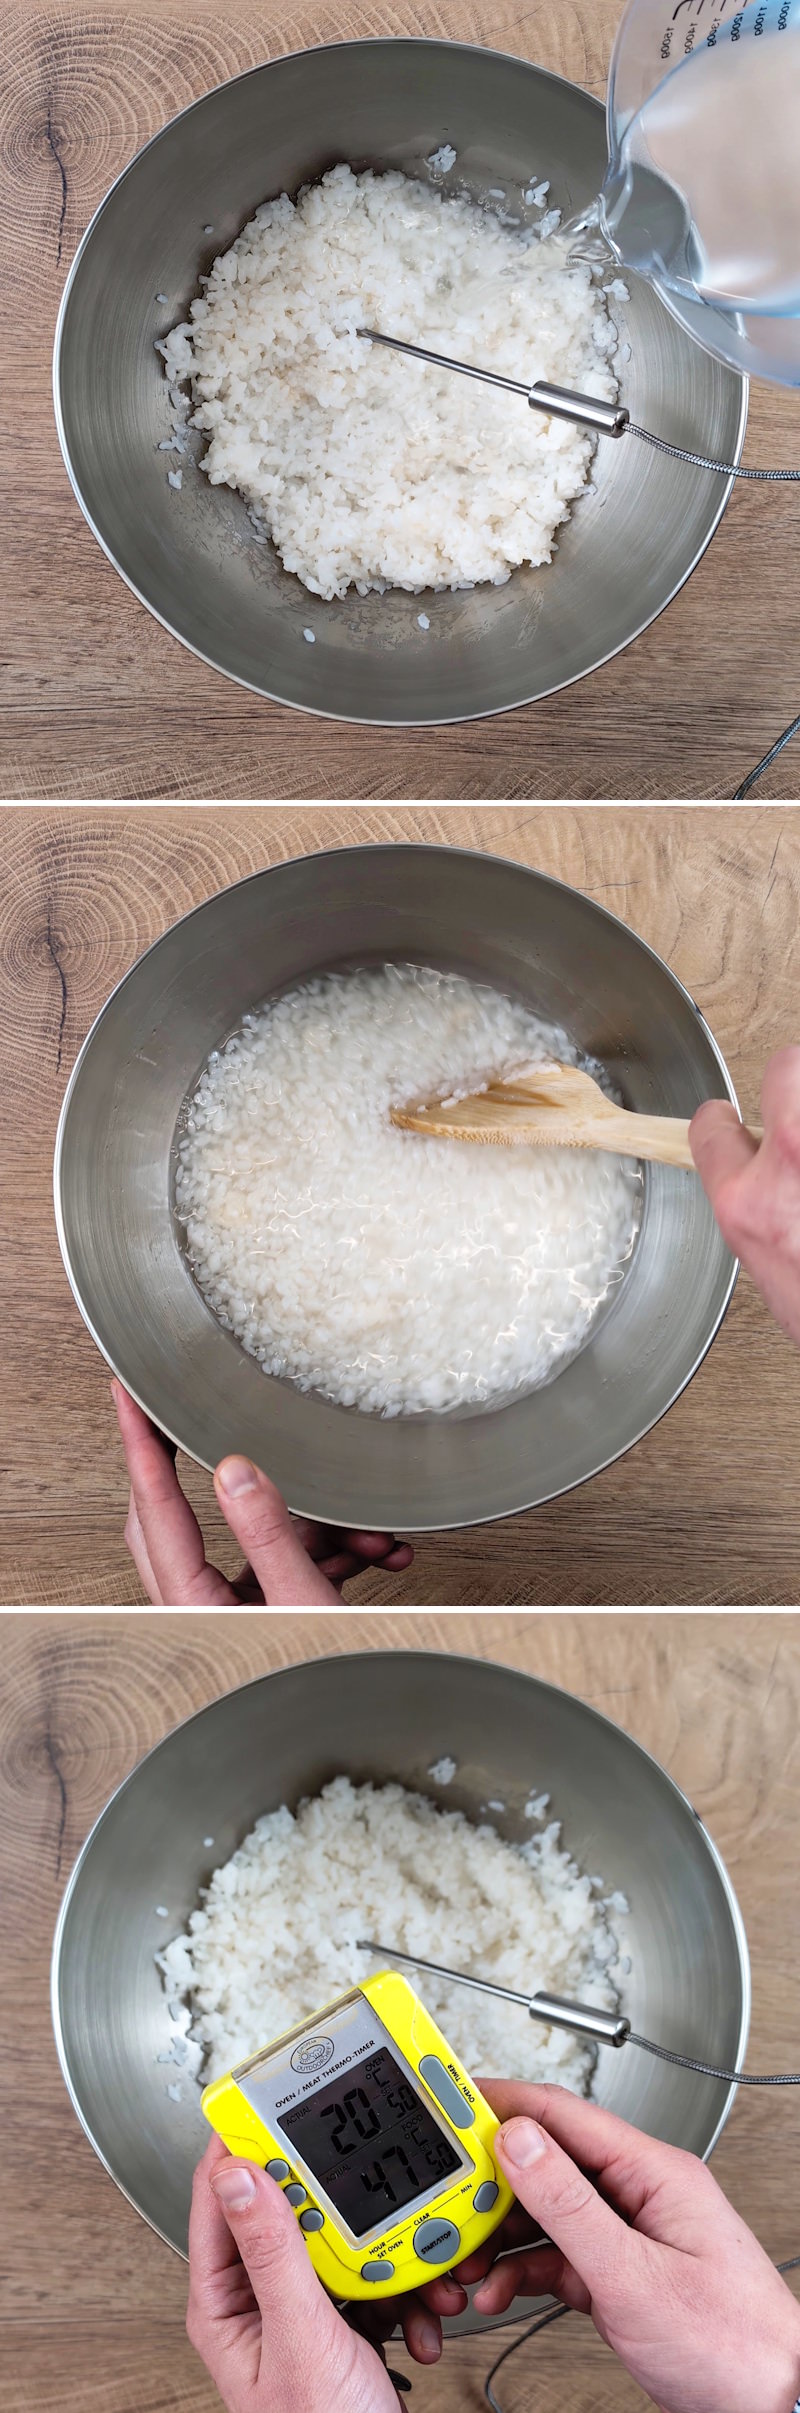
Once the rice porridge is ready, allow it to cool slightly and gradually stir in cold water until the temperature has dropped below 60°C. A kitchen thermometer is useful here, as the temperature must not be higher than this to avoid killing the rice Koji cultures.
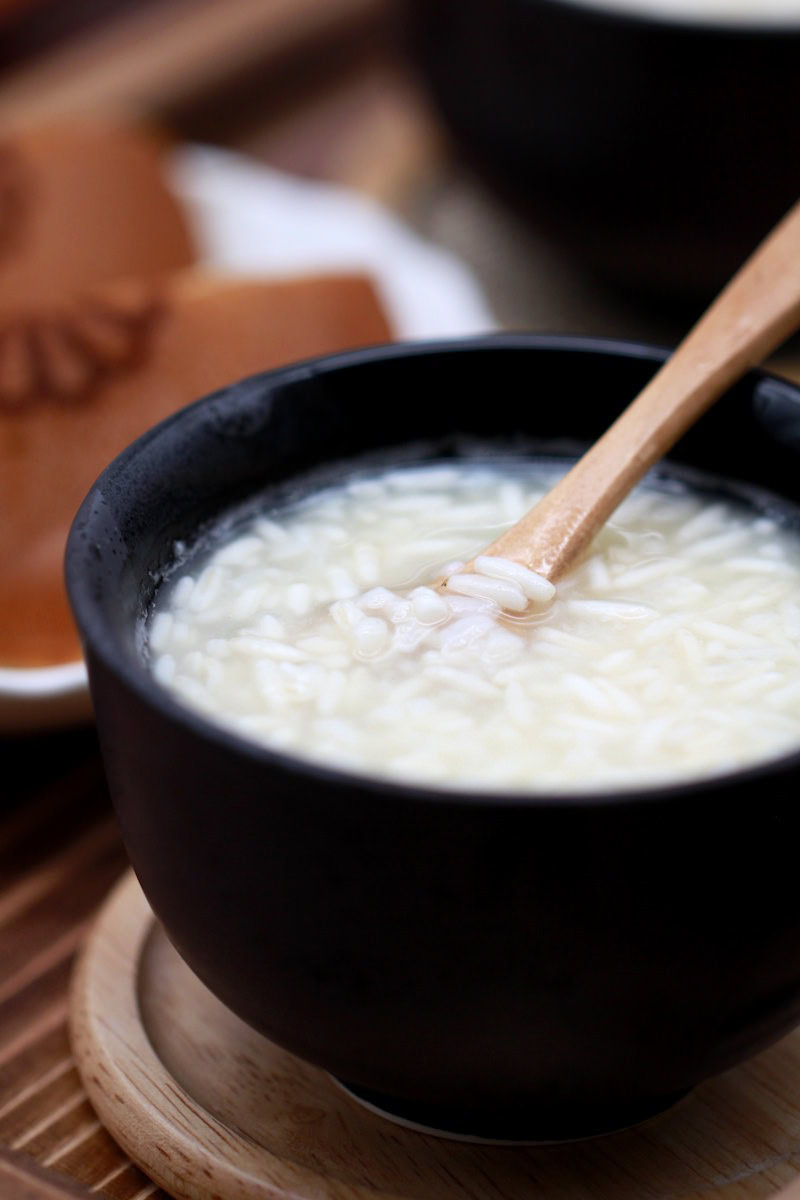
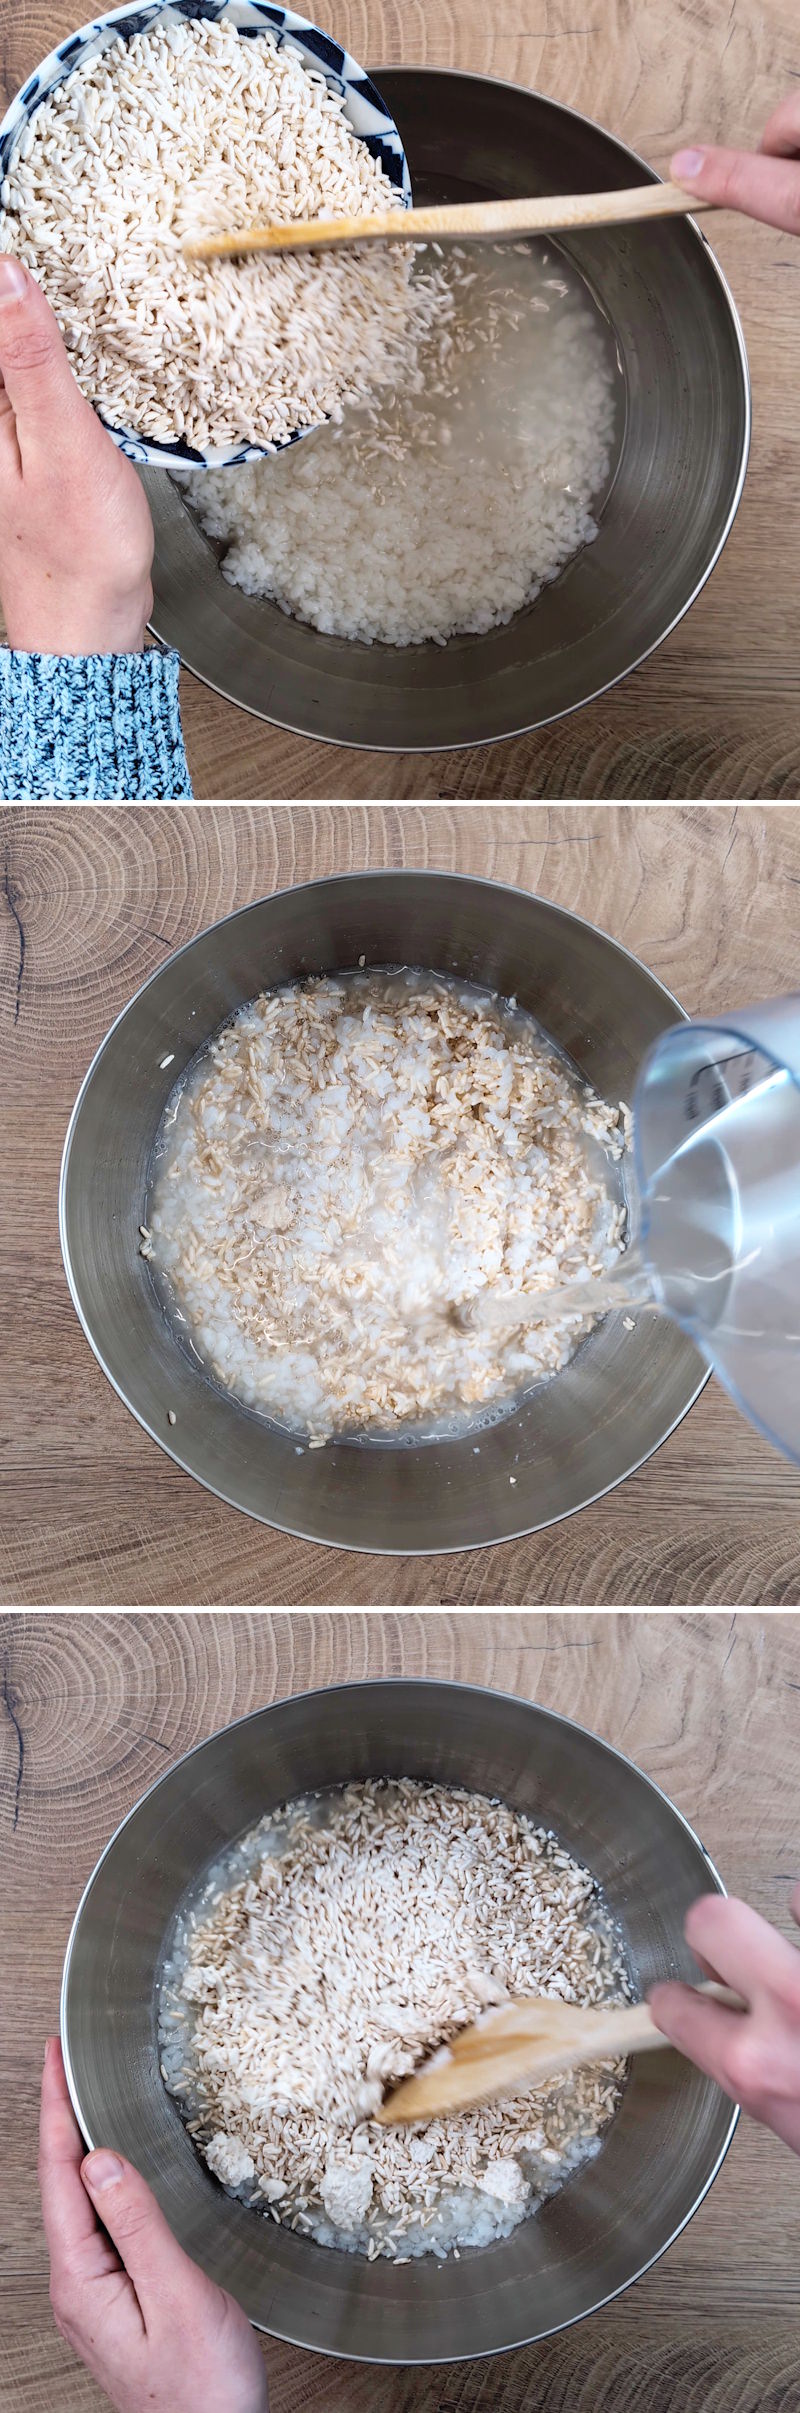
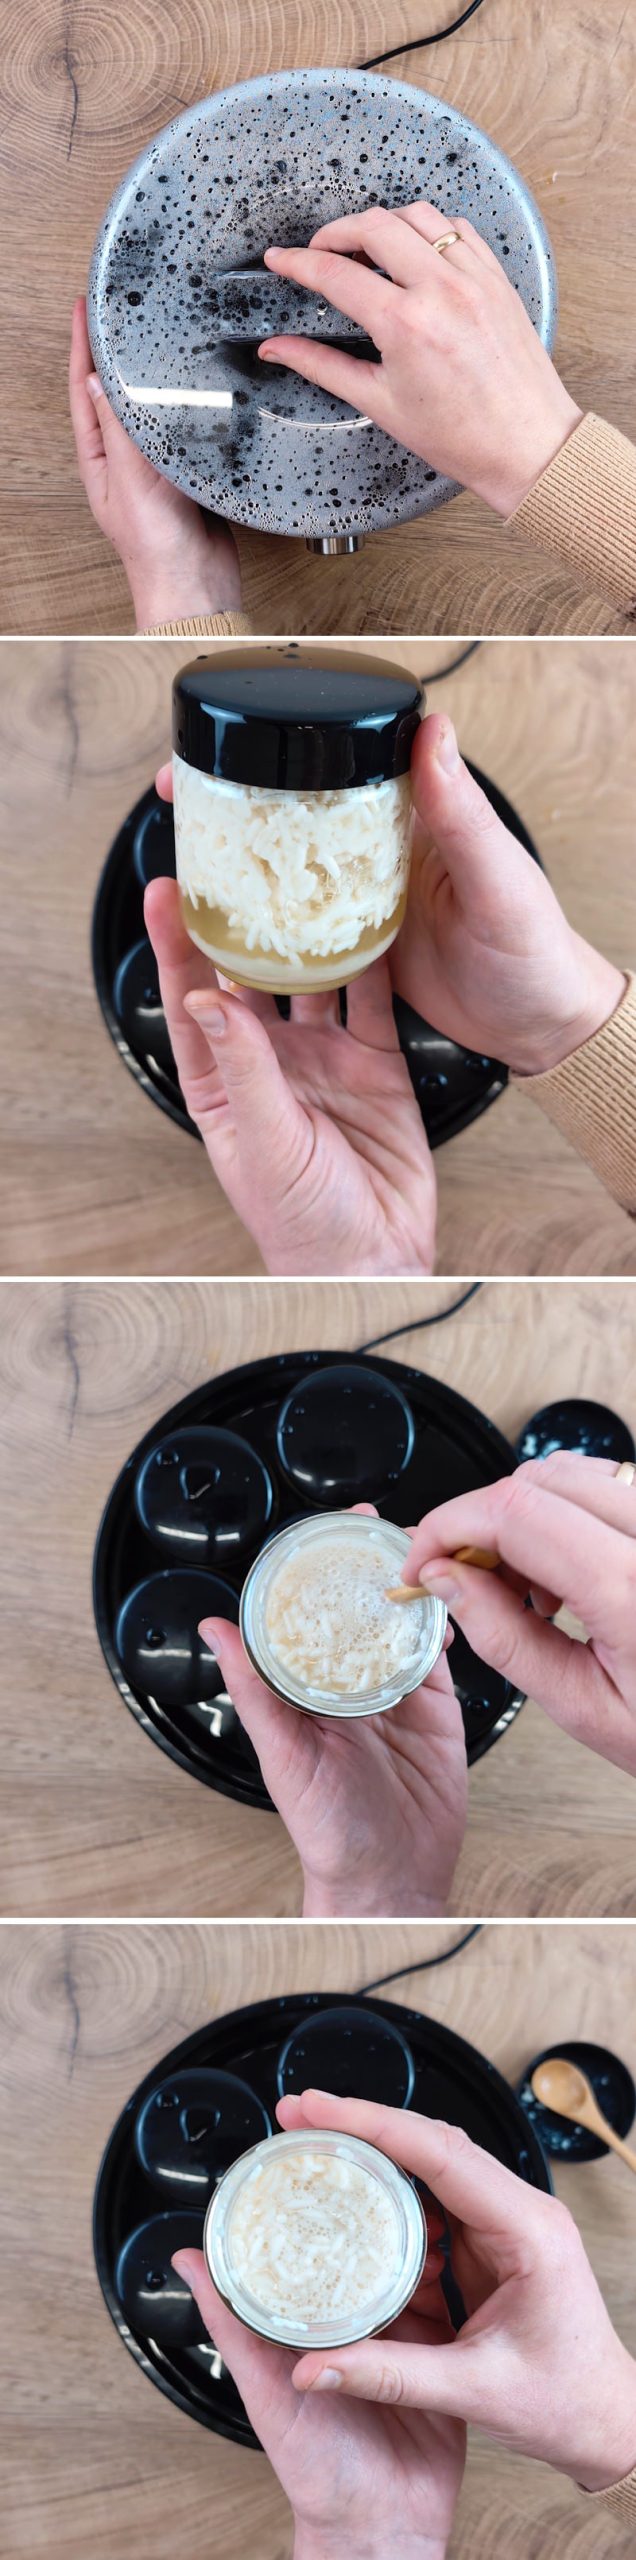
Once the temperature has been reached, add the rice Koji and stir it in evenly so that the porridge is moist but not too runny. Pour the mixture into the containers of a yoghurt maker, set it to the required temperature and leave the amazake to ferment for 10 to 12 hours.
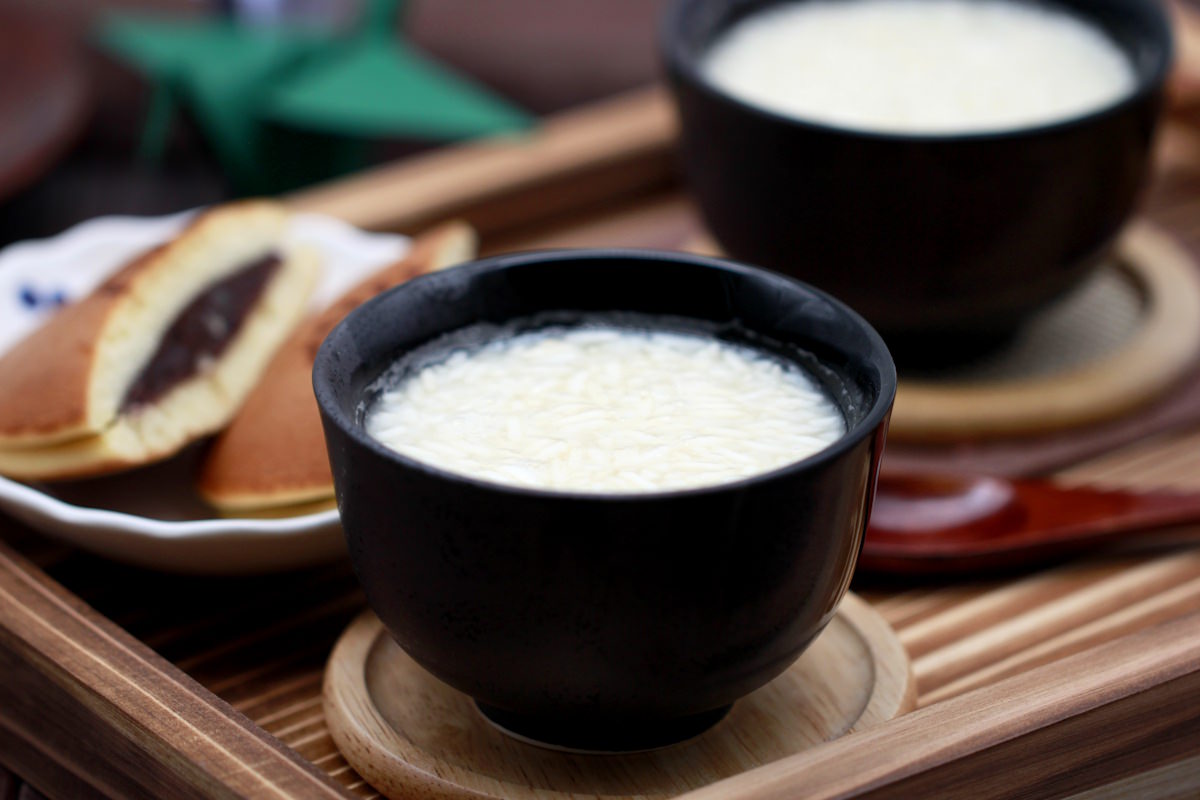
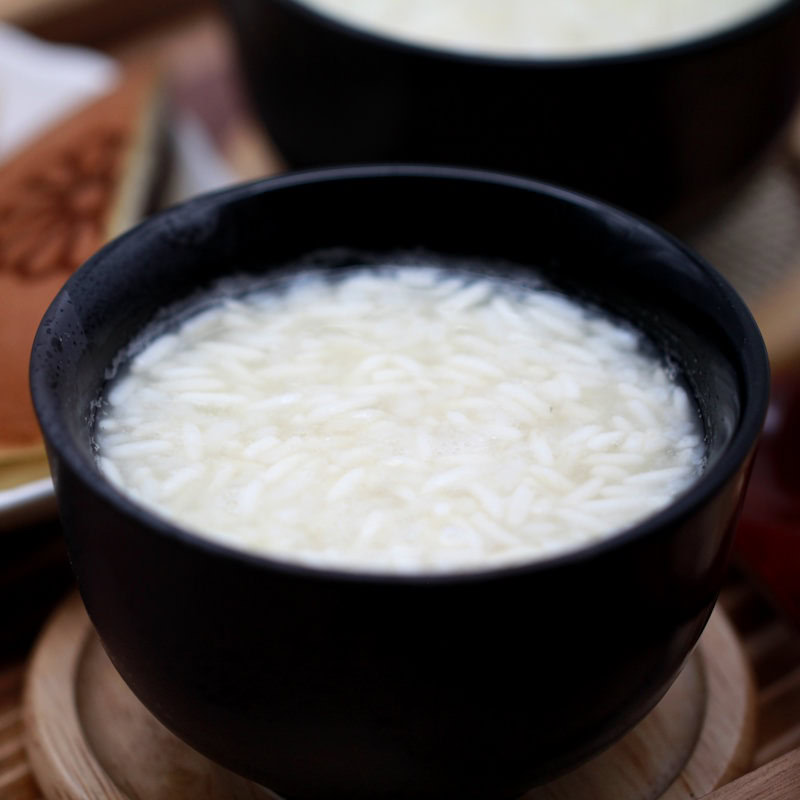
Stirring occasionally ensures that the fermentation proceeds evenly. As soon as the amazake has developed a pleasantly sweet flavour, remove it from the yoghurt maker and leave it to cool. The finished amazake can be enjoyed on its own, diluted with water, or used in smoothies and desserts. It will keep in the fridge for up to a week.
What goes well with Amazake?
Amazake is a versatile drink that works well both on its own and in other dishes. It goes perfectly with:
- Muesli and porridge: Amazake adds a natural sweetness to your breakfast.
- Smoothies: A portion of amazake combined with banana and plant-based milk makes for a creamy, nutrient-rich smoothie.
- Desserts: Amazake can be used as a natural sweetener for pancakes, puddings or desserts.
- Refreshing drinks: Diluted with ice water and served with a little grated ginger, amazake becomes a refreshing summer drink.
In winter, amazake tastes particularly good when slightly warmed. A hint of grated ginger gives it a subtle kick and warms you from the inside.
Do you have any questions about the amazake recipe or would you like to share your success with the community? Feel free to leave a comment below this post and let me know how your homemade Amazake turned out. Have fun trying it out and enjoy!
Amazake
serves 7 | 40 minutes + 10 hours fermentation | 193 kcal</ strong>
🖨️ Print PDF 📌 Save pinThis homemade amazake is a naturally sweet rice drink from Japan that contains no added sugar. Thanks to fermentation with rice Koji, it is packed with valuable nutrients and delights with its mildly sweet taste – perfect on its own, in smoothies or as a healthy sweetener alternative.
Ingredients (7 servings)
150 g loose rice (im Shop ansehen)
450 ml water (for cooking the rice porridge)
500 ml water (for cooling the rice porridge)
200 g rice Koji (also known as Kome Koji)
Useful equipment:
Rice cooker with accessories
Kitchen thermometer
Yoghurt maker
Preparation (40 minutes + 10 hours)
Step 1
Before you start, make sure your yoghurt maker can maintain a temperature of around 45–50°C (it must not exceed 60°C!). Alternatively, you can use your oven. It is important that the temperature remains constant throughout the entire fermentation period.
Step 2
Rinse the rice thoroughly by washing it with cold water at least three times, until the water runs clear.

Step 3
Then cook the rice with the specified amount of water in a rice cooker (or alternatively in a saucepan), until it is cooked to a soft, porridge-like consistency. Tip: If your rice cooker has a rice porridge setting, use that as a guide.
Step 4
Remove the hot rice porridge from the rice cooker and add 500 ml of cold water </ strong>to it. Stir well and allow the mixture to cool to just under 60 °C. Use a kitchen thermometer to ensure the temperature does not exceed this, as the Koji cultures will otherwise lose their effectiveness.
Passaggio 5
Once the porridge has reached the correct temperature, stir in the rice Koji evenly. Make sure the porridge isn’t too dry – it should be moist enough to ensure optimal fermentation. If necessary, add a little more water.
Step 6
Pour the mixture into the containers of your yoghurt maker and set the temperature to 45–55 °C. Leave the amazake to ferment for 10 to 12 hours (or overnight).
Tip #1: The longer the fermentation, the sweeter the result – feel free to taste it every now and then and stop the fermentation earlier if necessary!
Tip #2: If you don’t have a yoghurt maker, you can also ferment the mixture in an oven set to the lowest temperature.
Step 7
Once the amazake has finished fermenting, remove it from the yoghurt maker, leave it to cool completely and store it in the fridge. It will keep there for about a week.
Tip: Amazake can be served warm or cold – whichever you prefer. For a refreshing variation, dilute it with ice-cold water or serve it with fresh fruit and ice. It’s also perfect as a topping for muesli or as a base for smoothies.
Fancy some more delicious inspiration from Japan? You can find our best recipes here:
Butter Mochi (Hawaiian Mochi Cake)
Butter Mochi ist eines dieser Rezepte, die man nur schwer in eine Schublade stecken kann….
Warabi Mochi: Make your own delicate summer dessert with Kinako & Kuromitsu syrup
When the weather warms up, the appetite for light, refreshing sweets – and hardly any…
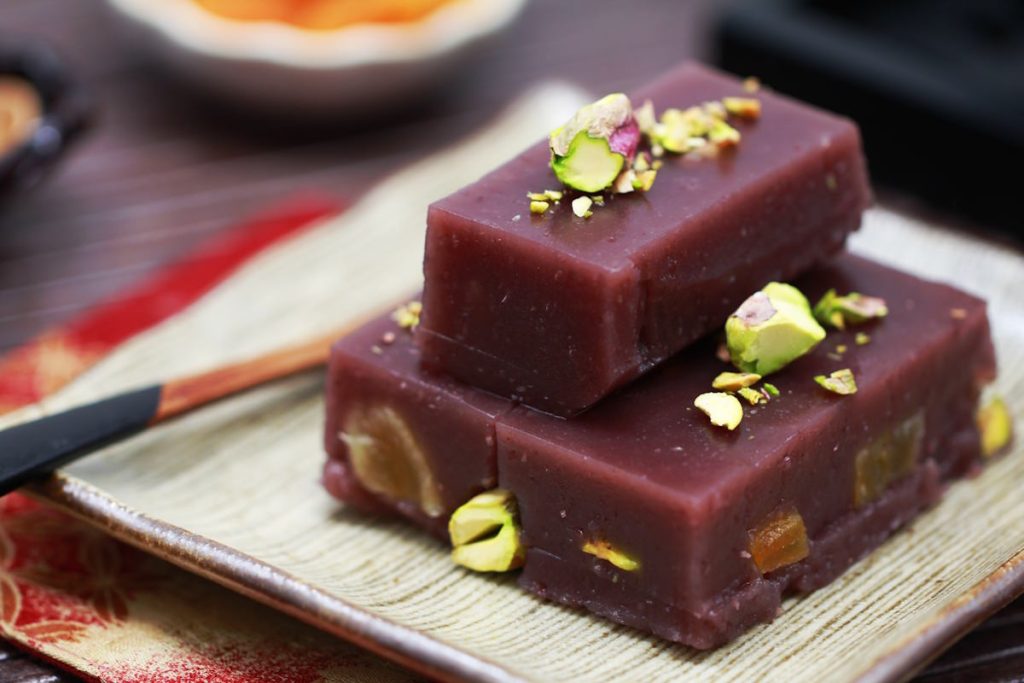
Make your own Yokan: Japanese jelly with red bean paste, apricot & pistachio filling
Yokan is a classic Japanese jelly made from red bean paste and agar-agar, which captivates…
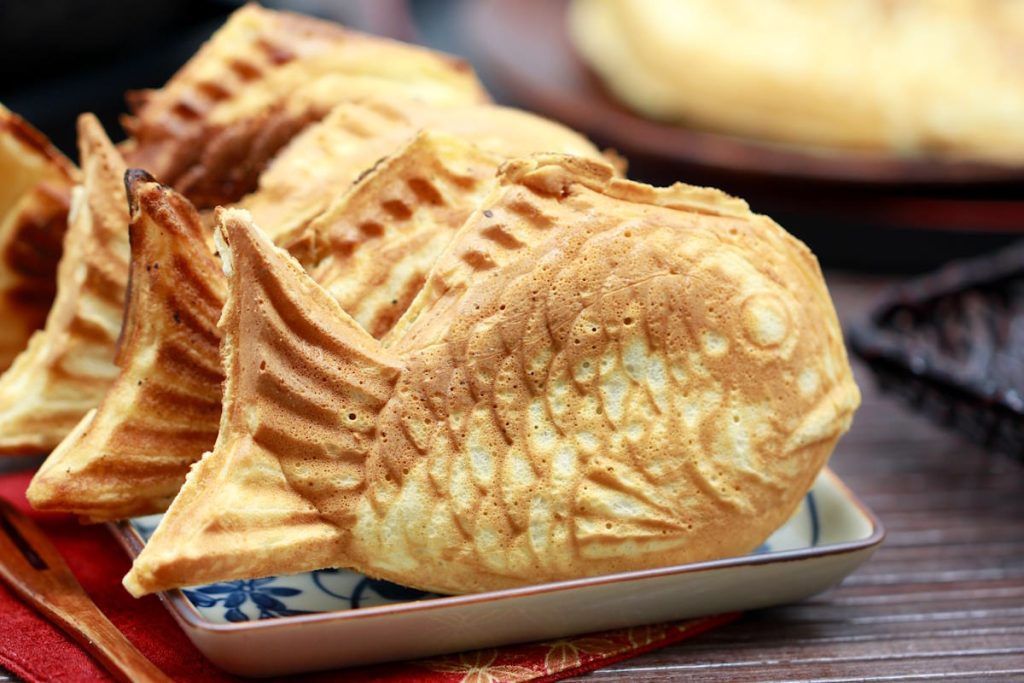
Make your own taiyaki: Japanese fish-shaped waffles with sweet anko filling – easy & so delicious!
Taiyaki is a classic of Japanese street food and delights with its charming fish shape…
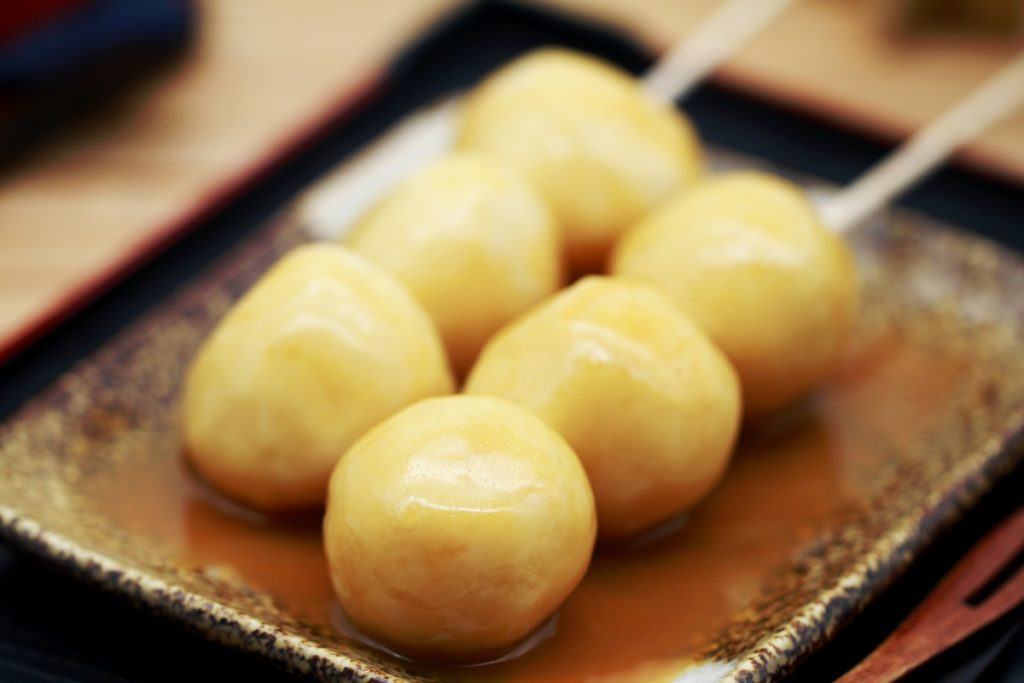
Make your own tofu Dango with caramel sauce: with a sweet and savoury twist!
Tofu Dango with caramel sauce is a harmonious blend of delicate silken tofu and traditional…
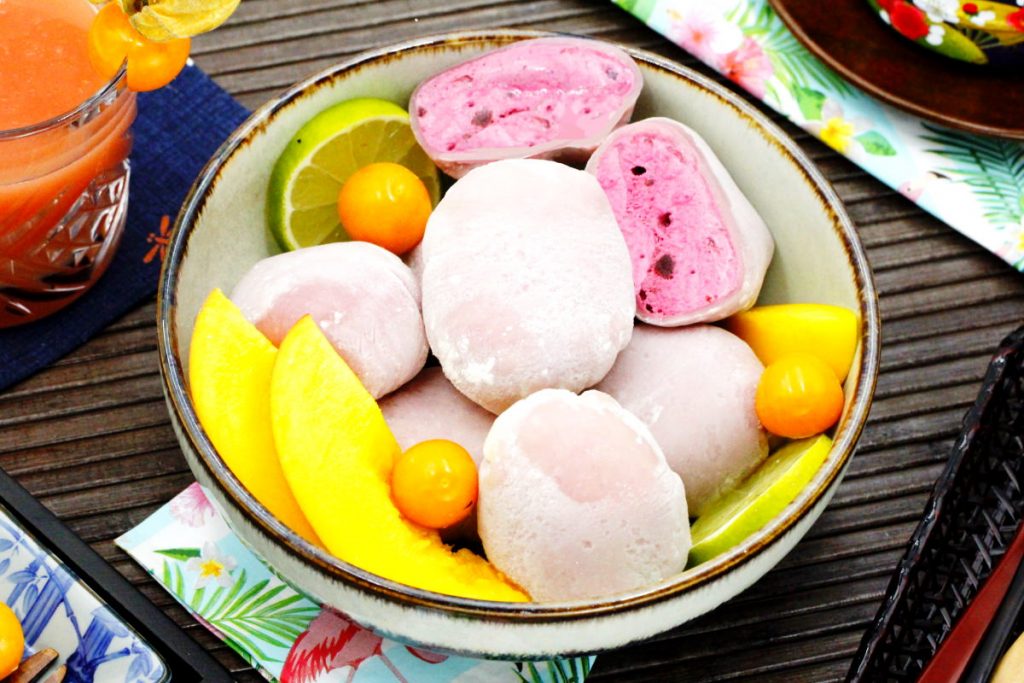
Make your own Mochi ice cream: It’s easy, in three fruity flavours!
Oishii! Everyone really loves this food trend from Japan: homemade Mochi ice cream. A treat…
Have you tried the recipe yet? Let me know in the comments – I can’t wait to hear from you.