

Language:


You’ll fall in love with this recipe for these delicate Japanese sweets, known throughout Tokyo as Kanto-style sakura Mochi and highly sought-after during the annual cherry blossom season! The incredibly simple preparation makes this sweet speciality a must-have in your recipe book, as the delicate adzuki bean filling is simply wrapped in a sweet pancake made from glutinous rice flour, then decorated and encased with a pickled cherry leaf. Simple, delicious and a real eye-catcher for any guest – discover this tempting treat here!
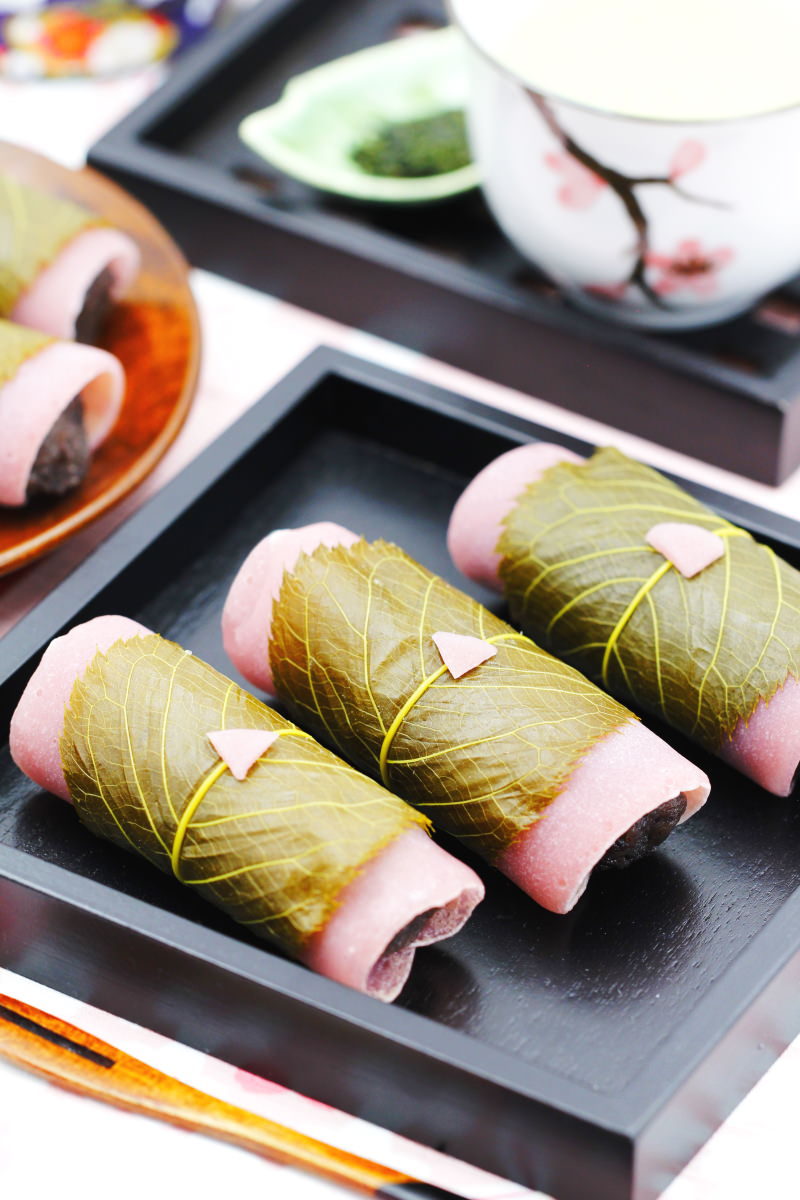
Psst… I just can’t keep this secret to myself! So, this recipe for Kanto-style rolled sakura mochi is by far the easiest mochi recipe I’ve ever made 😊.
Unlike other Japanese rice cakes, here the glutinous rice flour batter is simply spread thinly in a frying pan and cooked for less than 3 minutes. Brilliant, isn’t it?
To make sure it turns out really well, the Mochi dough here is made using both glutinous rice flour (im Shop ansehen) and wheat flour. Combined with sugar, water and a little food colouring, this creates perfect, beautifully elastic Mochi with a delicate pink colour.
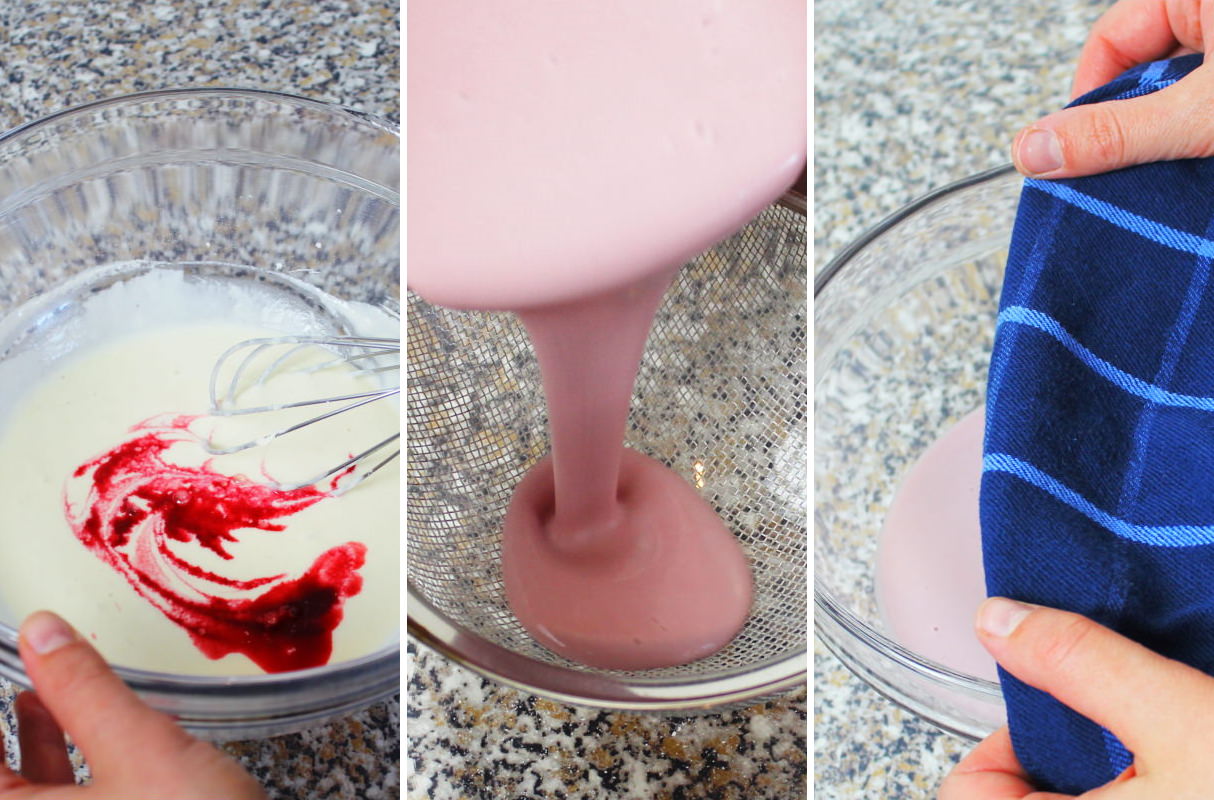
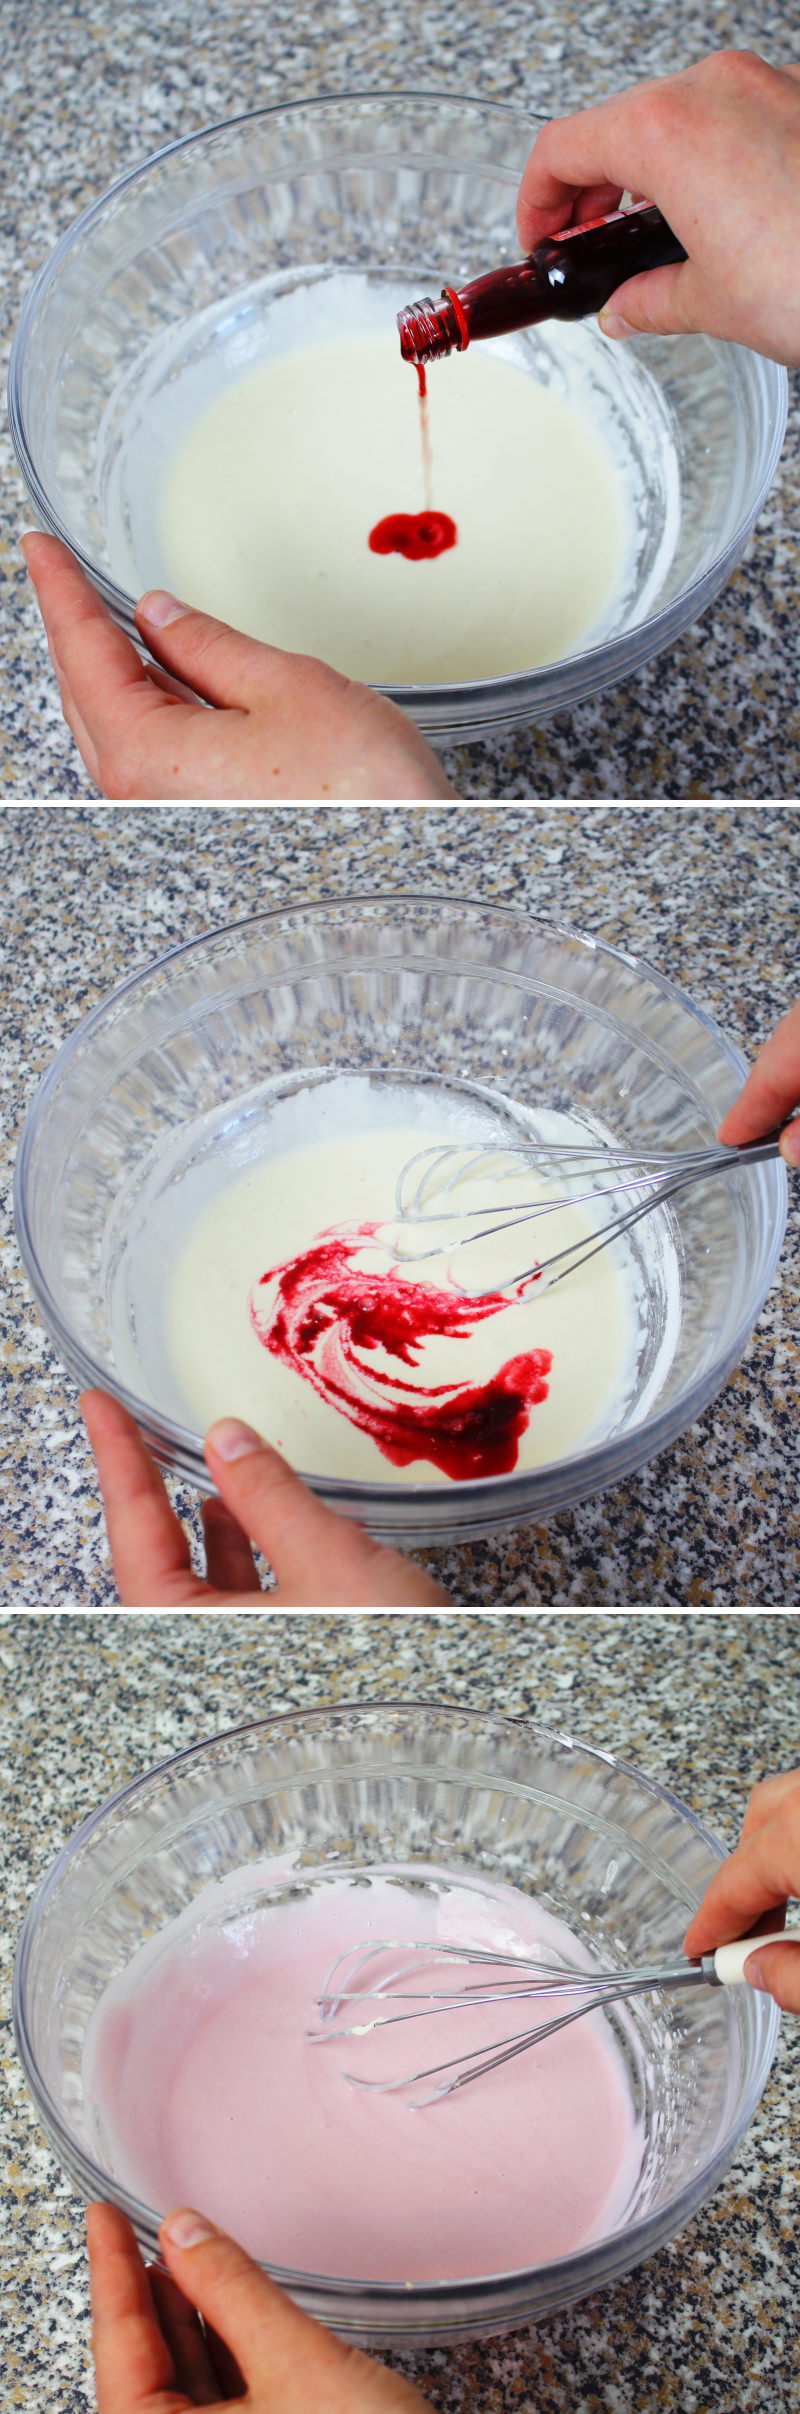
Tip: This time, I opted for a colour made from black carrot juice and I’m really pleased with the result. But you could also use raspberry purée or something similar!
The Mochi taste particularly good if you leave the mixed dough to rest undisturbed for 20 minutes. This allows the glutinous rice flour to soak up the water nicely, everything binds together perfectly, and the delicate pink colour will set well.
TOP RECOMMENDATION
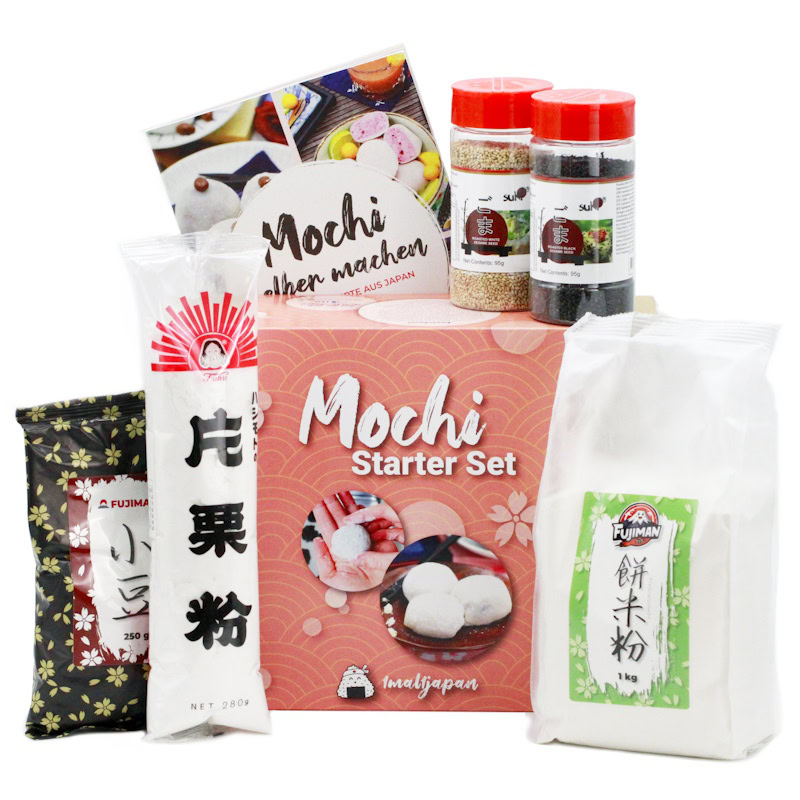
Mochi Starter Set | Klebreiskuchen selber machen, vegan
6-tlg. Kochset für 4 große Portionen Klebreiskuchen, inkl. Rezeptheft, glutenfrei & vegan. Mit dem Mochi Kochset stellst du japanische Reiskuchen ganz einfach selbst her –…
In stock
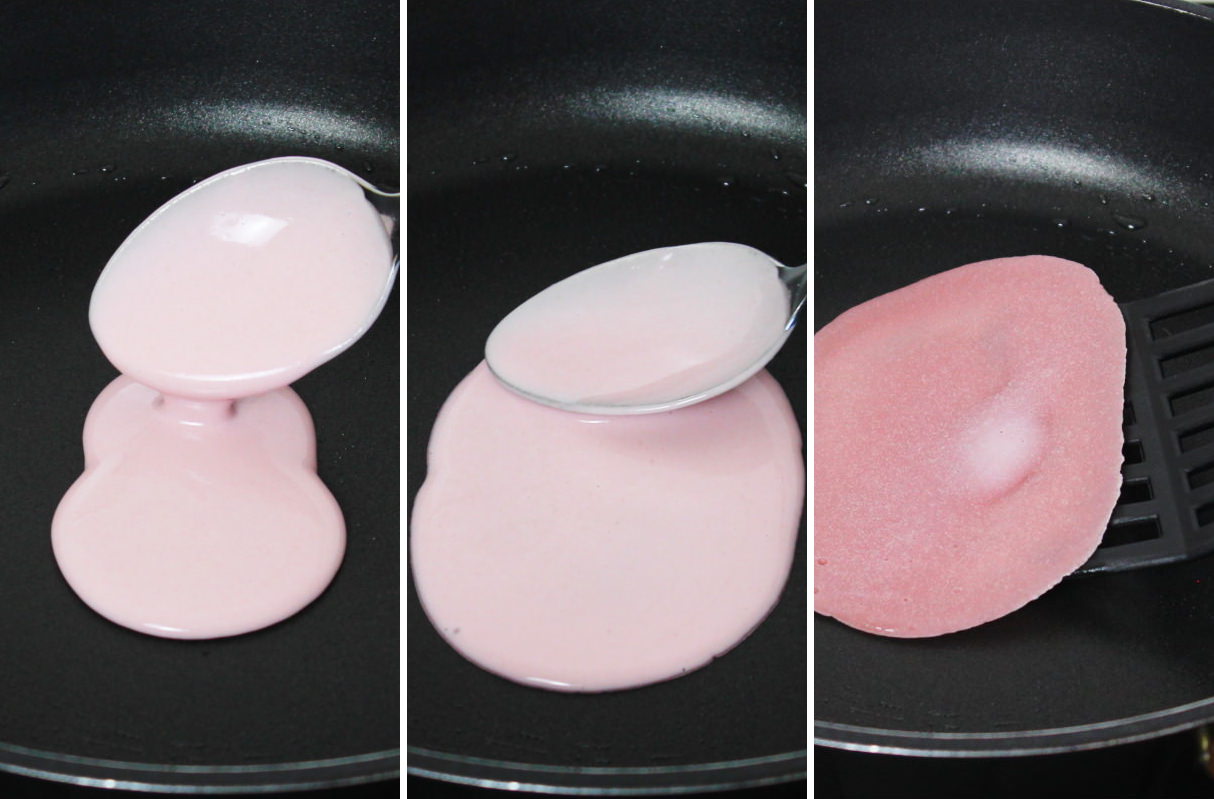
To cook them, place two portions of the Mochi batter close together in a lightly oiled frying pan and spread them thinly into a wide oval shape. Leave the Mochi pancakes to cook for about 3 minutes, so that the runny batter has completely set. Then lift them out of the pan with a spatula, place them on baking paper and leave them to cool there.
Tip: Do not flip the pancake. It is enough to cook the batter on one side only!
The lovely pink colour goes perfectly, of course, with the annual cherry blossom festival, the Japanese Hanami. On this occasion, delicious, traditional Japanese dishes are packed for a picnic and eaten whilst admiring the blossoming cherry trees.
That’s why it’s particularly handy that the sakura Mochi are wrapped all round in a pickled cherry leaf (sakura no ha), which adds a slightly salty note and protects the rice cake from drying out.
These are actually real cherry leaves!! When they’re still very young, they’re freshly picked and then pickled in salt and vinegar. Wow, brilliant – it’s so typically Japanese, isn’t it?! You can make these cherry leaves yourself or perhaps it’s best to buy them.
My tip: Would you like to find out more about these irresistibly sweet Mochi? Then let yourself be enchanted by the world of Japanese rice cakes here: → Easy homemade Mochi: 7 recipes that really work!
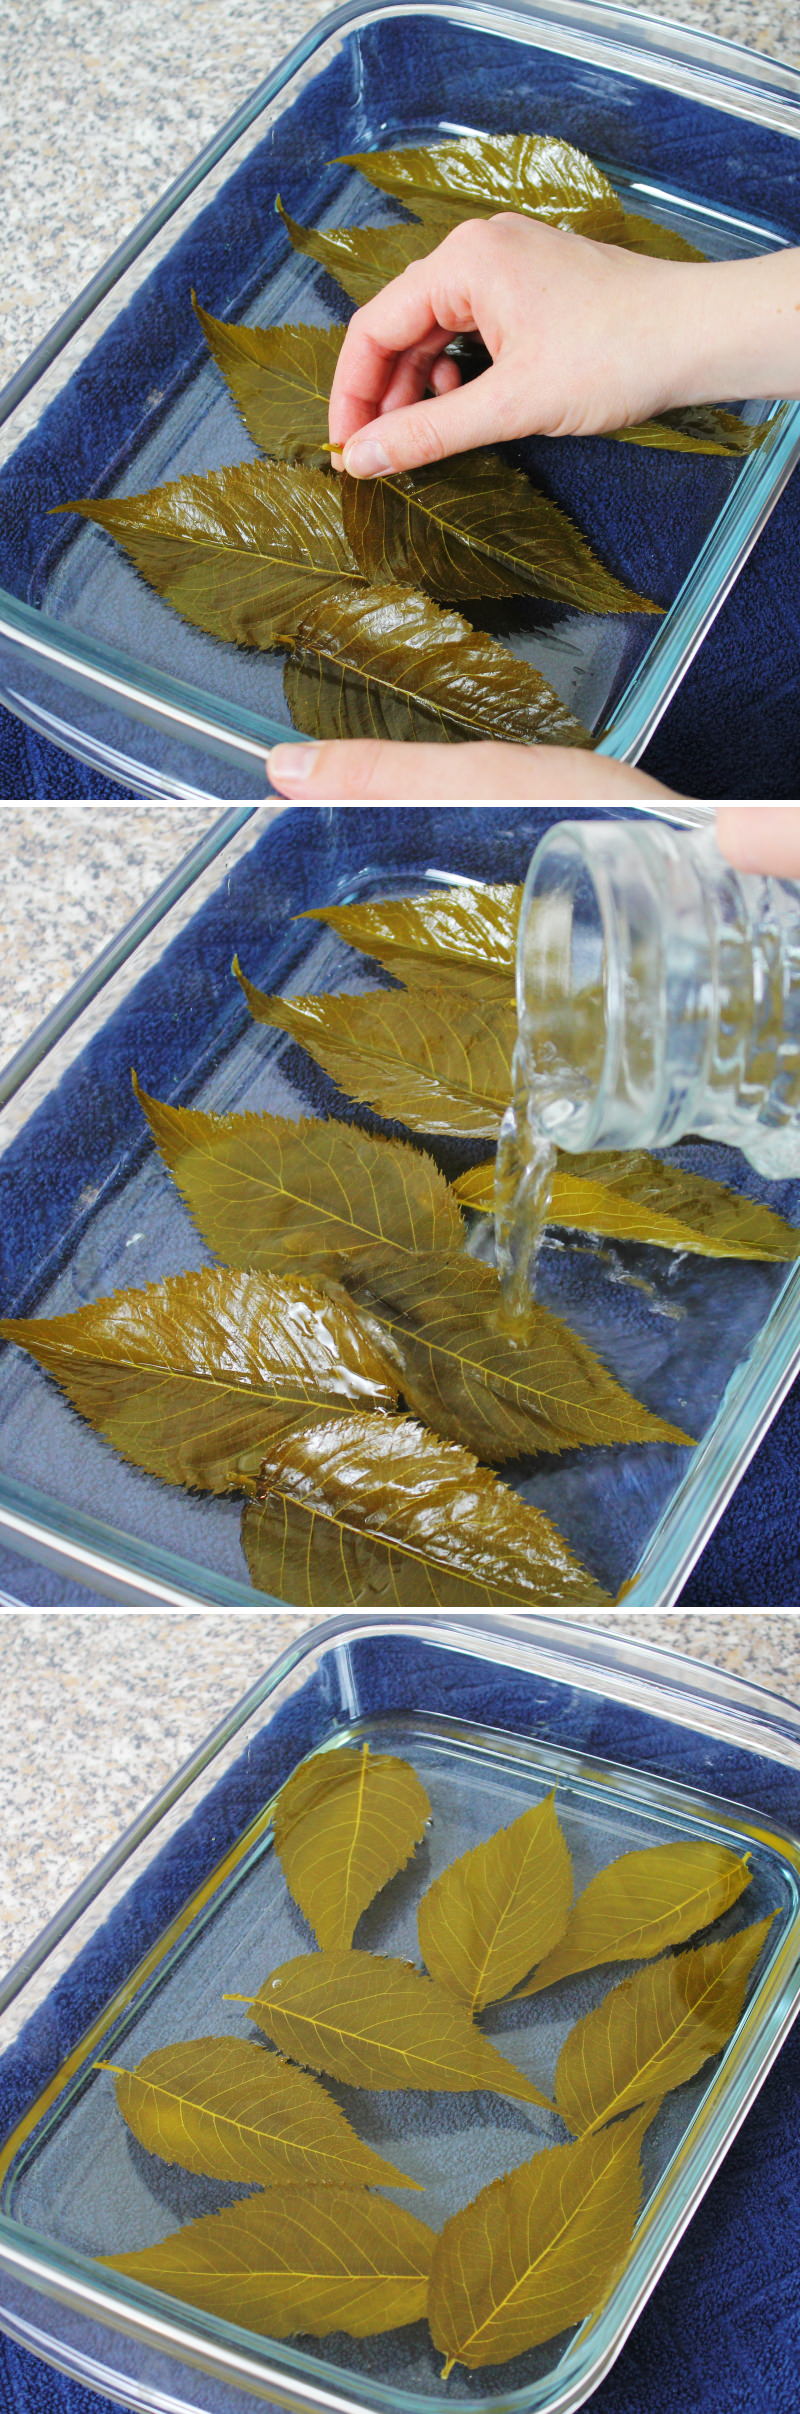
To use the leaves, we’ll desalt them in good time in a bowl of cold, fresh water. Then simply pat them dry gently and wrap them around the sakura Mochi. Yes, and that’s it 😊.
Inside the Mochi, we’ll hide a sweet filling made from red adzuki bean paste (anko). This creamy paste is called anko, or simply ‘an’, and is made from adzuki beans (im Shop ansehen). It’s the very best choice when it comes to the perfect accompaniment for traditional Japanese sweets and pastries. → Here’s my simple recipe for homemade red bean paste!
From preparation to serving, this recipe is a real all-round success. And I promise you that your guests will be amazed by your Japanese culinary skills. Incidentally, this recipe is also absolutely delicious as a dessert served with a cup of fresh Matcha tea!
Sakura Mochi (Kanto-style)
Serves 5 | 60 minutes | 343 kcal
🖨️ Print PDF 📌 Save this pinThese delicate Japanese sweets, known as sakura Mochi throughout Tokyo and highly sought-after during the annual cherry blossom season, are a recipe to fall in love with! The incredibly simple preparation makes this sweet speciality a must-have in your recipe book, as the delicate adzuki bean filling is simply wrapped in a sweet pancake made from glutinous rice flour and decorated with a cherry leaf. Simple, delicious and a real eye-catcher!
Ingredients (10 pieces = 5 portions)
25 g glutinous rice flour (im Shop ansehen)
85 g wheat flour
10 g sugar
20 ml red food colouring (or, if using concentrated food colouring, dissolve 1–2 drops in 20 ml of water)
120 ml water
300 g Koshi-an – fine anko, make your own red bean paste (→ to the recipe)
10 pieces of cherry leaves (sakura no ha) preserved in salt
2–3 tbsp oil (e.g. rapeseed or sunflower oil)
Method (60 minutes)
Step 1
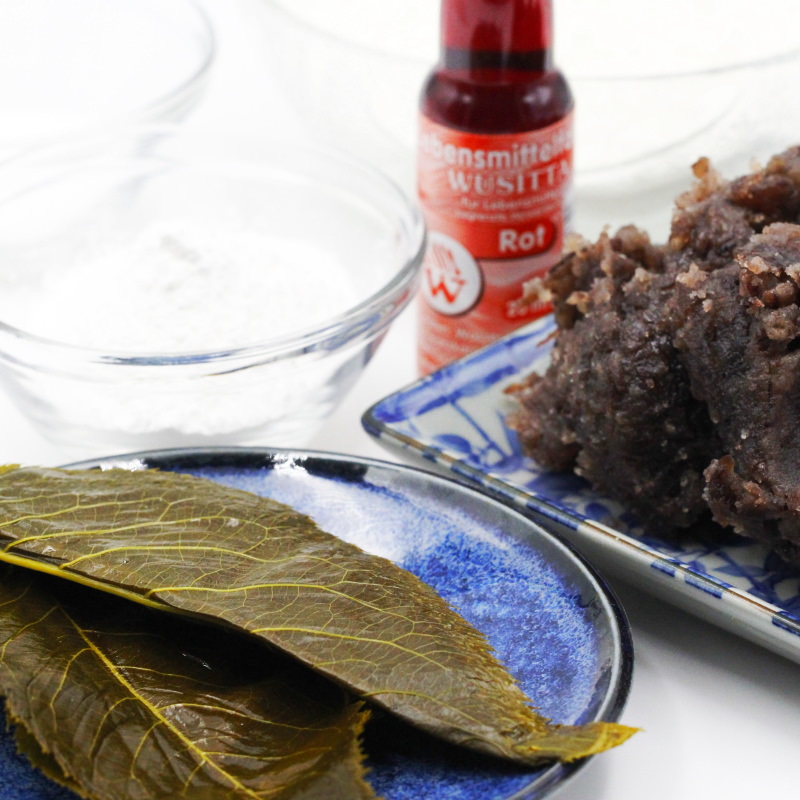
Prepare the ingredients for the rolled sakura Mochi. The homemade koshi-an
(click here for the recipe for homemade anko) should now be ready and completely cooled!
Step 2
First, we’ll take care of the pickled cherry leaves: Lay all the leaves flat in a container and cover them completely with water so that they’re all floating. To desalt the leaves, leave them to sit in the water for 30 minutes.
Step 3
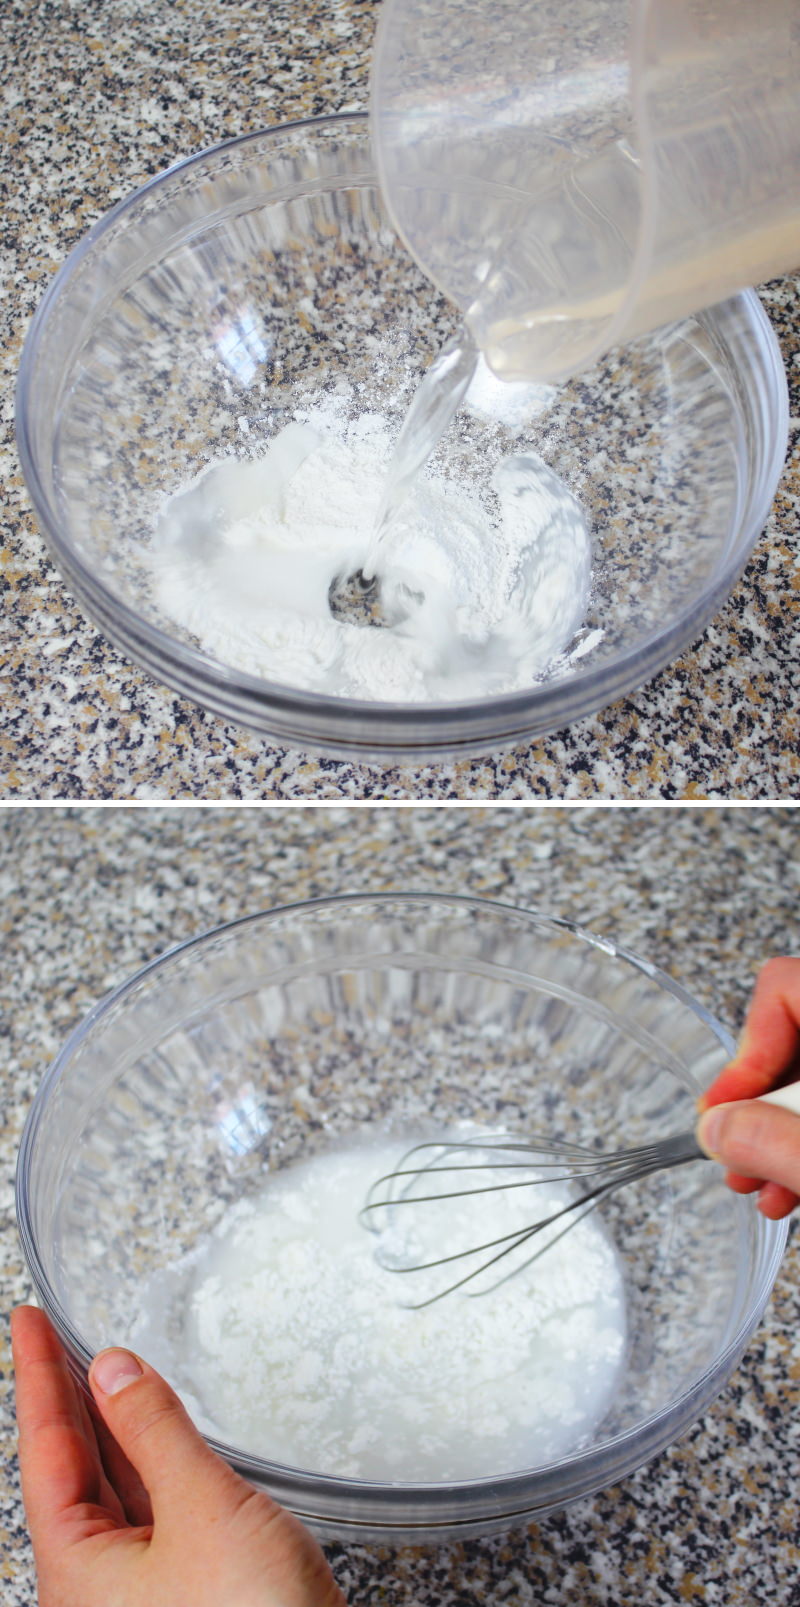
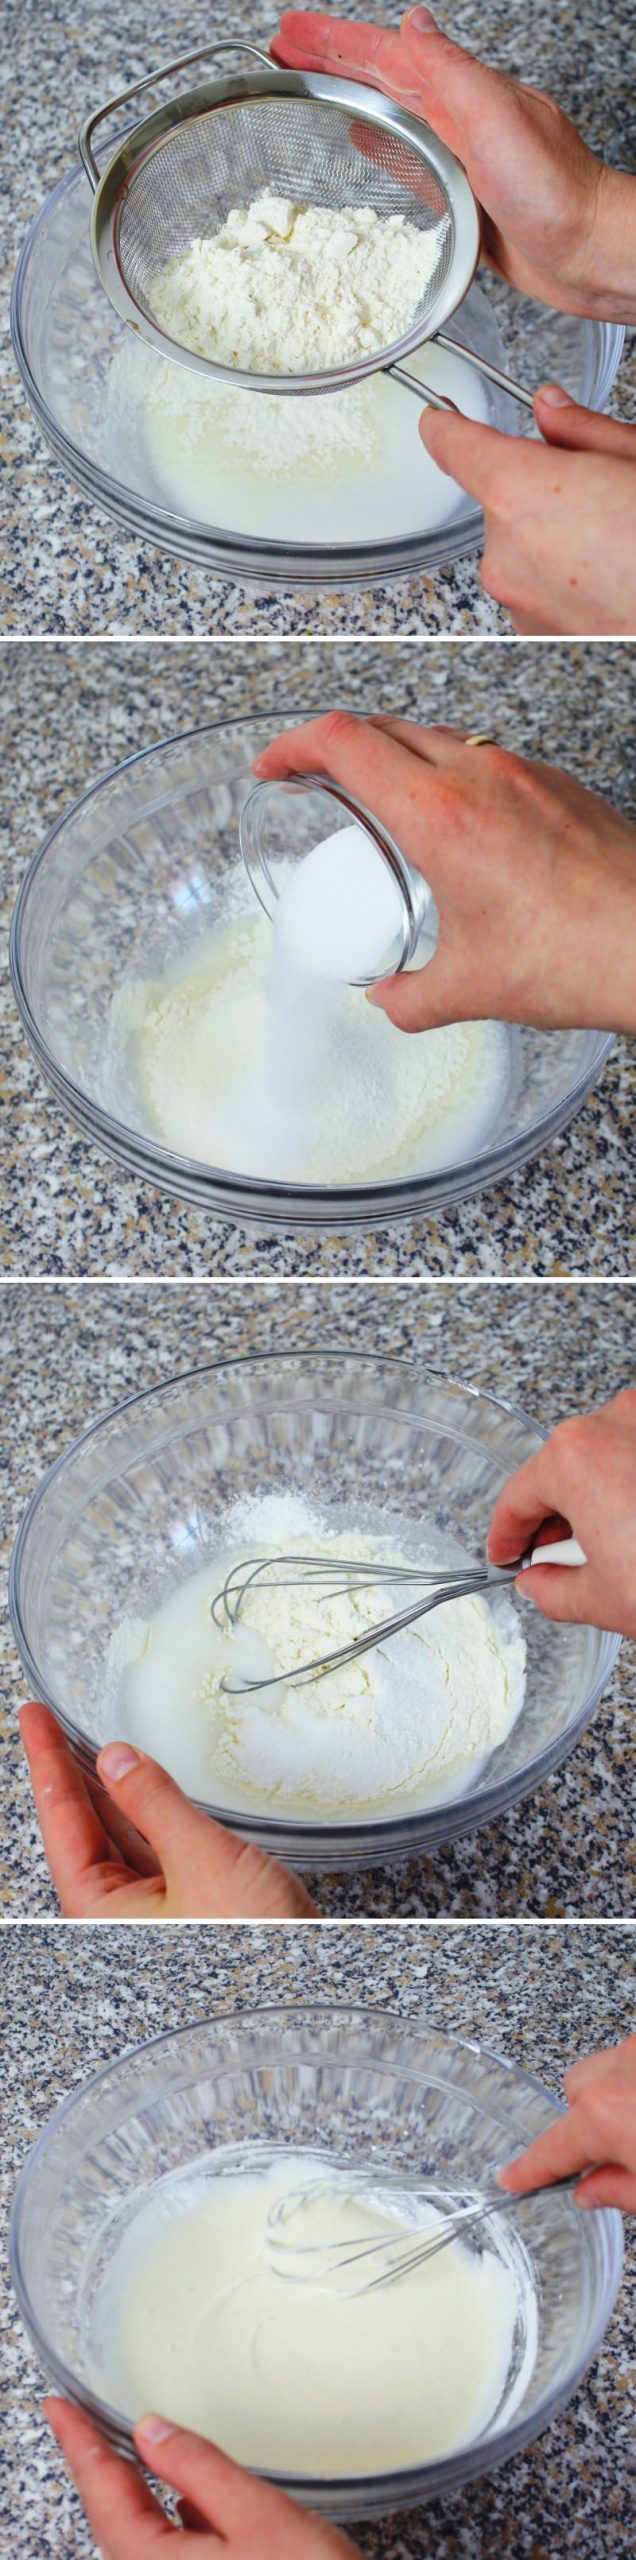
Now let’s get straight to the mochi pancake: Sift the glutinous rice flour through a sieve into a medium-sized bowl and mix it thoroughly with the water using a whisk.
Step 4
Then add the flour through a sieve and add the sugar to the mochi batter. Mix everything thoroughly with a whisk.
Step 5
Now add the food colouring to the mochi dough and mix it in evenly to create a lovely pink colour.
Step 6
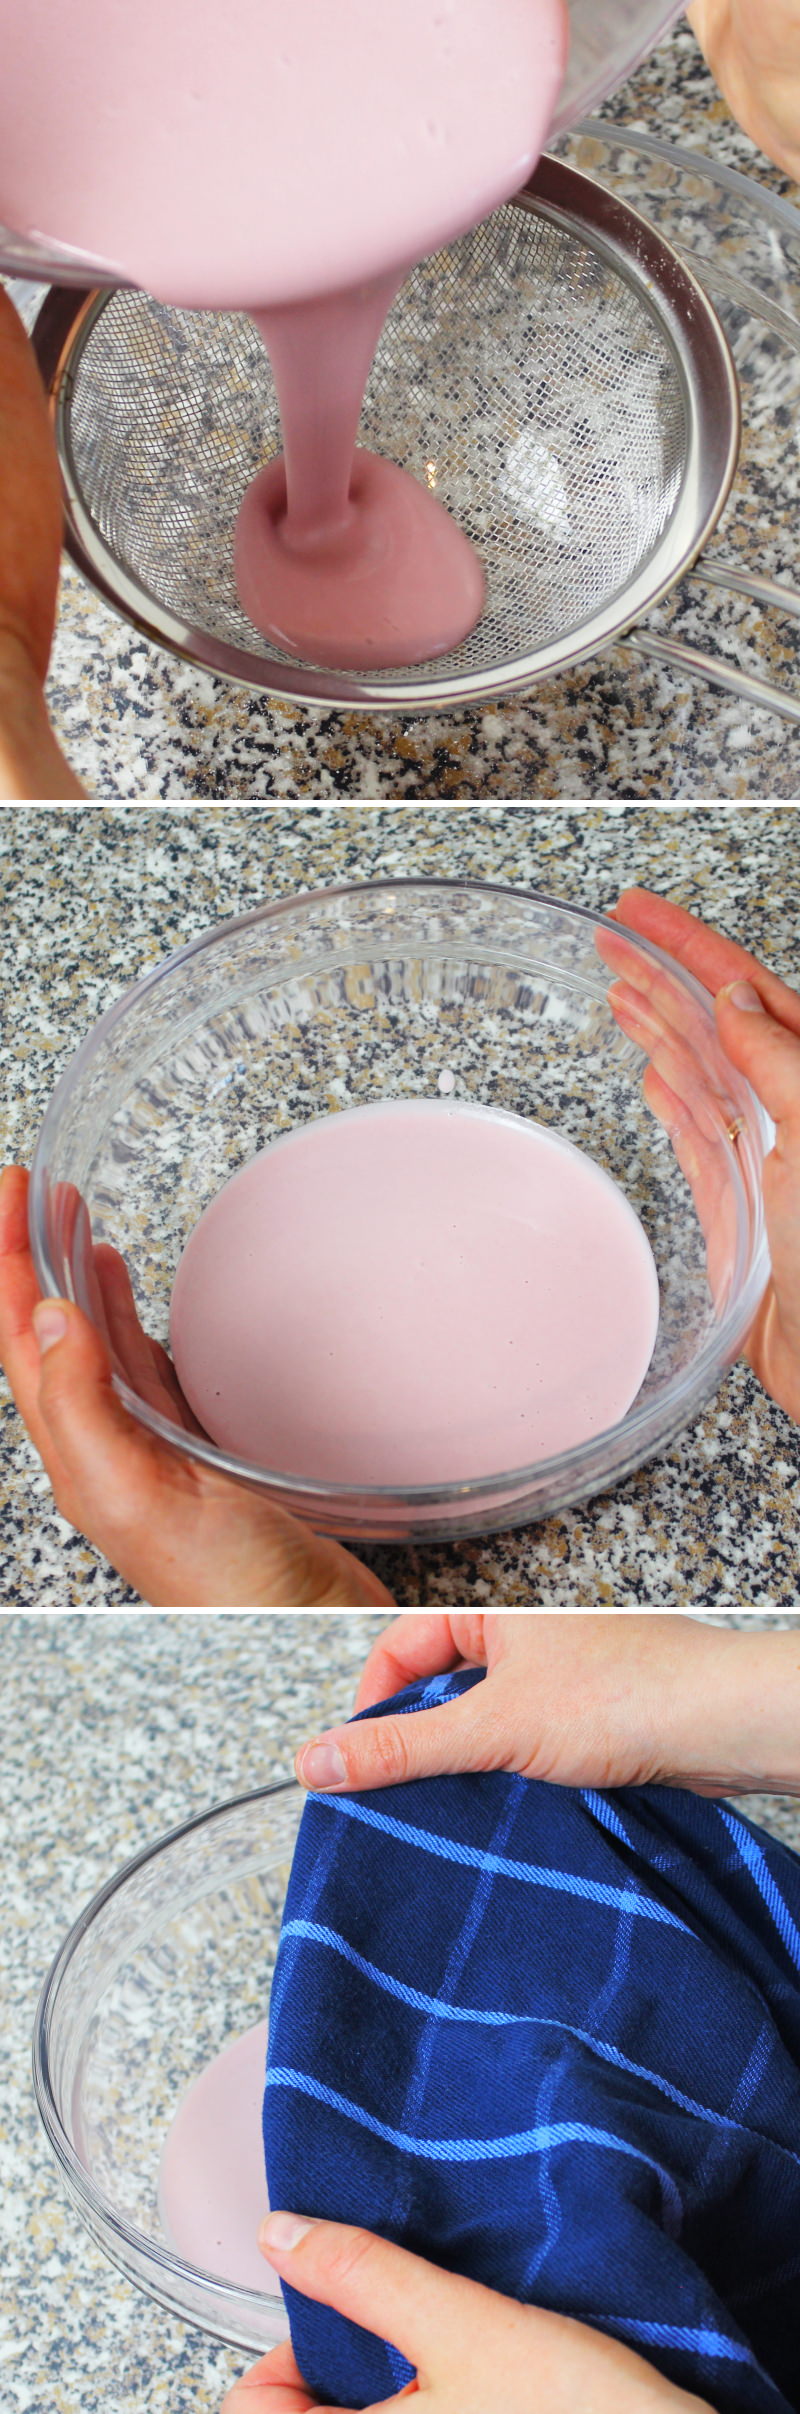
Transfer the batter through a sieve into a second bowl so that there are no more lumps in the batter.
Cover the finished batter with a cloth and leave to rest for 20 minutes so that the glutinous rice flour combines well with the water.
Step 7
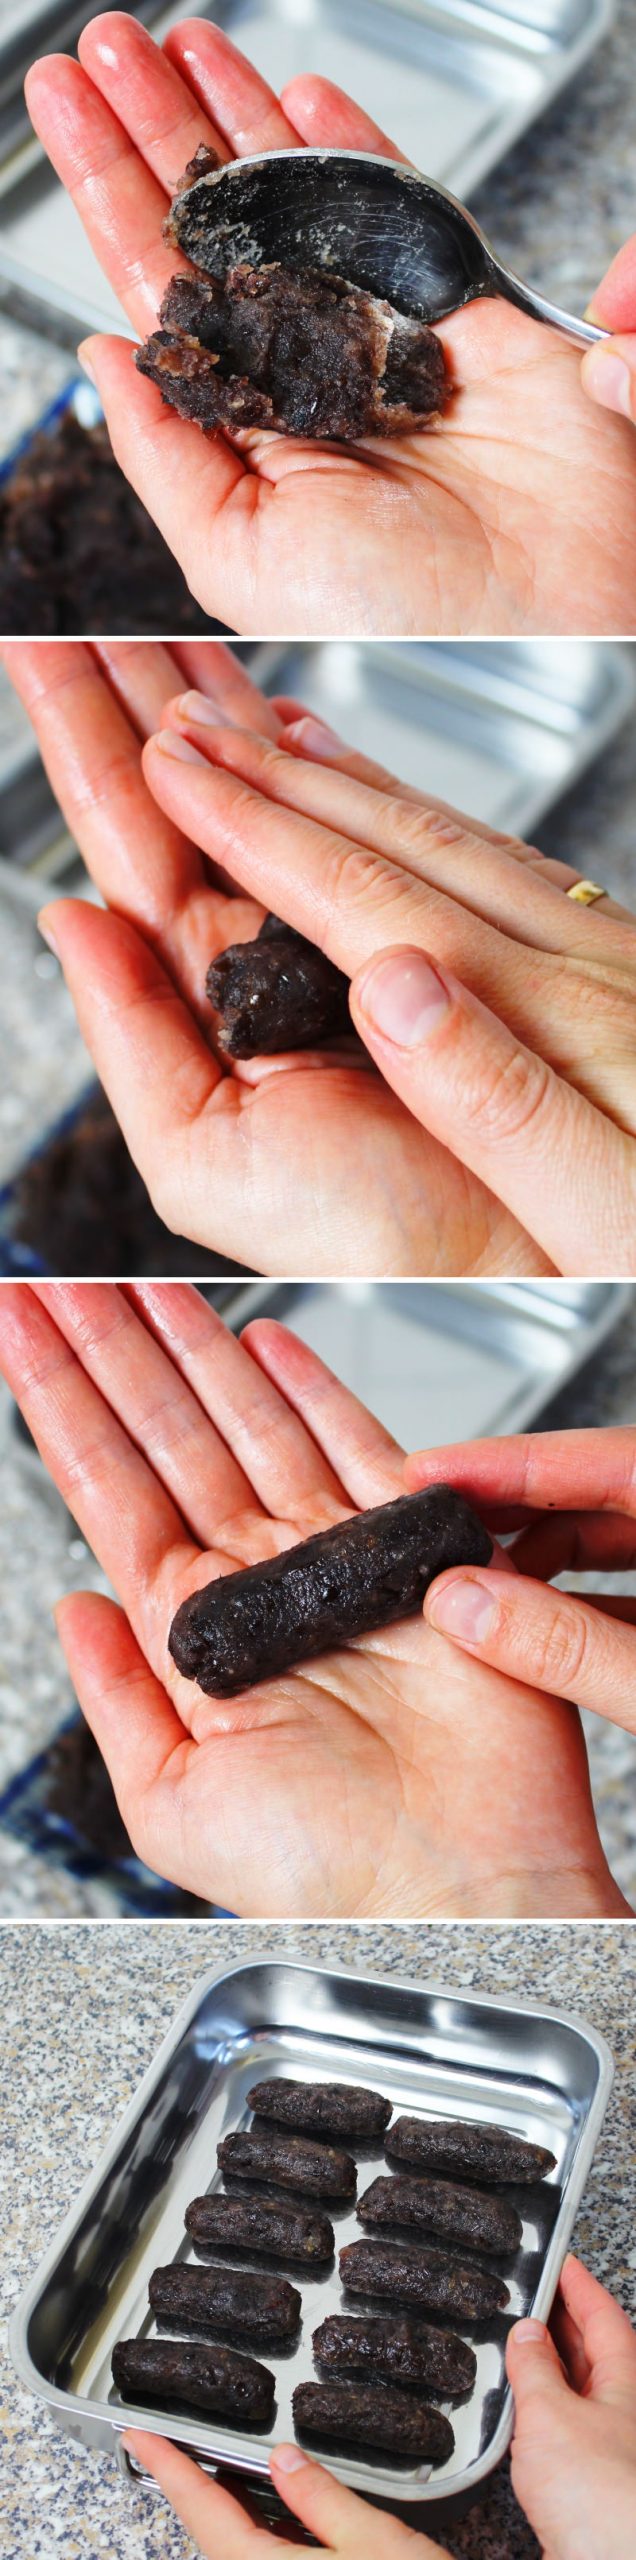
Let’s now turn our attention to the koshi-an: Shape the red adzuki bean paste into 10 elongated rolls (about 7 cm long). Place all the balls on a plate and set aside until needed.
Tip: The rolls don’t have to be perfect; it’s more about getting the portions right!
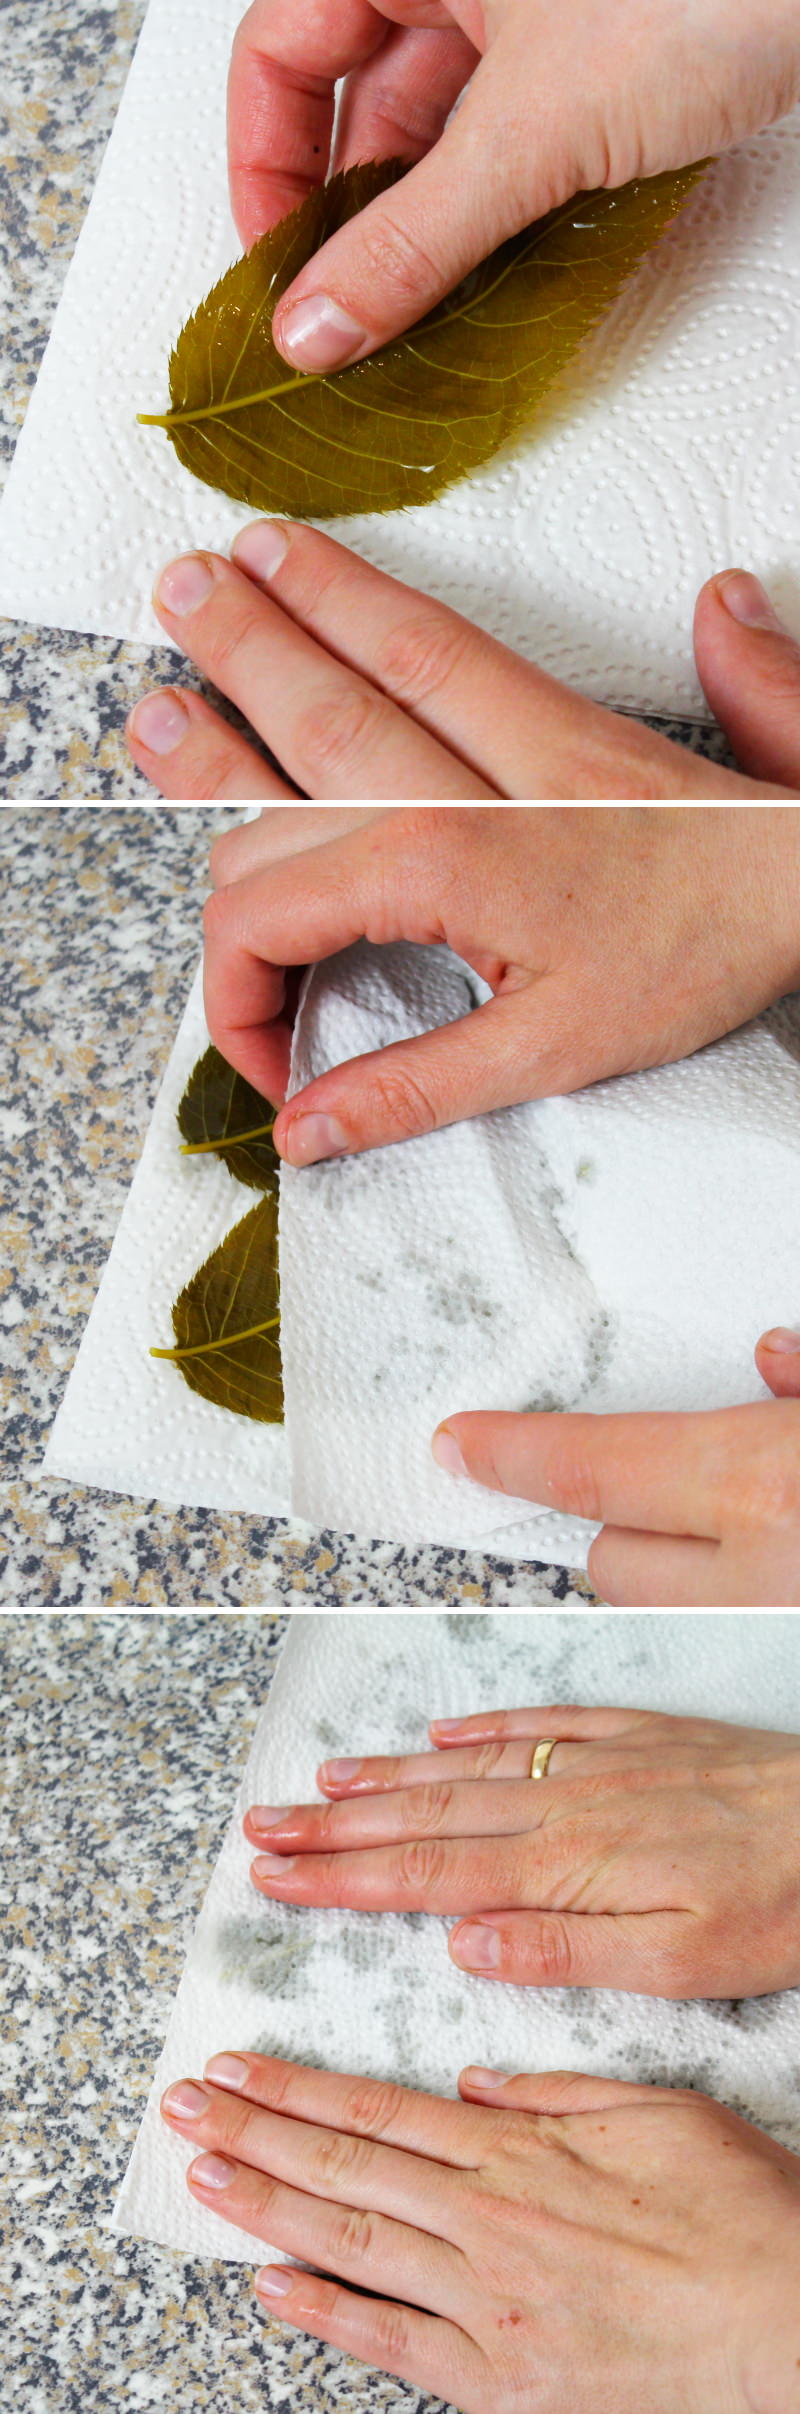
Step 8
The 30 minutes for desalting are now up: Now remove the cherry leaves from the water and pat them dry gently.
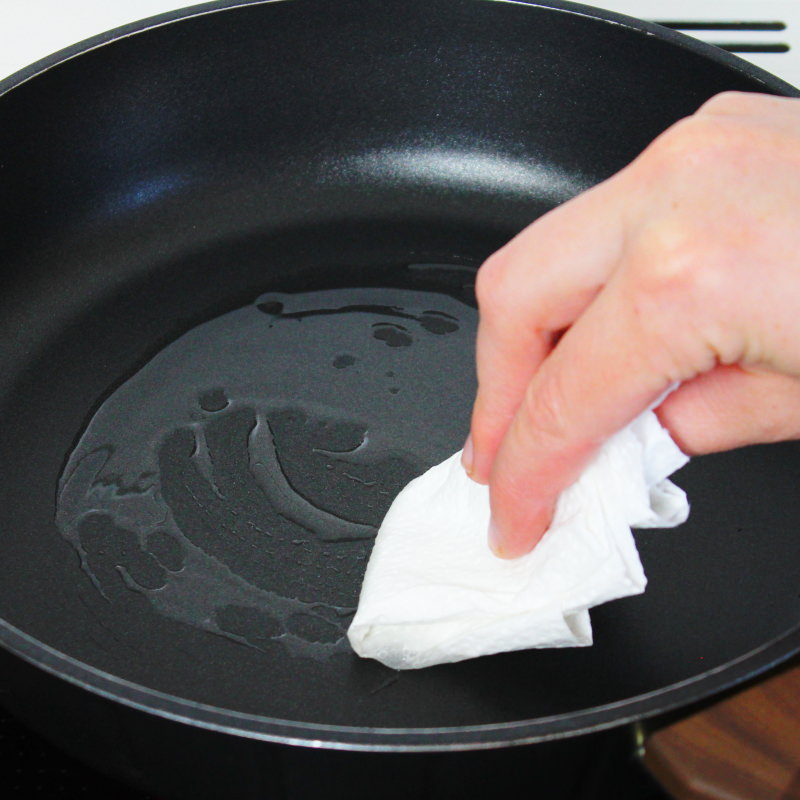
Step 9
The Mochi dough is now ready too; the 20-minute resting time has elapsed. Now we’ll prepare the Mochi dough pancakes: To do this, coat a frying pan with 1 tbsp oil – ideally using a pastry brush or some kitchen paper – and heat over a medium heat.
We’ll also need a large sheet of baking paper big enough to hold all the pancakes, and a spatula. It’s best to brush the front of the paper with oil so the pancakes don’t stick!
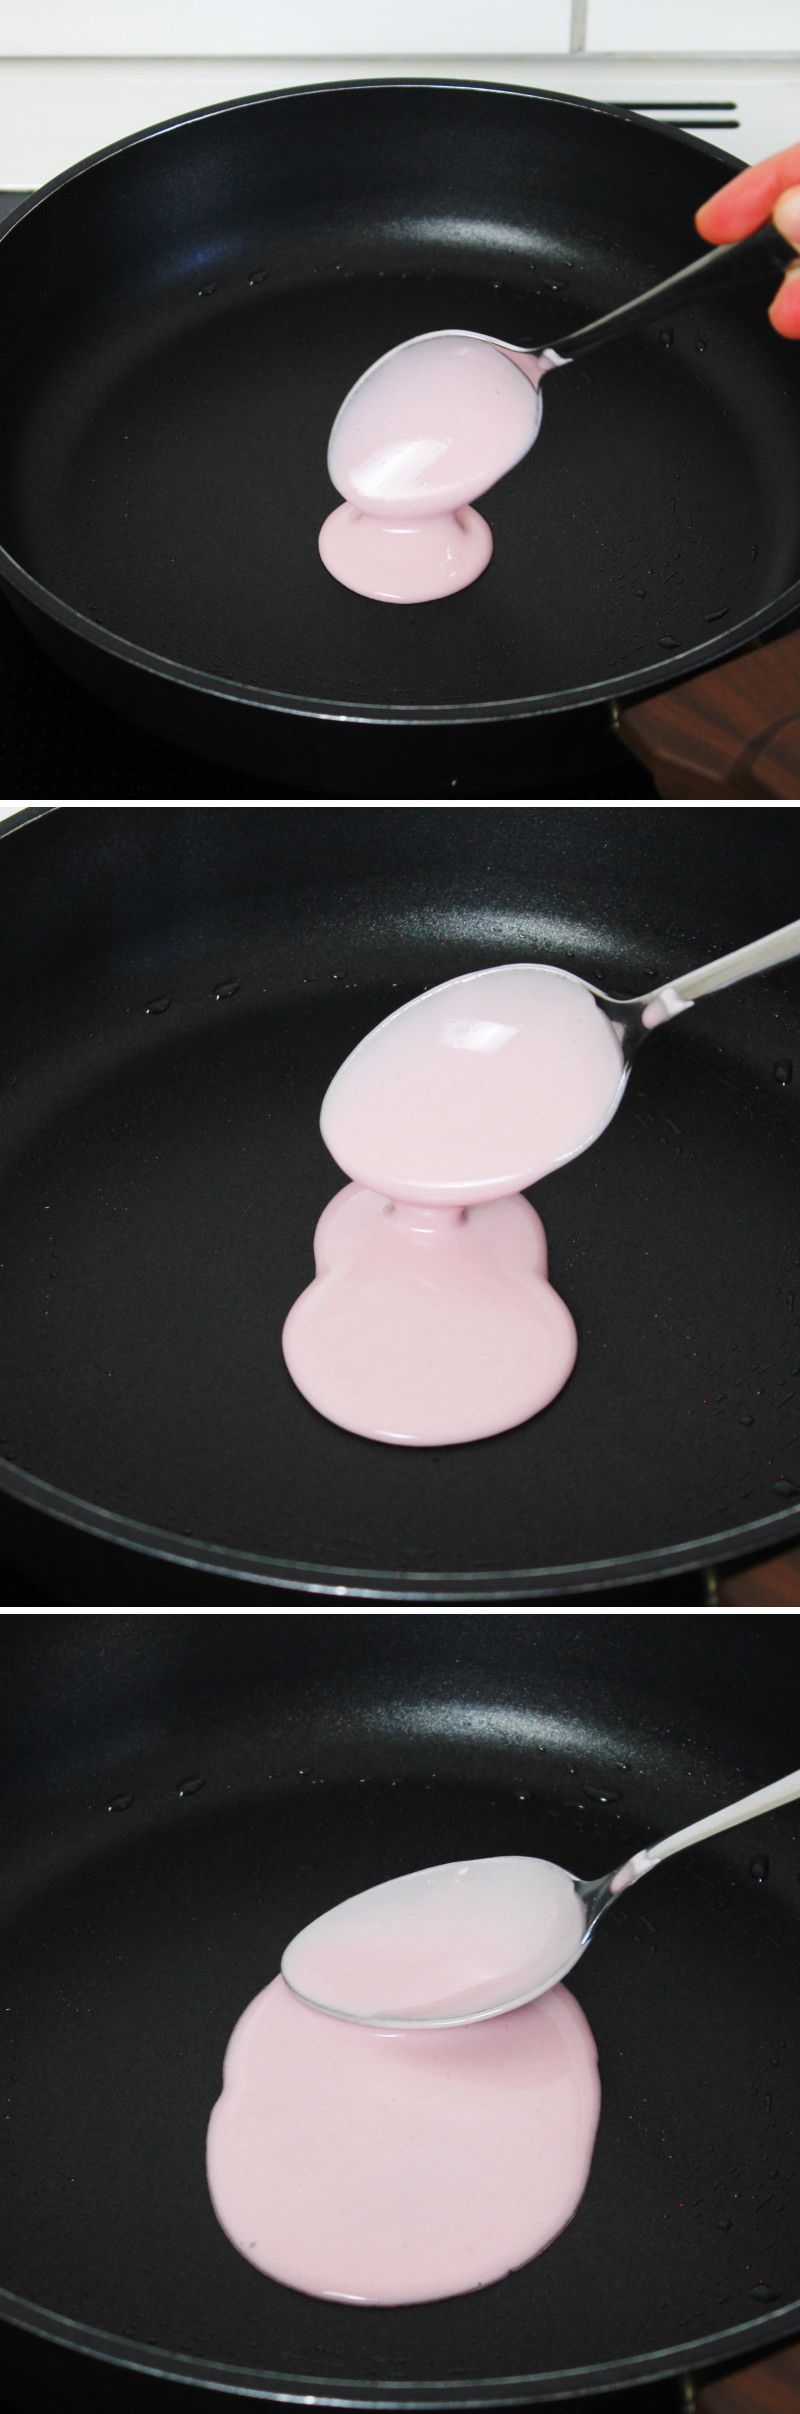
Step 10
Once the pan is hot, place 2 tbsp of the mochi batter close together in the pan and spread it thinly into a wide oval measuring 8 x 10 cm.
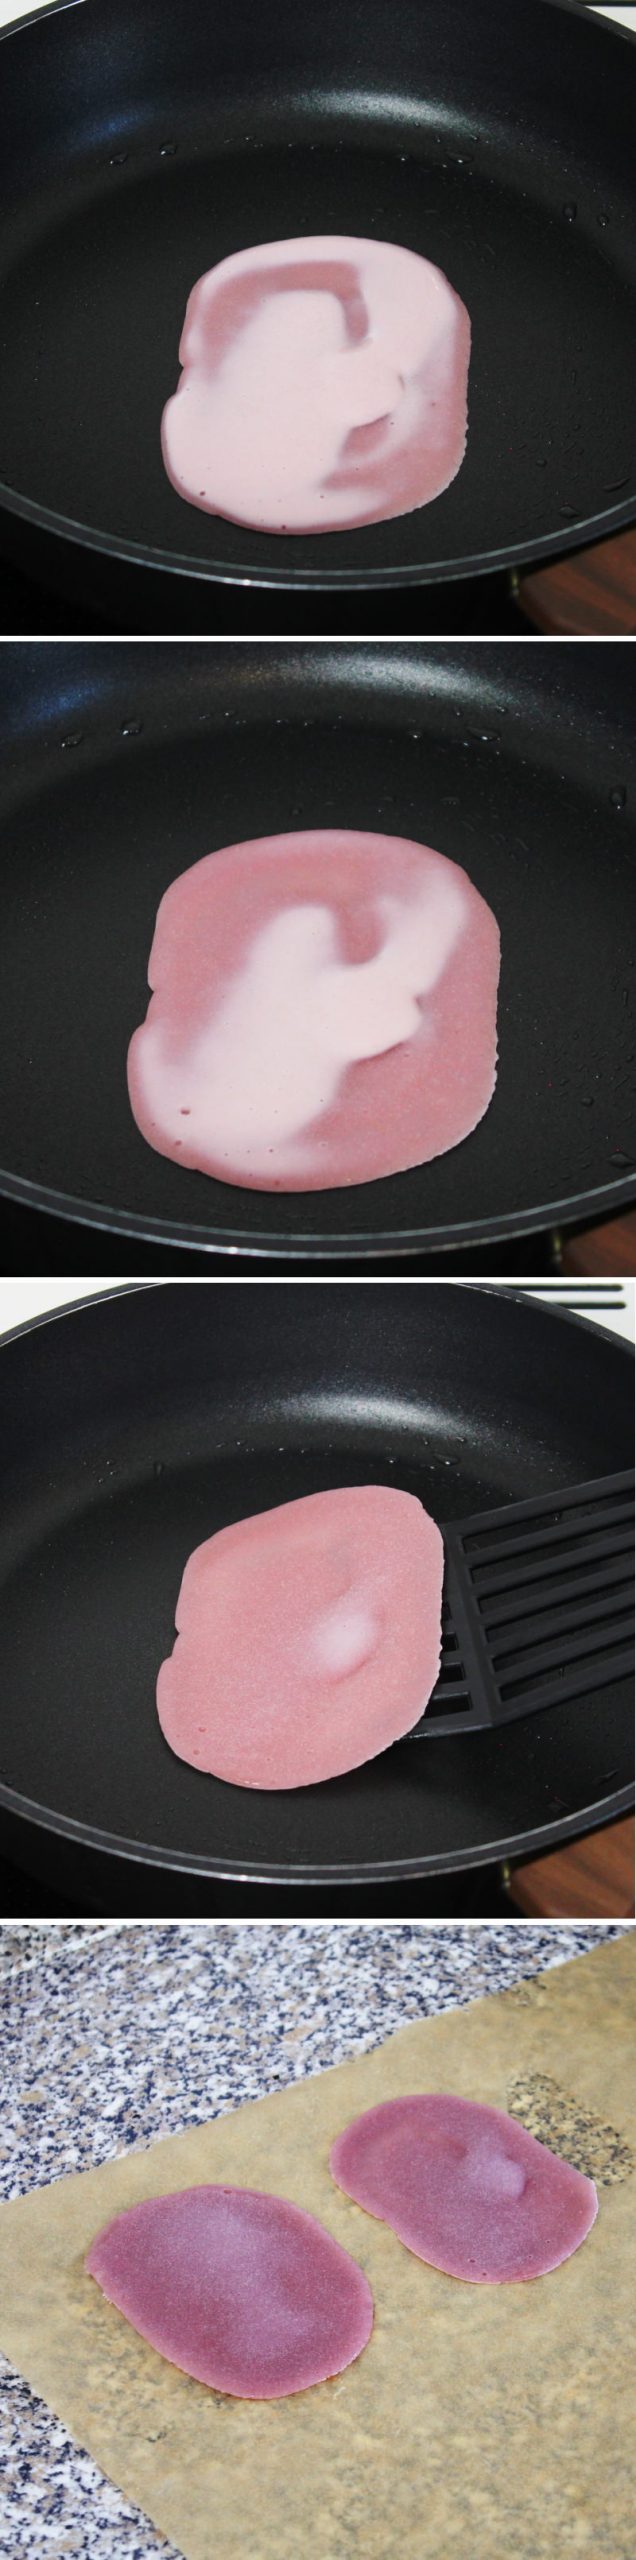
Step 11
Fry the pancake made from mochi batter for about 3 minutes on one side only (WITHOUT TURNING IT!), so that the runny batter has dried out completely.
Then lift them out of the pan with a spatula, place them on baking paper and leave them to cool there.
Make 9 more pancakes in this way and, halfway through, brush the pan again with 1 tbsp oil.
https://1mal1japan.de/wp-content/uploads/2022/04/Sakura-Mochi-nach-Kanto-Art-step 12 – Mochi-rollen-und-formen.jpg
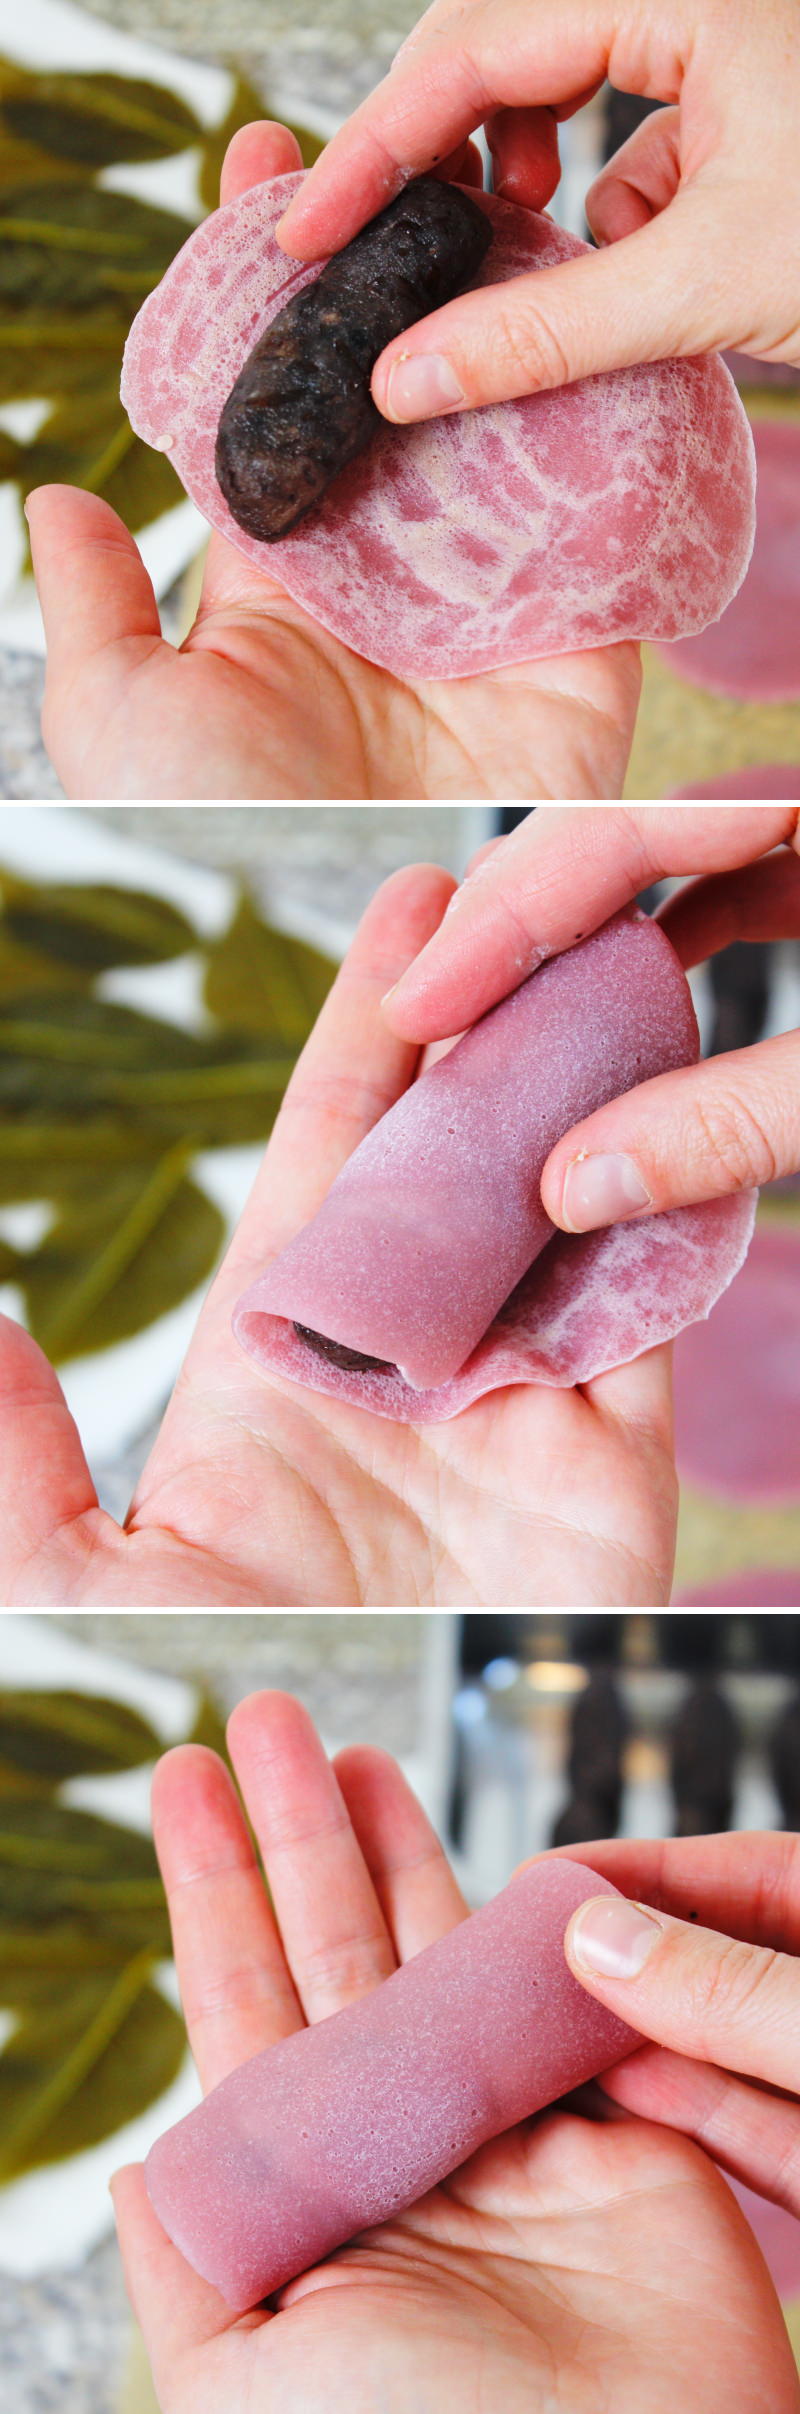
Step 12
Once all the pancakes are ready, we move on to shaping the Kanto-style Sakura Mochi: For this, we’ll need the pancakes, the adzuki bean filling and the cherry leaves!
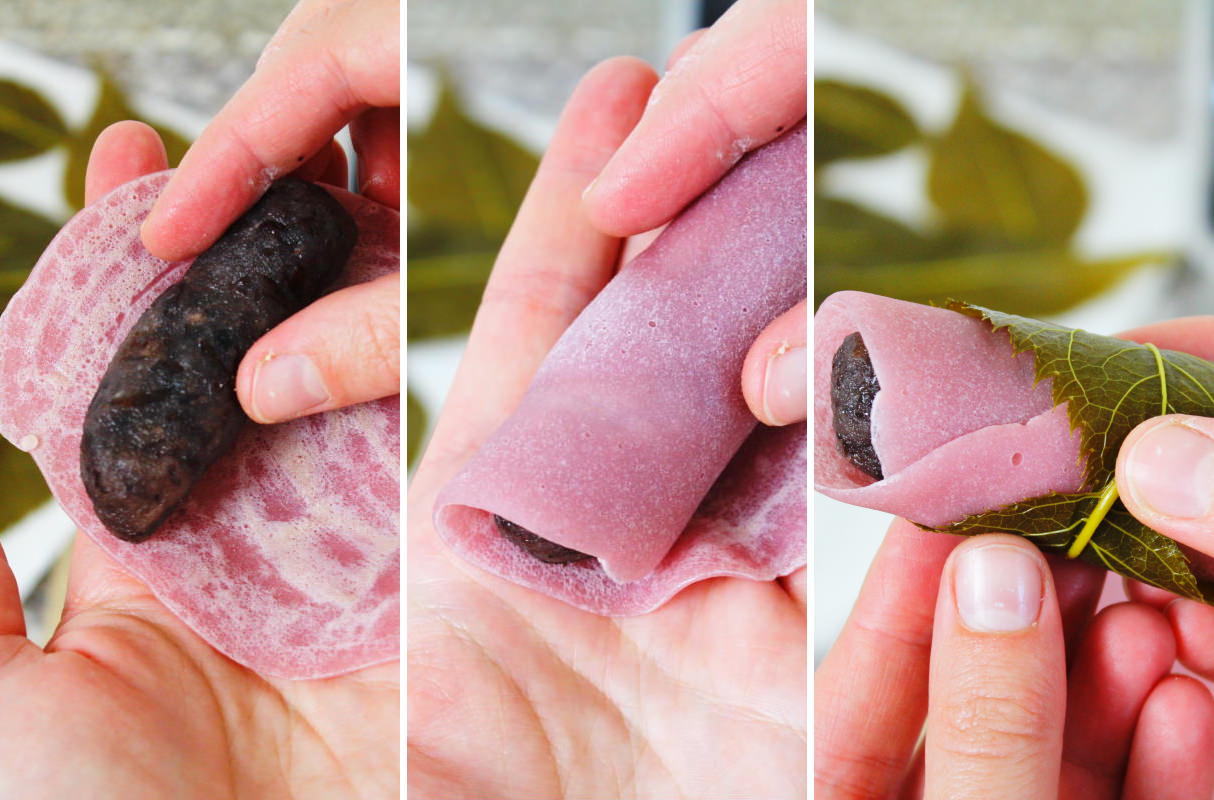
Now place a mochi dough pancake in the palm of your hand so that the cooked side (the side that was facing down in the pan) is facing upwards. Then place an adzuki bean roll at the top and roll the pancake up from there.
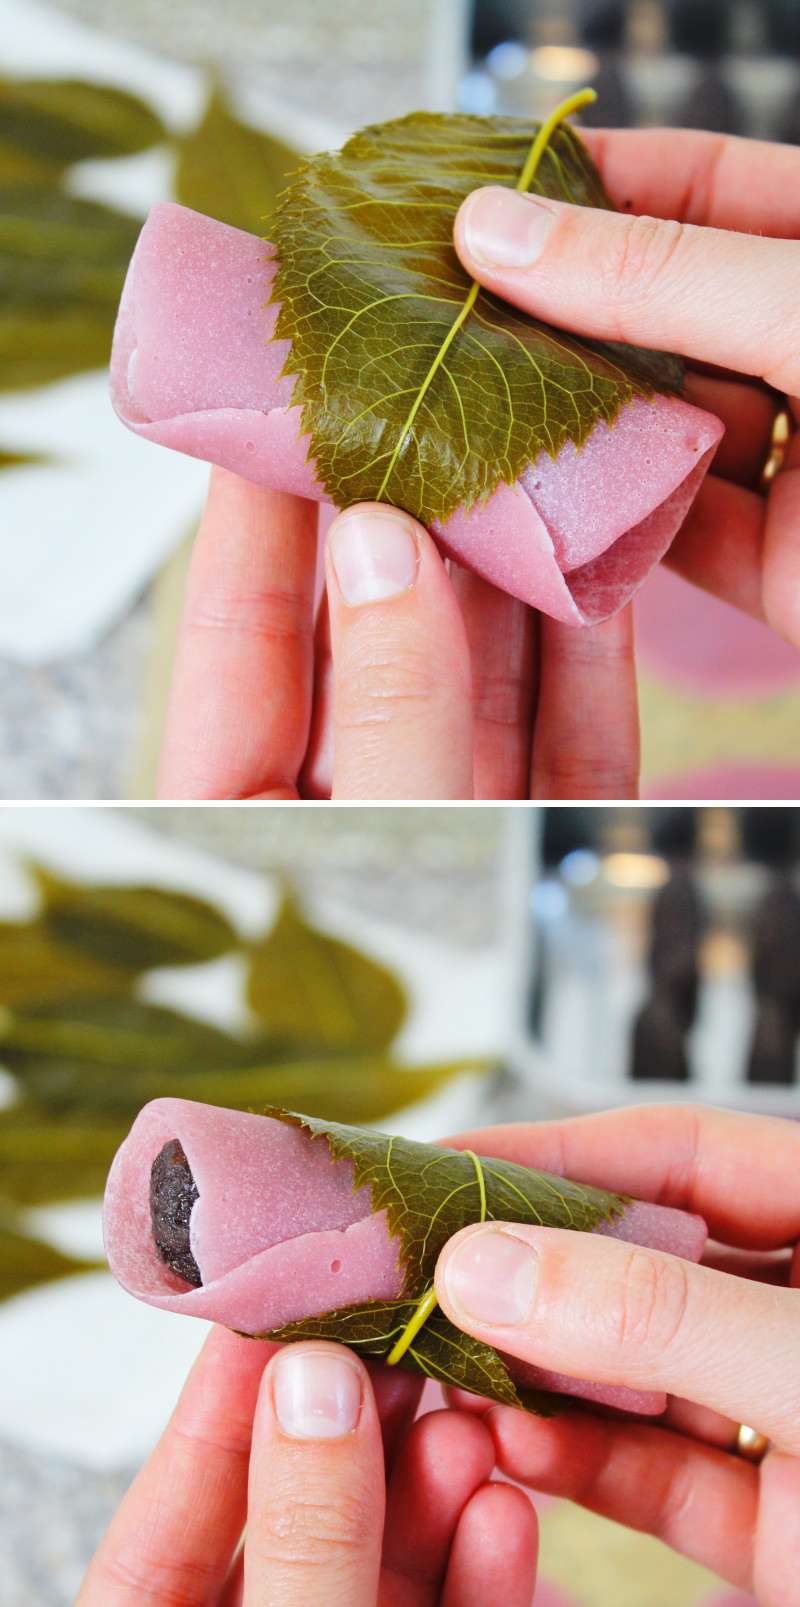
Step 13
Next, place the tip of a cherry leaf where the pancake roll ends and wrap it once around the roll.
This ensures both ‘seams’ face the same direction and the opposite, attractive side is perfectly presented.
Place them on a serving plate with the seams facing downwards – this prevents the rolls from unravelling on their own ;)!
Prepare 9 more sakura Mochi in this way and arrange them attractively.
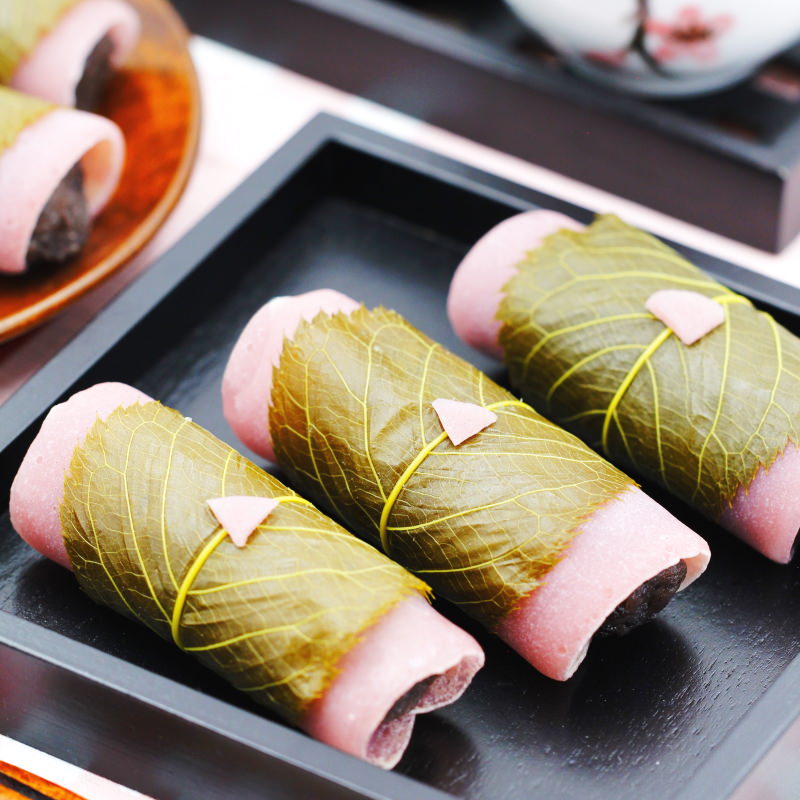
Step 14
The sakura Mochi are now ready and are best eaten fresh straight away. They go well with a cup of fresh Matcha tea. Done – Itadakimasu!
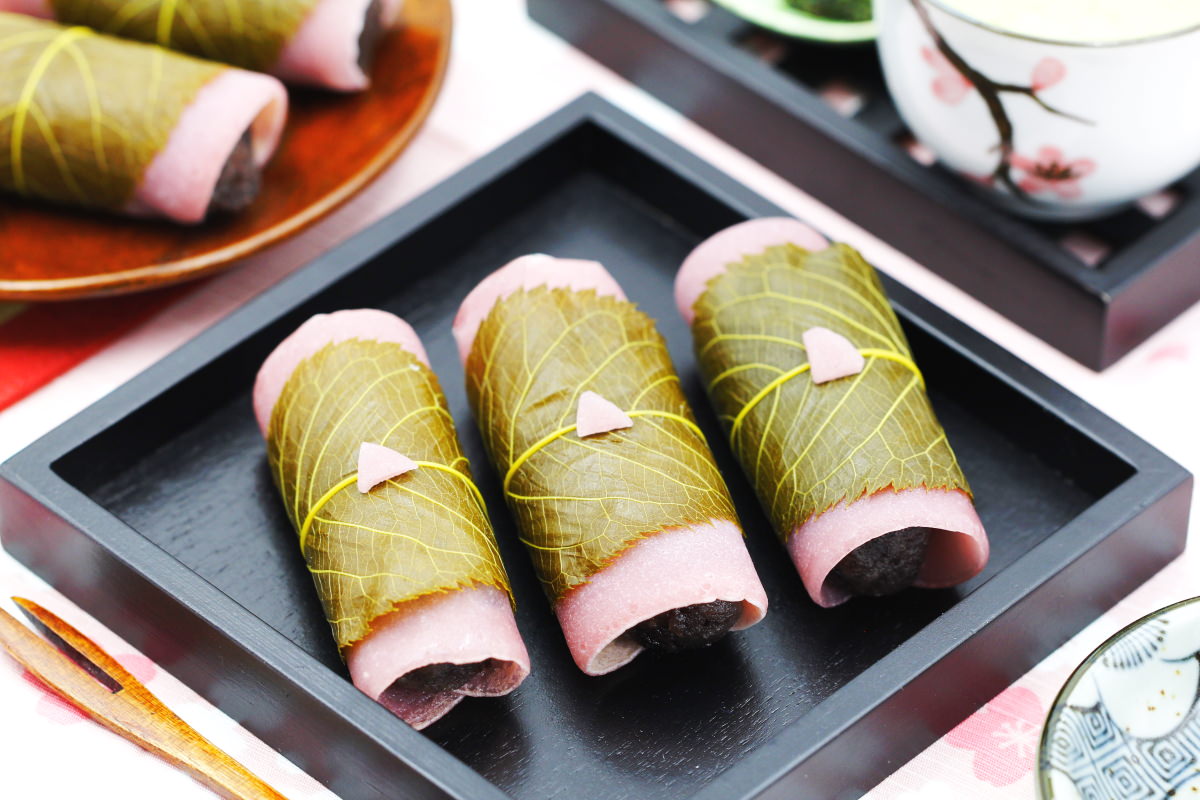
By the way, the shape and preparation of sakura Mochi differ between the Kanto region around Tokyo and the Kansai region around Kyoto! I’ve shown you the version commonly found in Kanto here, where the dough is traditionally baked thinly on a round, cast-iron griddle. In the variant often prepared in Kansai, the sakura mochi are made from whole mochigome rice grains!
Are you looking for even more delicious Mochi specialities from Japan that will delight your guests? Here you’ll find my most popular recipes:
No post found!
Have you tried out the recipe? Let me know in the comments – I can’t wait to hear from you.