

Language:


Spring is on its way, the sun is shining and the cherry trees are in full bloom – it’s time for sakura Mochi! You can easily make this classic cherry blossom treat yourself at home. Here, I’ll show you the right ingredients and the best instructions for making it easily in a saucepan! So, look forward to homemade, pale pink and heavenly sweet Mochi to celebrate the cherry blossom season.
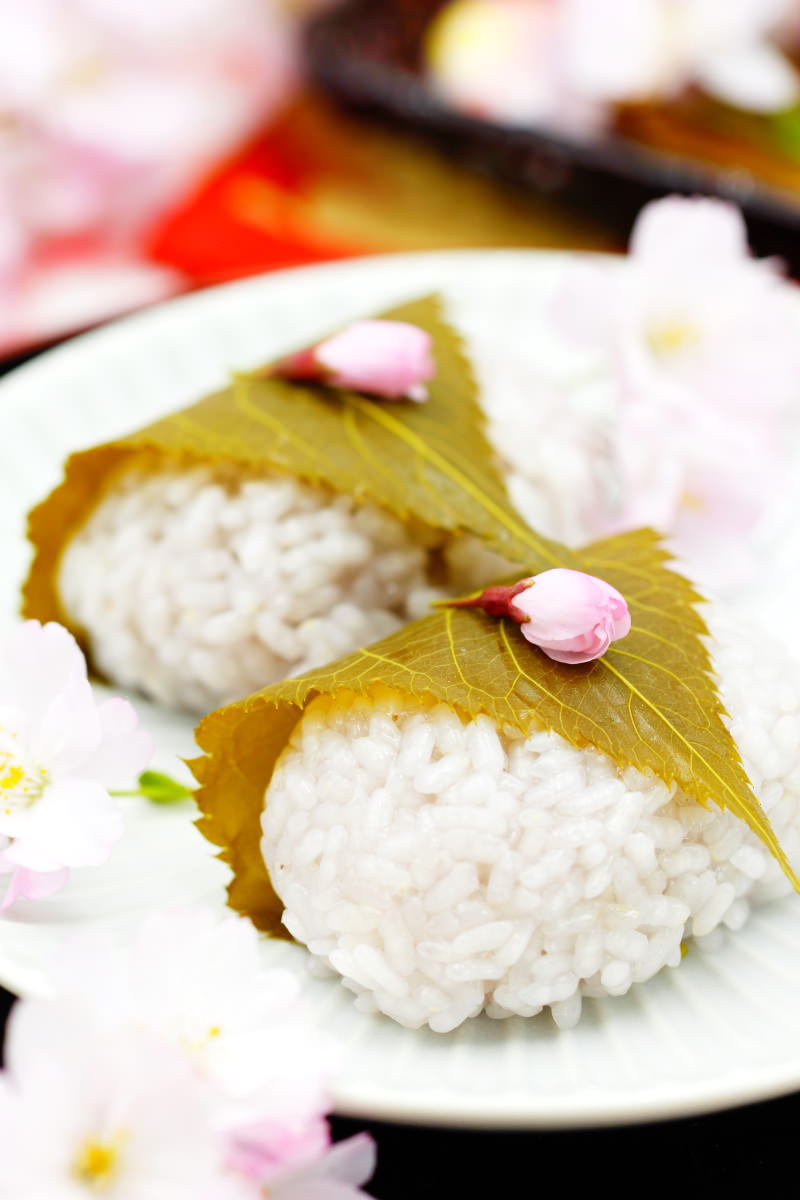
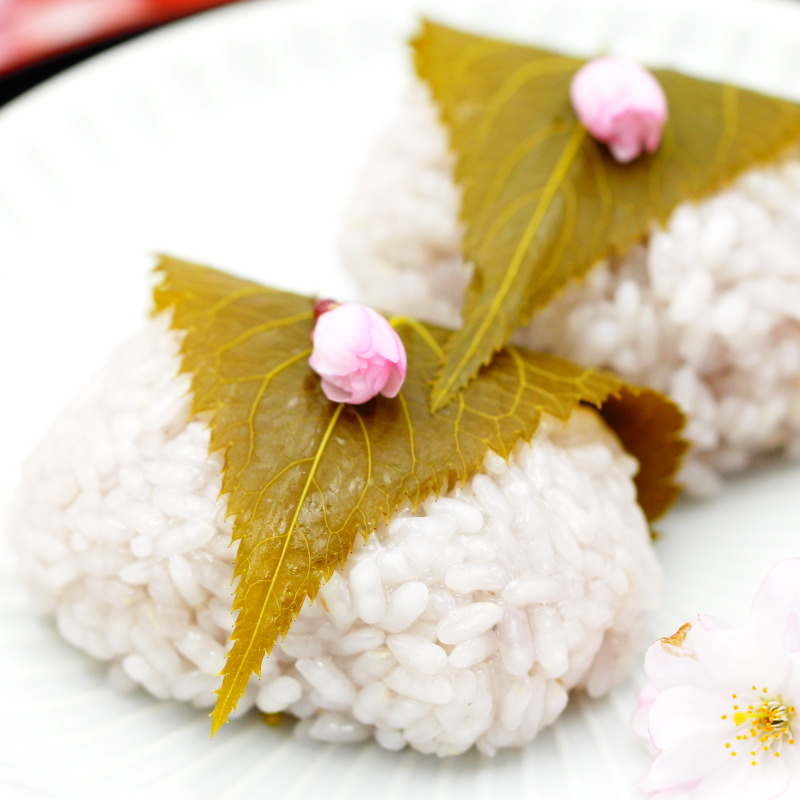
Sakura Mochi are a traditional Japanese sweet, or ‘wagashi’. The Mochi consist of a sweet, pale pink glutinous rice cake with a filling of red adzuki bean paste (anko) hidden in the centre. A pickled cherry leaf (sakura no ha) is wrapped around it, adding a slight salty note and protecting the rice cake from drying out.
This delicious sweet is traditionally eaten in Japan during the spring season, but especially on Girls’ Day (Hinamatsuri) on 3 March, and at all sorts of flower festivals – such as the cherry blossom festival, Hanami!
TOP RECOMMENDATION
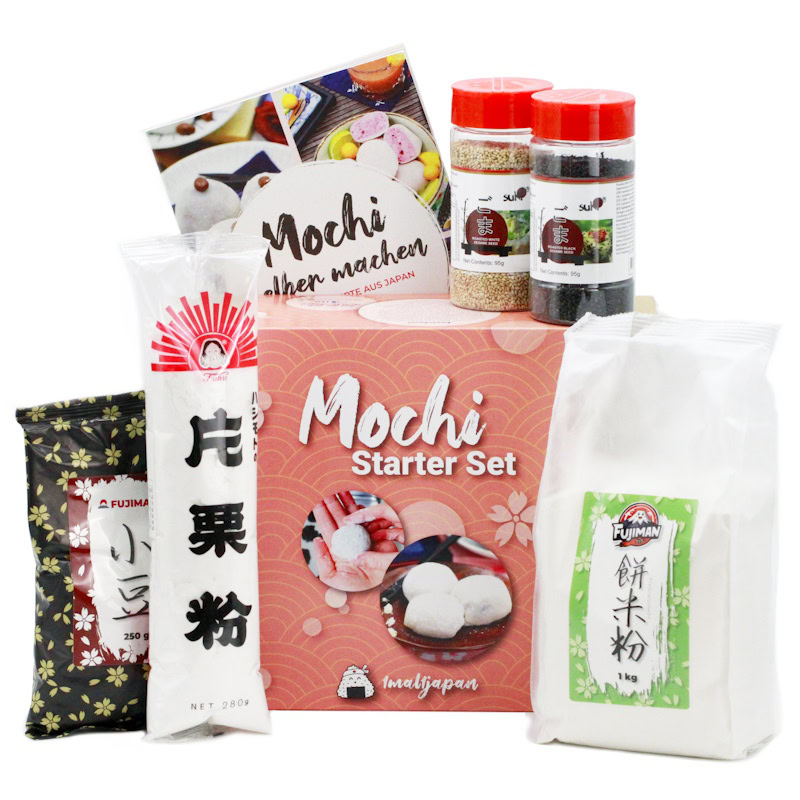
Mochi Starter Set | Klebreiskuchen selber machen, vegan
6-tlg. Kochset für 4 große Portionen Klebreiskuchen, inkl. Rezeptheft, glutenfrei & vegan. Mit dem Mochi Kochset stellst du japanische Reiskuchen ganz einfach selbst her –…
In stock
I, too, saw the very first cherry blossoms this year as a sign that it was time to share my recipe for homemade sakura Mochi with you 😊. I love strolling along the cherry blossom-lined avenue nearby on my old-fashioned walks with my family – and sometimes even letting the cherry blossoms rain down through the air like a child!
Traditionally, sakura Mochi are a lovely pink, just like a perfect cherry blossom! To be honest, this colour is usually achieved using highly concentrated food colouring of dubious origin. However, I’m not a big fan of artificial additives, which is why my sakura Mochi are only very, very pale pink.
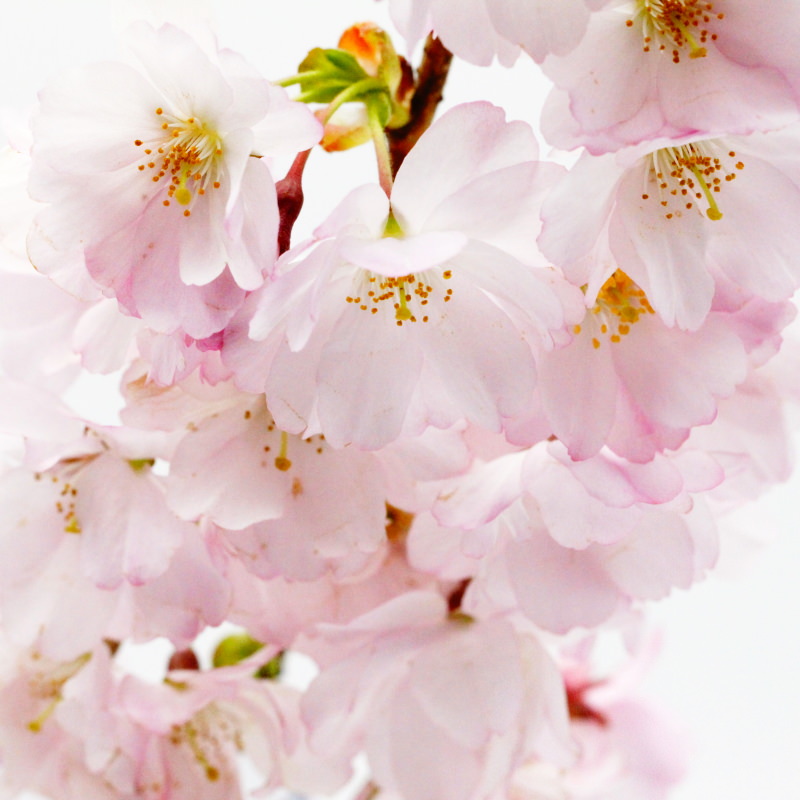
This time, I’ve opted for a colour made from black carrot juice and I’m quite happy with the result. But you could also use raspberry purée or something similar!
If you’d prefer a bright colour, you should definitely choose a highly concentrated red and use it just drop by drop! With my black carrot juice, you really do need to add 20 ml to 200 g of glutinous rice for the colour to take hold.
Speaking of glutinous rice! Today we need sweet glutinous rice. You might be wondering what exactly sweet glutinous rice is? Genuine glutinous rice, or sweet rice, is known in Japan as mochigome or Mochi rice and is a very special variety of rice.
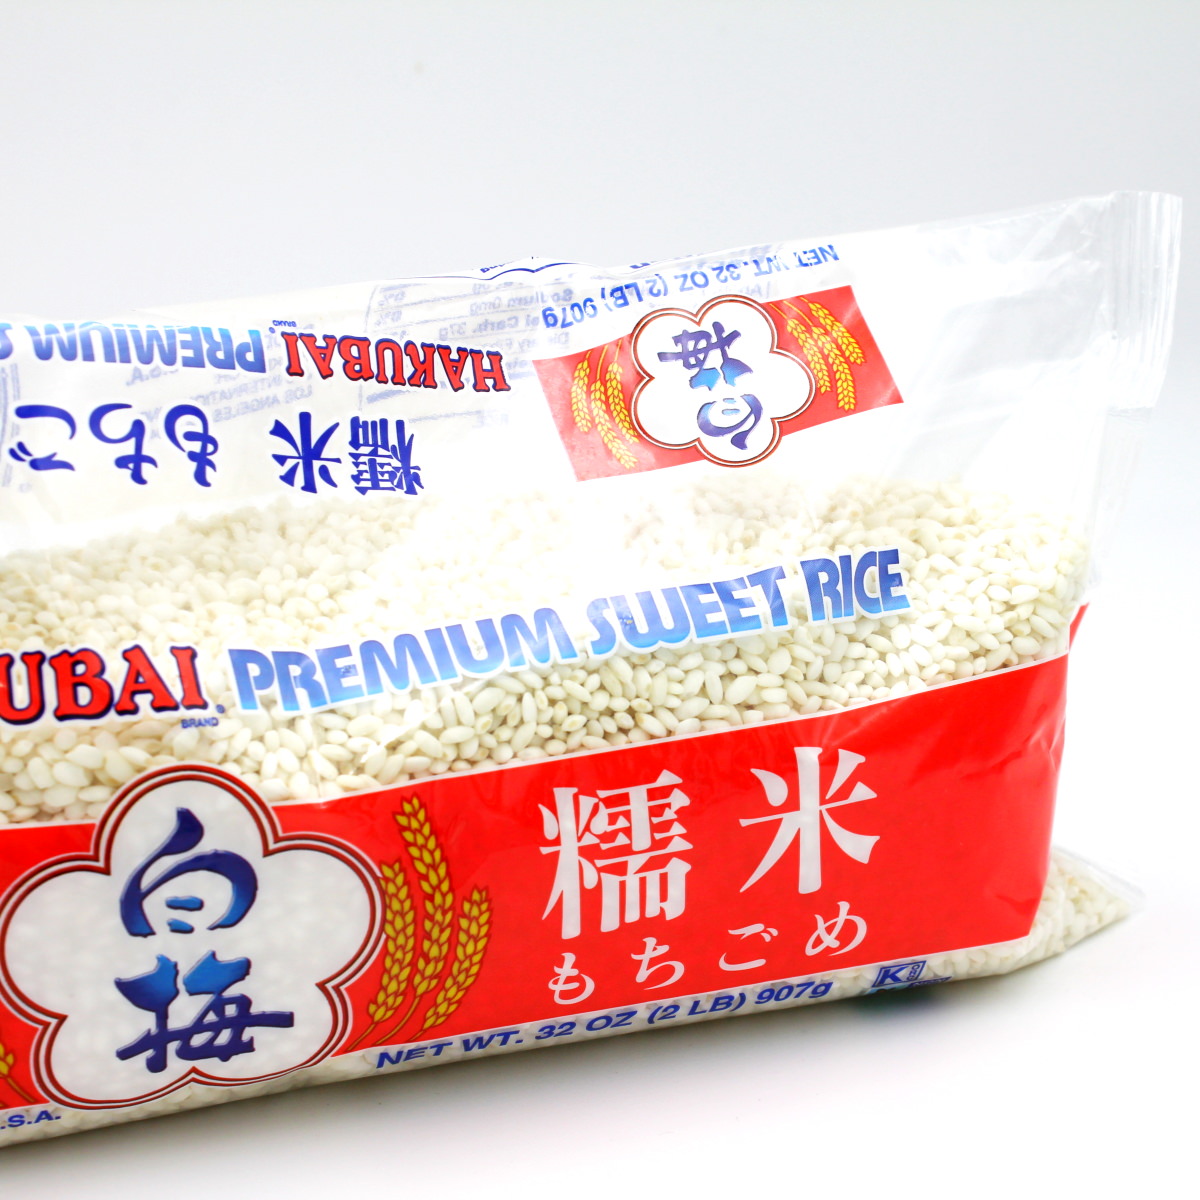
The grains of sweet glutinous rice are snow-white, shorter and rounder than other varieties of rice in Japan, and are used exclusively for making Mochi (rice cakes) and other traditional sweets such as rice crackers.
Thanks to its excellent properties, glutinous rice becomes very sticky and quite chewy when cooked. It also has a sweet flavour, even though it is cooked without sugar! This makes it ideal for making Japanese sweets. Glutinous rice is also often ground into a fine flour to produce sweet glutinous rice flour (im Shop ansehen) – which you’ll need for classic daifuku Mochi or Dango.
My tip: Would you like to find out more about these irresistibly sweet Mochi? Then let yourself be enchanted by the world of Japanese rice cakes here: → Make Mochi yourself: 7 recipes that really work!
Psst: Although Japanese sticky rice is also referred to as ‘glutinous’, it actually contains no gluten. This rice is therefore safe for a gluten-free diet.
Some people might think that sticky rice could be replaced with ordinary Japanese short-grain rice. Wrong!! These are two completely different types of rice with different uses.
Japanese short-grain rice (sometimes also referred to as “sushi rice” ) is the rice you need for making Sushi, Onigiri or other rice accompaniments for Japanese dishes. Genuine Japanese glutinous rice, or mochigome, is mainly used to make sweets and snacks.
I would also not recommend replacing Japanese glutinous rice with Thai or Chinese long-grain glutinous rice, as these contain too much starch!
Once we’ve weighed out the sticky rice, we’ll wash it and then leave it to soak for an hour. After that, we’ll crush the rice grains just a little bit in no time at all and then cook the sticky rice in a saucepan for a short while until soft. Many recipes suggest cooking the rice in the microwave… Well, that works very well too, but not everyone will have a microwave to hand, will they?
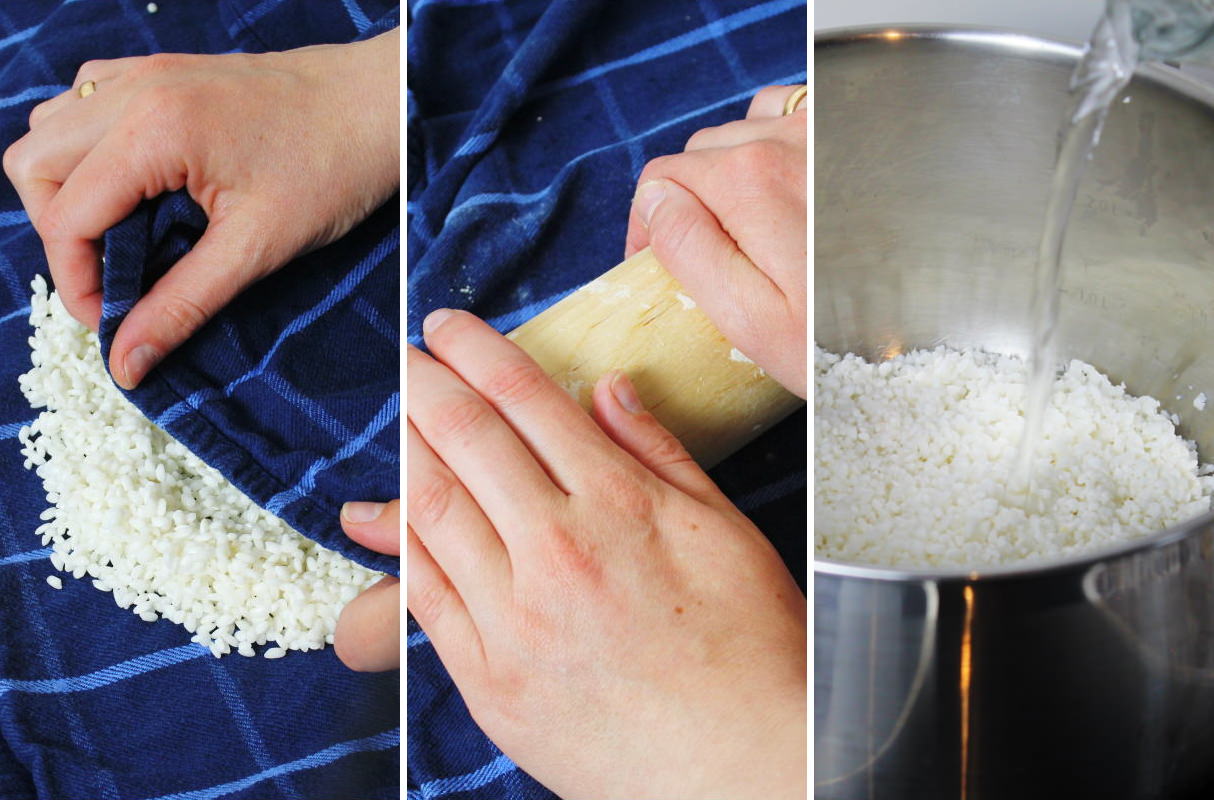
But be careful! Japanese sticky rice really does burn very quickly in the pan. So, it’s better to give it a stir more often whilst it’s cooking, rather than getting annoyed later 😉!
You can read exactly how it all works in the detailed recipe in a moment. But let’s briefly turn to the filling first, shall we! In such a traditional recipe, the filling can, of course, only be a classic sweet red bean paste.
This creamy paste is called anko, or simply an, and is made from adzuki beans (im Shop ansehen). It’s the absolute first choice when it comes to the perfect accompaniment for traditional Japanese sweets and pastries. → Here’s my simple recipe for homemade red bean paste!
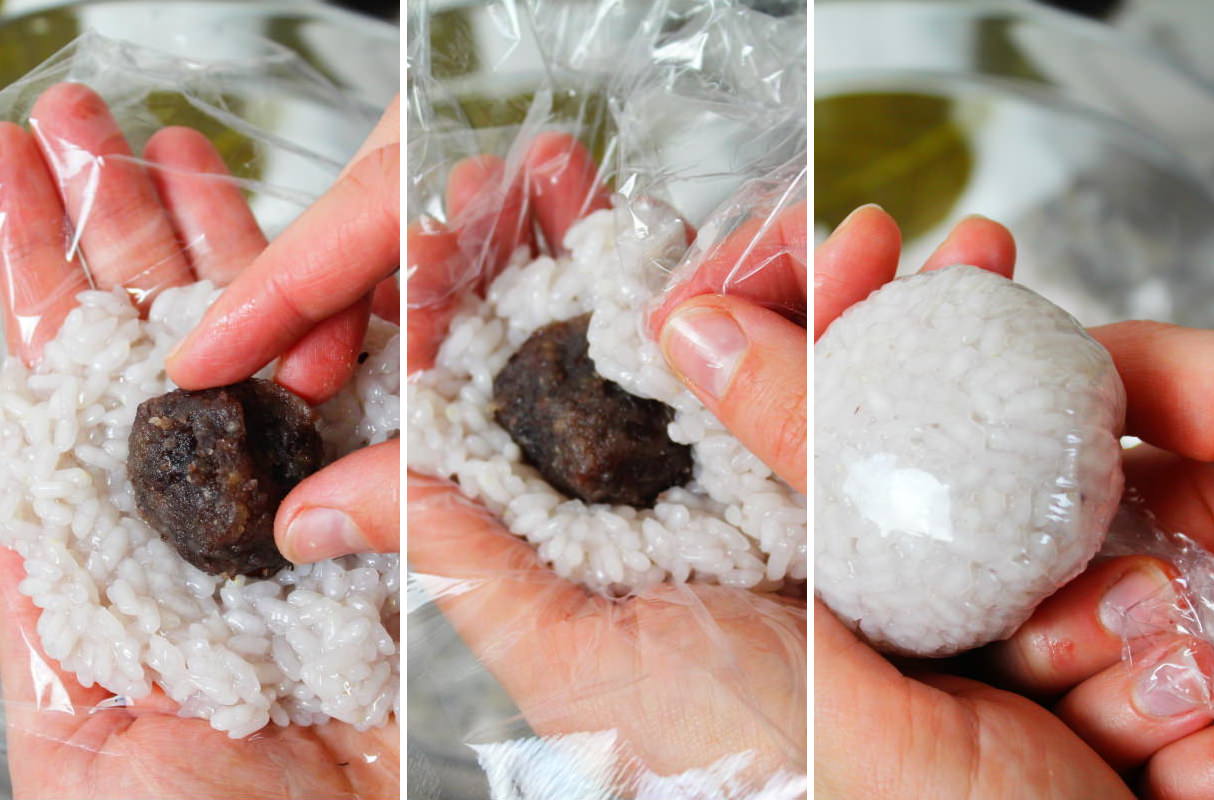
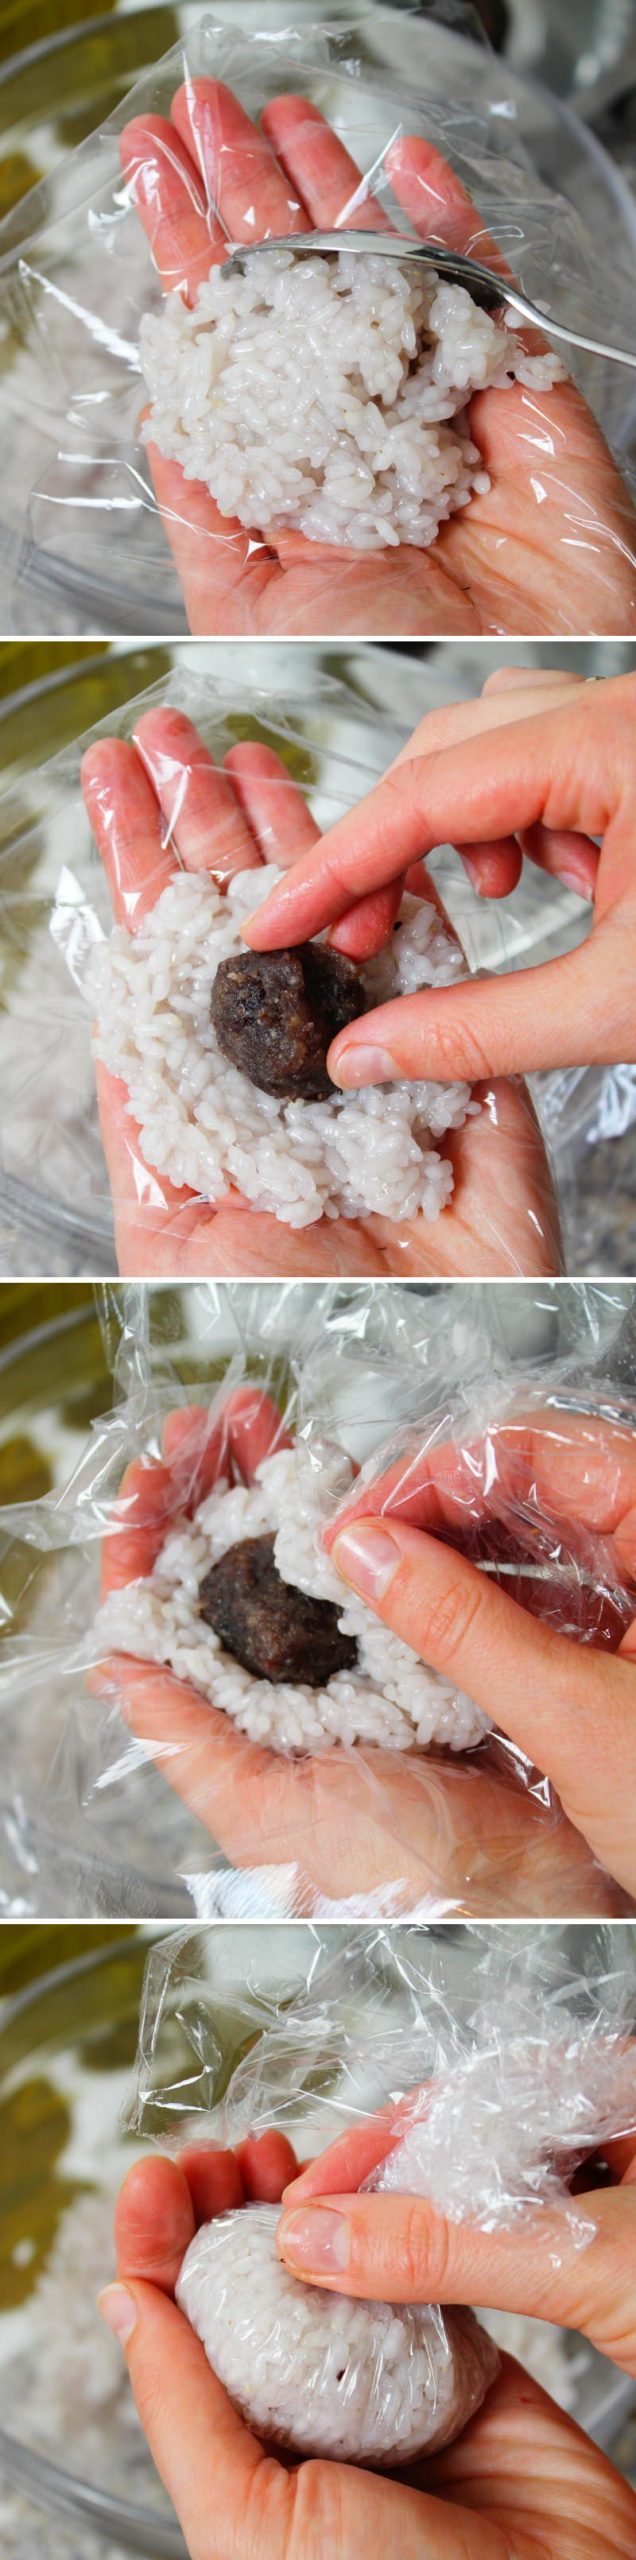
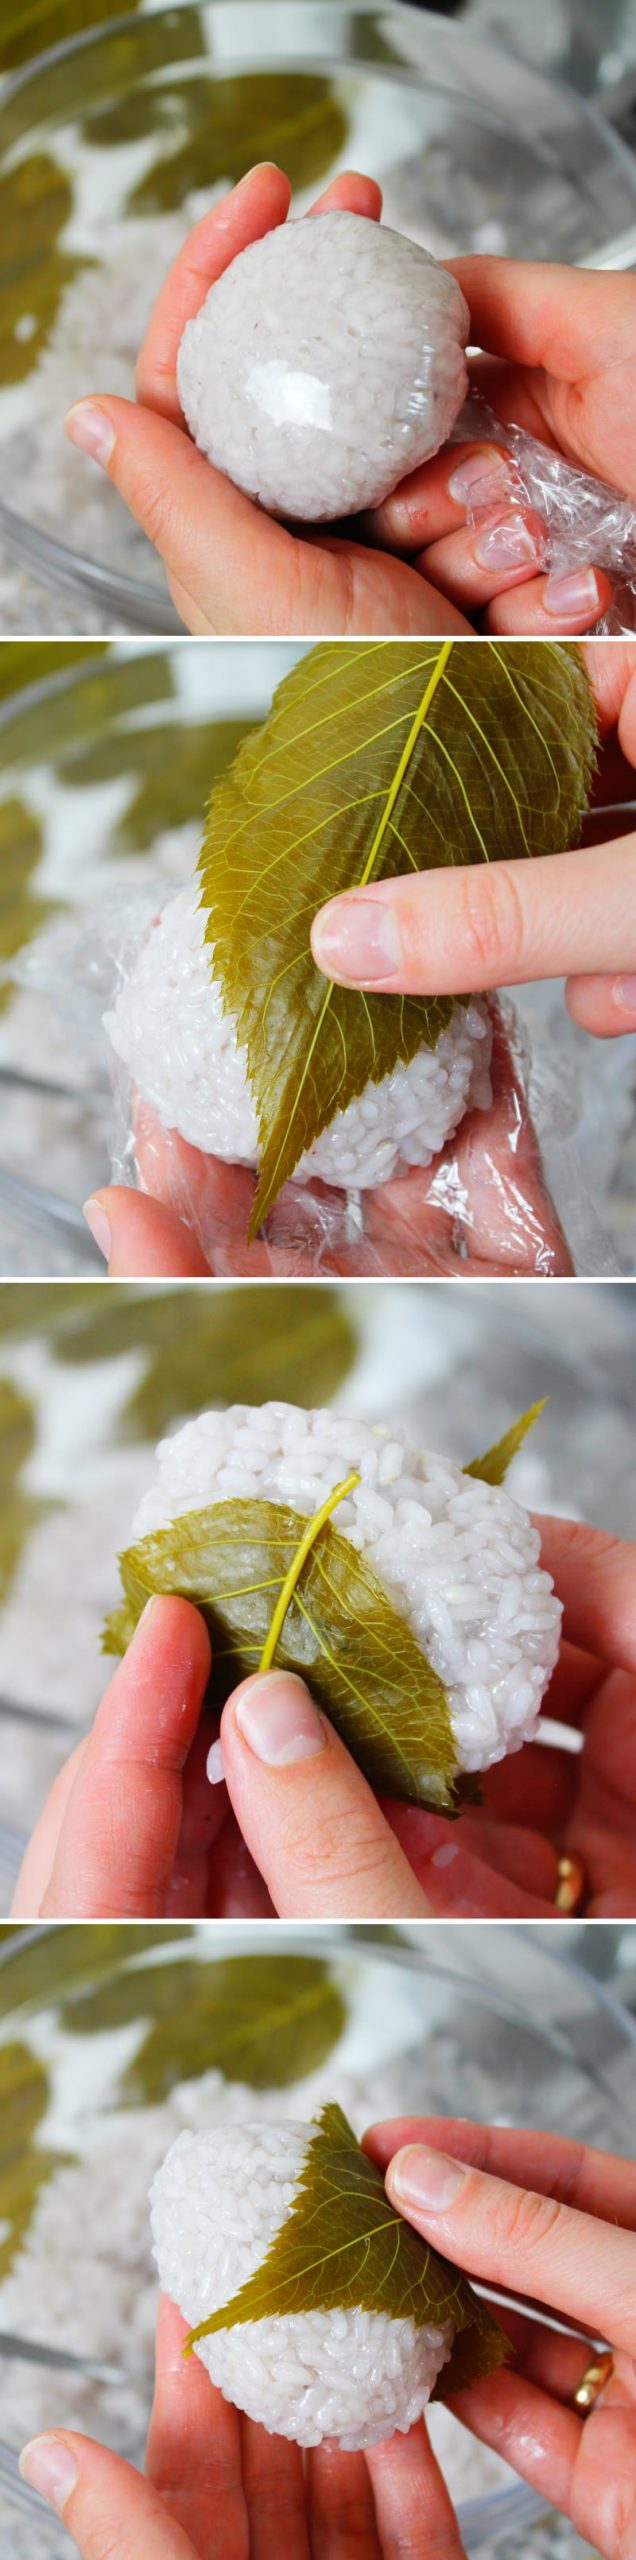
By the way, I use a bit of cling film to shape and wrap the sakura Mochi. This helps immensely when shaping the delicious Mochi, as it’s quite difficult to spread a thin layer of rice around the red bean paste!
The finishing touch is the salt-pickled cherry leaf. This visual effect is really well done and a real eye-catcher. These are actually real cherry leaves!! They’re picked fresh when they’re still very young and then pickled in salt and vinegar. Wow, brilliant – somehow typically Japanese, isn’t it?! You can make these cherry leaves yourself or perhaps it’s best to buy them.
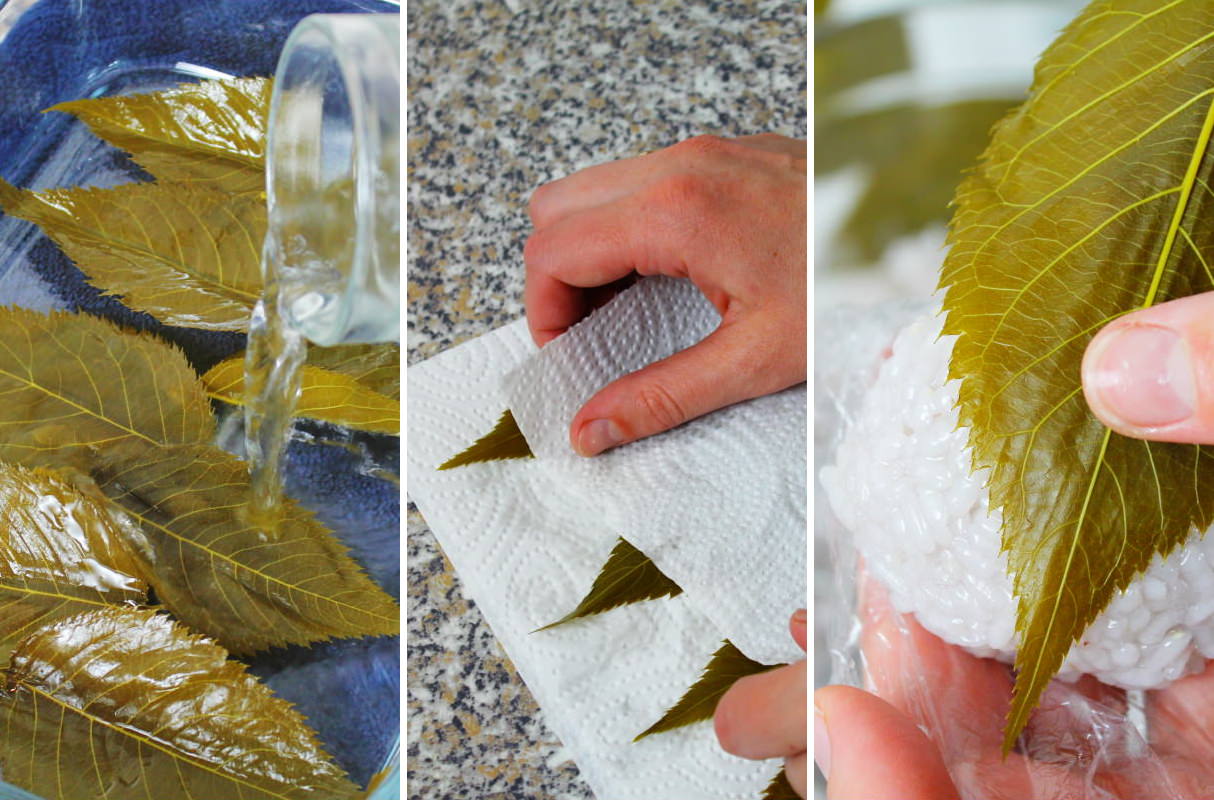
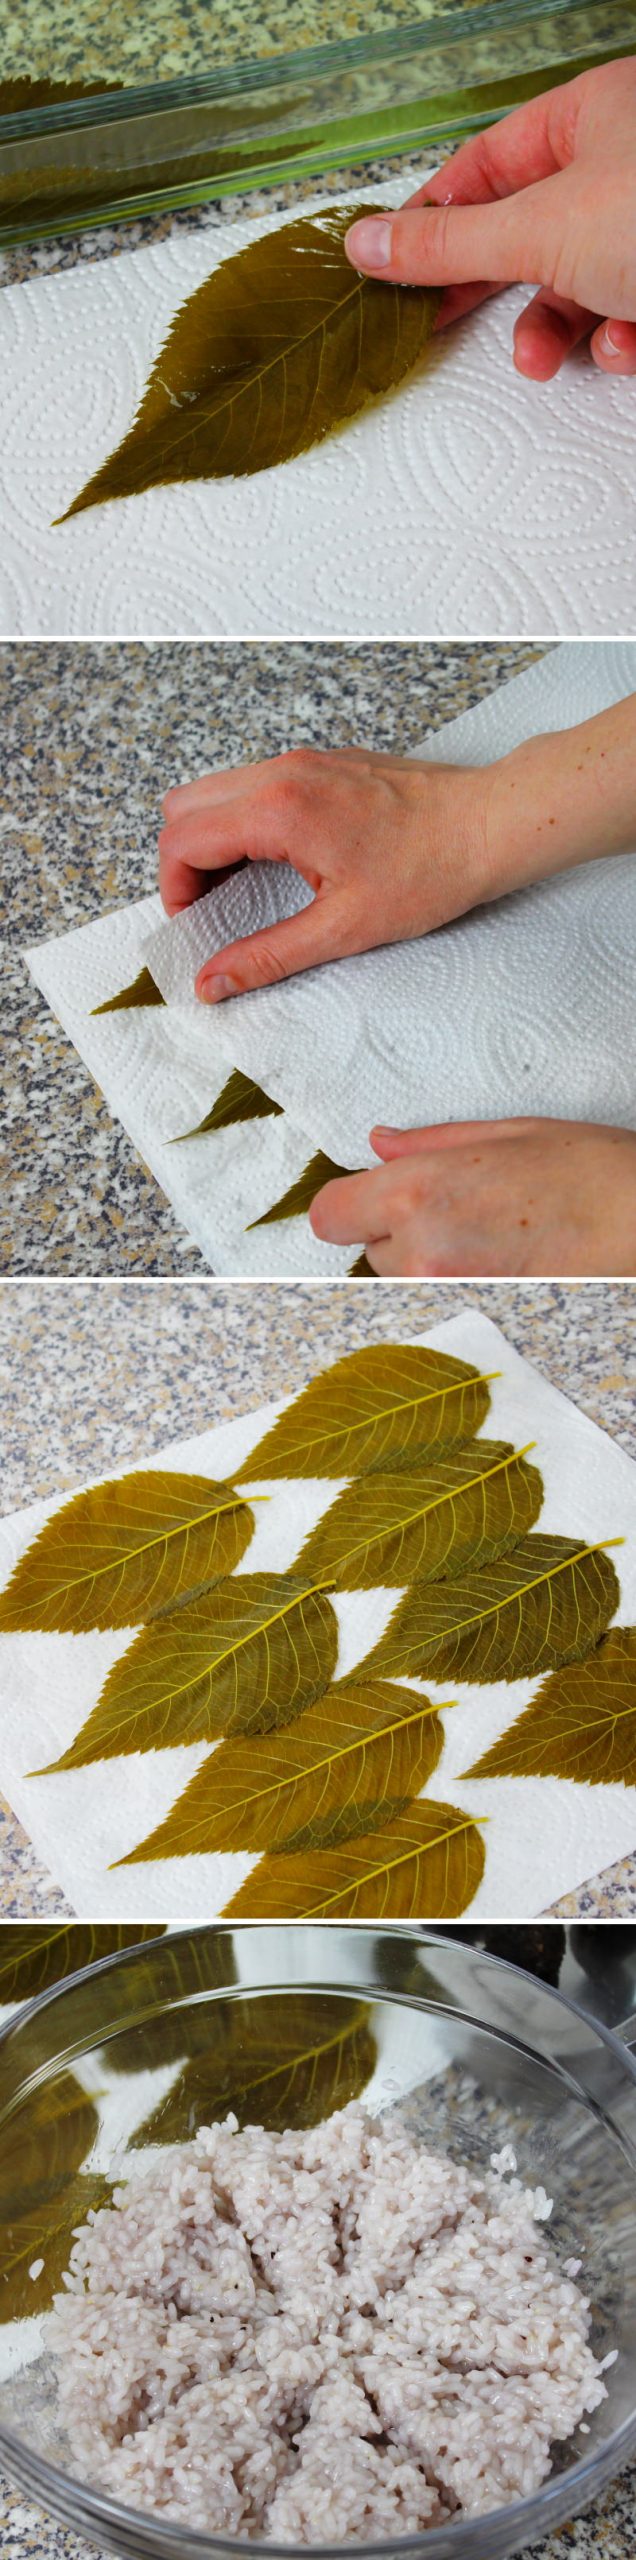
To use the leaves, we’ll desalt them in good time by soaking them in a bath of cold, fresh water. Afterwards, simply pat them dry carefully and wrap them around the sakura Mochi. Yes, and that’s it 😊.
With these delicate glutinous rice balls filled with sweet red bean paste, you can now experience the taste of cherry blossom season in Japan right in your own home. So enjoy the recipe to the full!
And one last little tip: Sakura Mochi taste best when fresh and are best not kept in the fridge!
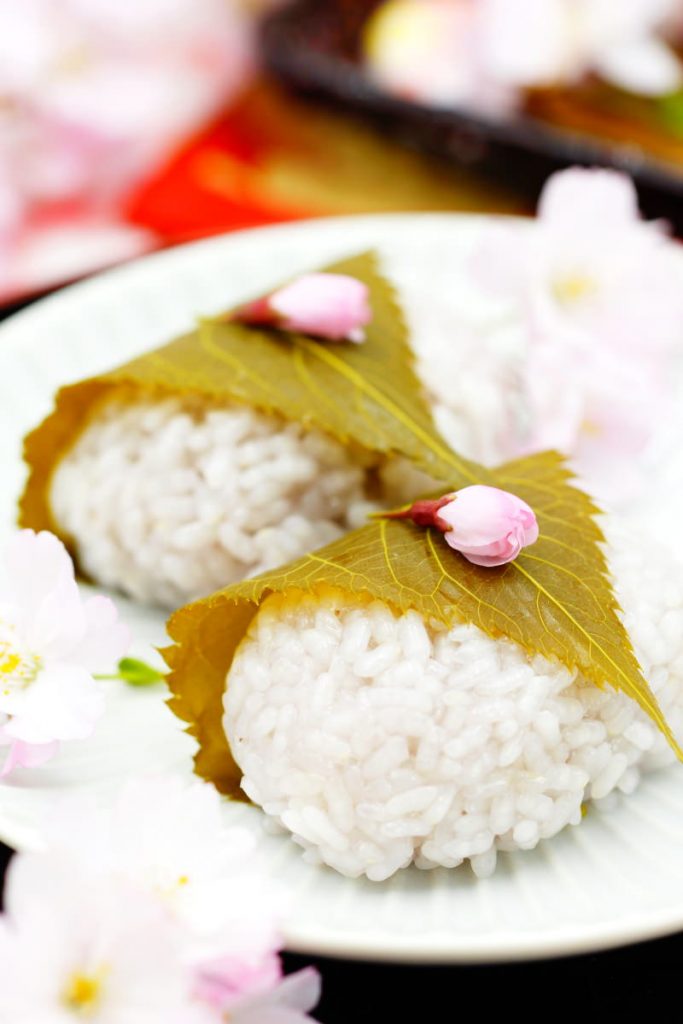
Sakura Mochi (Kansai-style)
Serves 4 | 120 minutes | 305 kcal
🖨️ Print PDF 📌 Pin thisSpring is in the air, the sun is shining and the cherry trees are in full bloom – it’s time for sakura Mochi! You can easily make this classic cherry blossom treat yourself at home. Here, I’ll show you the right ingredients and the best instructions for making it easily in a saucepan! So, look forward to homemade, pale pink and heavenly sweet sakura Mochi.
Ingredients (8 pieces = 4 portions)
200 g mochigome
300 ml water
20 g sugar
20 ml red food colouring (or, if using concentrated food colouring, dissolve 1–2 drops in 20 ml of water)
200 g koshi-an – fine anko, make your own red bean paste (→ see recipe)
8 pieces of cherry leaves (sakura no ha) preserved in salt
Preparation (120 minutes)

Step 1
Gather the ingredients for the spring-inspired Sakura Mochi. The homemade koshi-an (click here for the recipe for homemade anko) should now be ready and completely cooled!
Step 2
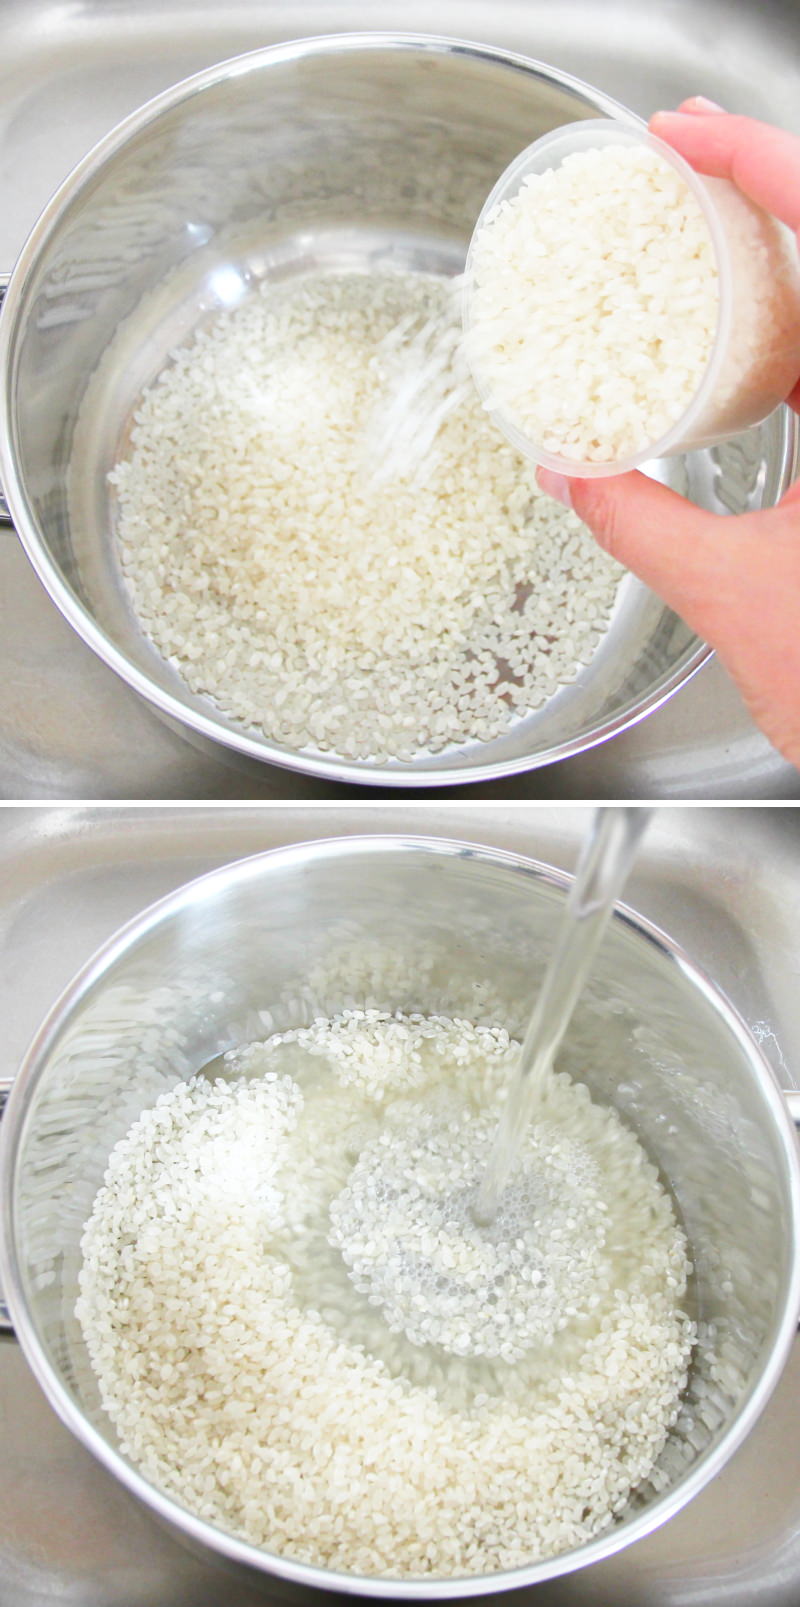
First, we’ll prepare the Japanese glutinous rice: to do this, place the Mochigome rice in a saucepan (or a large bowl) and fill it with plenty of cold water .
Step 3
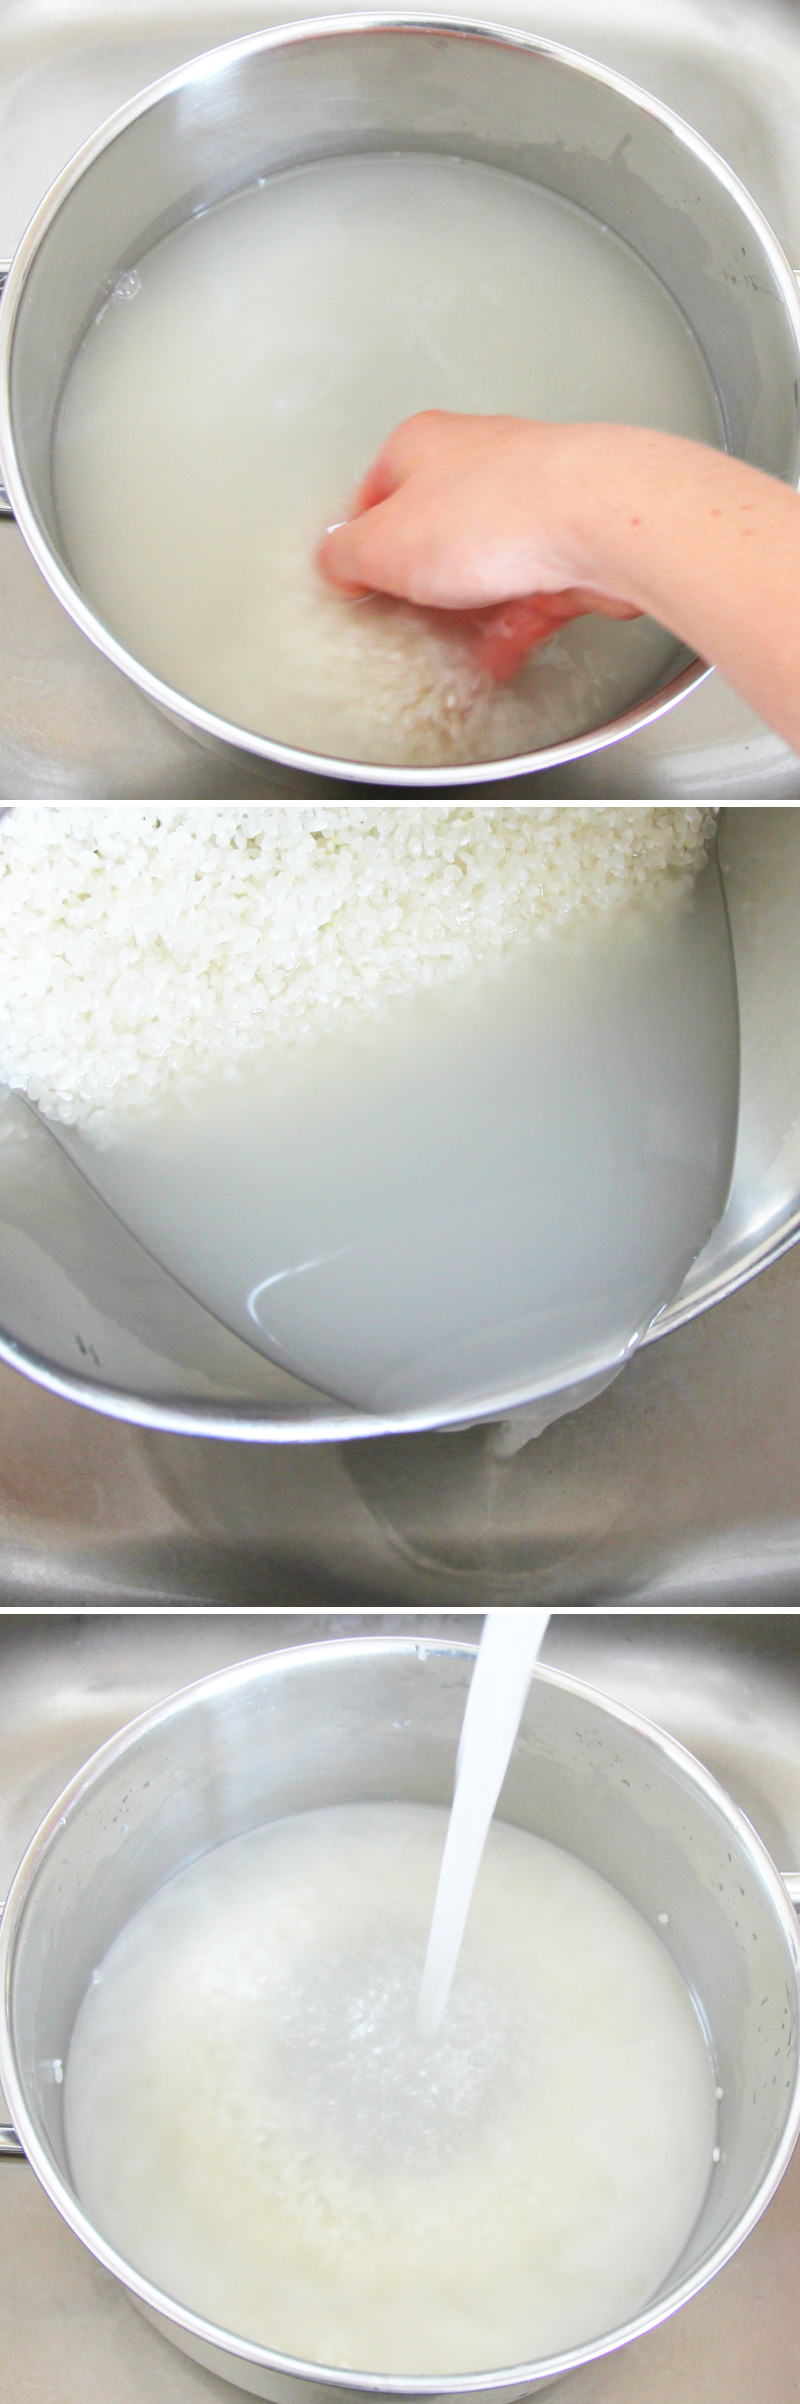
Now carefully wash the rice with your hands using circular movements and gentle friction between the grains.
Slowly drain off almost all the water (using a sieve) and rinse the rice in the remaining water in the saucepan.
Now top up with fresh cold water and wash carefully using circular movements.
Step 4
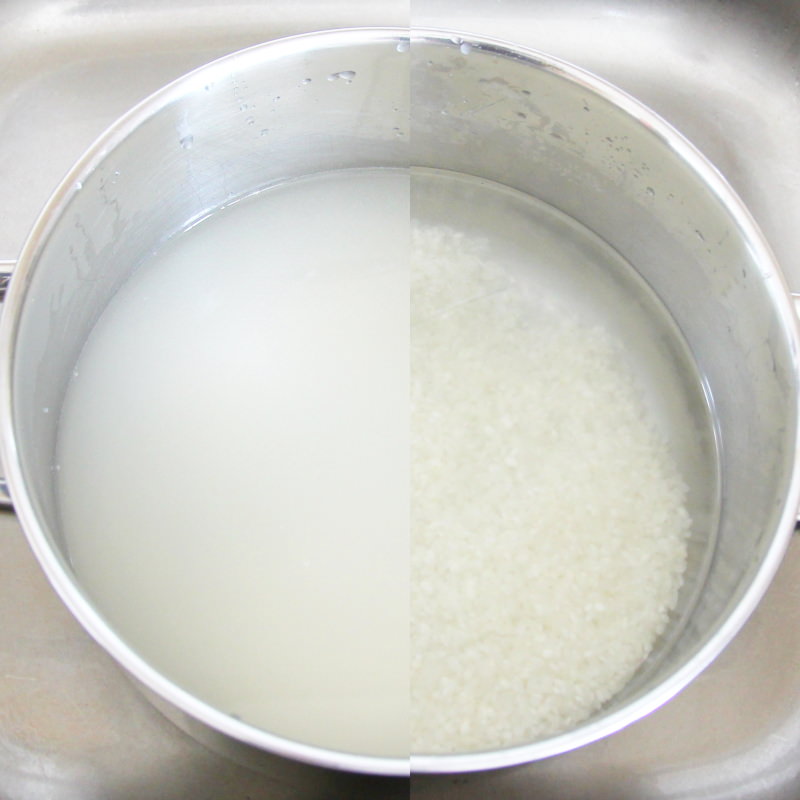
Repeat the process of washing and draining the rice grains at least three times until the water remains clear (you’ll notice the difference when comparing before and after).
Then leave the rice to soak, completely covered with water, for 1 hour (this step must not be skipped!).
Step 5
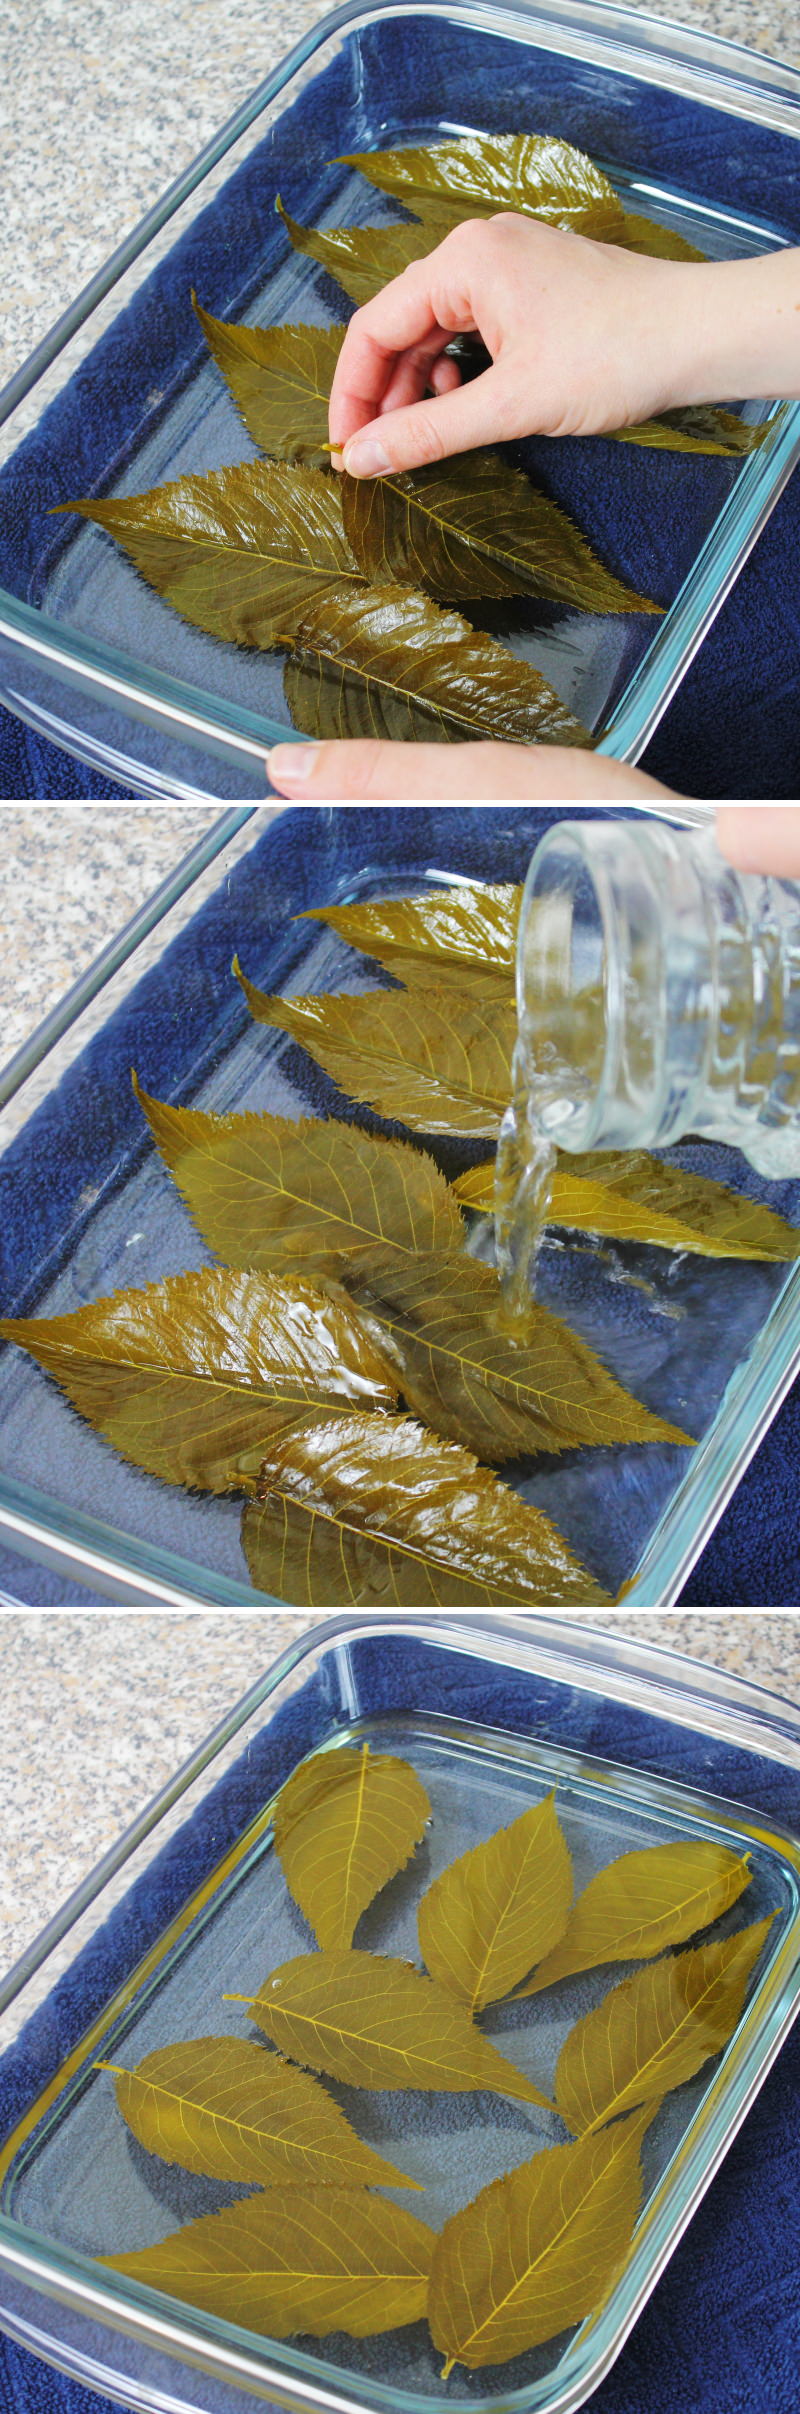
In the meantime, let’s move on to the pickled cherry leaves: Lay all the leaves flat in a container and cover them completely with water so that all the cherry leaves are floating. To desalt the leaves, leave them to soak in the water for 30 minutes.
Step 6
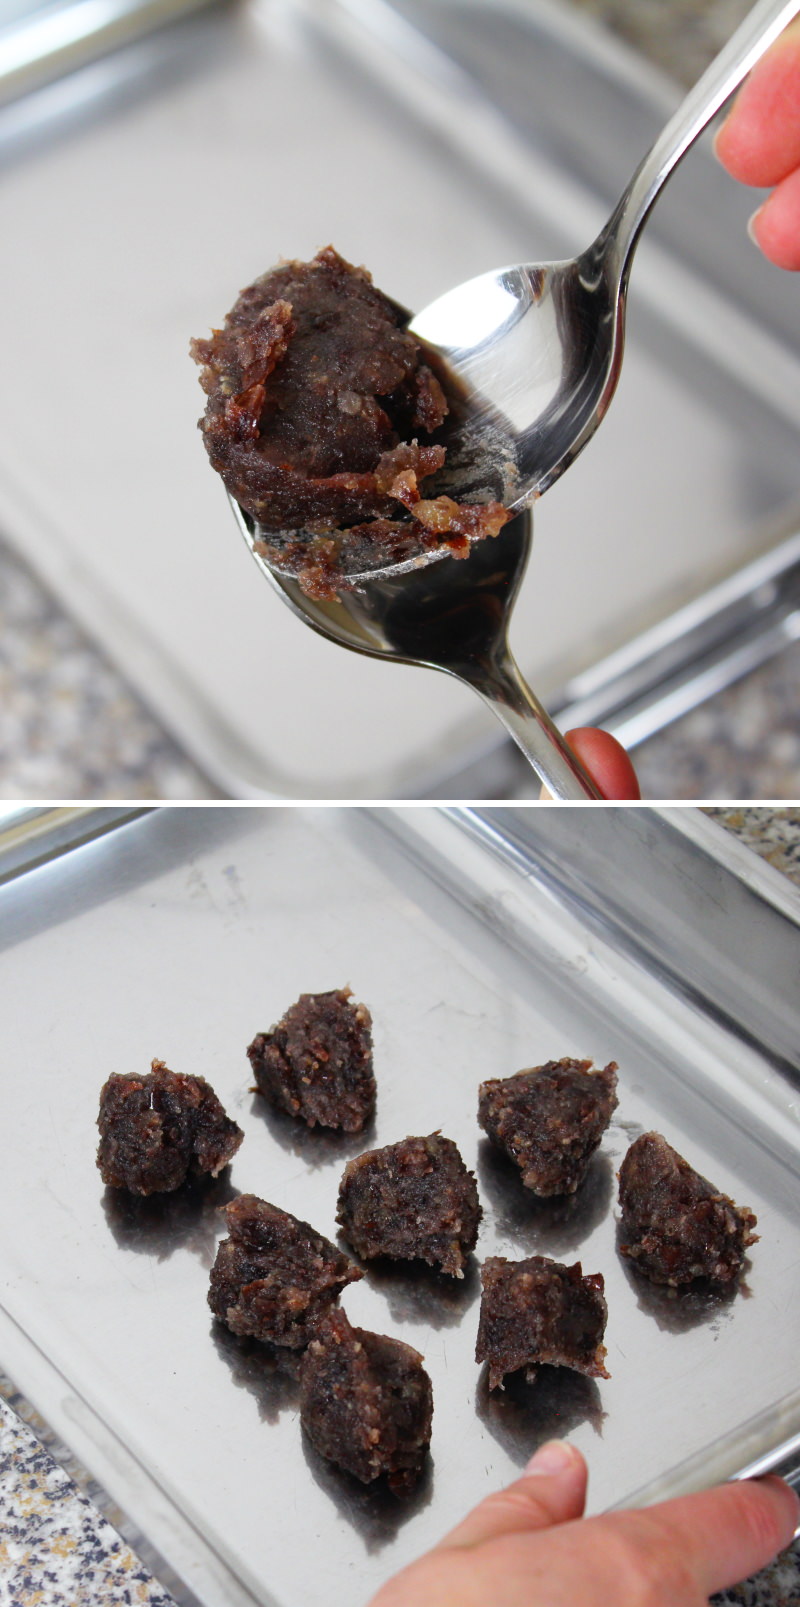
Let’s also turn our attention to the koshi-an: Shape the red adzuki bean paste into 8 balls of 25 g each between two large spoons. Place all the balls on a plate and set aside until needed.
Tip: The balls don’t have to be perfect – it’s more about getting the portions right!
Step 7
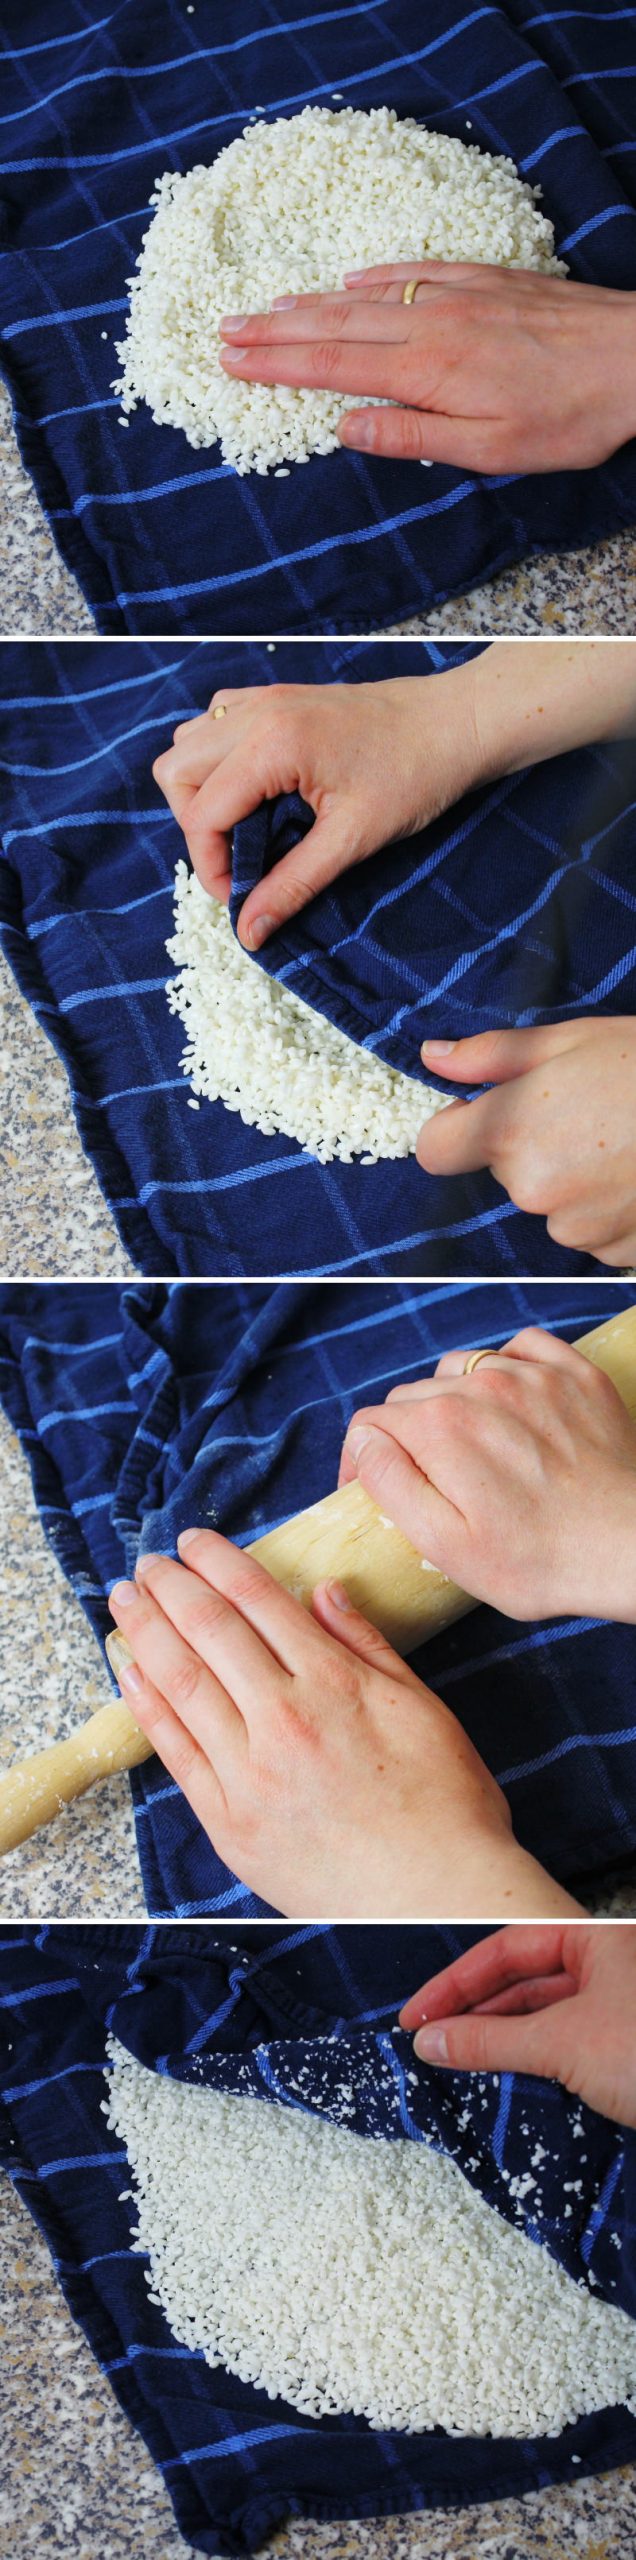
Once the rice has finished soaking, drain it through a sieve, leave it to drain briefly, then spread it out on a kitchen towel. Place the other end of the towel over the rice and roll over it with a rolling pin so that the rice grains are lightly crushed.
Step 8
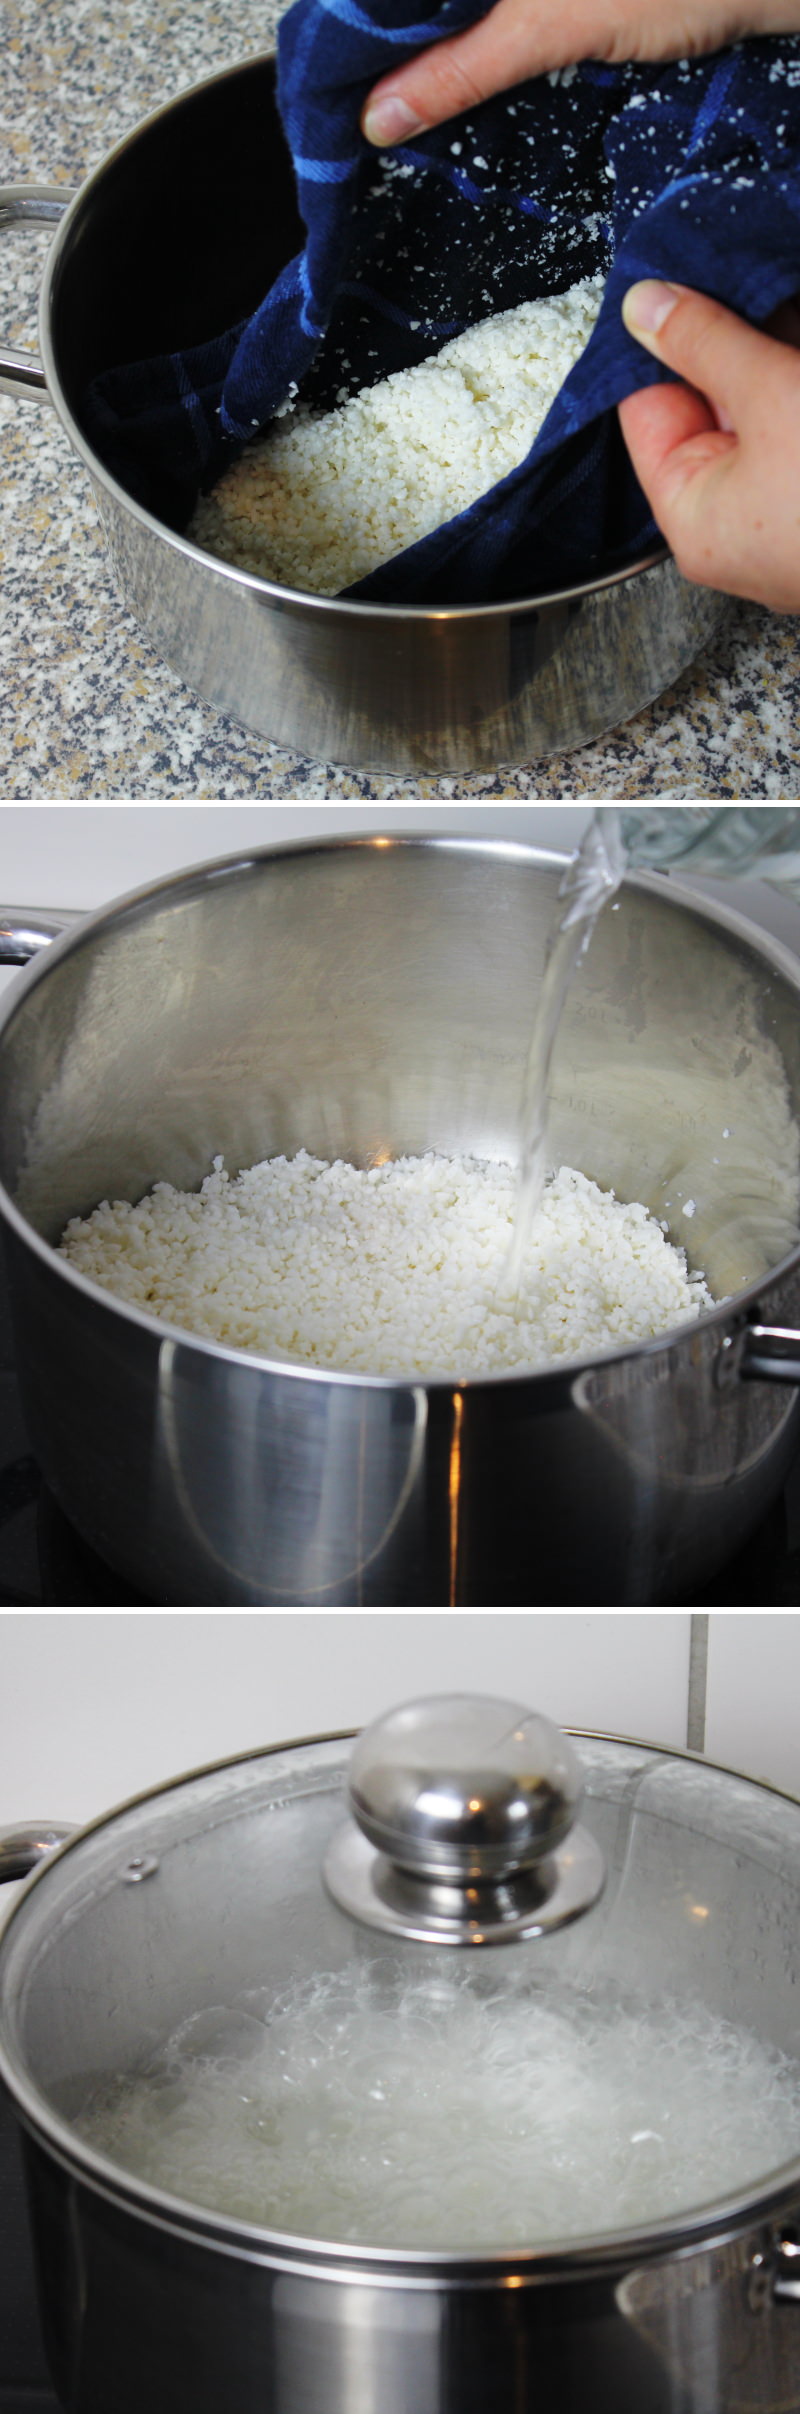
Now transfer the rice to a larger saucepan, top up with 300 ml of cold water, place on the hob and bring to the boil over a medium heat. Be sure to stir occasionally, as the glutinous rice burns easily!
As soon as the rice has come to the boil, turn the heat down to the lowest setting and, with the lid on, simmer gently for 13 minutes until the water has been completely absorbed.
Step 9
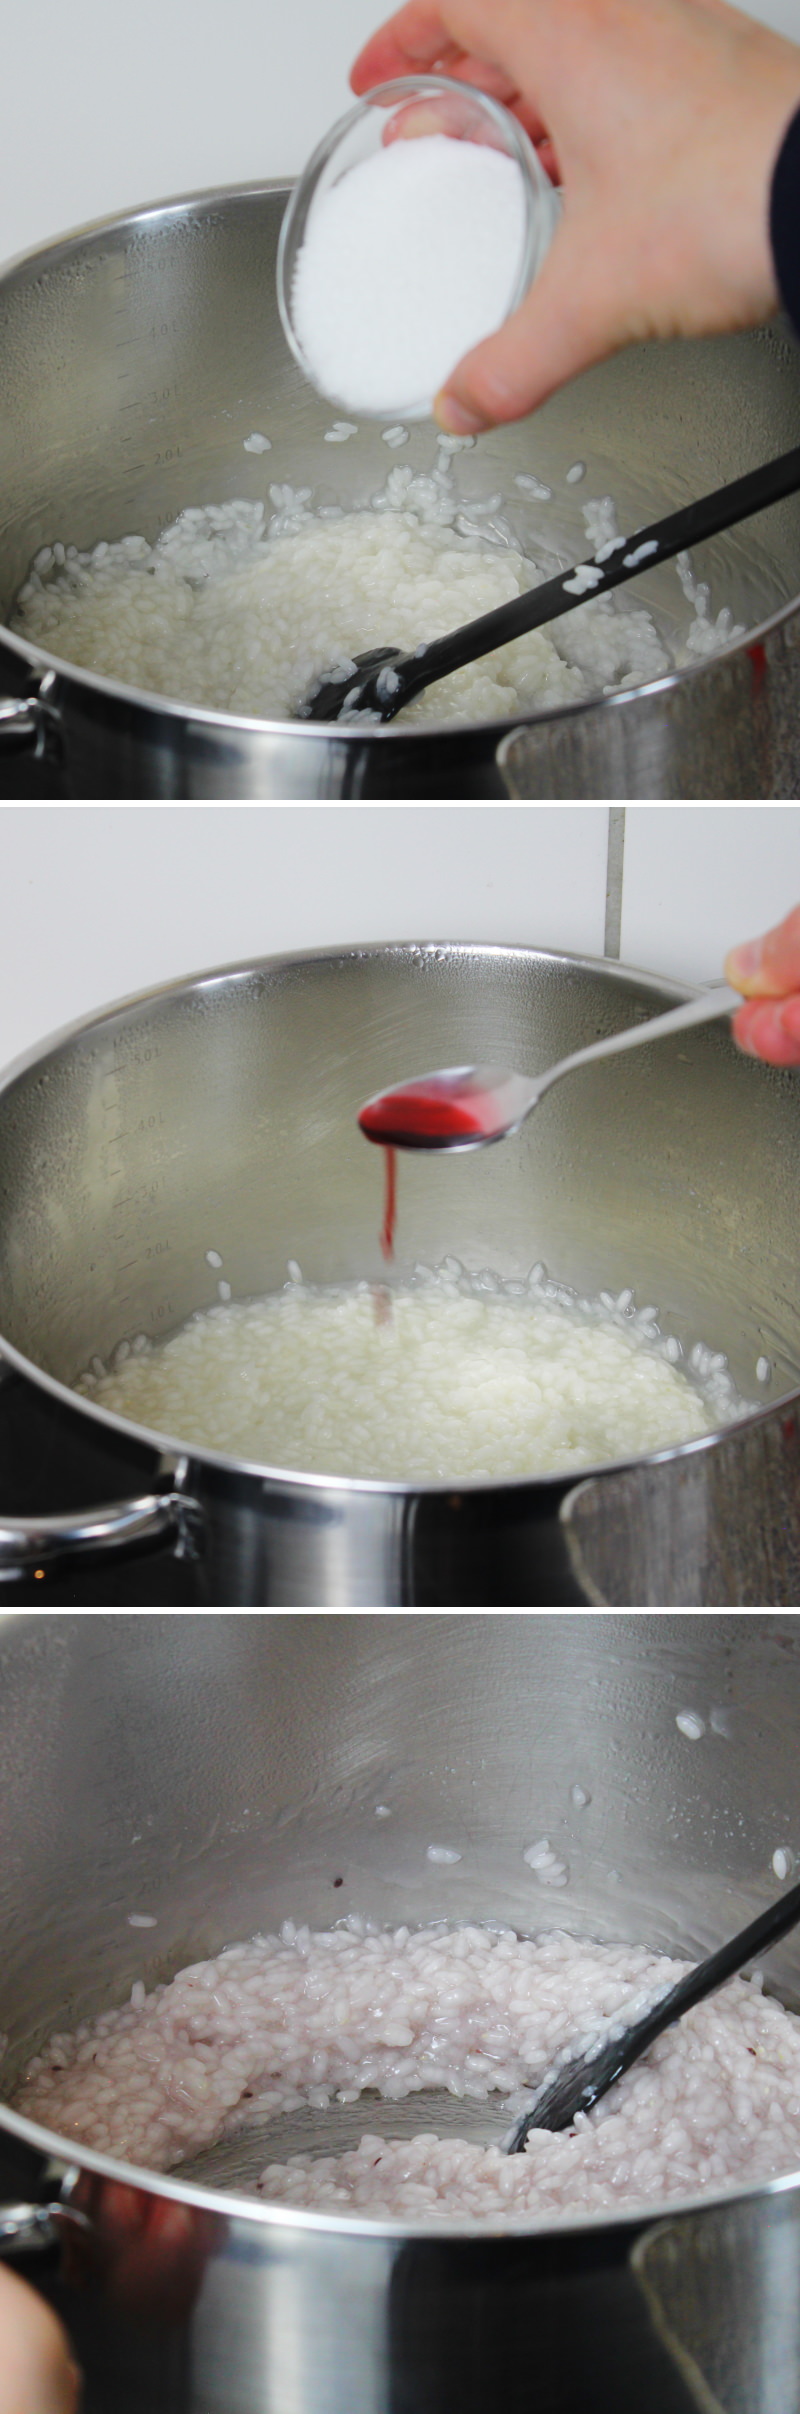
As soon as the rice is cooked – i.e. once it has absorbed all the water – add the sugar and food colouring straight away. Stir everything thoroughly to combine.
Simmer the rice with the sugar and food colouring over a medium heat for about 10 minutes, stirring constantly until it forms a nice, sticky, cohesive mass. The rice mustn’t fall apart; otherwise, you won’t be able to shape it properly later!
Step 10
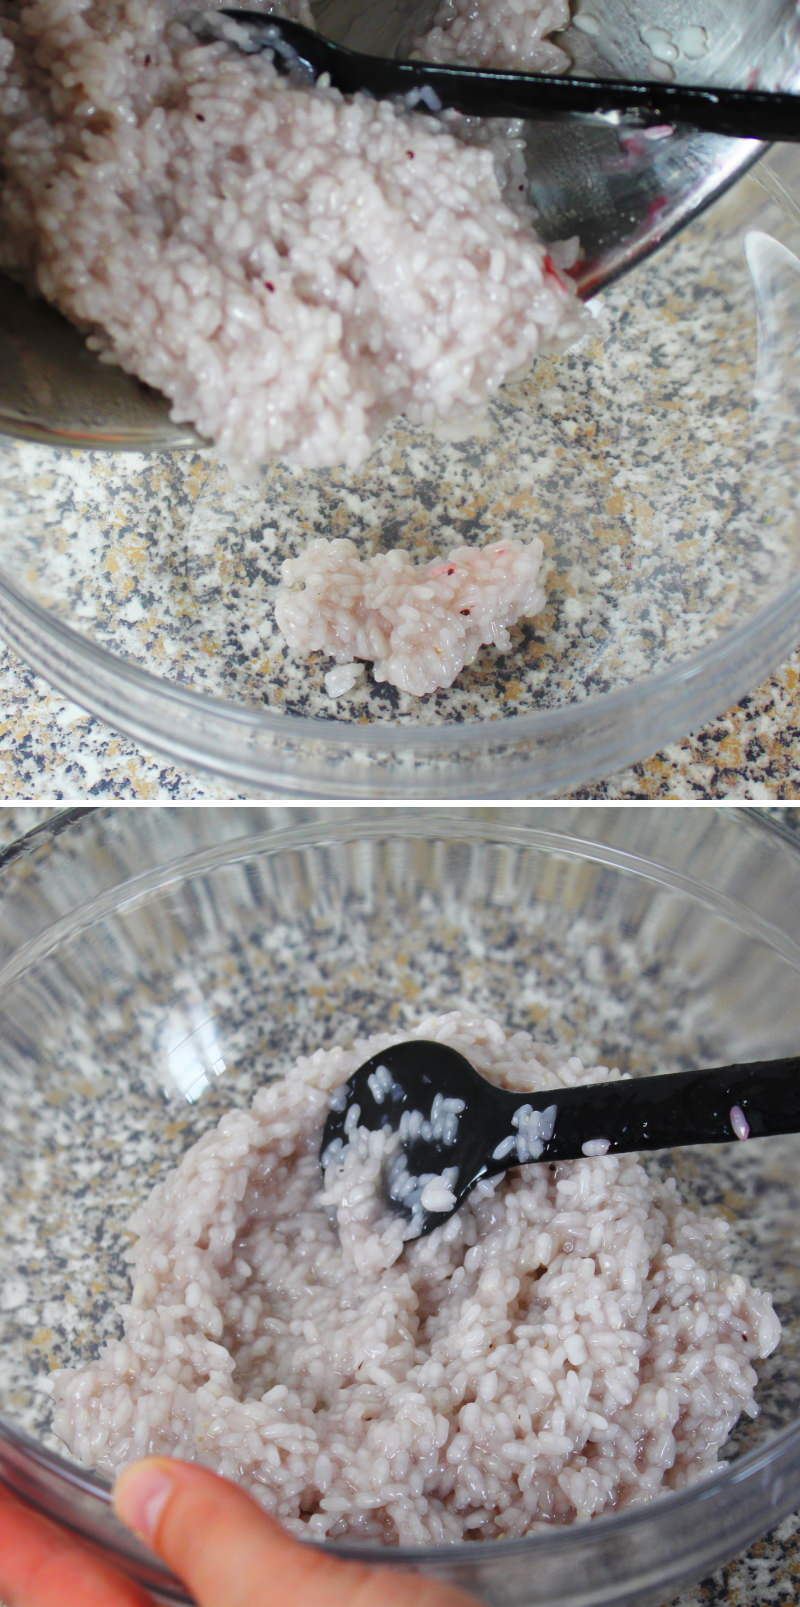
Once the sweet, slightly pink-coloured rice has been cooked down to a cohesive mass, transfer it to a bowl and leave to cool for 10 minutes.
Step 11
Now remove the cherry leaves from the water and pat them dry gently. Now divide the glutinous rice with a spoon or knife into 8 roughly equal portions. We’ll also need the koshi-an balls and some cling film!
Step 12
To make the Sakura Mochi, place the cling film in the palm of your hand, then place a portion of the rice on it and press it flat and into a circular shape with a spoon. Now place a small ball of koshi-an in the centre and, using the cling film, wrap the rice around it.
Step 13
Pull the cling film together and use it to shape everything into a nice round shape, then carefully remove it and wrap each one in one of the cherry leaves. Prepare 7 more sakura Mochi in this way and arrange them attractively.
Step 14
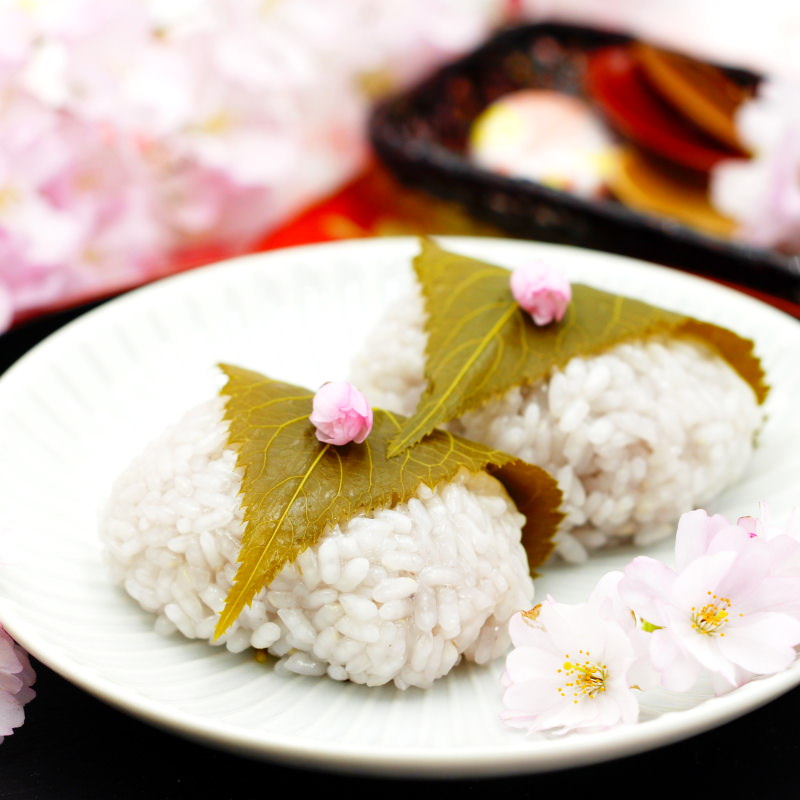
Place all the mochi on a serving plate. Best eaten straight away. A cup of fresh sencha tea goes well with this. Done – Itadakimasu!
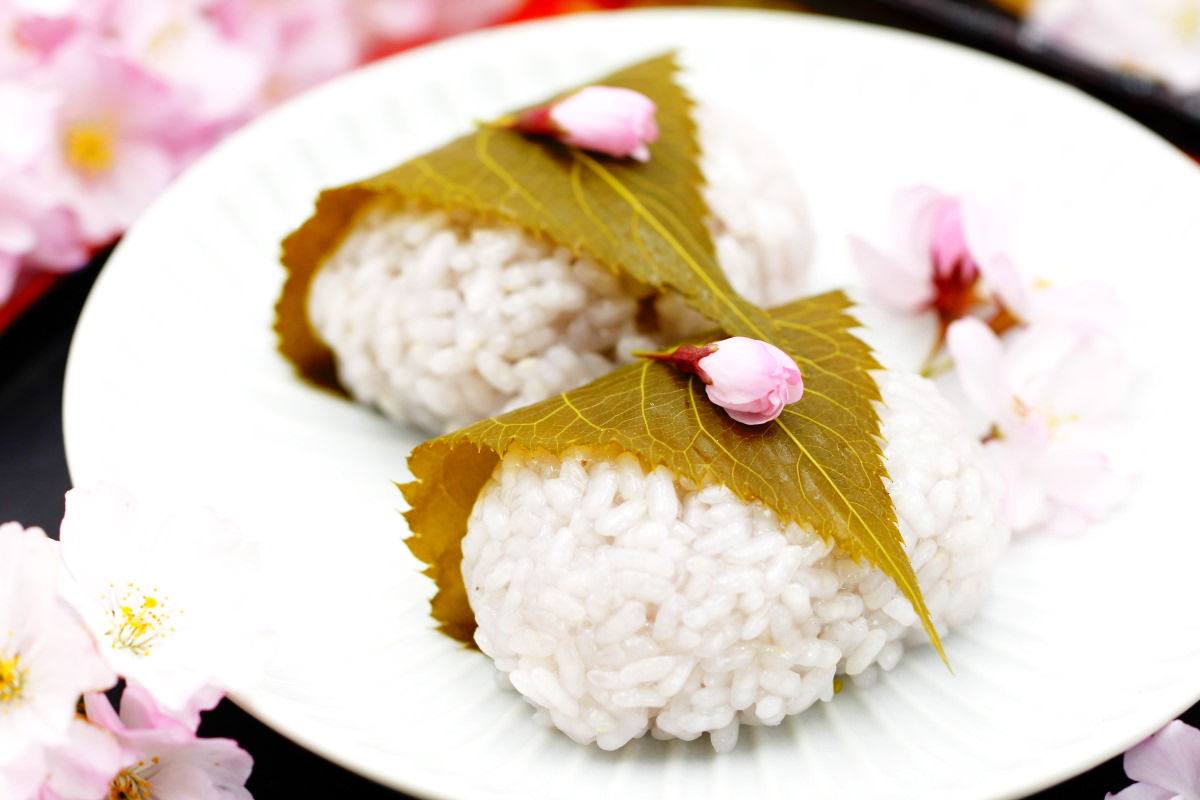
By the way, the shape and preparation of Sakura Mochi differ between the Kanto region around Tokyo and the Kansai region around Kyoto! Today I’ve shown you the version common in Kansai, which uses whole rice grains.
In the version often made in Kanto, the batter is made from rice flour and baked thinly on a round cast-iron plate. The mochi dough is wrapped around a generous amount of fine adzuki bean paste, giving Sakura Mochi Kanto-style its cylindrical shape.
Looking for more delicious Mochi specialities from Japan that will delight your guests? Here are my most popular recipes:
No post found!
Have you tried the recipe? Let me know in the comments, I’m looking forward to hearing from you.