For me, Okonomiyaki is one of those dishes that instantly puts me in a good mood. A hearty pancake, lots of finely shredded cabbage, a spicy sauce and, to finish, those typical toppings that sizzle slightly in the heat. In Osaka, Okonomiyaki is a real everyday meal. It’s simple, filling and perfect for sharing. That’s exactly how I like it at home too.
Okonomiyaki is often described as ‘Japanese pizza’. That’s only half the story, because it’s actually much more versatile. The name translates roughly as “fried just the way you like it”. And that’s exactly what it’s all about: a simple basic recipe that you can adapt to suit your mood, the contents of your fridge and your taste.
What exactly is Okonomiyaki?
The base of Okonomiyaki is a thick batter made from flour, egg and liquid, mixed with very finely chopped cabbage. This forms a thick pancake that is fried in a pan until golden brown. Slightly crispy on the outside, juicy on the inside – it is precisely this texture that defines Okonomiyaki.
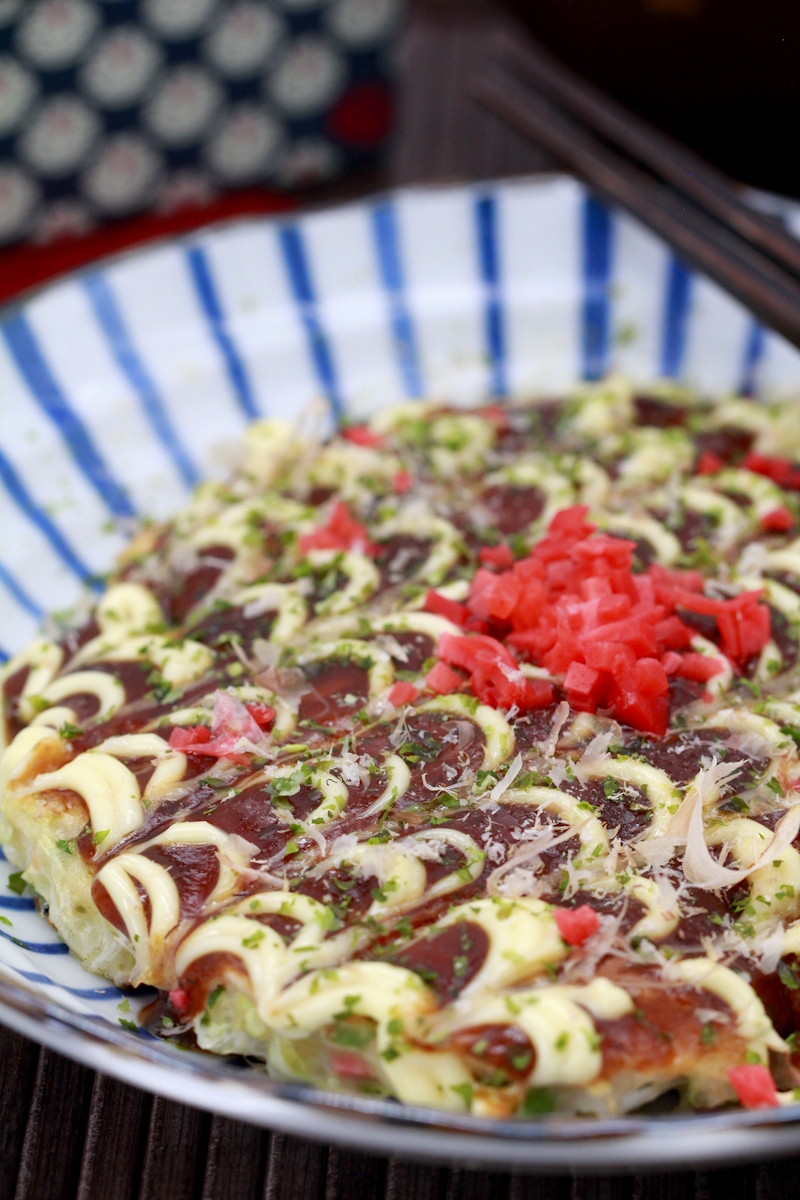
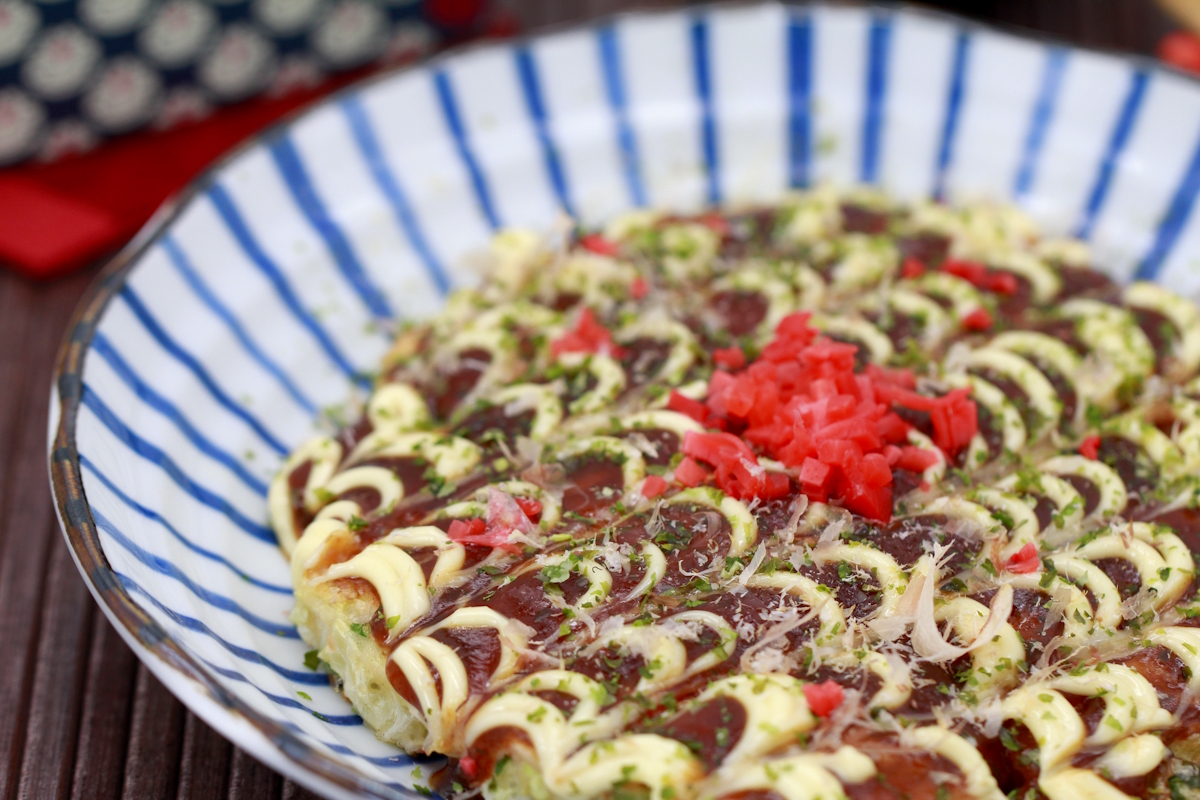
The pancake is traditionally served with Okonomiyaki sauce, Japanese mayonnaise and typical toppings such as Aonori, Katsuobushi and pickled ginger. This combination creates the distinctive flavour, which is savoury, slightly sweet and wonderfully balanced.
TOP RECOMMENDATION
Okonomiyaki Kochbox | japanische Pfannkuchen selber machen
7-tlg. Set für 6 Portionen japanische Pfannkuchen + Anleitung, auch für Anfänger. Mit dem Okonomiyaki Kochset gelingen dir herzhafte japanische Pfannkuchen wie in Osaka ganz…
In stock
There are two main styles of Okonomiyaki: the Osaka style, where all the ingredients are mixed into the batter, and the Hiroshima style, where the ingredients are added in layers, often supplemented with fried noodles. In this recipe, we focus on the more popular Osaka style, which is easy to prepare and widely enjoyed in Japan.
A brief history of Okonomiyaki
The roots of Okonomiyaki date back to the Edo period (1603–1868). Originally, a simple batter dish called “funoyaki” was prepared in Kyoto, consisting of a mixture of water and flour and topped with a light sauce.
During the Meiji period (1868–1912), this evolved into a more substantial dish, enriched with additional ingredients. Following the Great Kantō Earthquake of 1923, Okonomiyaki spread from Tokyo to the Osaka and Hiroshima regions, each of which developed its own distinct preparation styles.

Okonomiyaki gained popularity particularly during and after the Second World War. At a time when food was scarce, flour became an affordable staple, and fresh ingredients such as cabbage and egg made the dish nutritious and versatile. From its humble beginnings as a simple ‘pancake’, Okonomiyaki has evolved into one of Japan’s best-known and most popular dishes, finding its place in both street markets and upmarket restaurants.
Today, Okonomiyaki is not only a culinary delight but also a symbol of creativity and regional diversity in Japanese cuisine.
Making Okonomiyaki yourself: Here’s how
Making Okonomiyaki at home is not only easy, but also a great way to get creative. With these 5 passaggi, you’ll master the dish perfectly – whether you want to stick to the classic recipe or experiment with your own variation.
1. Make the basic batter
The batter forms the basis for your Okonomiyaki and can be prepared in two ways:
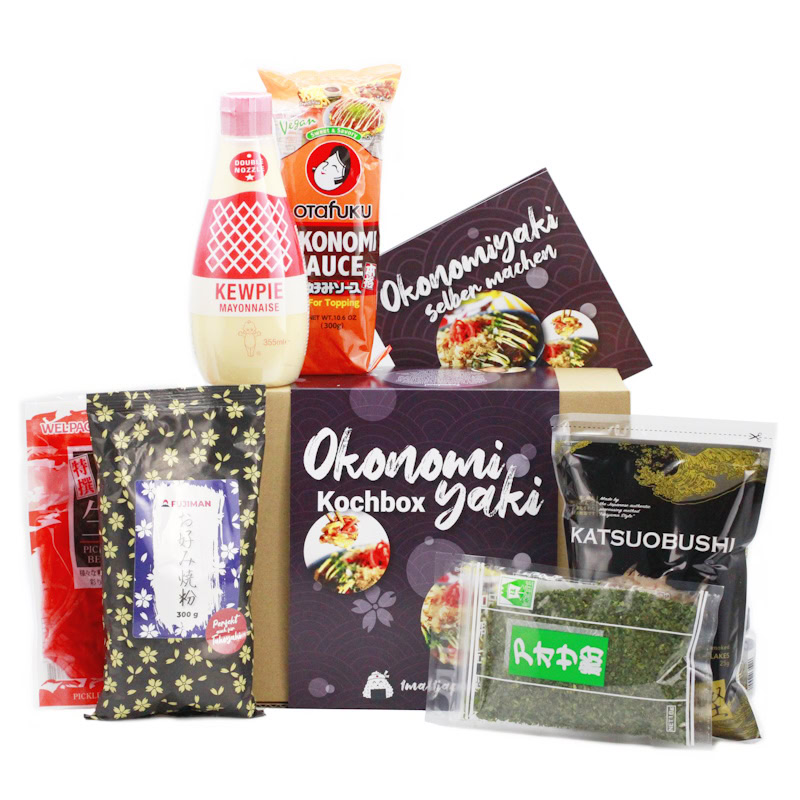
- With okonomiyakiko: The special flour for Okonomiyaki (im Shop ansehen) is particularly easy to use. Simply mix it with water and egg until you have a smooth batter. This flour ensures an authentic flavour and a fluffy texture, just like in a Japanese restaurant.
- With wheat flour: If you want to make the batter yourself, you will need 100 g wheat flour, 100 ml brodo Dashi, 1 egg and 1/2 tsp salt. Mix everything together to form a sticky batter, which provides the perfect base for the other ingredients. Dashi broth gives the bread a subtle umami flavor.
No dashi broth at home?
If you don’t have access to dashi broth, you can replace it with vegetable broth or water. The flavor will be slightly less intense, but the bread will still work.
2. Choose and prepare the filling
A must-have in any Japanese pizza is very finely sliced cabbage. You can actually use any variety of white cabbage here (white cabbage, Chinese cabbage, pointed cabbage…). Then comes the creative part: choose from a variety of ingredients to personalise your Okonomiyaki.
- Classic: prawns, squid or surimi, finely chopped and mixed directly into the batter.
- Hearty: Thin slices of pork belly or bacon, either mixed into the batter or placed on top whilst frying.
- Vegetarian: spring onions, mushrooms, peppers, carrots, sprouts or a little tenkasu (deep-fried tempura batter) for extra texture.
Osaka or Hiroshima style?
There are essentially two well-known methods of preparation:
In the Osaka style, all the ingredients are mixed directly into the batter and fried together. This version is particularly common, easy to make and perfect for beginners. This is exactly what this recipe focuses on.
The Hiroshima style works differently: here, the batter, cabbage and other ingredients are fried in layers, often supplemented with fried noodles. This version is slightly more labour-intensive and considerably more filling.
3. Frying Okonomiyaki properly
Heat a little oil in a large frying pan or on a teppan grill, if you have one. Pour a portion of the batter into the pan and shape it into a round pancake about 1–2 cm thick.
First, fry the Okonomiyaki over a medium heat until the underside is golden brown. Then flip it over carefully. Now place a lid on the pan so that the cabbage inside softens and the pancake cooks evenly.
Proportions
Do you feel there is too little batter compared to the cabbage and the other ingredients? Then add more flour and water to make it more stable when frying. Otherwise, your Okonomiyaki will fall apart when you flip it! It’s also recommended for beginners to use a plate for flipping – be careful, it’s hot! If you’re really unsure, just flip the Okonomiyaki once, then nothing can go wrong…!
4. Seasoning with sauce and mayonnaise
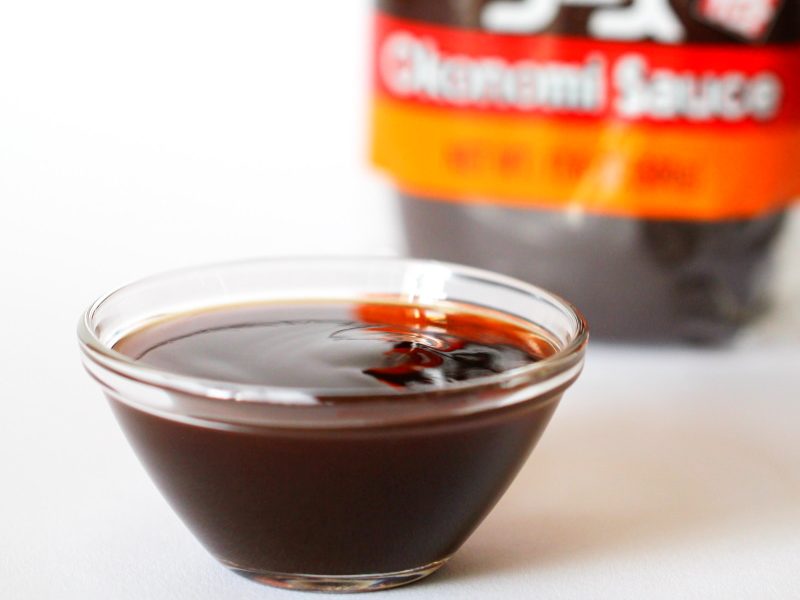
While the final frying is taking place, spread the top of the pancake with a savoury-sweet Okonomiyaki sauce</ strong>. You can buy this ready-made (im Shop ansehen) or make it yourself using 4 tbsp ketchup, 3 tbsp Worcestershire sauce, 2 tbsp oyster sauce and 3 tbsp sugar.
Then drizzle Japanese mayonnaise (im Shop ansehen) over the top in a zigzag pattern. Classic Kewpie mayonnaise has a slightly sweet flavour and a creamy texture that goes perfectly with the sauce. If you don’t have any Japanese mayonnaise to hand, you can also use standard mayonnaise or make your own version.
5. Garnish and serve
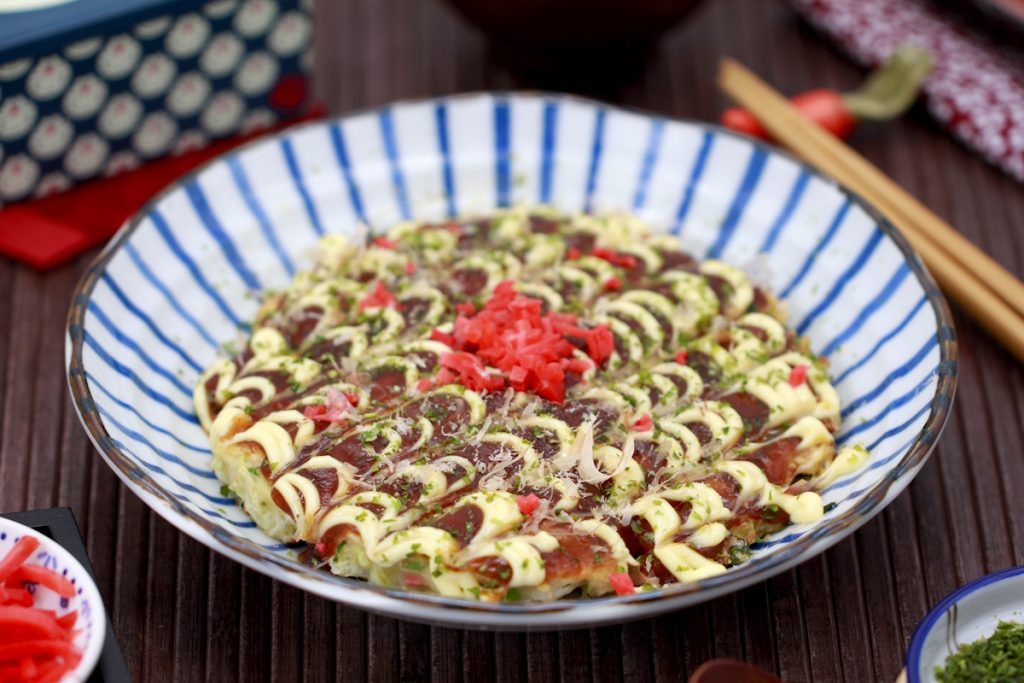
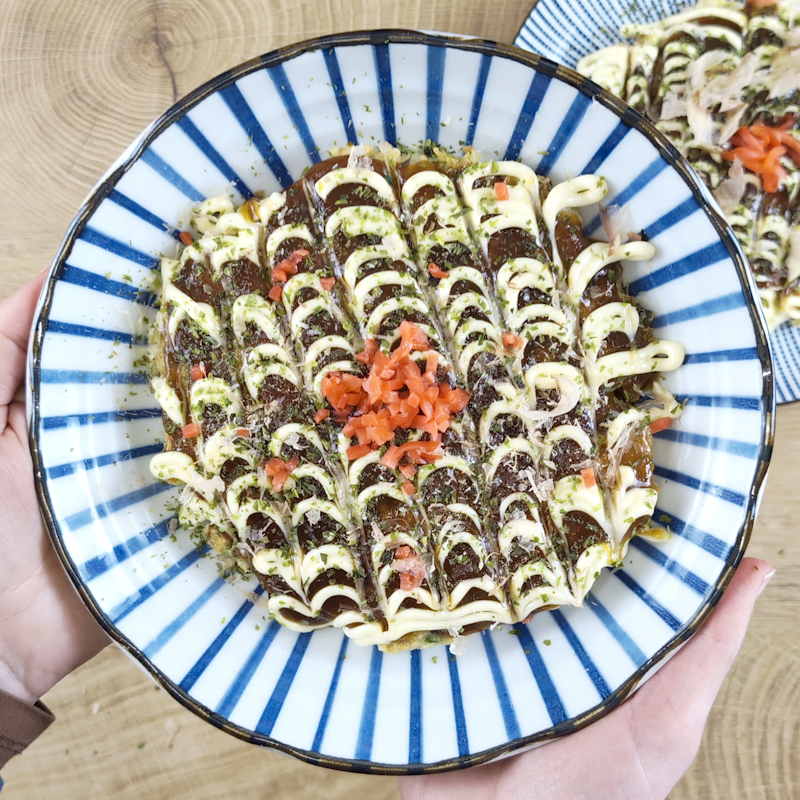
The topping makes every Okonomiyaki a real eye-catcher. Sprinkle the pancake with fine Aonori seaweed powder (im Shop ansehen), bonito flakes and some pickled Beni Shoga ginger .
The bonito flakes start to “dance” in the heat – a fascinating effect that is typical of Japanese dishes.
Serve the Okonomiyaki hot, ideally cut into bite-sized pieces, and enjoy it the authentic way with chopsticks.
Alternatives and tips
Try the Hiroshima style: In this version, fried noodles such as Udon or Ramen are incorporated into the layers, making the dish even more filling.
For vegetarians: Use deep-fried tempura batter (tenkasu) as a crispy addition to the filling.
For beginners: Reduce the amount of ingredients in the batter to make it easier to flip.
Why is it worth making Okonomiyaki yourself?
Making Okonomiyaki at home is not only cheaper than visiting a Japanese restaurant, but also a great way to get creative. You can adapt the ingredients to suit your tastes and try out new variations time and time again. What’s more, with this dish, you’re bringing a slice of Japanese street food culture straight into your own kitchen.
Whether classic with pork belly, seafood-style with shellfish or vegetarian with fresh vegetables – the combination of crispy batter, spicy sauce and aromatic toppings makes Okonomiyaki a real comfort food.
What goes well with Okonomiyaki?
Okonomiyaki is a versatile dish that pairs wonderfully with other Japanese dishes. Light and fresh dishes make ideal accompaniments, complementing the savoury flavour of the pancake. A classic green salad with a Japanese sesame dressing adds freshness, whilst Miso soup offers a warming accompaniment. Pickled vegetables, such as Tsukemono, also go down a treat and provide a pleasant contrast.
Green tea or a cold beer are the perfect drinks to accompany it. For an authentic experience, you could also serve Sake or a refreshing yuzu drink with it.
Do you have any questions or would you like to share your experiences? How do you like this Okonomiyaki recipe? Have you tried it yet or created your very own version? I look forward to your comments and hope you enjoy cooking and eating!
Osaka-style Okonomiyaki
serves 2 | 30 minutes | 798 kcal
🖨️ Print PDF 📌 Save pinSavoury Japanese Osaka-style okonomiyaki: this delicious cabbage pancake is fried until golden brown, seasoned with a spicy sauce and creamy mayonnaise, and finished with classic toppings. A simple basic recipe that can be adapted to suit your taste.
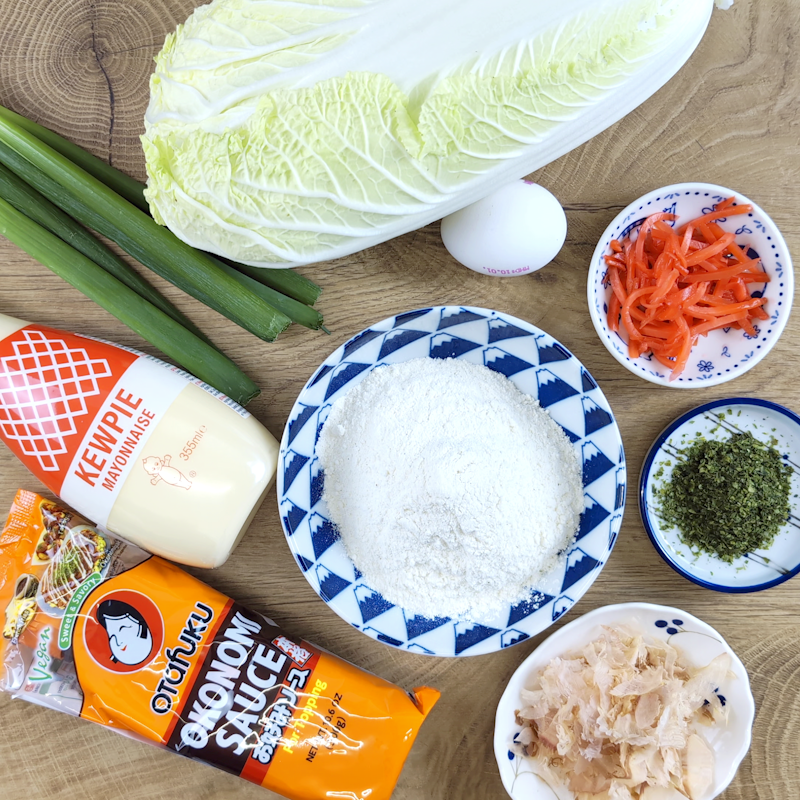
Ingredients (2 servings)
Batter:
100 g Okonomiyaki flour (Okonomiyakiko) (im Shop ansehen)*
100 ml water
1 egg
300 g Chinese cabbage (also pointed or white cabbage)
3 spring onions
8 tbsp oil (e.g. rapeseed oil)
Sauces & Toppings (to taste):
Okonomiyaki sauce (Okonomi sauce) (im Shop ansehen)*
Mayonnaise (preferably Japanese mayonnaise) (im Shop ansehen)*
Aonori (seaweed) (im Shop ansehen)*
Katsuobushi (bonito flakes) (im Shop ansehen)*
Beni Shoga (pickled red ginger) (im Shop ansehen)*
Preparation (30 minutes)
Step 1
To begin with, please have your ingredients for the homemade Okonomiyaki ready.

Step 2
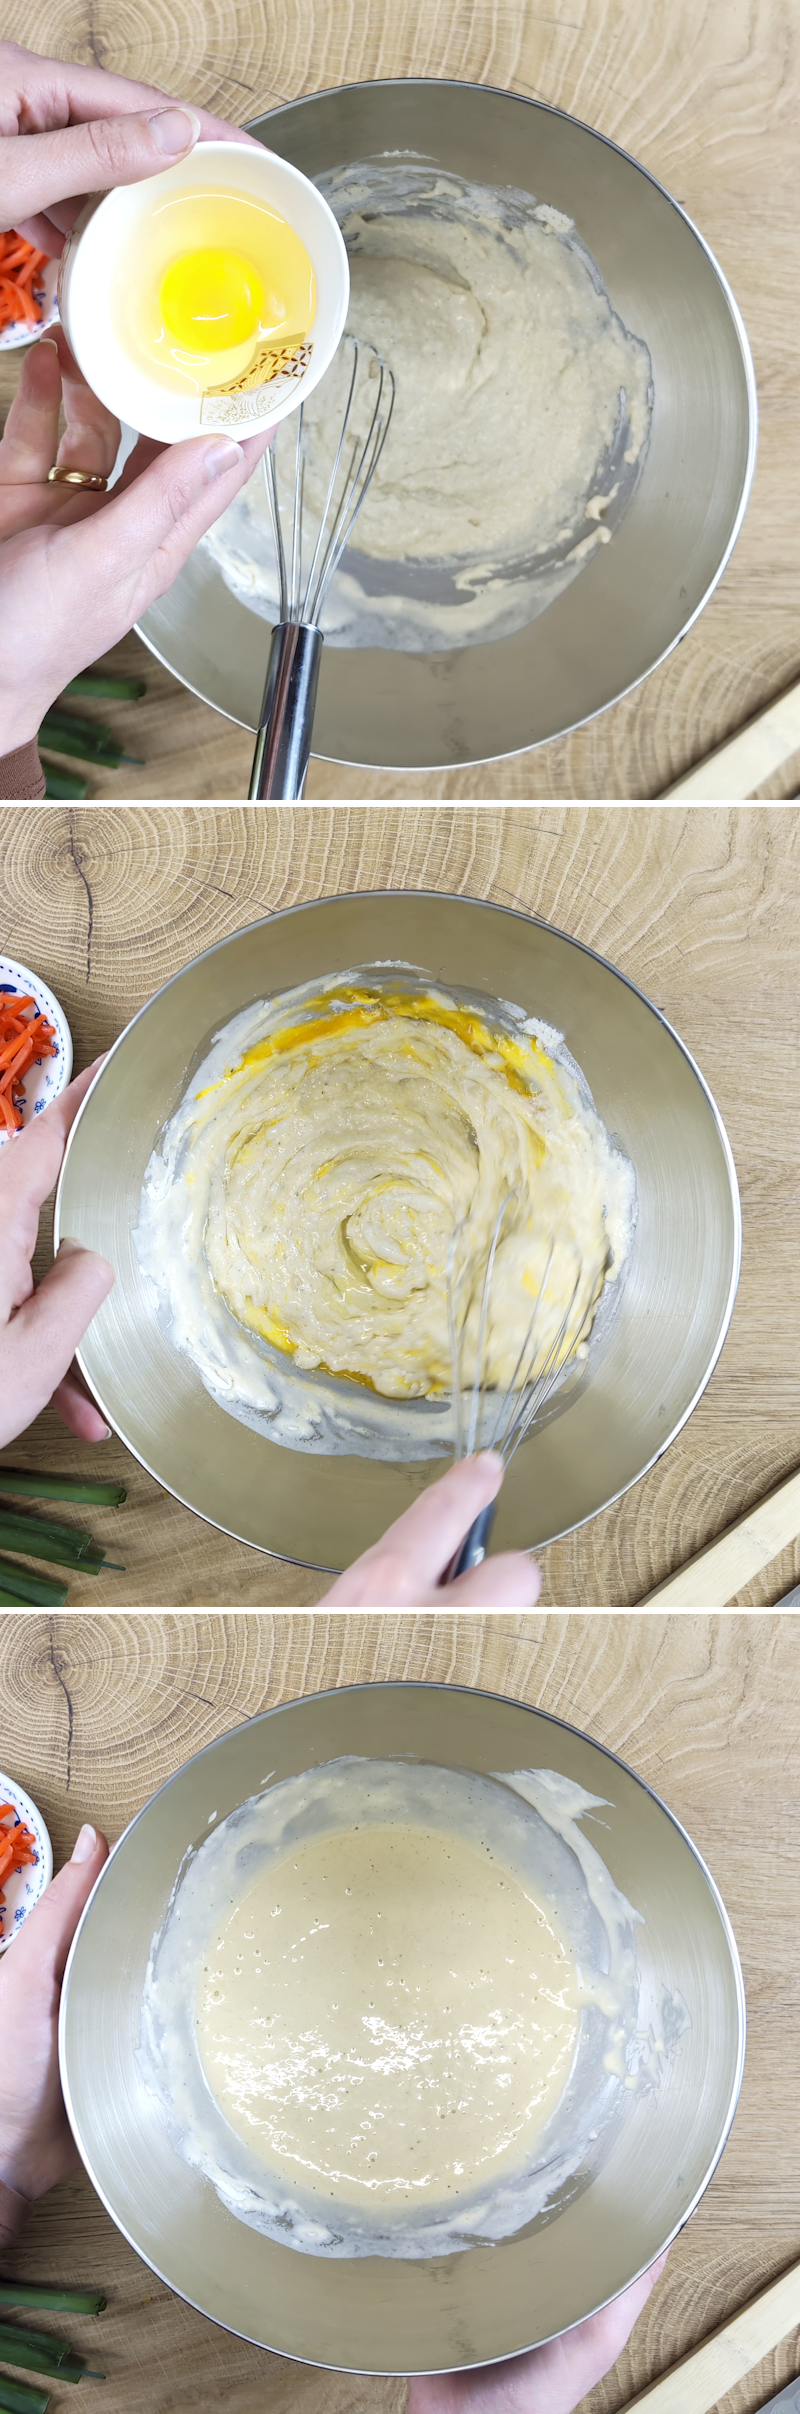
Put 100 g of Okonomiyaki flour into a bowl and mix it with 100 ml of water until there are no lumps left.
Passaggio 3
Then beat in 1 egg and stir everything into a smooth, slightly thick batter.
Step 4
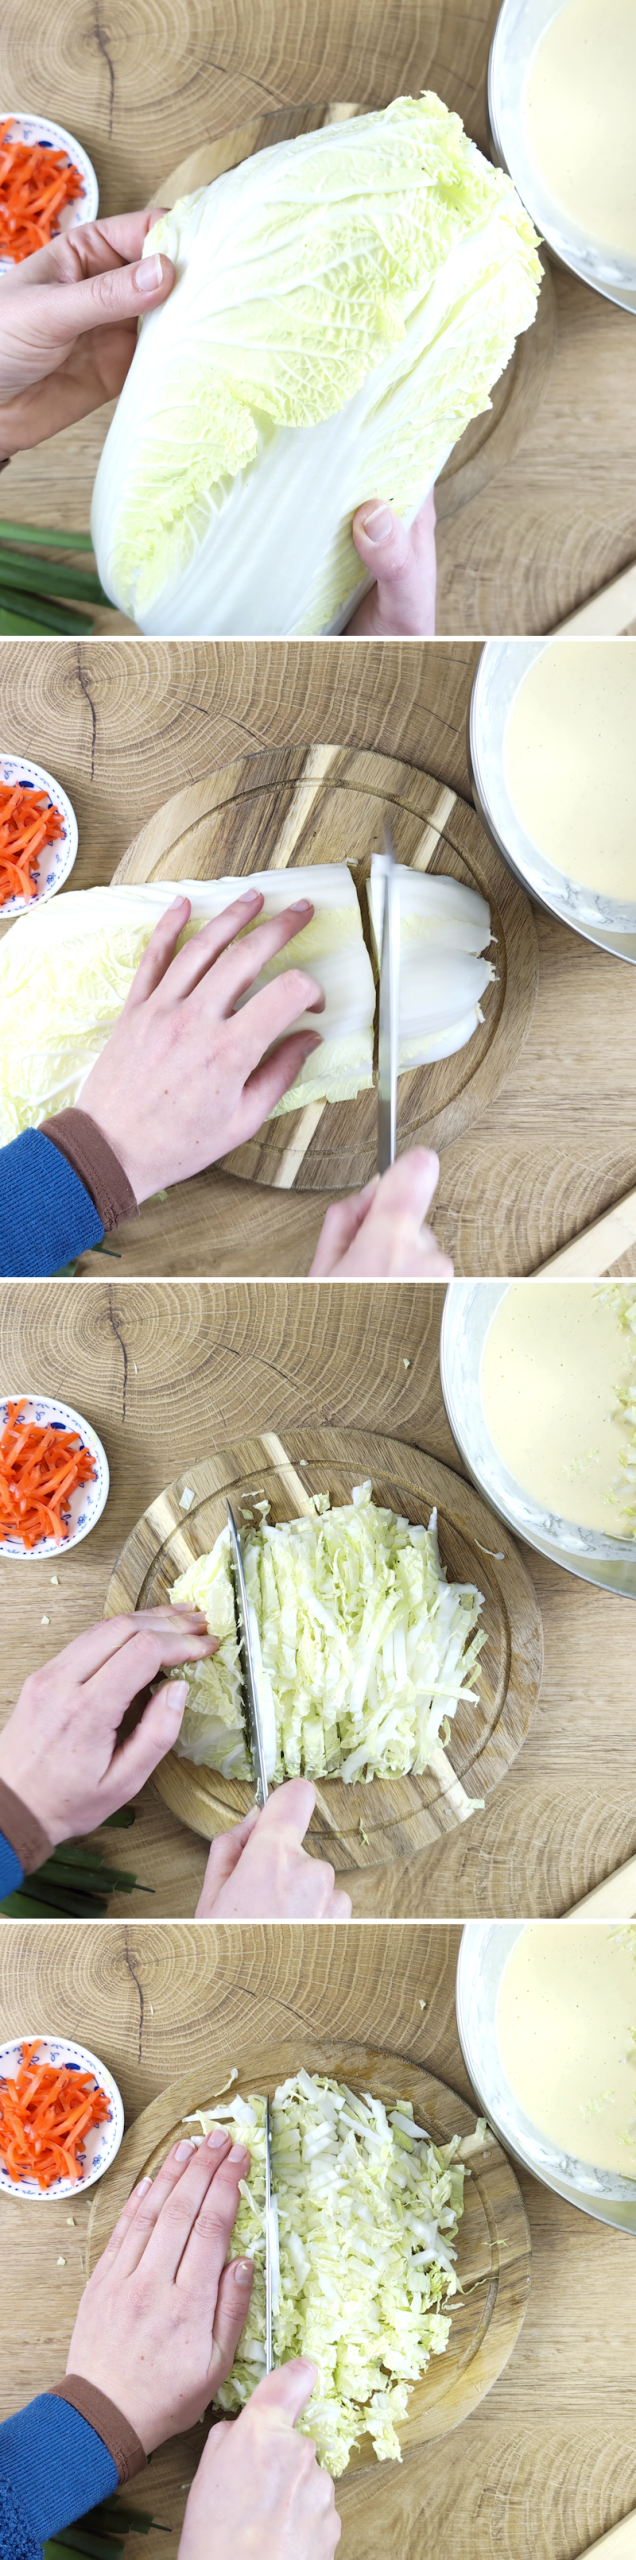
Separate the cabbage leaves, weigh out 300 g of Chinese cabbage and cut it first lengthways, then crossways into small cubes of about 5 × 5 mm. Cutting it finely ensures that the pancake holds together well later on. Add the cabbage to the batter.
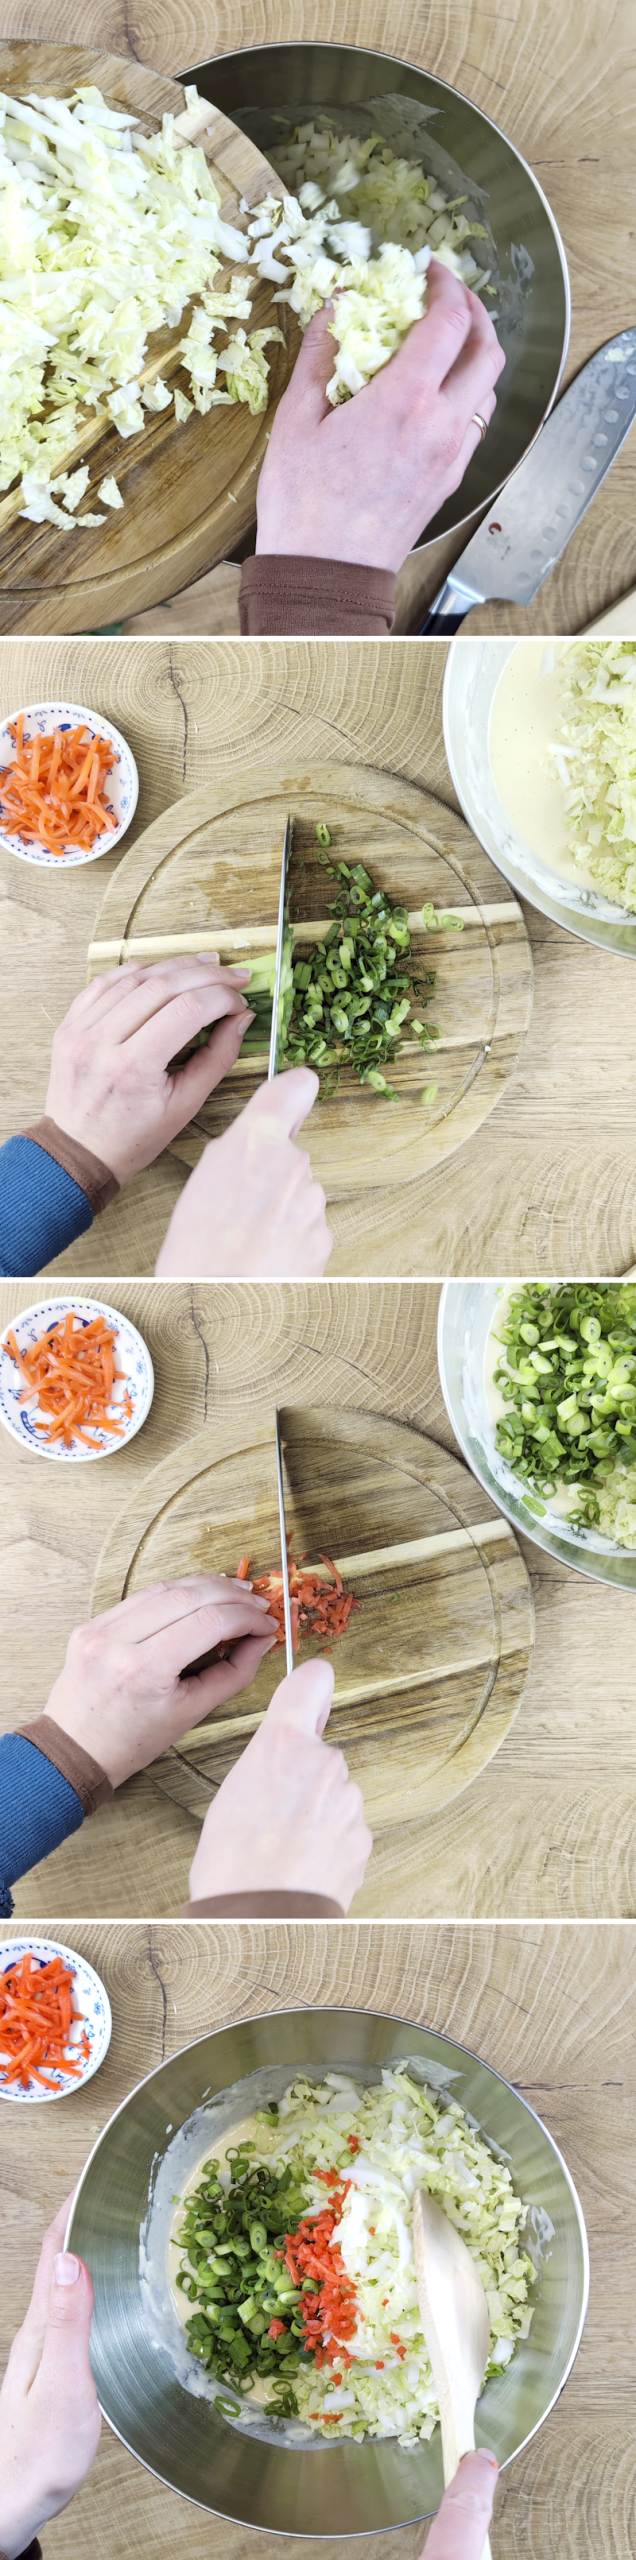
Step 5
Wash the 3 spring onions, remove the roots and slice them into fine rings.
Finely chop the Beni Shoga.
Step 6
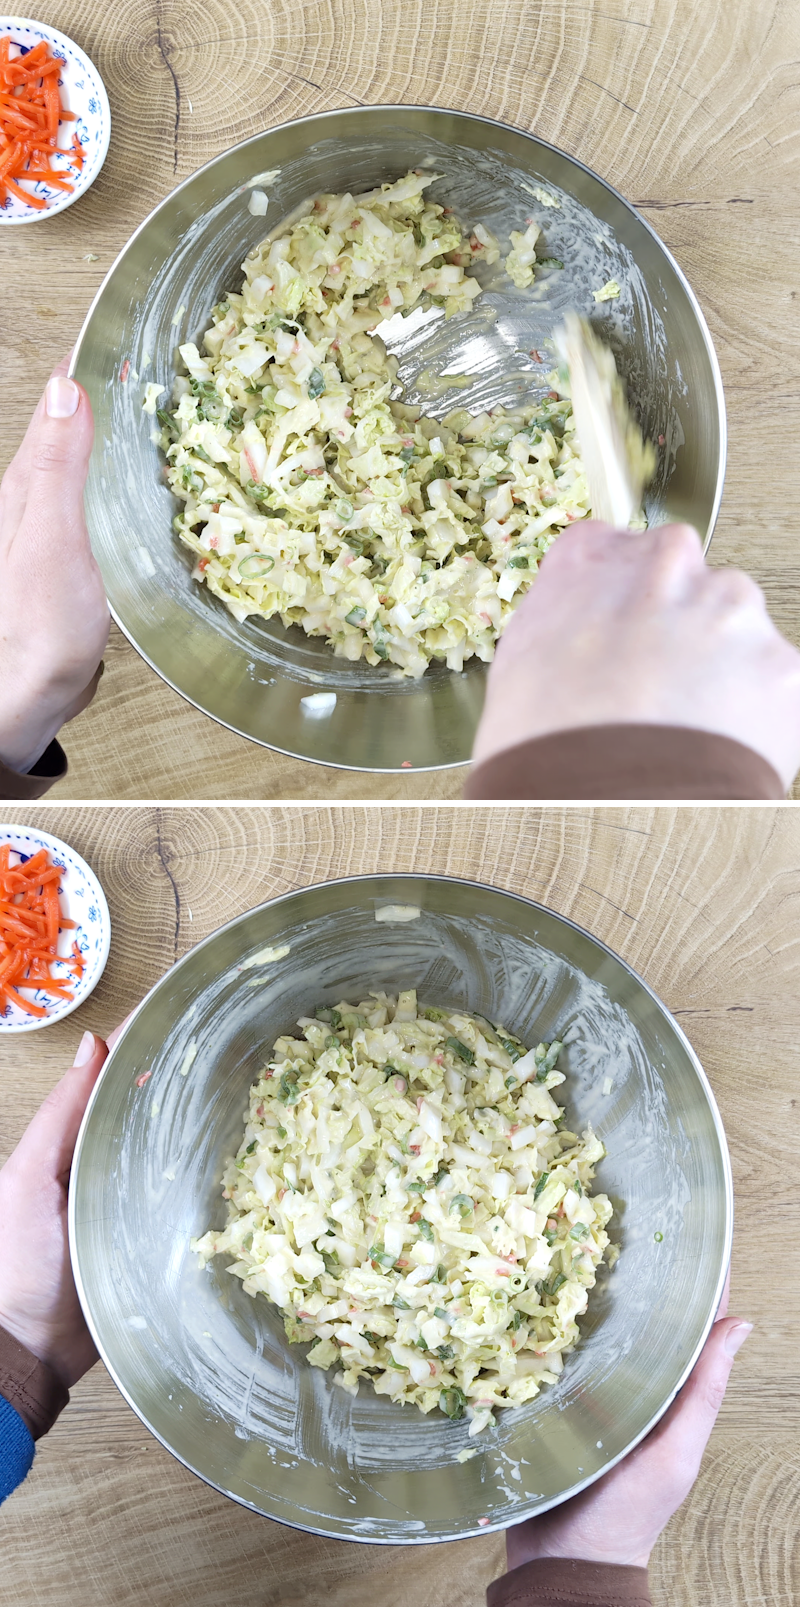
Now add the spring onions and Beni Shoga to the batter and mix everything thoroughly until the cabbage is evenly distributed.
Step 7
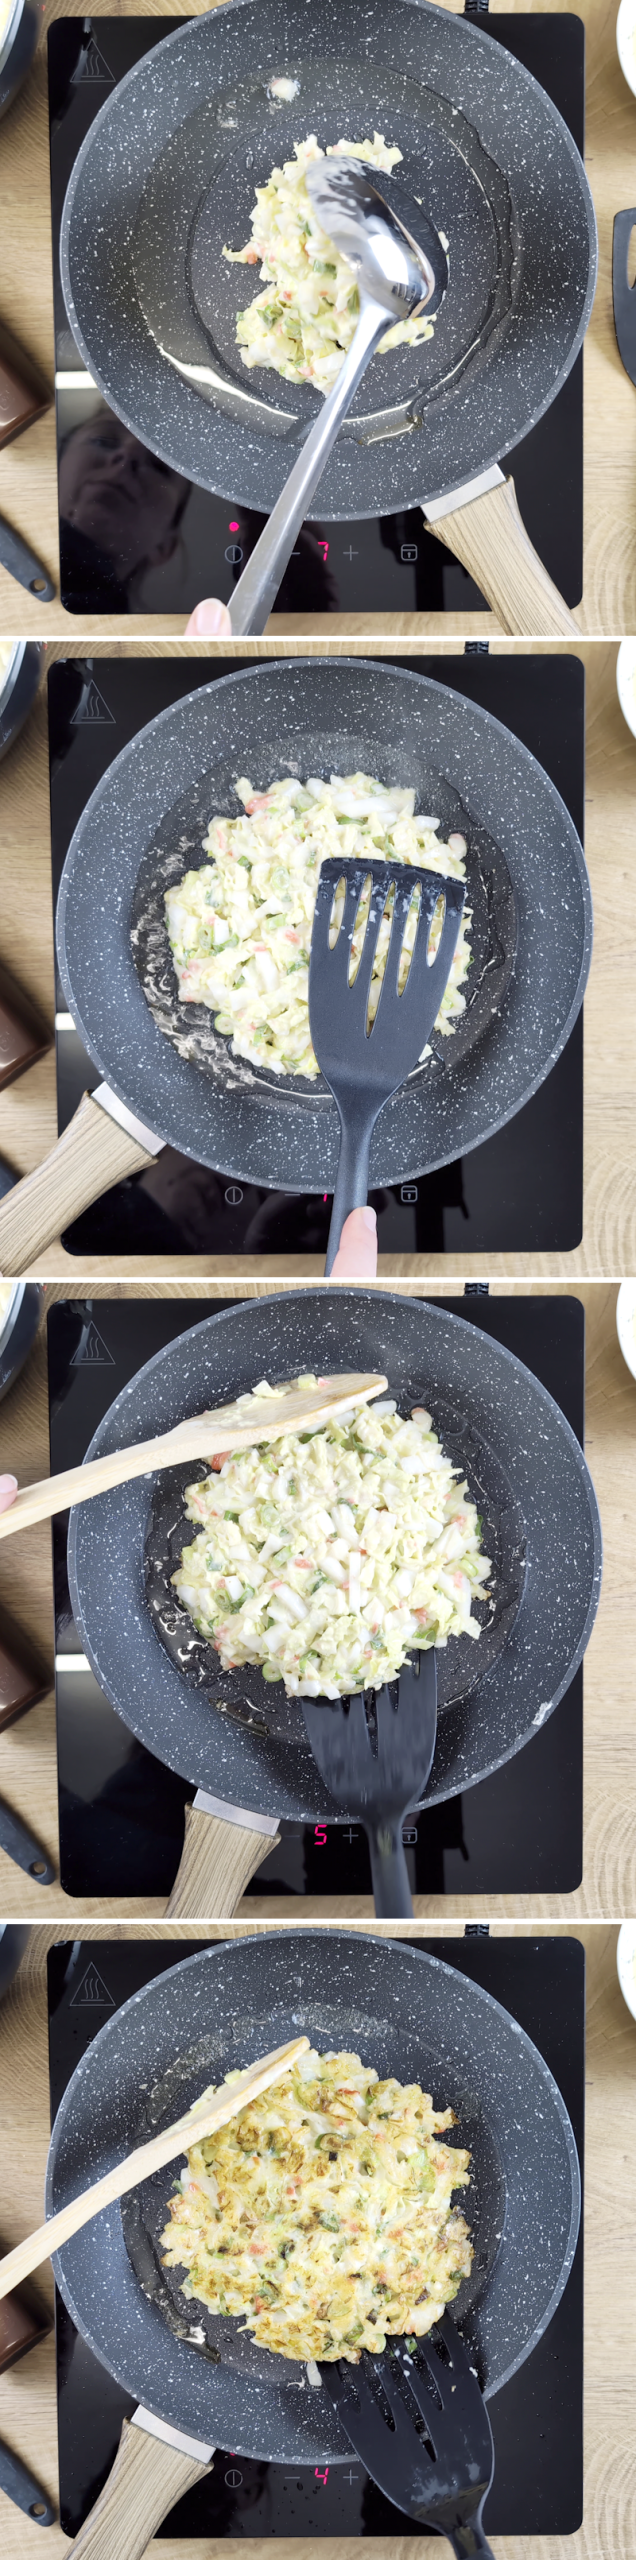
Heat a frying pan to around 200 °C and add 4 tbsp oil.
Then pour half the batter into the pan and shape it into a round, flat cake about 2 cm high.
Let this fry for 4 minutes until the underside is golden brown.
Step 8
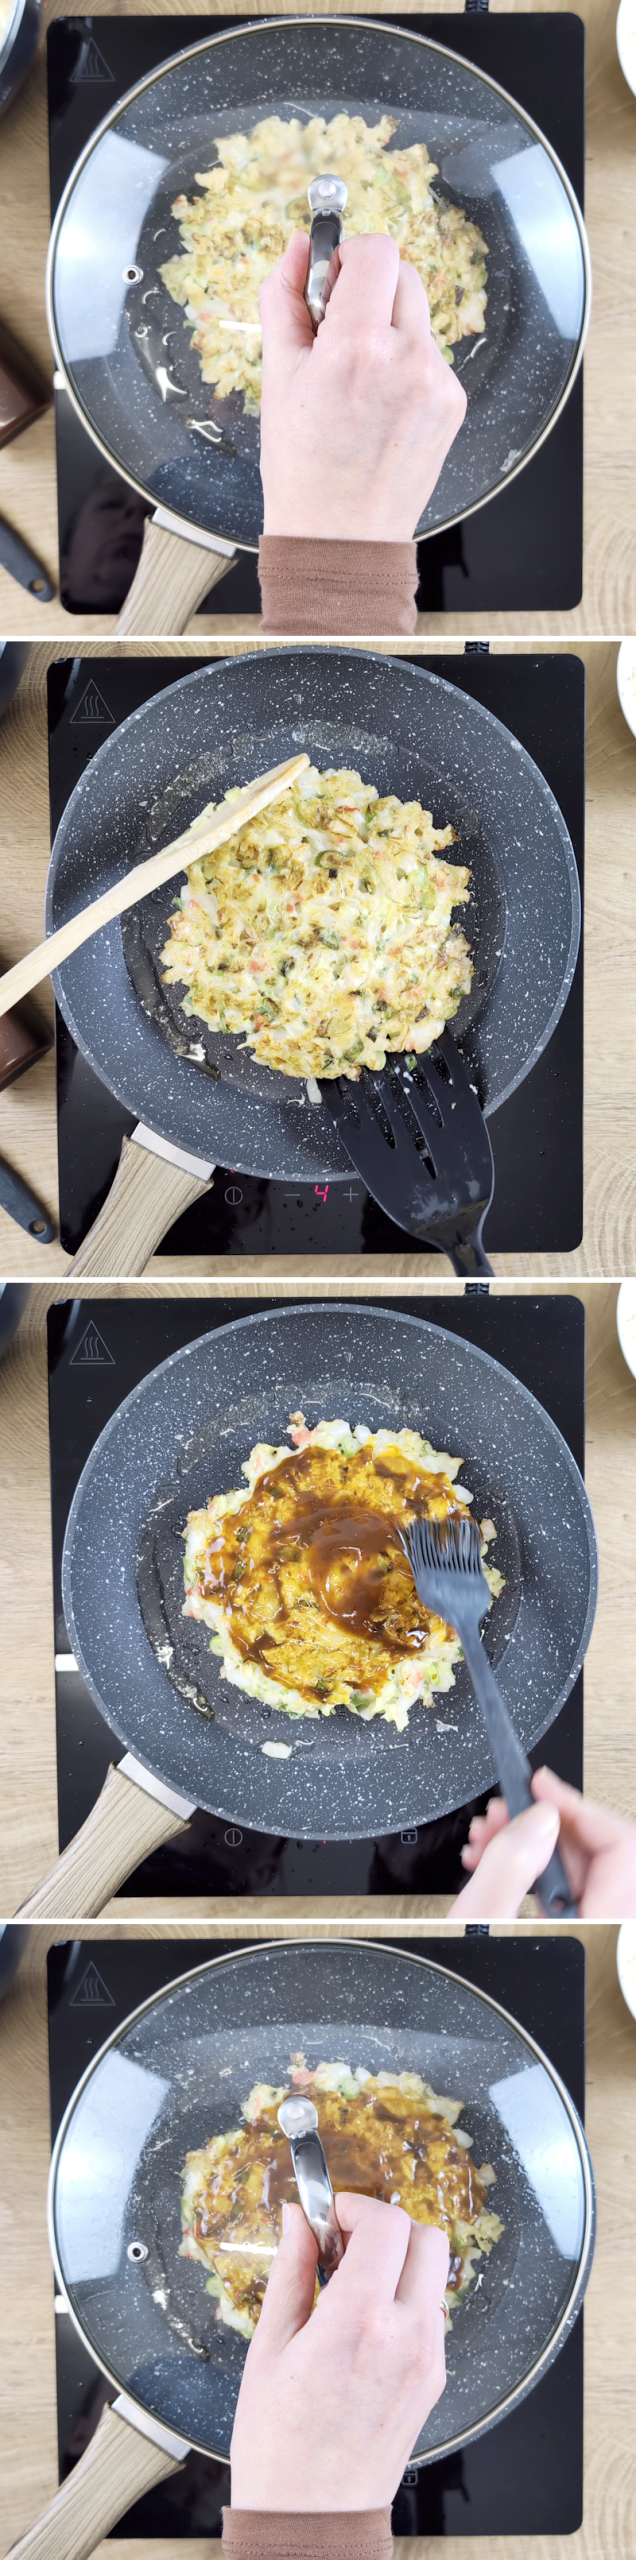
Carefully flip the Okonomiyaki and leave it to cook for a further 4 minutes with the lid on so that the cabbage inside softens.
Now flip the pancake again, brush the surface generously with Okonomiyaki sauce and leave it to cook for 1 minute with the lid on.
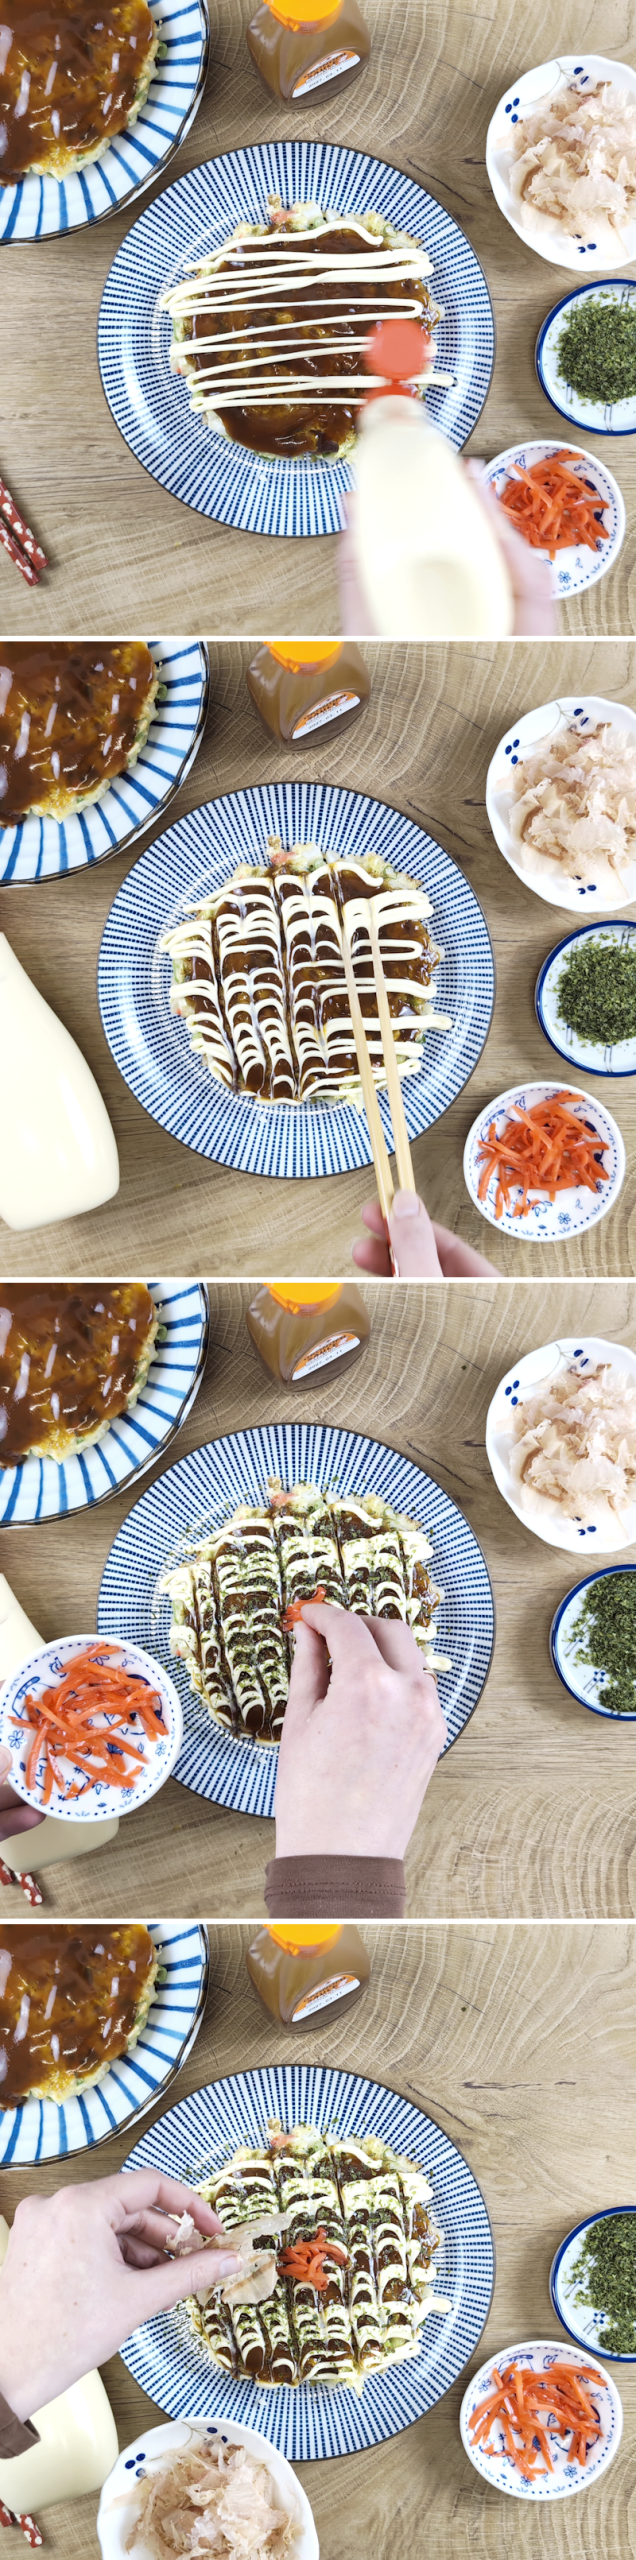
Step 9
Remove the Okonomiyaki from the pan, decorate it with Japanese mayonnaise in a zigzag pattern (you can also draw vertical lines with chopsticks) and sprinkle it with Aonori, Katsuobushi and a little beni shoga.
Prepare the second Okonomiyaki in exactly the same way.
Step 10
It’s best to serve it straight from the pan whilst it’s still hot. Itadakimasu!
Fancy some more delicious inspiration from Japan?

Tamago Kake Gohan: Japanese breakfast rice with egg, Furikake & Katsuobushi | TKG
In this recipe, I’ll show you a particularly flavourful version of Tamago Kake Gohan (TKG)…
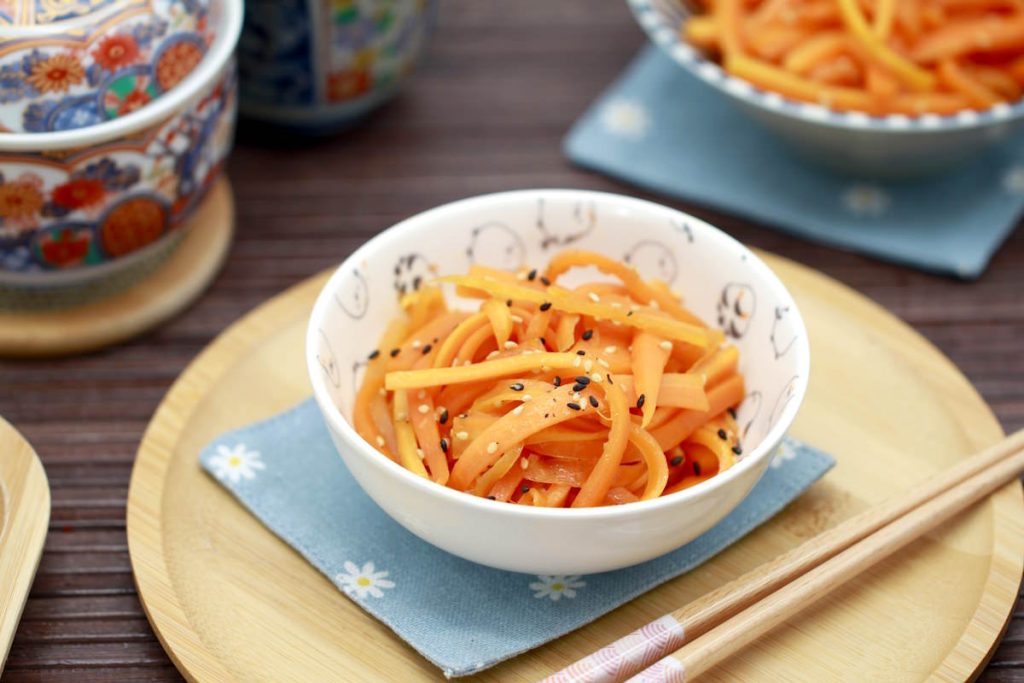
Make your own Ninjin no Kinpira: Japanese carrot side dish in the Kinpira style
Ninjin no Kinpira is a simple Japanese side dish made from finely sliced carrots that…

Nasu Dengaku: Oven-baked aubergines glazed with Miso – simple & irresistible
Nasu Dengaku is a true classic of Japanese cuisine and perfect as a side dish…
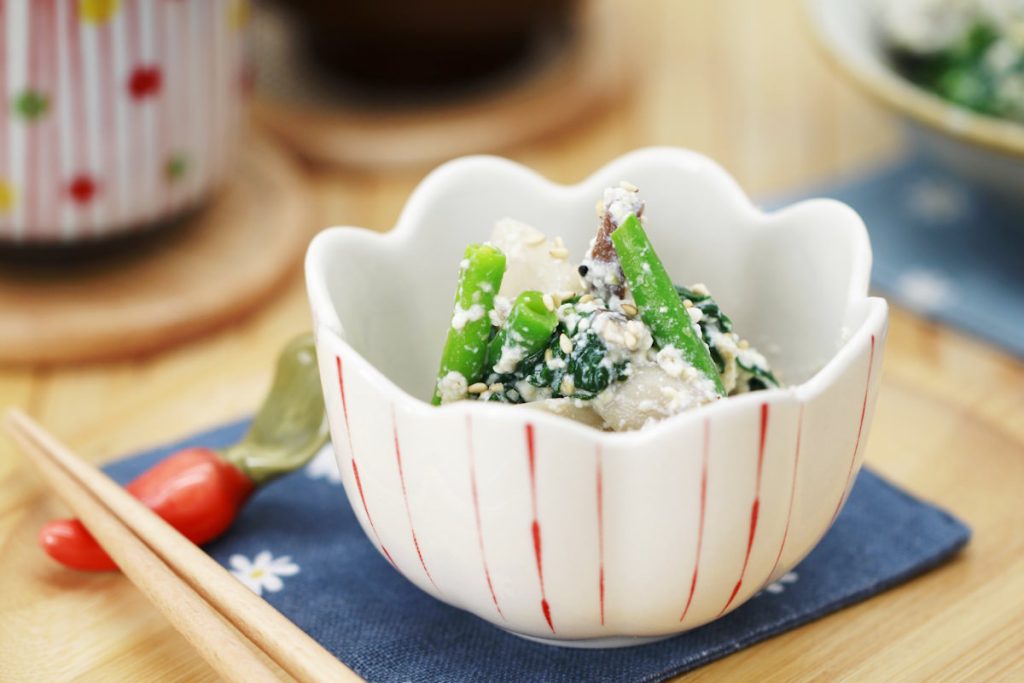
Mushroom and spinach salad with sesame and Tofu dressing: Recipe for Yasai no Shira ae
Mushroom and spinach salad with sesame and Tofu dressing, also known as Yasai no Shira…
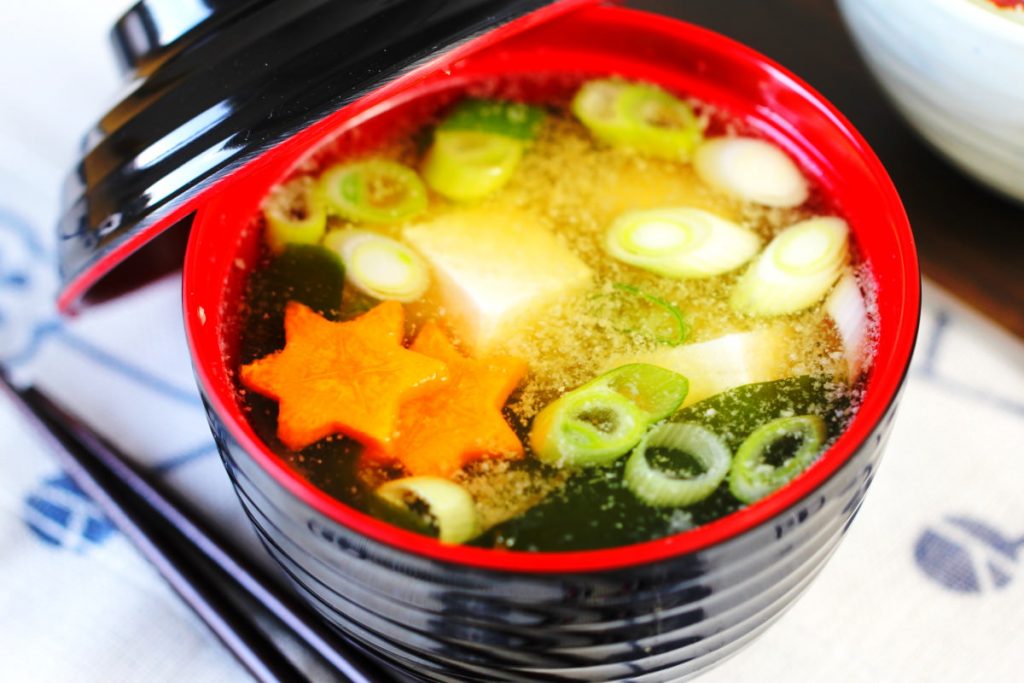
Misoshiru in a flash: basic recipe for miso soup with Wakame & Tofu
Miso soup is much more than just a side dish in Japan – it’s a…

Make your own Japanese potato salad: fresh, creamy and irresistible!
If you’re looking for a delicious side dish that’s both familiar and excitingly new, then…
Have you tried the recipe yet? Let me know in the comments – I can’t wait to hear from you.