

Language:


Onigiri with tuna mayonnaise is one of the most popular fillings for Japanese rice balls. It’s not only delicious, but also super quick and easy to make. This recipe is perfect for a light lunch, a tasty Bento or a quick snack between meals.
For this recipe, you only need a few ingredients and a couple of quick steps. So let’s get started – today I’ll show you everything you need to know to make the very best tuna and mayonnaise rice balls yourself.
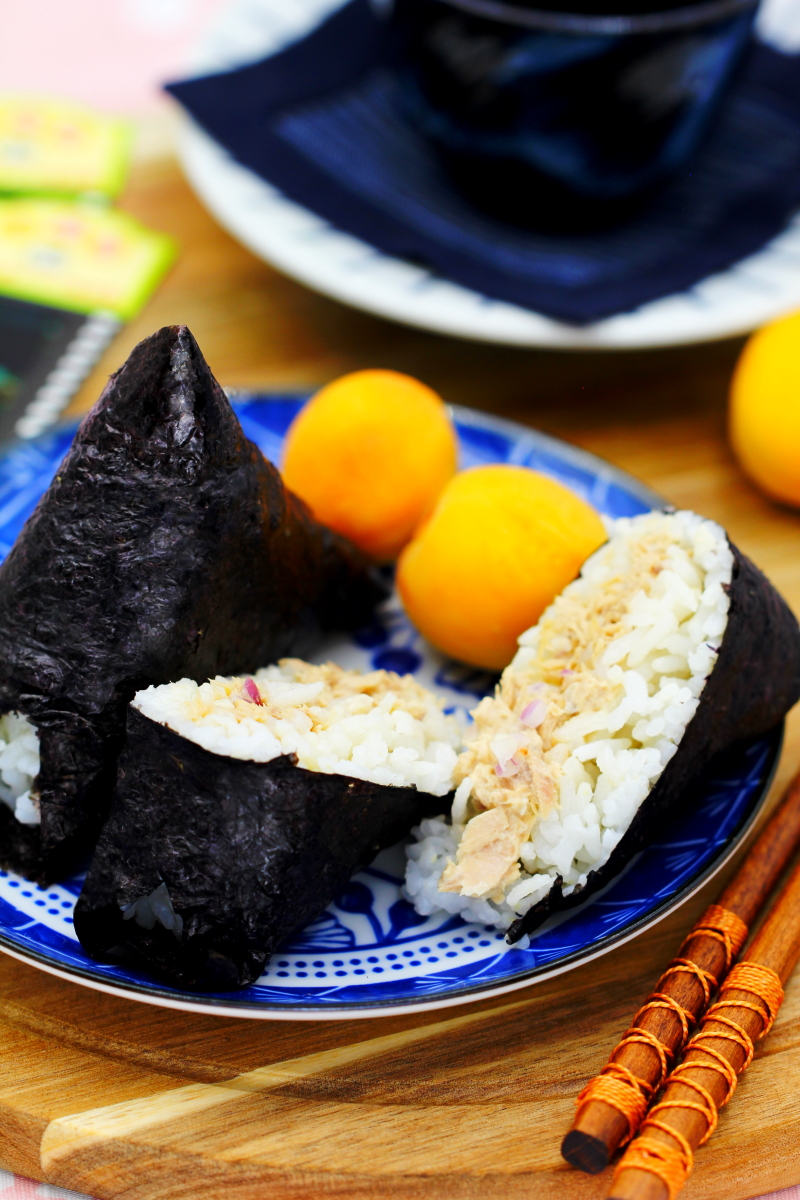
You might have guessed it already: Tuna and mayonnaise Onigiri is a modern take on traditional Japanese rice balls. These delicious rice triangles are filled in no time at all with tinned tuna, seasoned with mayonnaise and soya sauce in the Japanese style.
Why should you choose this recipe? Quite simply, because it’s super quick to make and requires just a few ingredients. What’s more, it’s the most popular Onigiri filling in Japan!
The combination of tuna and mayonnaise was first offered in the early 1980s by the Japanese convenience store chain 7-Eleven. In fact, over the last 40 years, this variety has become the most popular Onigiri flavour in Japan!
TOP RECOMMENDATION
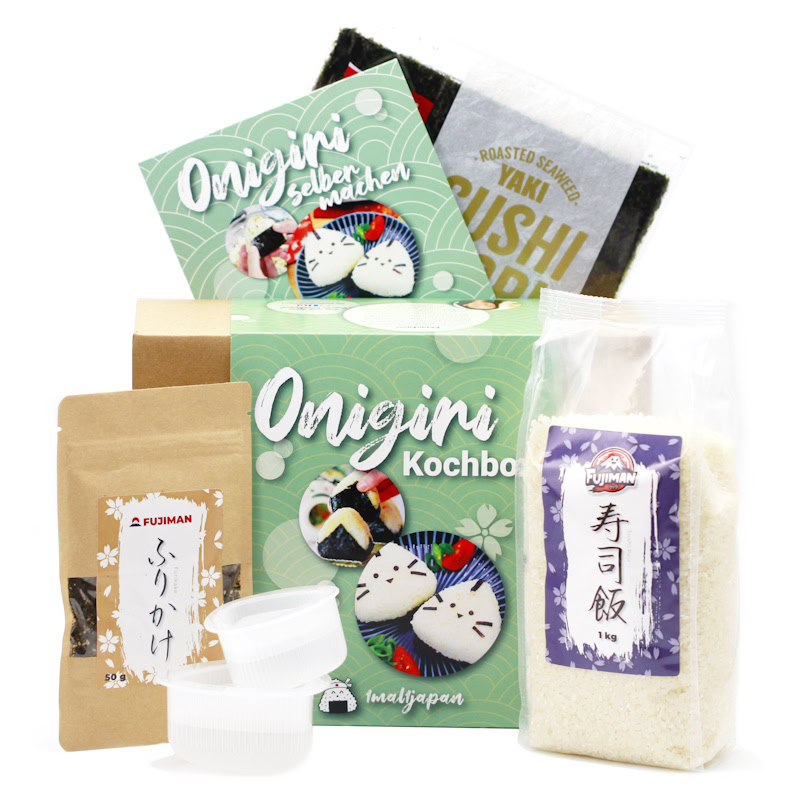
Onigiri Kochbox | Reisbällchen selber machen
5-tlg. DIY Set, inkl. 3 Rezeptideen für japanische Reisdreiecke | vegan, Geschenkidee für Anime Fan. Mit dem Onigiri Kochset gelingen dir japanische Reisdreiecke ganz einfach…
In stock
The key ingredients for these Onigiri are:
Rice: For really good Onigiri, you’ll need Japanese short-grain rice, also known as Sushi rice (im Shop ansehen).
Tuna: Any tinned tuna is suitable for this recipe, but I like to use tuna in its own juice.
Mayonnaise: The key to giving this onigiri filling that authentic Japanese flavour is using Japanese mayonnaise. Kewpie mayonnaise (im Shop ansehen) is best, but of course other brands work too!
Shoyu: By using Shoyu (im Shop ansehen), you not only add a good dose of Umami to the filling but also season the white rice at the same time.
Nori seaweed sheets: The mild, slightly savoury flavour and the crispy, toasted texture provide the perfect finishing touch. The rice is wrapped in the Nori sheets (im Shop ansehen) at the end.
Tip: Onigiri should hold their shape well, but at the same time they should be light and fluffy. So it’s important not to press them too tightly!
Using all these ingredients, today we’re going to conjure up some heavenly delicious rice triangles, just like in Japan, with an aromatic filling. I’ll show you exactly how it’s done now! Have fun and good luck making the Onigiri with tuna and mayo filling!
Onigiri with tuna and mayo
Serves 6 | 30 minutes | 212 kcal
🖨️ Print PDF 📌 Save pinOnigiri with tuna and mayonnaise is one of the most popular fillings for Japanese rice balls. It’s not only delicious, but also super quick and easy to make. This recipe is perfect for a light lunch, a tasty Bento or a quick snack between meals. You only need a few ingredients and a couple of quick steps to make it!
Ingredients (makes 6)
600 g cooked rice (see recipe):
✔ 300 g loose rice (im Shop ansehen)*
✔ 300 ml water (fresh, cold tap water)
✔ 1 pinch salt
For the filling:
80 g tinned tuna (alternatively: vegan tuna)
1 small red onion
1 tbsp soya sauce (im Shop ansehen)*
3 tbsp mayonnaise (im Shop ansehen)*
a little La-Yu sesame chilli oil (im Shop ansehen)*
3 Nori sheets (im Shop ansehen)*
Useful utensils:
Onigiri moulds – Rice mould set for rice triangles (im Shop ansehen)*
Method (30 minutes)
Step 1
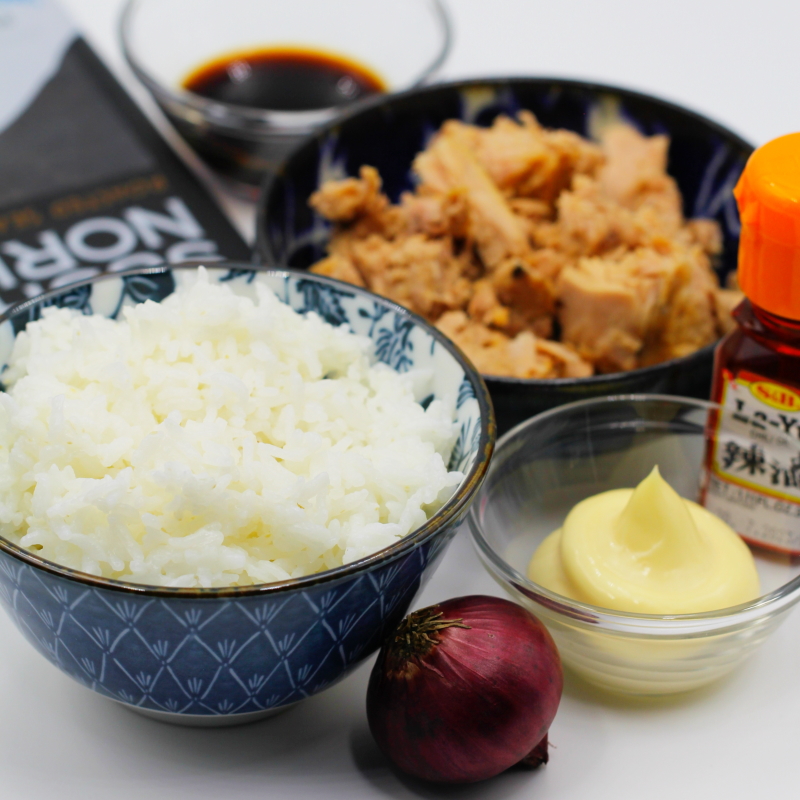
Prepare the ingredients for the Onigiri and get the rice ready (see the recipe here in a rice cooker or in a saucepan + leave to cool for 20 minutes).
Step 2
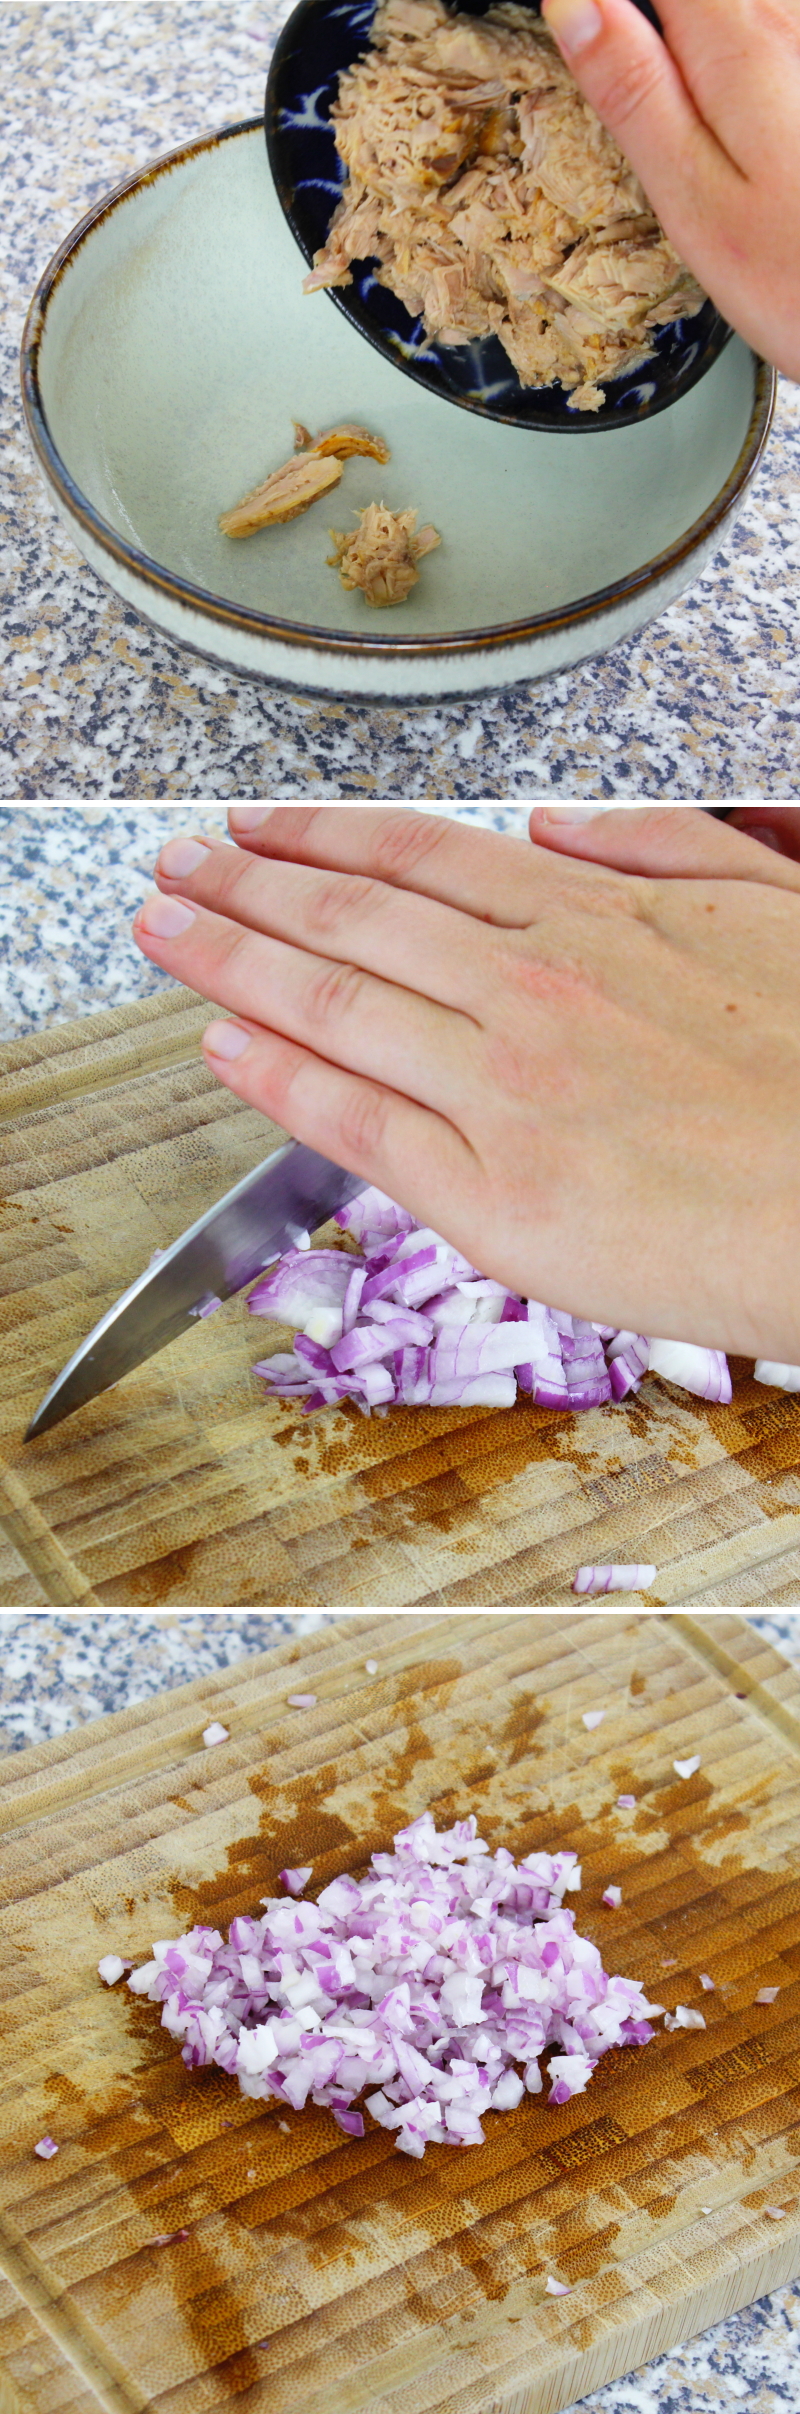
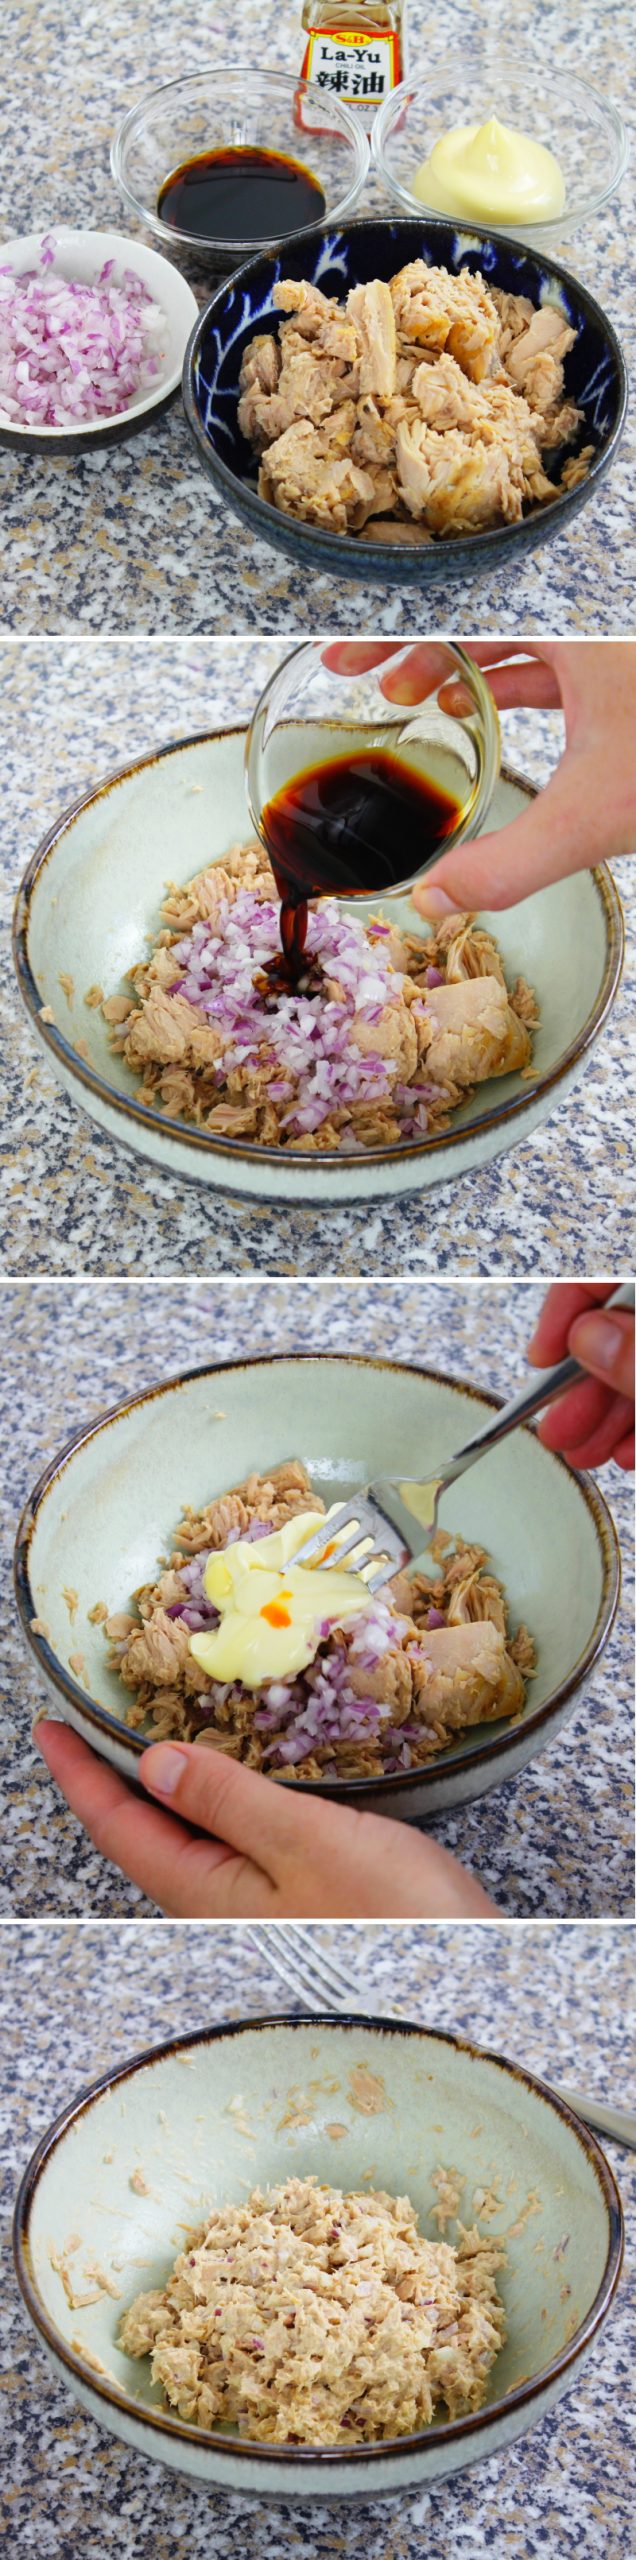
Prepare the filling for the Japanese rice balls: To do this, drain the tuna in a sieve, transfer to a bowl and use a fork to break up any large pieces into small chunks.
Also, peel the red onion, cut it into small cubes and chop it very finely.
Step 3
onion, soya sauce, mayonnaise and the sesame chilli oil to the tuna. Mix everything together with a fork and gently mash into a smooth mixture.
Step 4
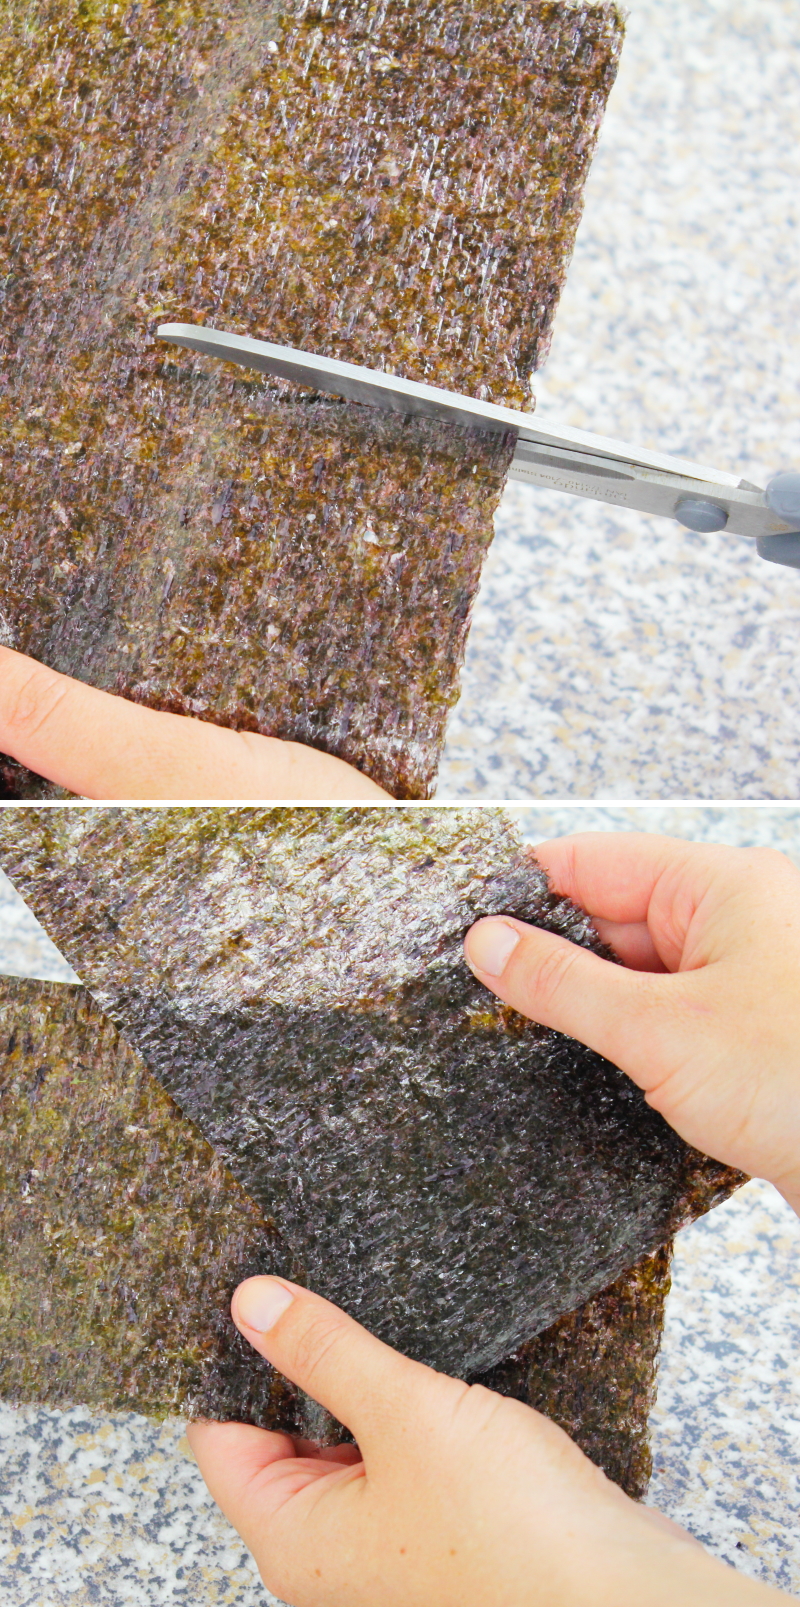
Cut each Nori sheet in half with a pair of scissors.
Step 5
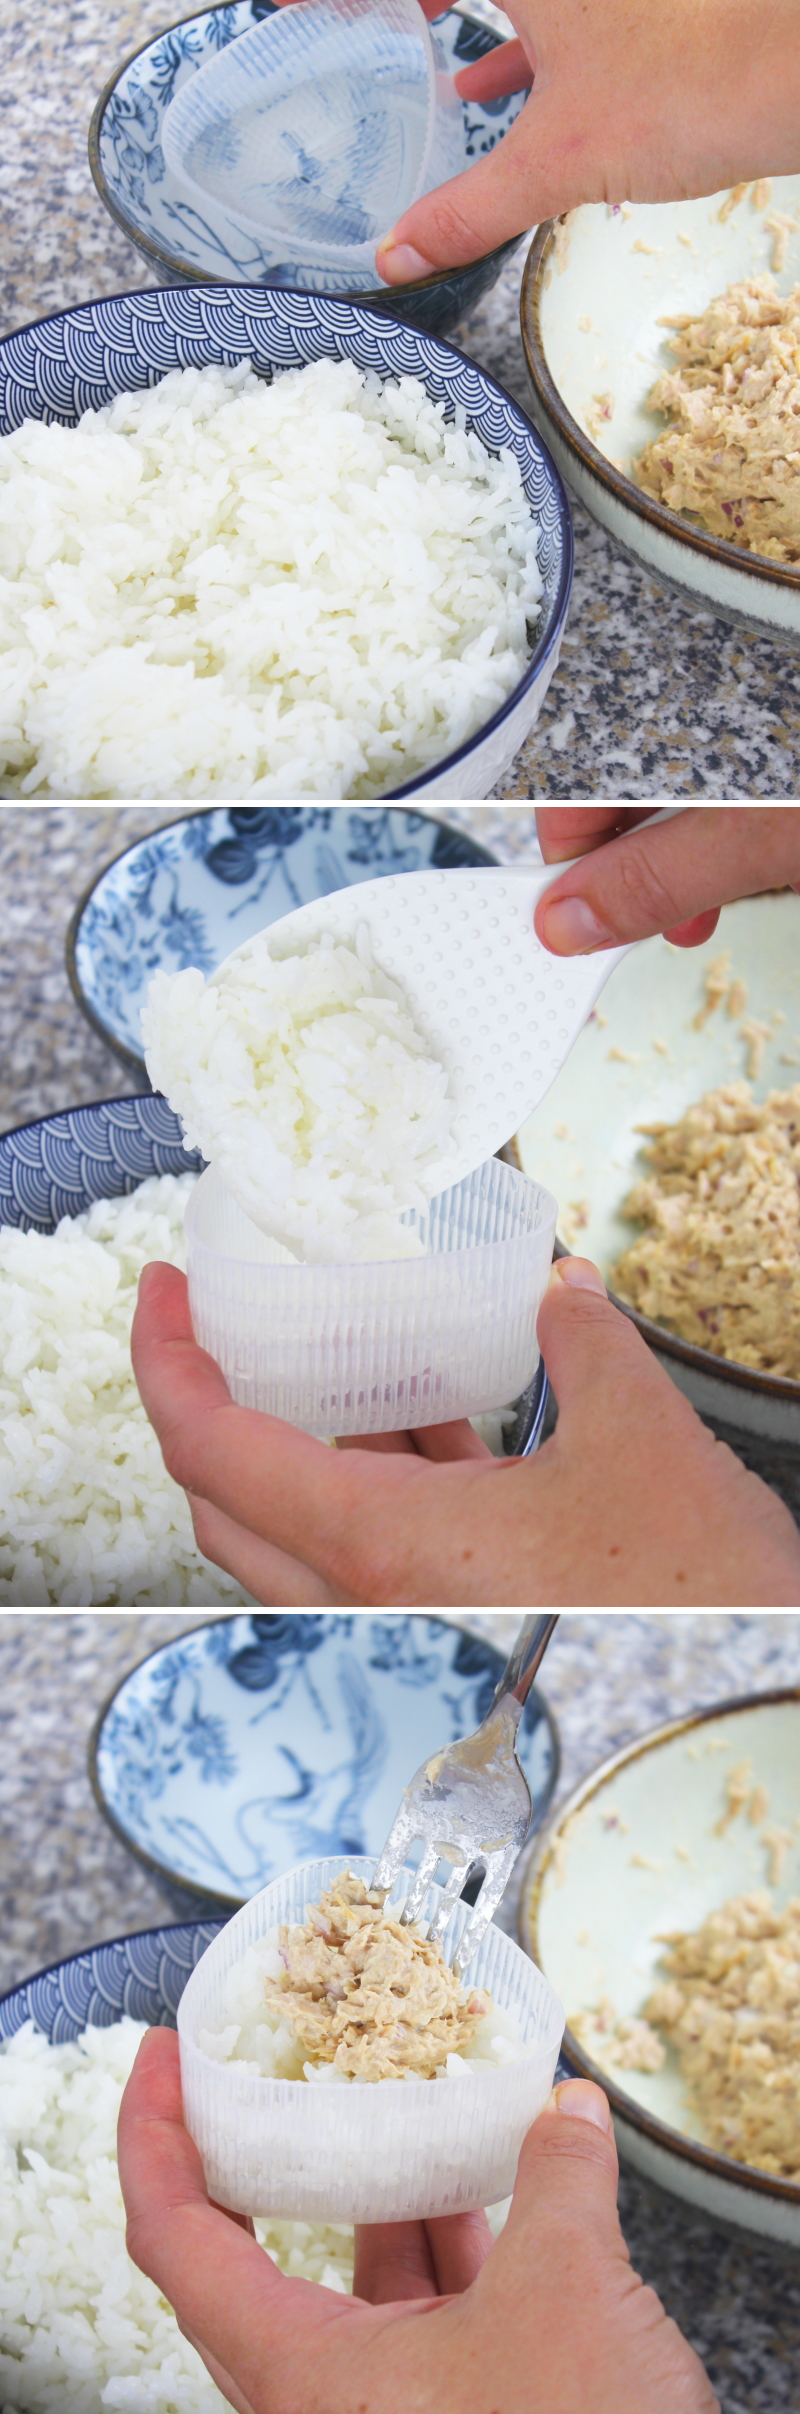
Fill a small bowl with lightly salted water and have it ready. To shape the rice balls, dip the onigiri mould (both the large and small sides) into the water and let them drain briefly.
Fill the large side of the onigiri mould halfway with about 50 g of the prepared rice and form a small hollow in the centre for the filling.
Place some of the filling into the hollow (but not too much, otherwise it will all spill out).
Step 6
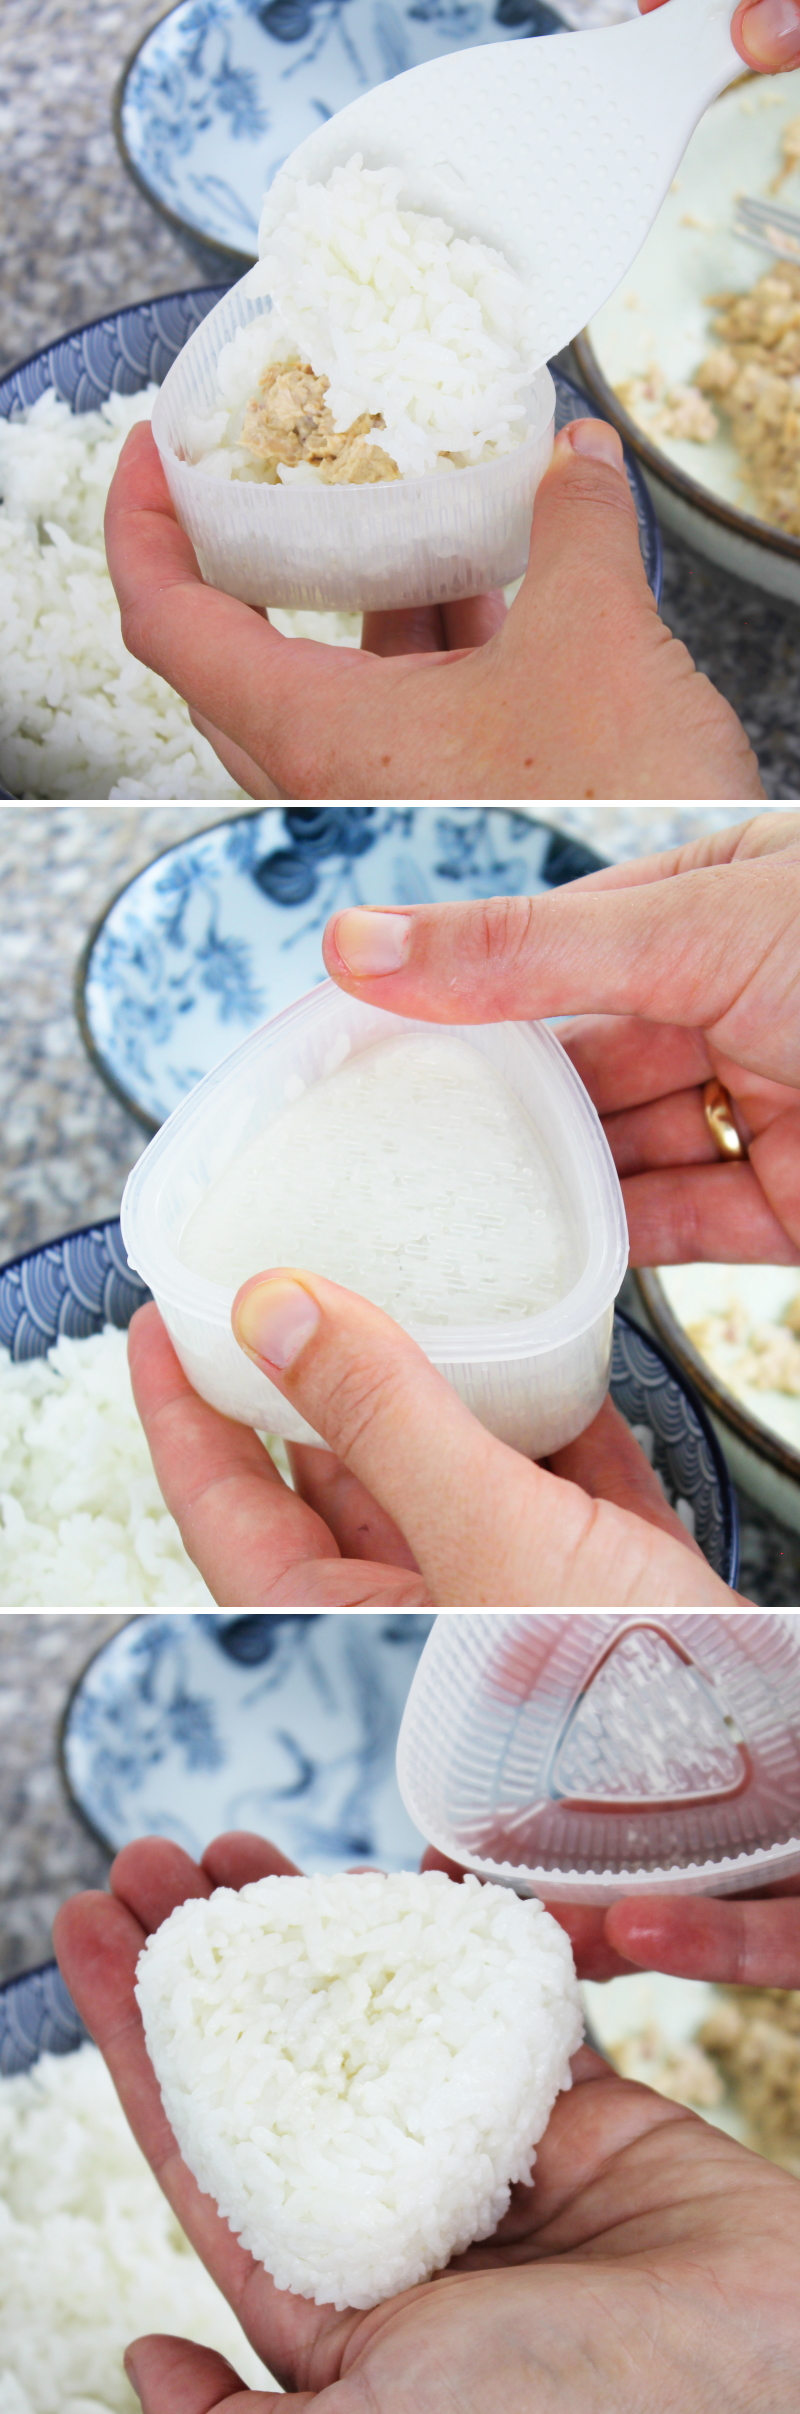
Next, fill the mould with 50 g of rice (but do not fill it beyond the rim, otherwise the rice will spill out from the sides).
Now place the lid of the onigiri mould onto the rice and press both sides together with light pressure. Open the onigiri mould by removing the lid. On the back of the long side of the mould, gently press the small triangle inwards to remove the rice triangle from the mould.
Step 7
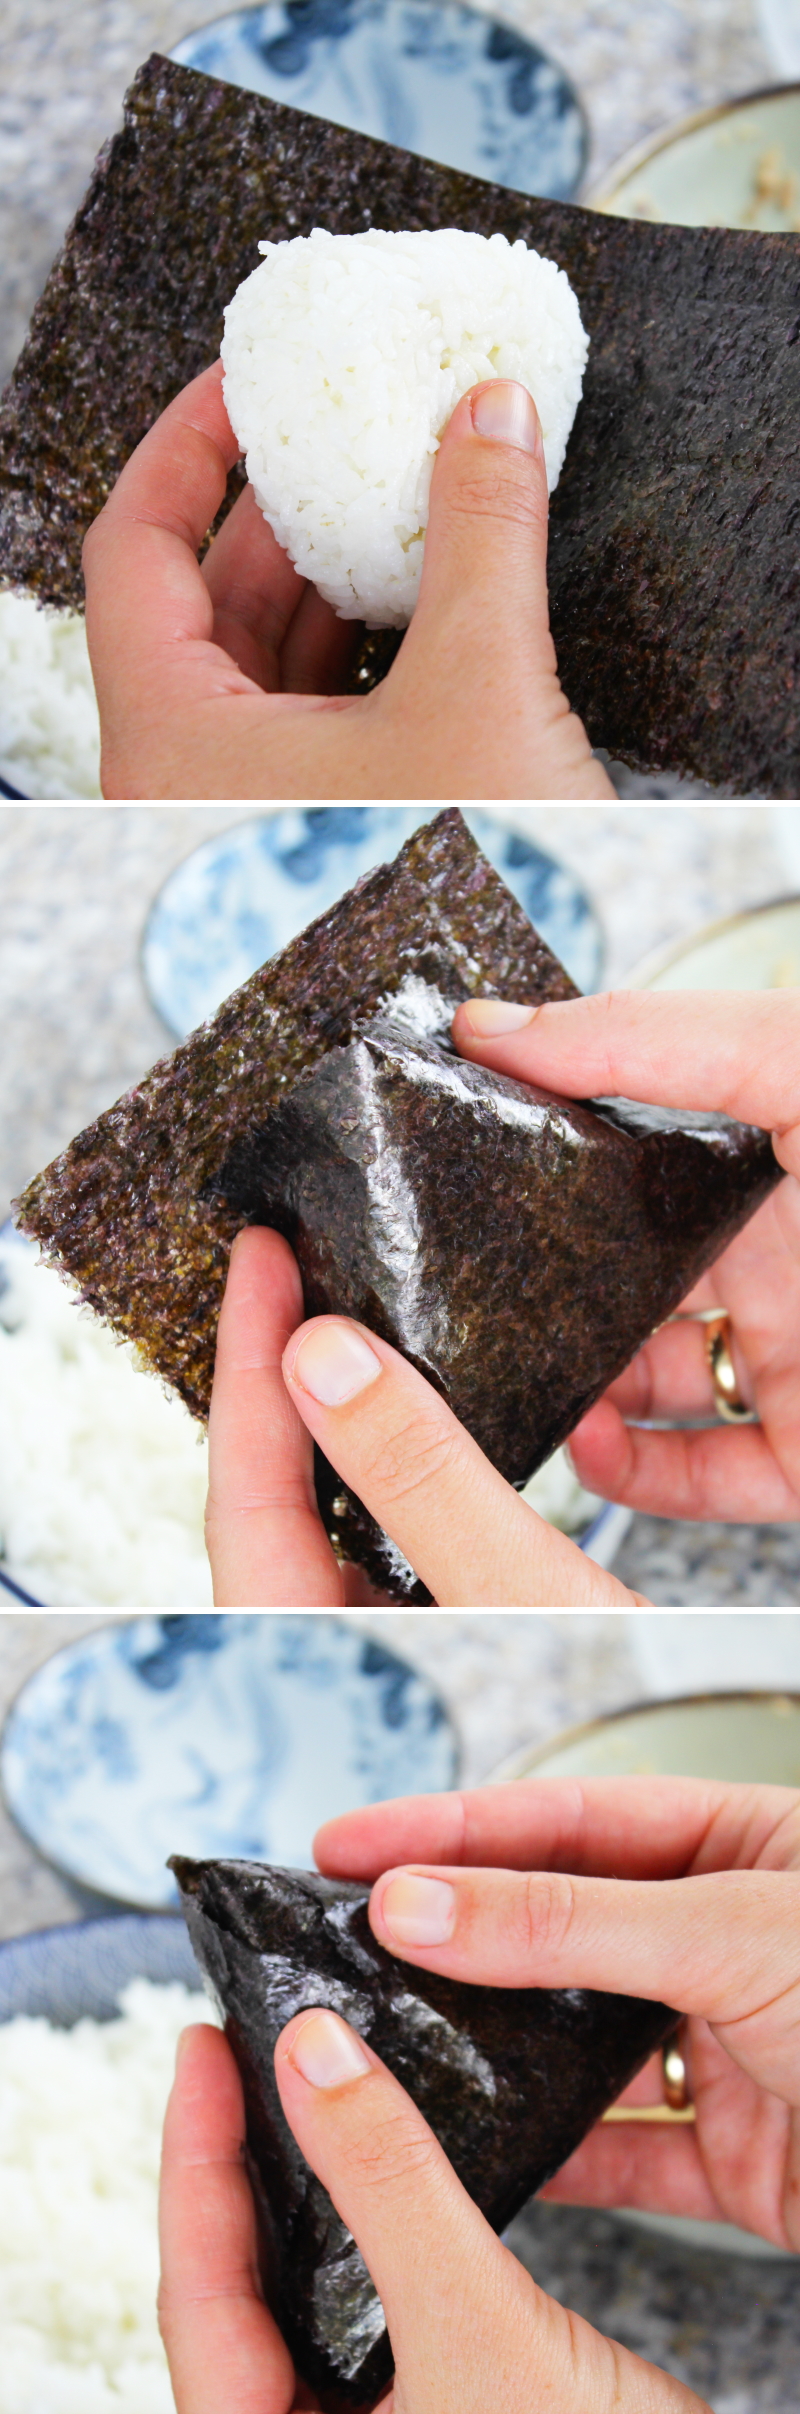
Place the rice triangle in the centre of one of the pre-cut nori sheets and wrap it completely around it.
Make 5 more Onigiri using the remaining ingredients!
Step 8
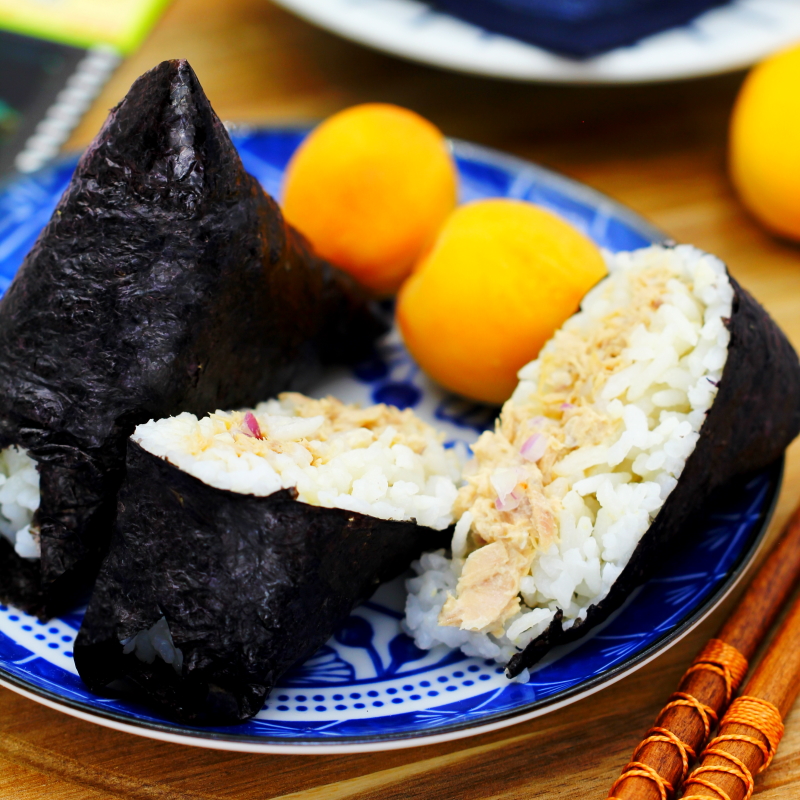
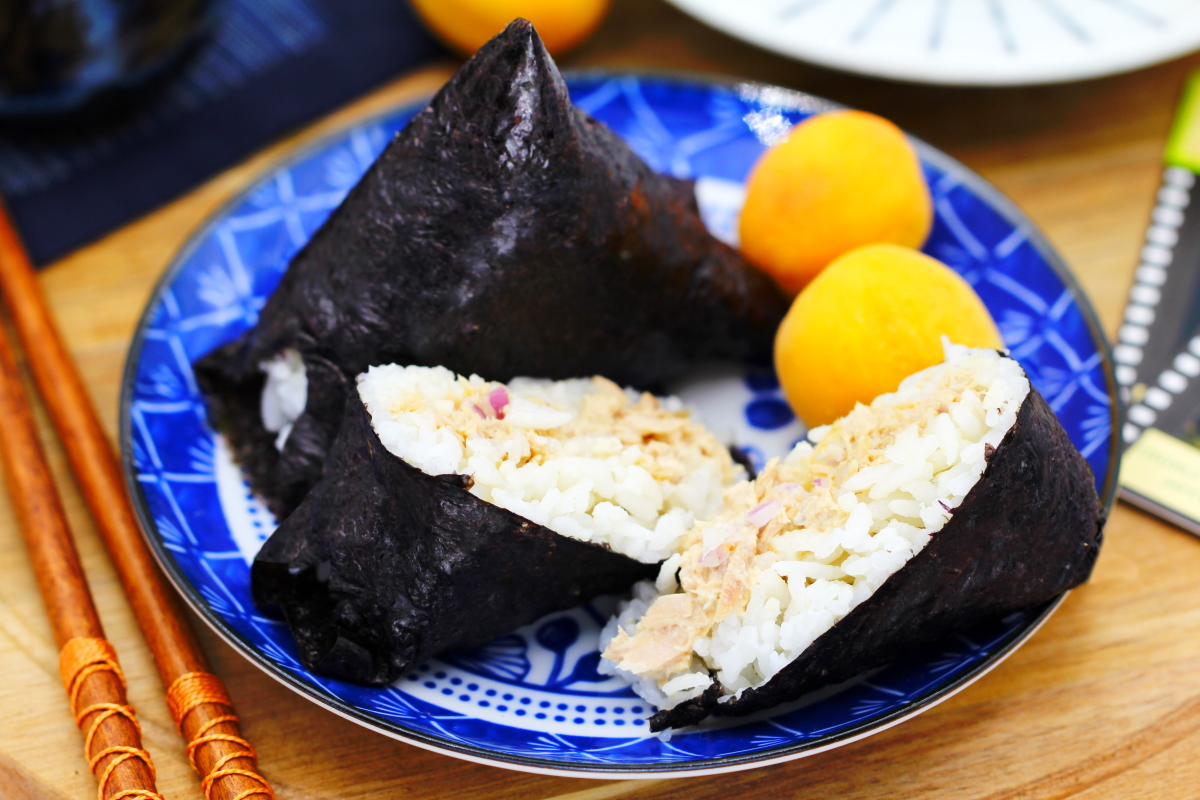
Onigiri should be eaten straight away or as soon as possible. They’re best when fresh, as the rice dries out quickly after a while and the Nori sheet becomes slightly soggy. Done – Itadakimasu!
Are you looking for even more delicious Onigiri recipe ideas from Japan? Here you’ll find my most popular guides:
No post found!
Have you tried out the recipe? Let me know in the comments – I can’t wait to hear from you!