Sprache:
Onigiri with ume are the ultimate traditional comfort food for on the go! These Japanese rice balls are made with Japanese umeboshi – spicy pickled plums. Today I’ll show you two great ways to present this Japanese treat to its best advantage. With just 4 ingredients and a few simple passages, we’ll be whipping up homemade Onigiri that every Japan fan will fall in love with!
As a true Japan fan, you’ve surely seen the brilliant series “Midnight Diner: Tokyo Stories” and enjoyed it just as much as I did 😊. Since then, I’ve been watching all the episodes every now and then; somehow the scenes always cheer me up. Do you feel the same way?
In episode 3 of the second series, the owner of the Meishiya diner prepares delicious plum rice balls for a customer. This episode is so heart-warming and always reminds me how food can not only bring people together, but also evoke memories!
Because I find this episode so lovely, I’d like to share the recipe for these plum rice balls with you today 🥰.
Onigiri Rice triangles are usually filled with a very intense filling or generously mixed with a rice seasoning, as the rice absorbs much of the flavour . If too little filling or seasoning is used, or if it is not very intense, Onigiri quickly become bland in flavour.
With the pickled ume plums used in Midnight Diner, you don’t need to worry about that. The dried and salted plums are tart, spicy and certainly take some getting used to
Umeboshi are processed Ume fruits, also known as Japanese apricots or Japanese plums. They have been produced and eaten in Japan for over a thousand years.
Incidentally, Umeboshi not only add a lot of flavour, but also keep the rice fresh!
Generally speaking, there are two types of umeboshi, made from different varieties of ume plums. The standard, larger, wrinkled pickled plum is called umeboshi, and the smaller, plump variety is called ko-ume. You can use either variety in this recipe, depending on your preference 😊.
TOP RECOMMENDATION
Onigiri Kochbox | Reisbällchen selber machen
5-tlg. DIY Set, inkl. 3 Rezeptideen für japanische Reisdreiecke | vegan, Geschenkidee für Anime Fan. Mit dem Onigiri Kochset gelingen dir japanische Reisdreiecke ganz einfach…
In stock
Apart from the umeboshi, all we need is Japanese rice, some toasted sesame seeds and, of course, Nori seaweed sheets to wrap the Onigiri. Using these ingredients, we’ll conjure up two variations of this Onigiri speciality together!
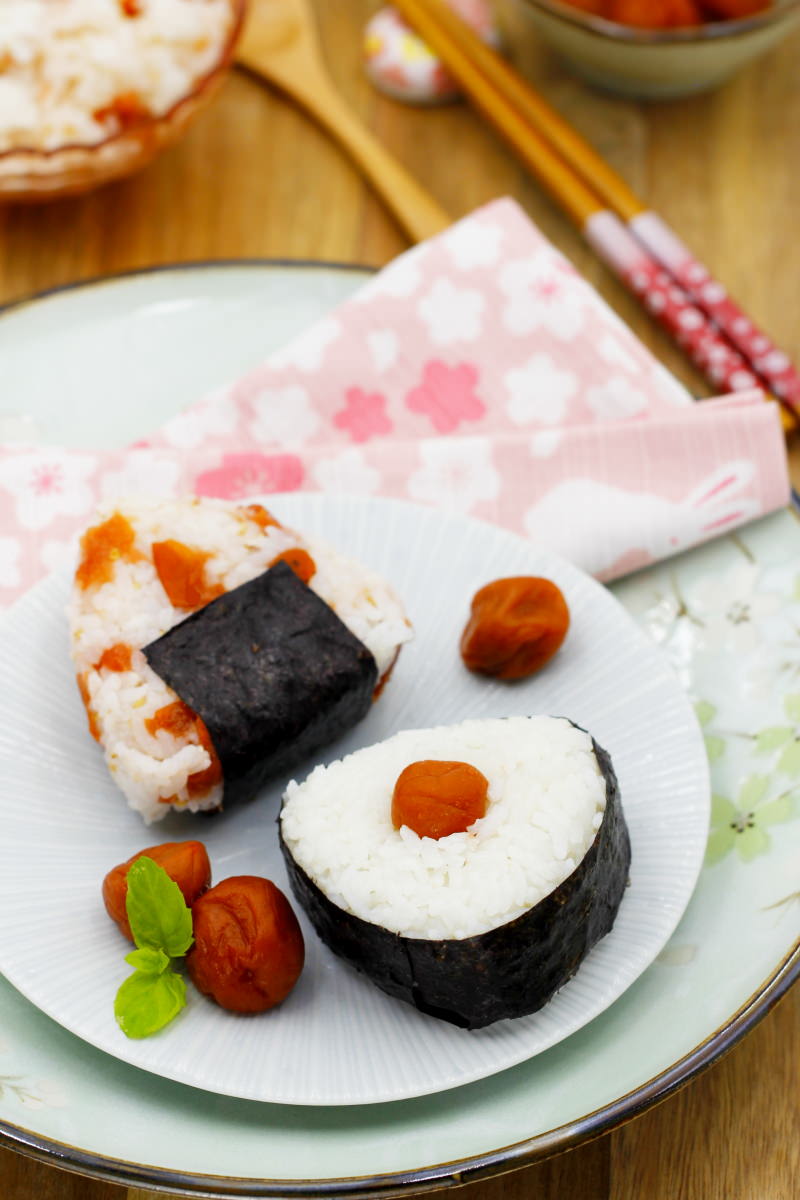
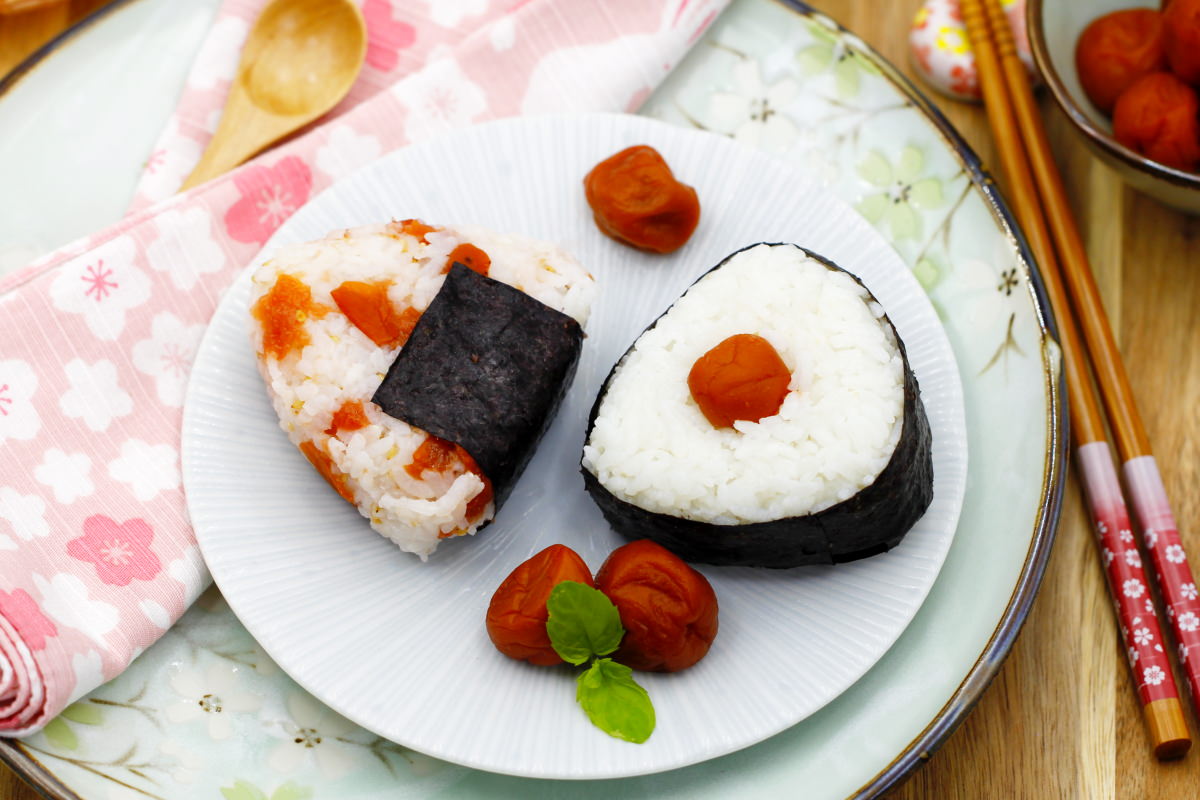
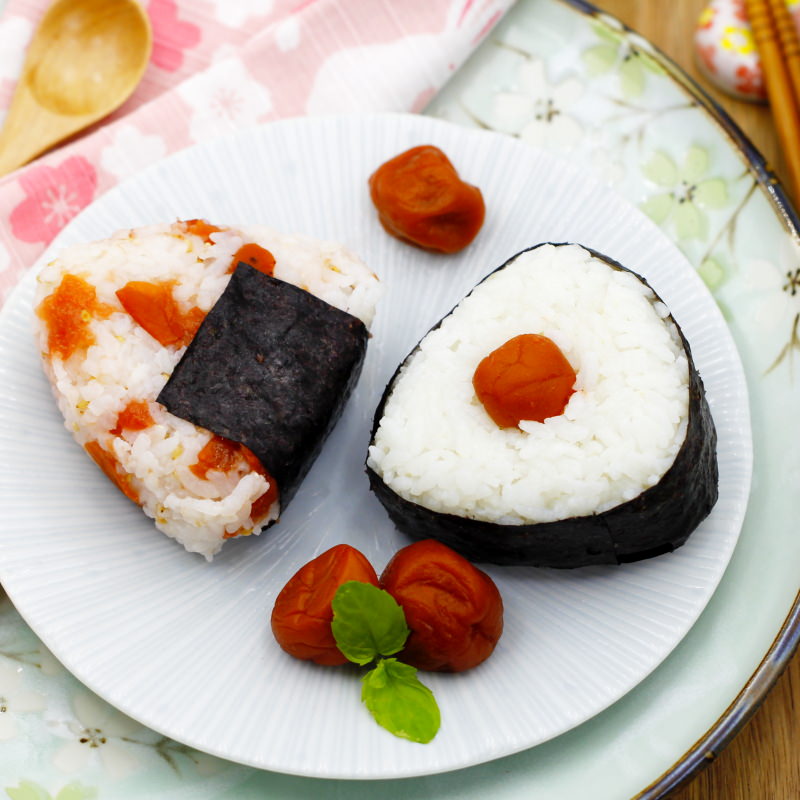
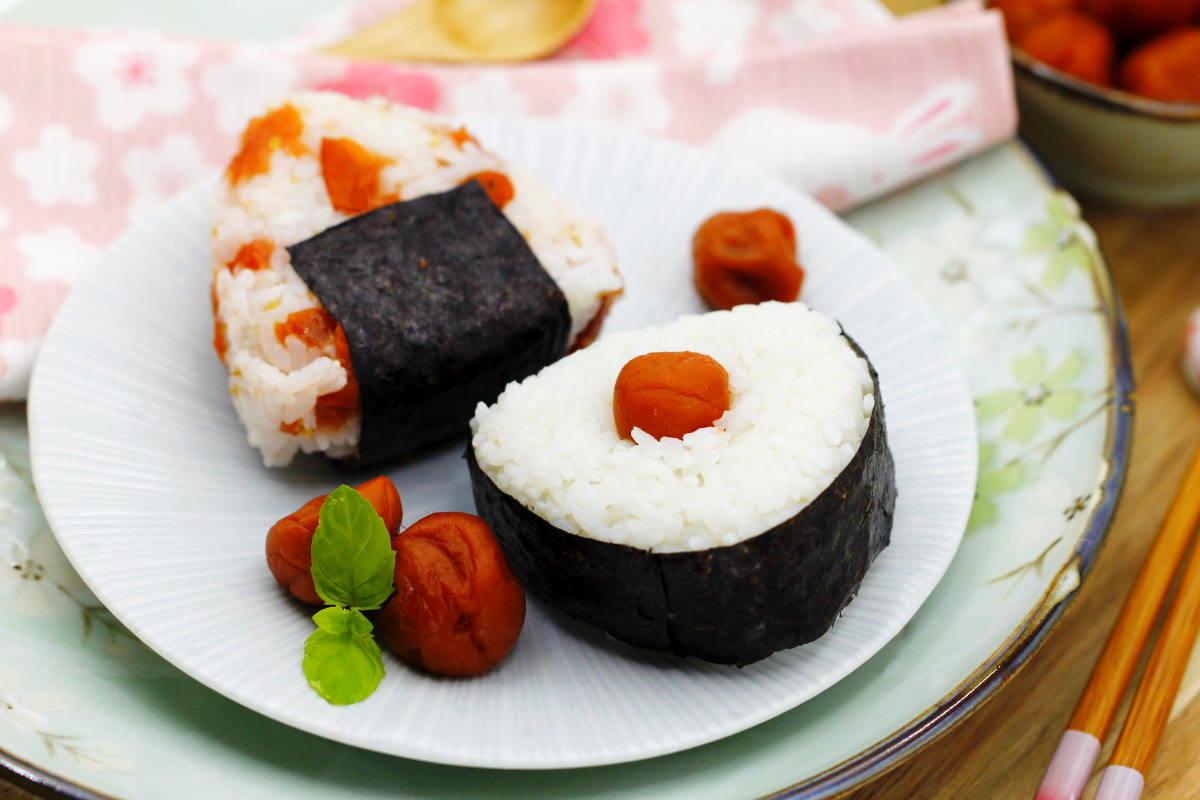
For one version, we’ll shape the white, cooked rice into triangles and then place a pitted plum in the centre. With its red colour set against the white rice, this version is reminiscent of the Japanese flag. That’s why this combination makes great finger food for a Japanese-themed evening 😉. It’s sure to go down a treat.
For the other version we’ll chop the plums into small pieces, mix them into the rice with sesame seeds and then shape them into triangles. This is a great way to keep the rice fresh and tasty when you’re on the go.
I’ll now show you exactly how it all works in my recipe for Onigiri with ume. Have fun and good luck!
Onigiri with Ume
Makes 6 | 30 minutes | 203 kcal
🖨️ Print PDF 📌 Save pinOnigiri with ume are the ultimate comfort food for on the go! These Japanese rice balls are made with salt-pickled umeboshi, or spicy plums. Today I’m showing you two great ways to showcase this feast for the eyes from Japan. With just 4 ingredients and a few simple passages, we’ll be whipping up homemade Onigiri that every Japan fan will fall in love with!
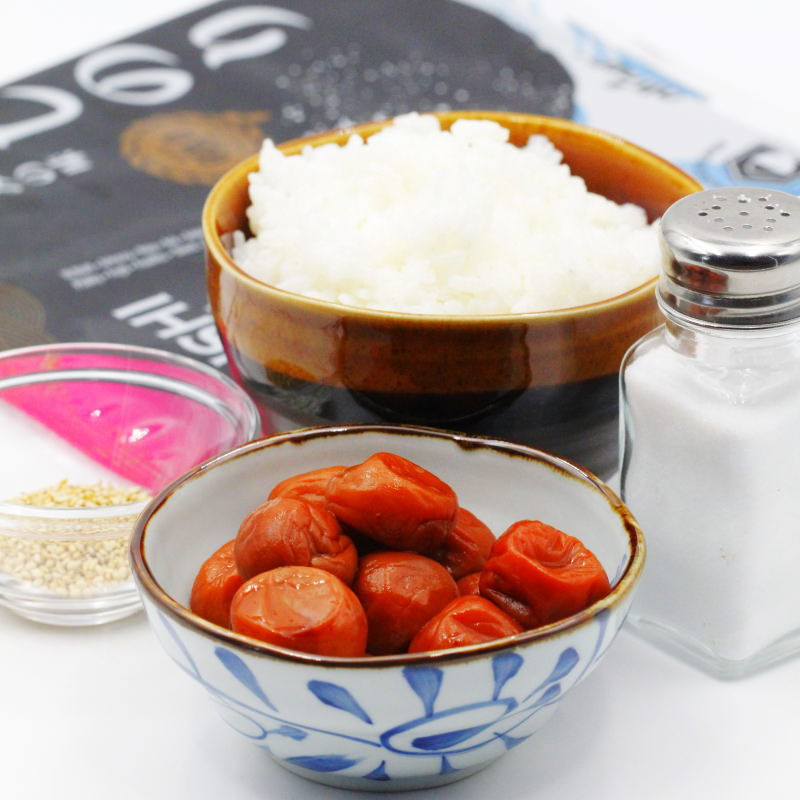
Ingredients (makes 6)
600 g cooked rice (see recipe):
✔ 300 g loose rice (im Shop ansehen)*
✔ 300 ml water (fresh, cold tap water)
✔ 1 pinch salt
100 g umeboshi (salted pickled plums)
1 tsp sesame seeds, toasted (im Shop ansehen)*
1 piece nori sheets (im Shop ansehen)*
Useful utensils:
Onigiri mould – Rice mould set for rice triangles (im Shop ansehen)*
Preparation (30 minutes)
Step 1
Prepare the ingredients for the Onigiri and get the rice (see the recipe here in a rice cooker or in a saucepan + leave to cool for 20 minutes).
Also, fill a small bowl with lightly salted water and have it ready.
Step 2
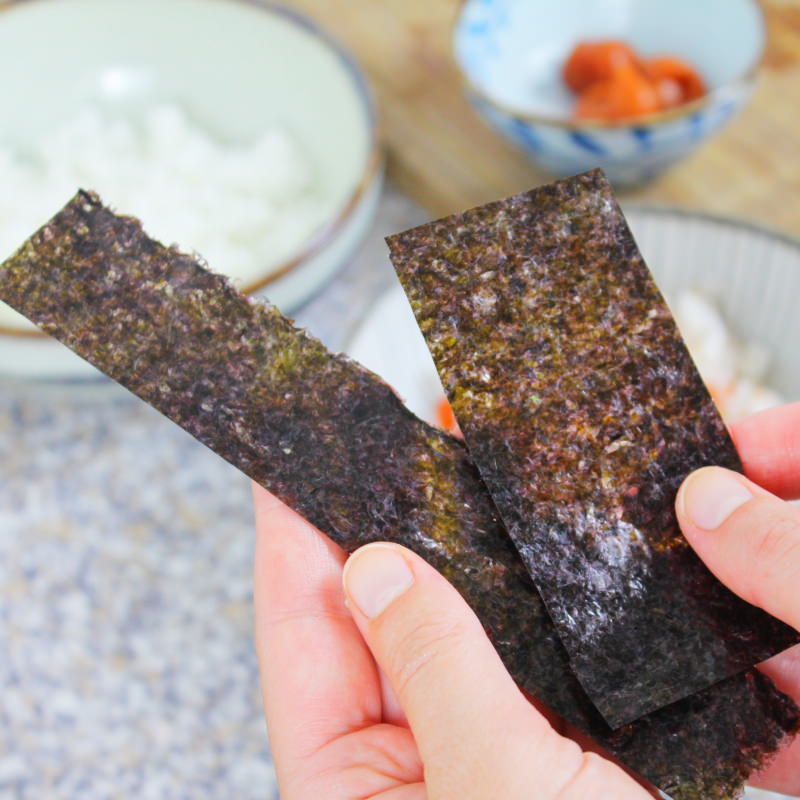
Cut the Nori sheet into 3 small rectangles and 3 long strips using scissors, as desired.
Step 3 – Version #1
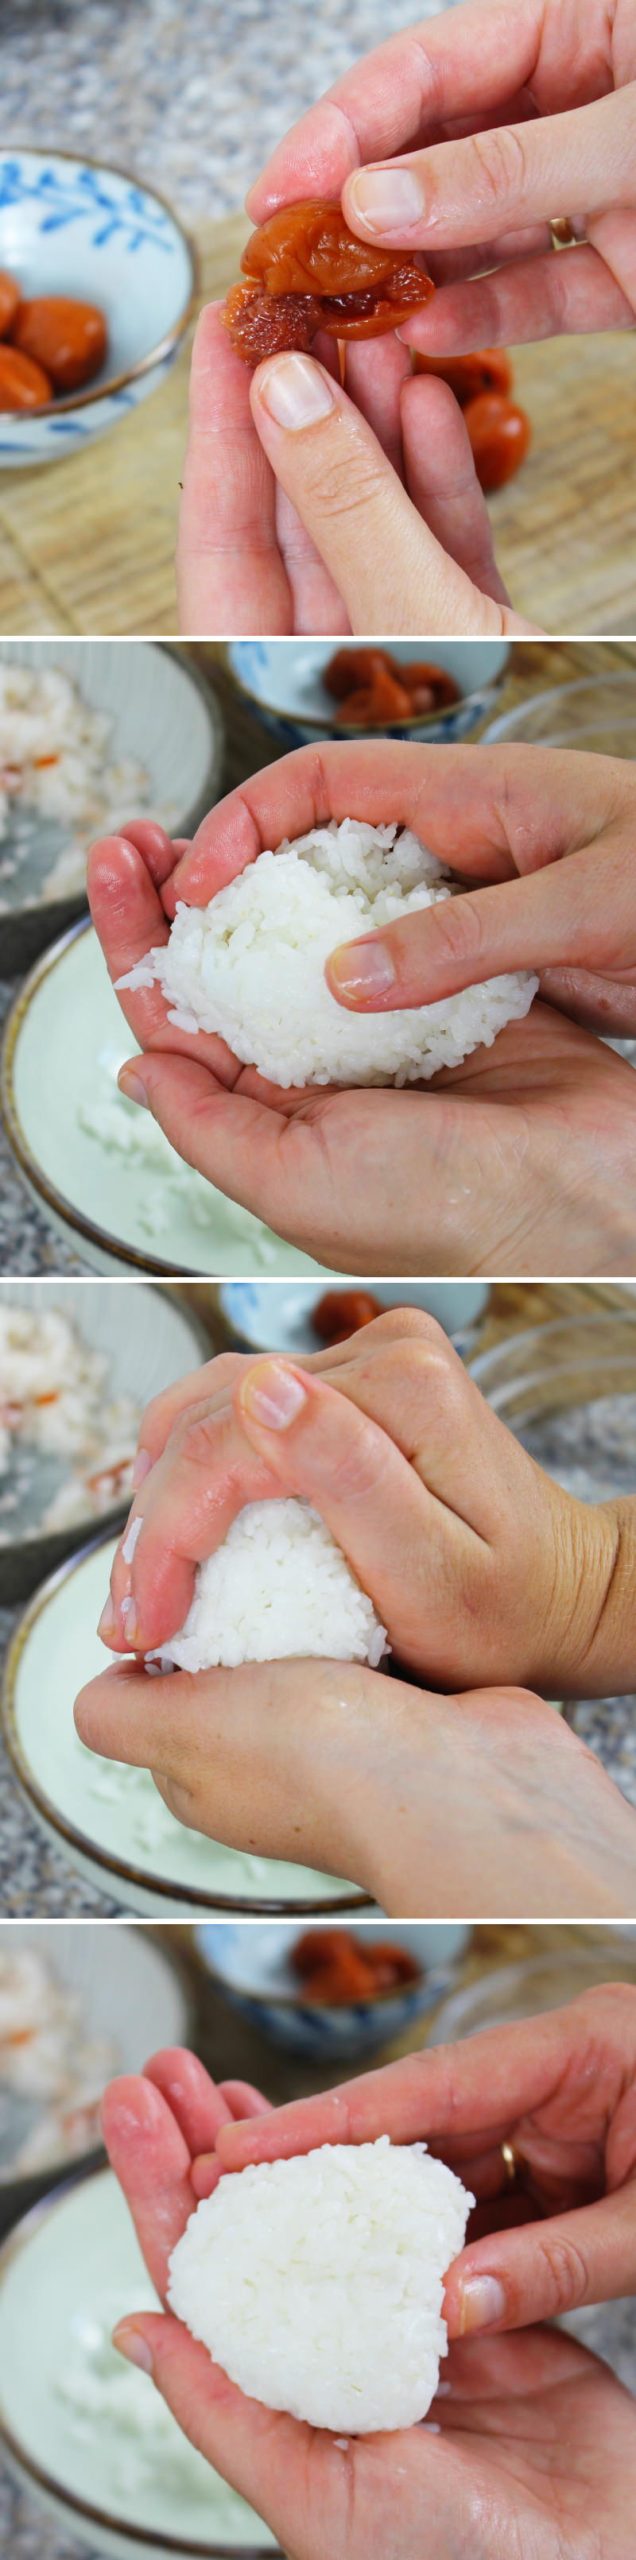
For the first variation select 3 nice ume plums, cut them lengthways and remove the stone.
Then moisten your hands in the prepared water and shape about 100g of the rice into a triangle (or use an Onigiri mould ).
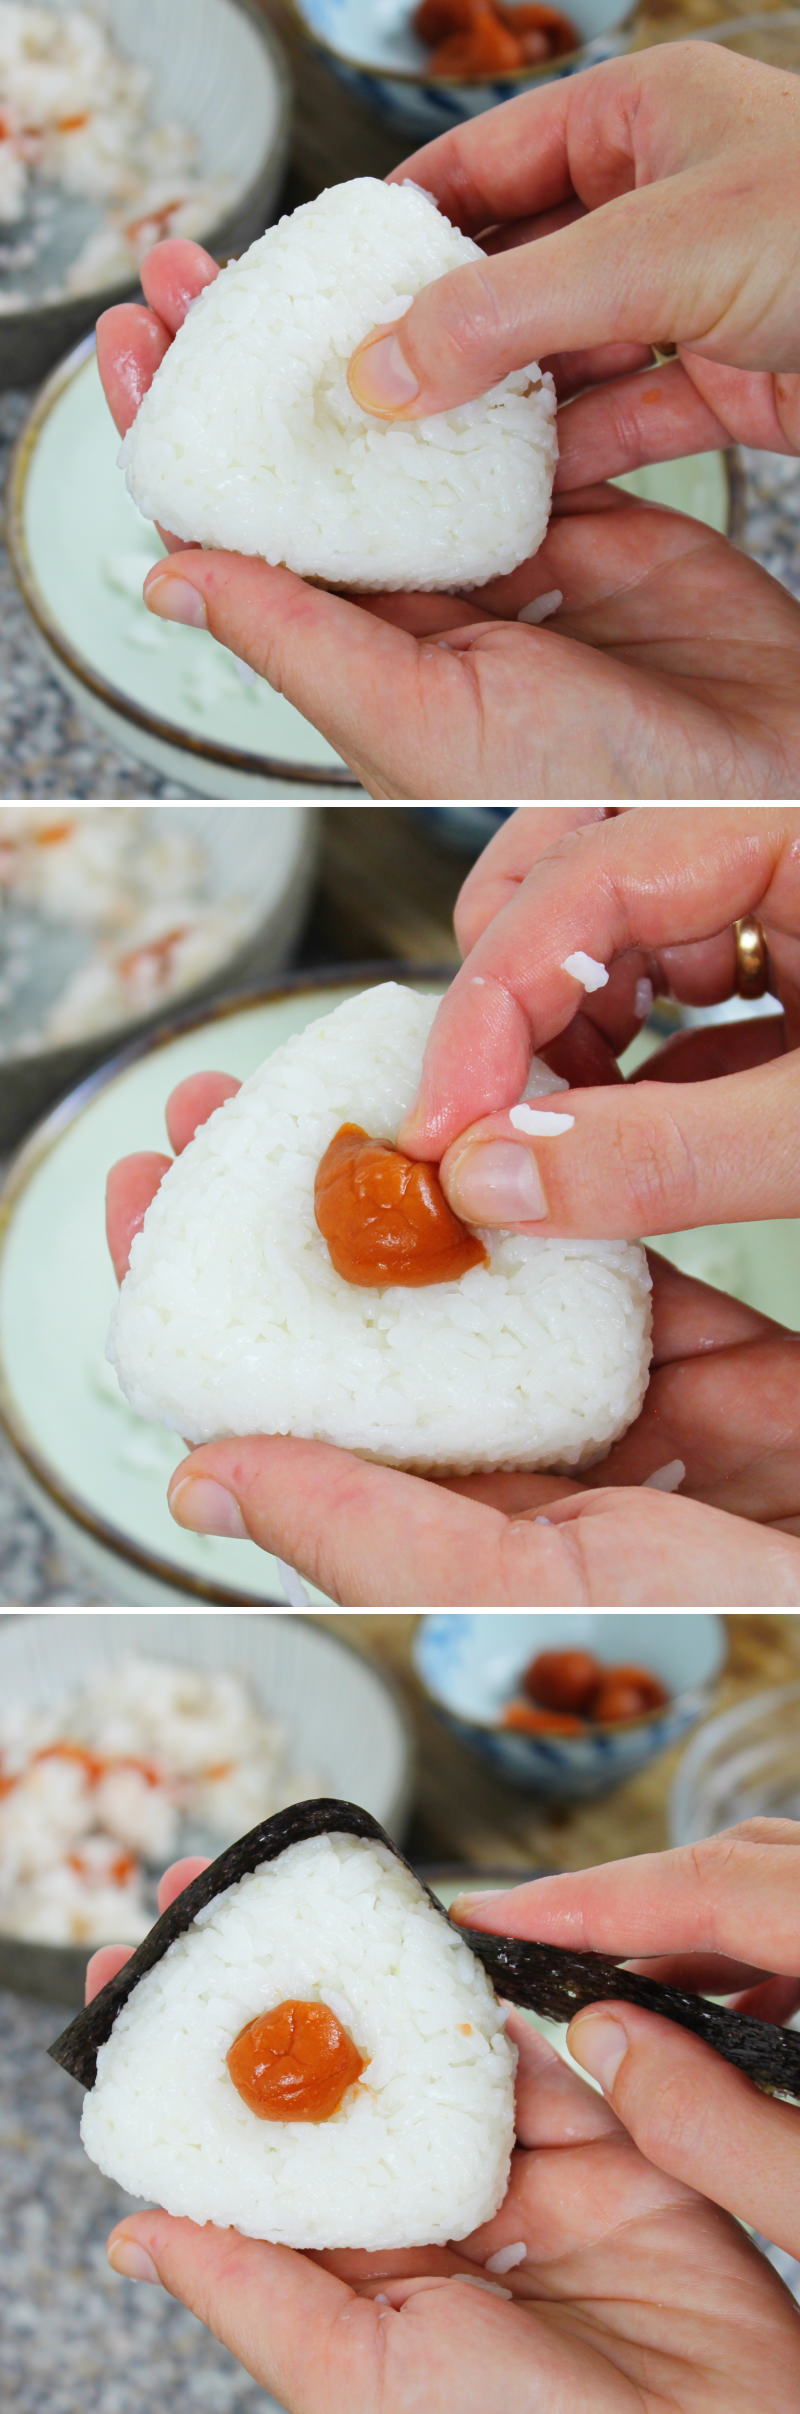
Passaggio 4 – Version #1
On one side, press a small hollow into the centre of the rice triangle. Place a pitted ume plum in it. Wrap the Onigiri all around with a strip of Nori.
Form 2 more rice balls in exactly the same way.
Passaggio 5 – Version #2
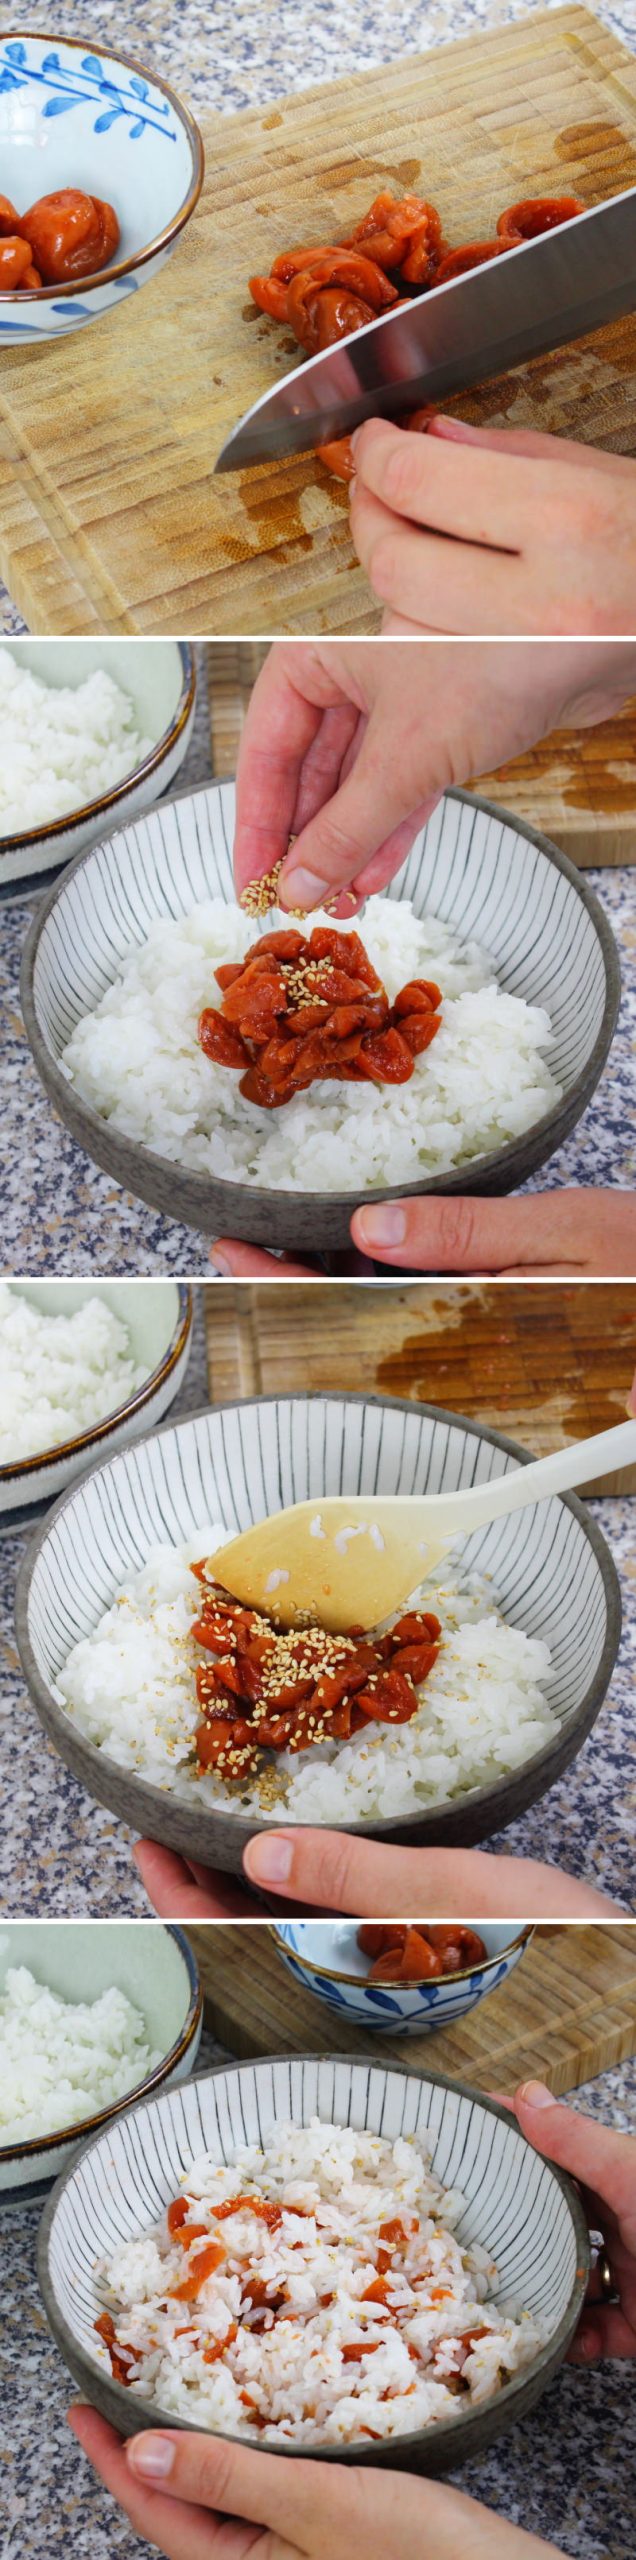
For the second variation, make a lengthwise cut in the remaining ume plums and remove the stones. Then chop them all finely with a large knife.
Add the chopped ume plums together with sesame seeds to the leftover rice and mix thoroughly.
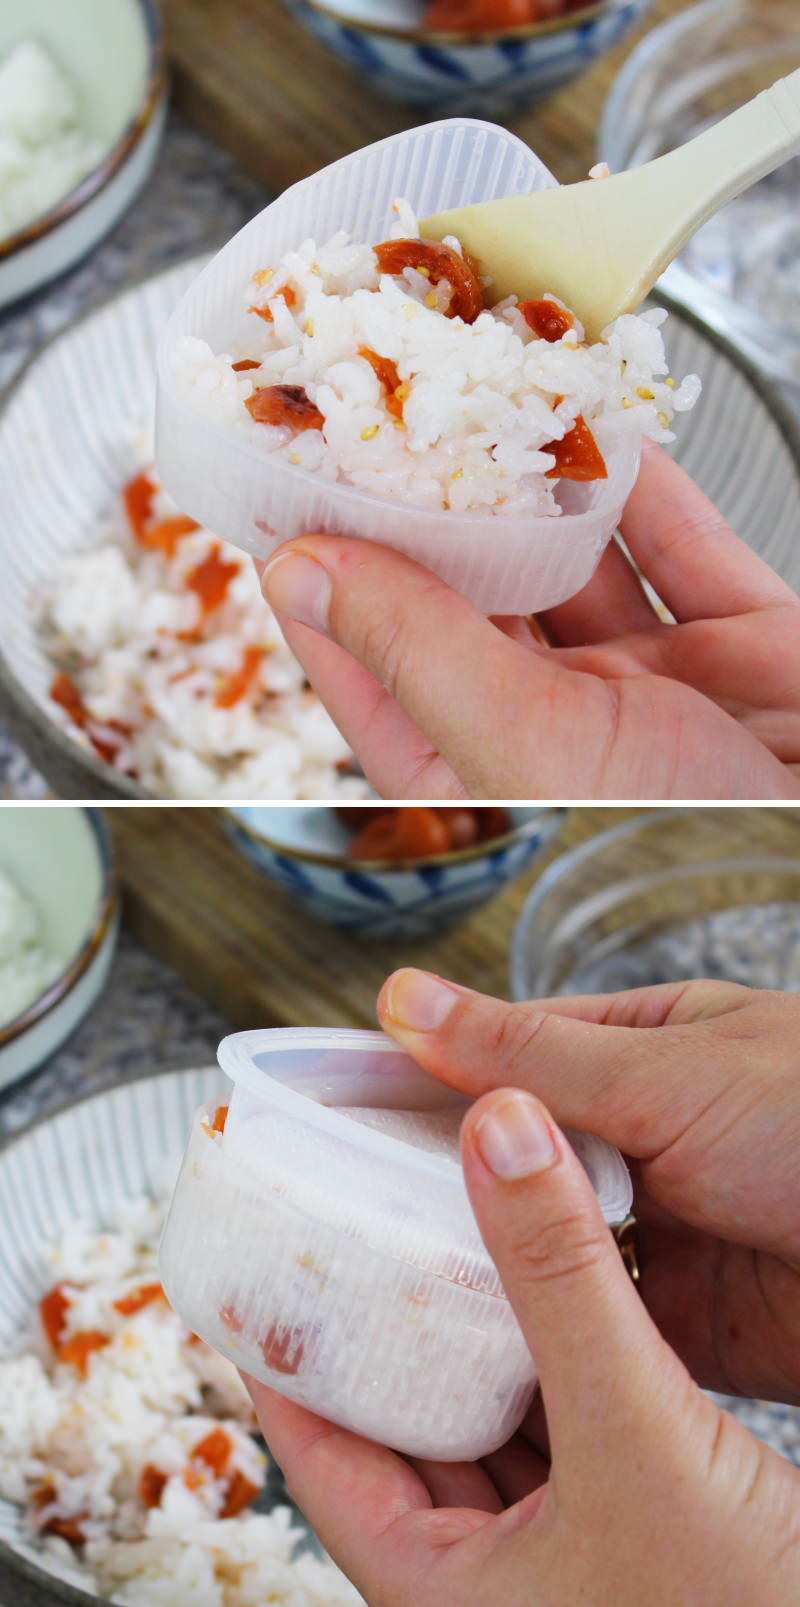
Step 6 – Version #2
Either shape the seasoned rice into 3 rice triangles using your hands again, or use special Onigiri moulds: To do this, dip the Onigiri mould (large and small sides) into the water and allow to drain briefly.
Fill the large side of the onigiri mould with about 120 g of seasoned rice. Now place the lid of the onigiri mould onto the rice and press both sides together with light pressure.
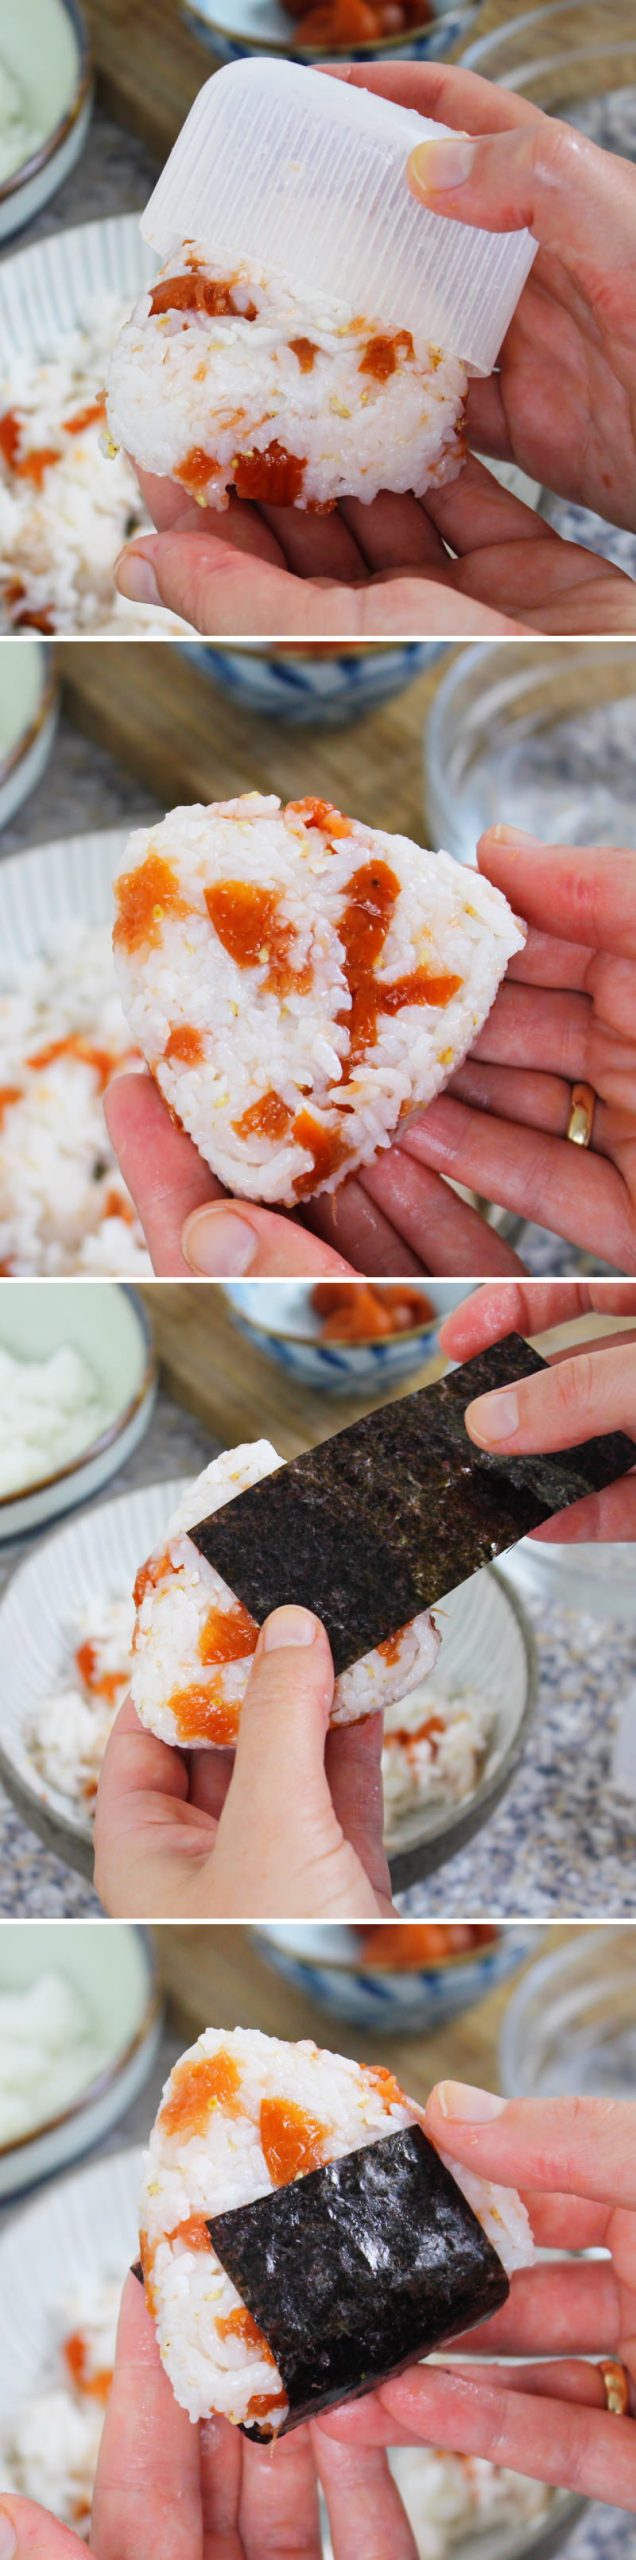
Passaggio 7 – Version #2
Open the onigiri mould and remove the rice triangle from the mould. Now wrap the rice triangle with Nori rectangles on one side.
Shape 2 more rice balls in the same way.
Step 8
Once all 6 Onigiri are ready, they should be eaten as soon as possible. Onigiri are best when fresh, as the rice dries out quickly after a while and the nori sheet becomes slightly soggy. Done – Itadakimasu!
Are you looking for even more delicious onigiri recipe ideas from Japan? Here you’ll find my most popular guides:
No post found!
Have you tried the recipe? Let me know in the comments – I can’t wait to hear from you!