Language:


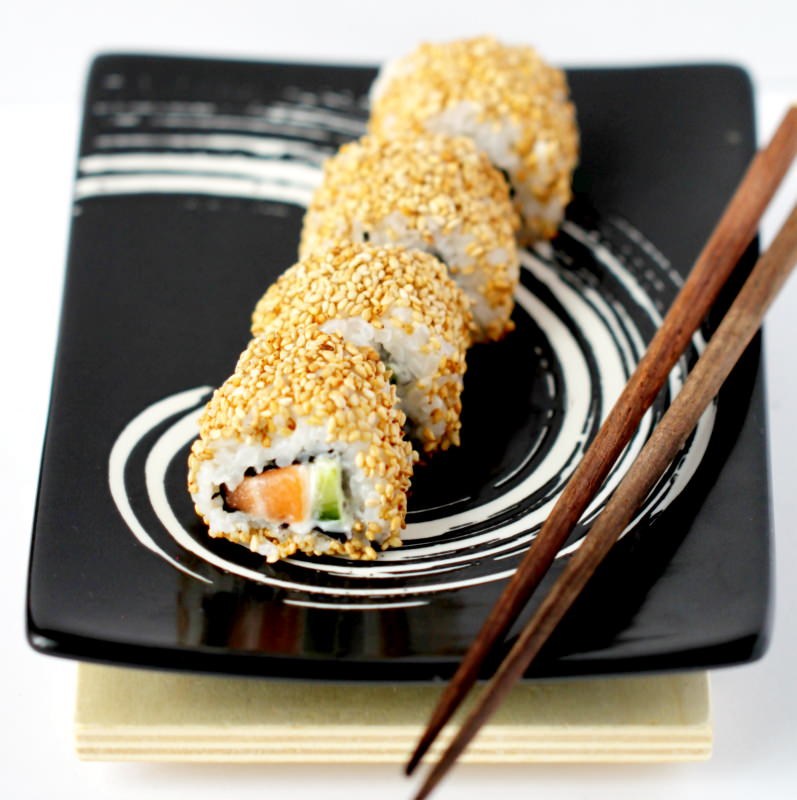
Outside Japan, uramaki are best known as California rolls or inside-out sushi. In this variation on traditional maki Sushi , the rice is on the outside and the nori sheet is on the inside of the Sushi roll – the whole thing is coated in toasted sesame seeds. Despite its extravagant appearance, this type of rolled Sushi is easier to make than you might think – so do give it a go!
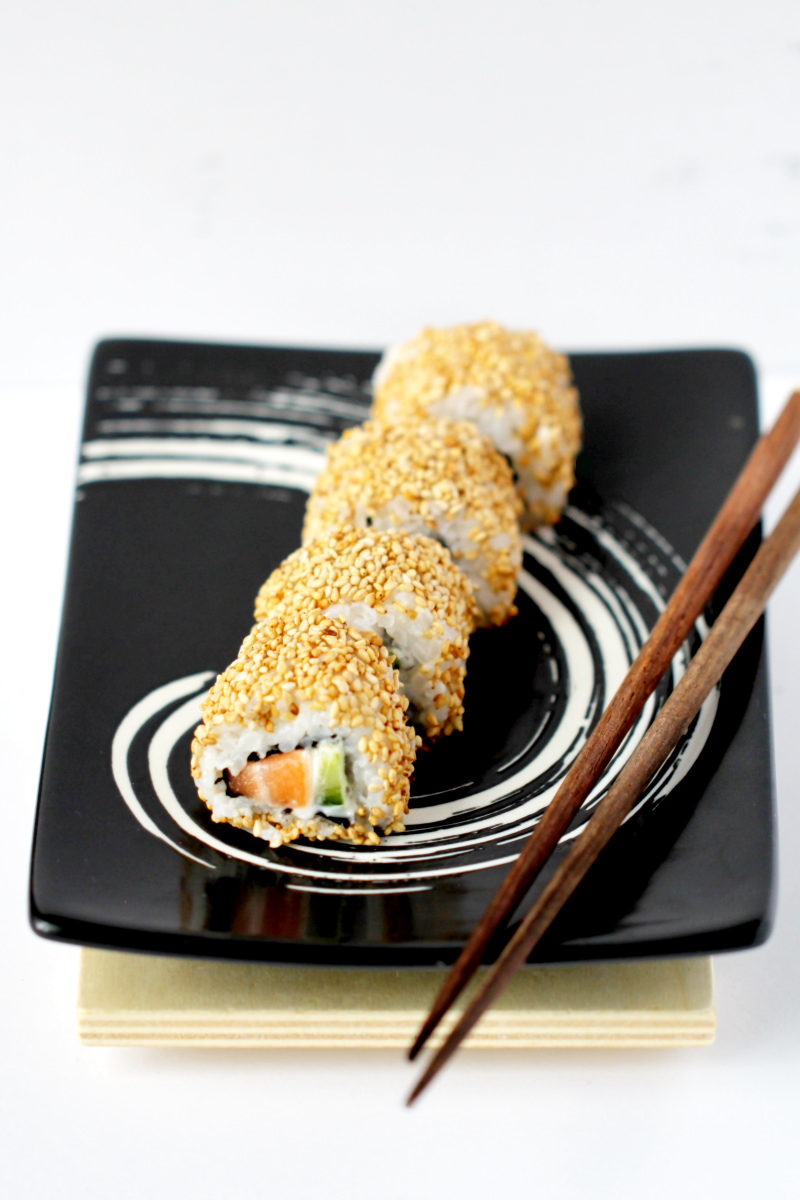
The original idea behind Sushi was to preserve raw fish by combining it with rice.
Today, it is a Japanese national dish that is served and eaten in a wide variety of forms as a snack, starter or main course – the creations range from generously filled bowls to artfully designed rolls.
Would you like to make these types of Sushi yourself? The best recipes for making these types of Sushi easily at home can be found here: → Sushi fillings: Make the 7 best types of Sushi yourself!
Here in this country, we’re familiar with Sushi from what’s known as ‘sushi running’ (called ‘kaiten zushi’ in Japan). There, an incredible number of little works of art whizz past right under our noses… But don’t let that put you off!
Sushi is perfect for making yourself at home with ease. It’s a wonderful opportunity to cook together with friends or family (especially children) and prepare a meal together.
TOP RECOMMENDATION
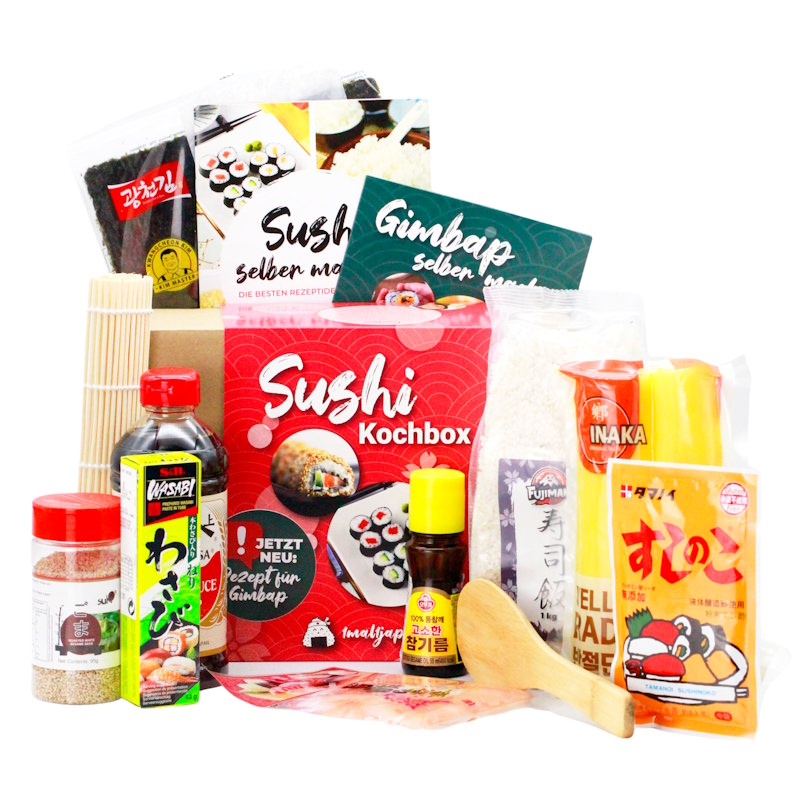
Sushi + Gimbap Kochbox | Reisrollen selber machen
11-tlg. DIY Sushi Set, inkl. Rezepte + Zubehör, für Anfänger & Kenner. Mit der Sushi + Gimbap Kochbox gelingen dir japanische und koreanische Rollen ganz…
In stock
The basis for this recipe is homemade Sushi rice, for which it’s best to use a short-grain (or round-grain) white glutinous rice (im Shop ansehen) .
This contains a lot of starch and therefore absorbs liquid well, which in turn means that it sticks together nicely after cooking – a must for delicious uramaki!
You can find out everything else you need for Sushi rice and how best to prepare it here in the basic recipe for Japanese sticky rice:
No post found!
This recipe for homemade inside-out Sushi rolls was first created in the early 1970s by an American-born Japanese Sushi chef for his customers, who were not used to the sight of raw fish or the texture of crispy Nori.
The solution was to move both of these elements to the inside of the sushi roll and place rice with sesame seeds on the outside instead. Since then, this sushi variation has become an international classic on sushi menus.
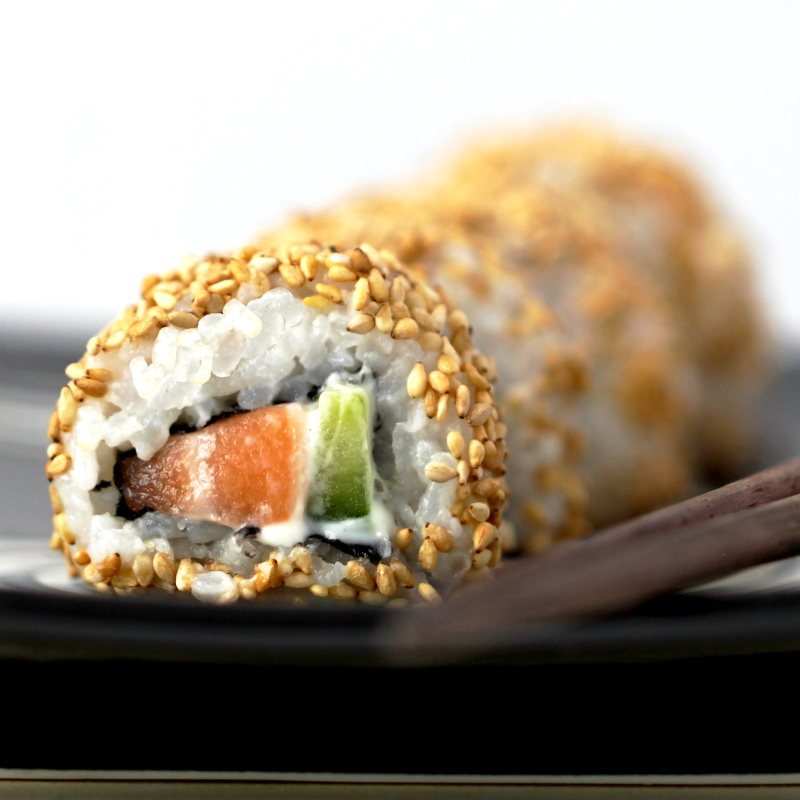
Find out how to shape perfect uramaki using sushi rice, sesame seeds and filling in this recipe! Have fun and good luck making your own California rolls!
Uramaki
serves 4 | 15 minutes | 554 kcal
🖨️ Print PDF 📌 Save to PinterestOutside Japan, uramaki are best known as California rolls or inside-out Sushi. In this variation on traditional maki Sushi, the rice is on the outside and the nori sheet is on the inside of the Sushi roll – the whole thing is coated in toasted sesame seeds. Despite its extravagant appearance, this type of rolled Sushi is easier to make than you might think – so do give it a go!
Ingredients (4 portions = 36 pieces)
600 g Sushi rice (see recipe):
✔ 300 g rice (im Shop ansehen)
✔ 1 piece Kombu (im Shop ansehen)
✔ 2 tbsp Sushi no ko (im Shop ansehen)
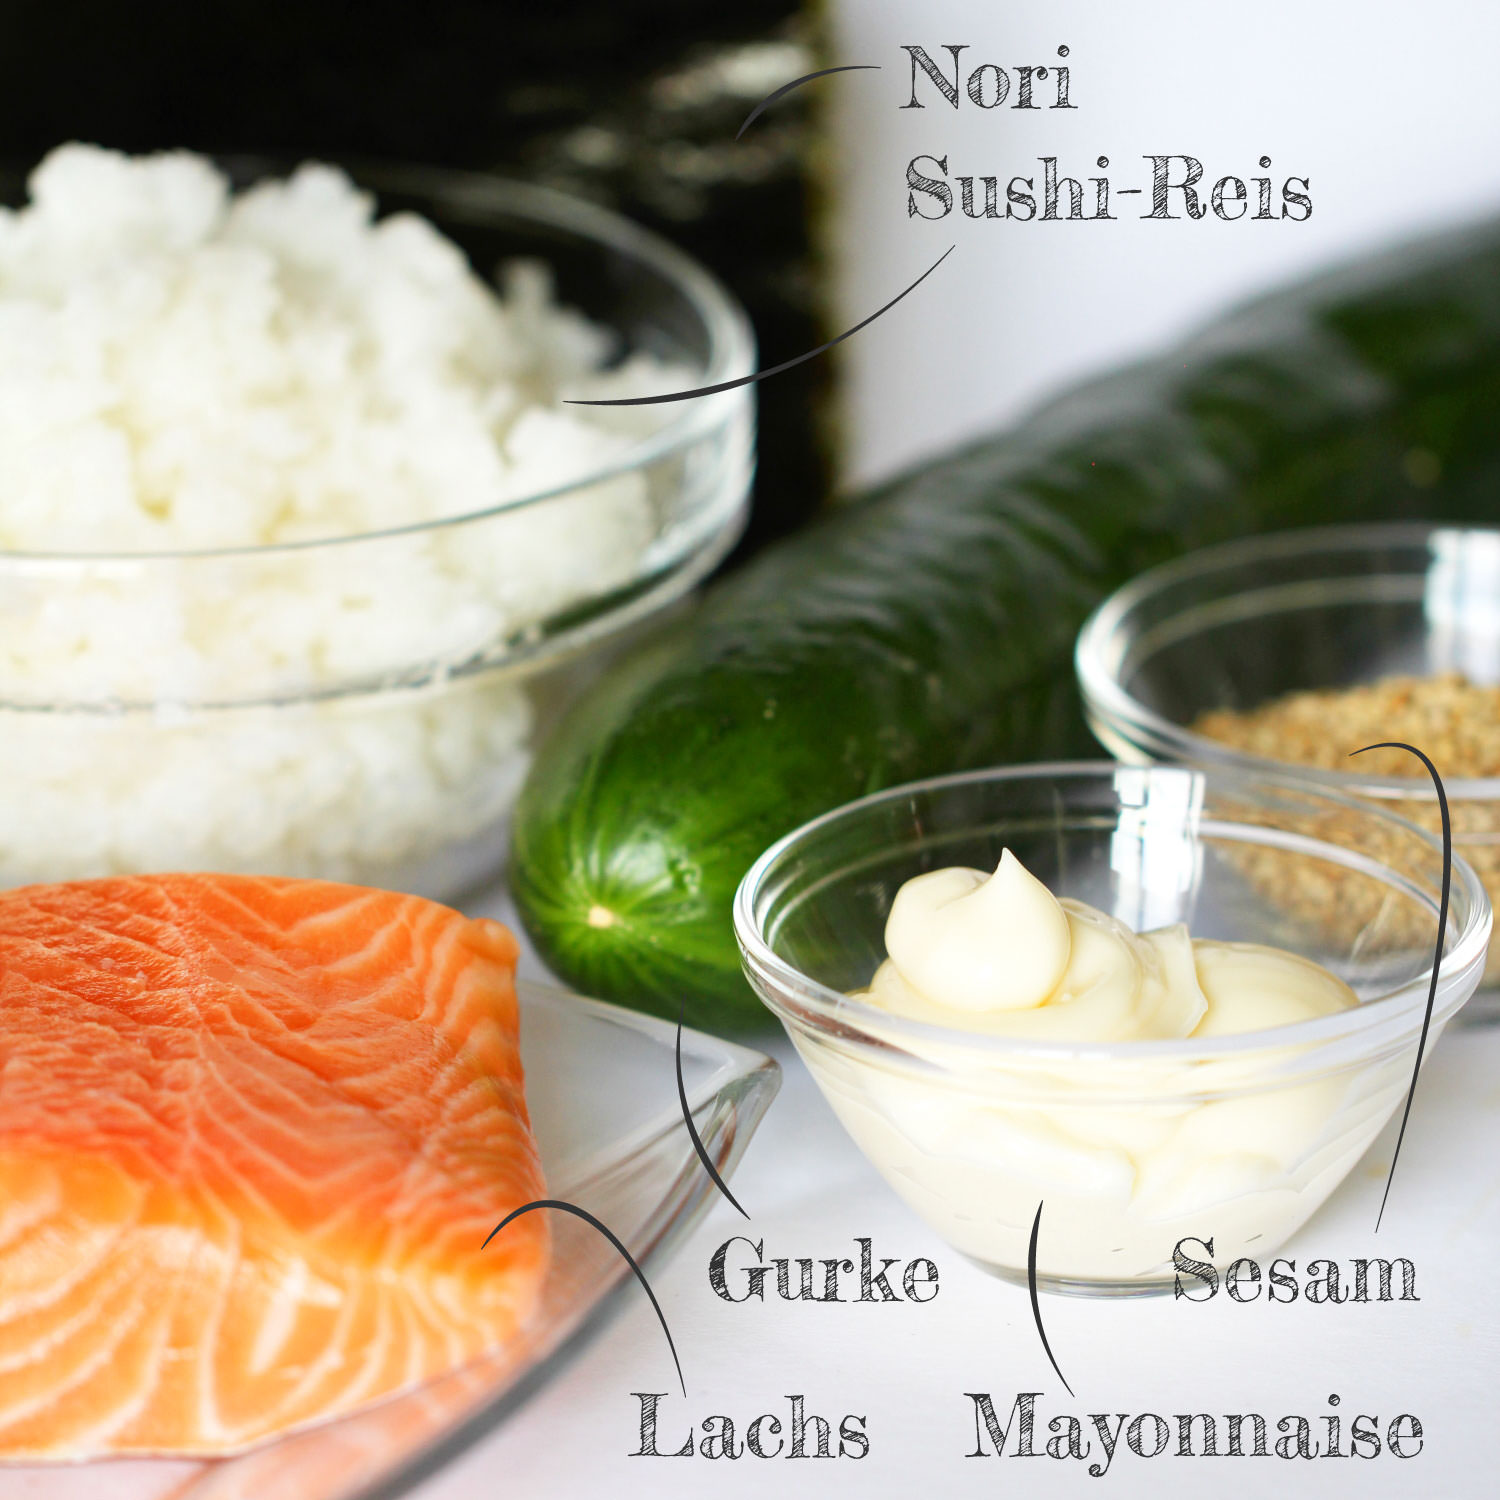
3 Nori sheets (im Shop ansehen)
120 g salmon
1/2 cucumber
6 tbsp mayonnaise (im Shop ansehen)
6 tbsp sesame seeds (toasted) (im Shop ansehen)
For the vinegar water:
250 ml water
1 tbsp rice vinegar (im Shop ansehen)
To serve (provide the following for each guest):
Wasabi (im Shop ansehen)
Sushi ginger (im Shop ansehen)
Soy sauce (im Shop ansehen)
Useful utensils:
Bamboo mat (im Shop ansehen)*
Santoku knife (im Shop ansehen)
Sushi serving set (im Shop ansehen)
Preparation (15 minutes / 60 minutes to cook the rice, if required)
Step 1
Gather the ingredients for the Uramaki sushi rolls and prepare the sushi rice (see here for the recipe for delicious sushi rice) and leave to cool briefly. Also, prepare the vinegar water in a small bowl using fresh water and rice vinegar for shaping the rice.
In addition, wrap the sushi mat in cling film so that the rice doesn’t stick to the bamboo.
Step 2
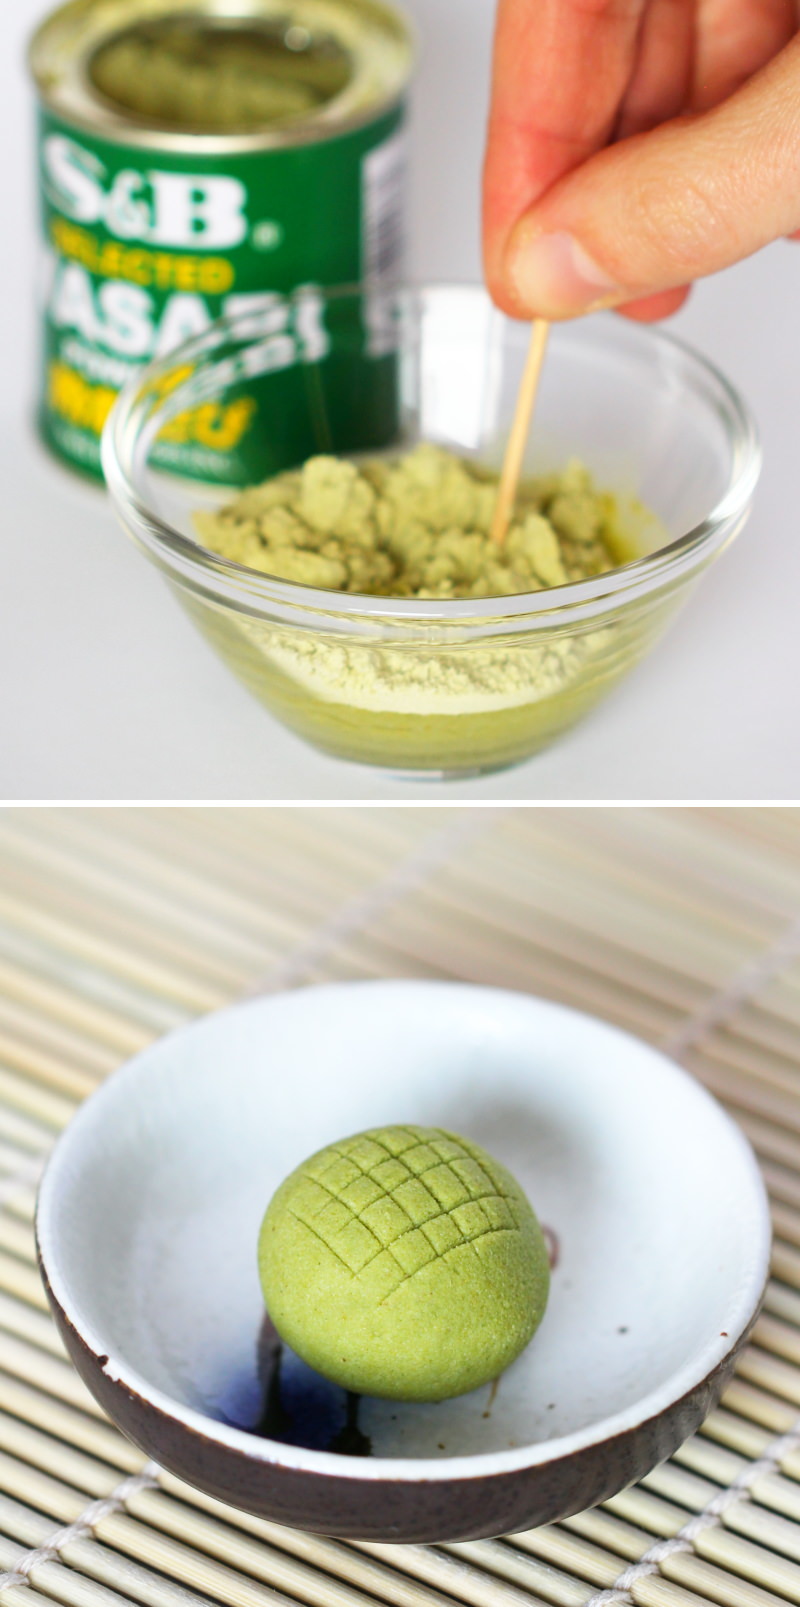
If you are making the wasabi yourself from wasabi powder to serve: The mixing ratio is 5 tsp wasabi powder to 3 tsp water. Mix both together in a small bowl, shape into a ball if desired, and leave to stand for 5 minutes to allow the flavour to develop.
Step 3
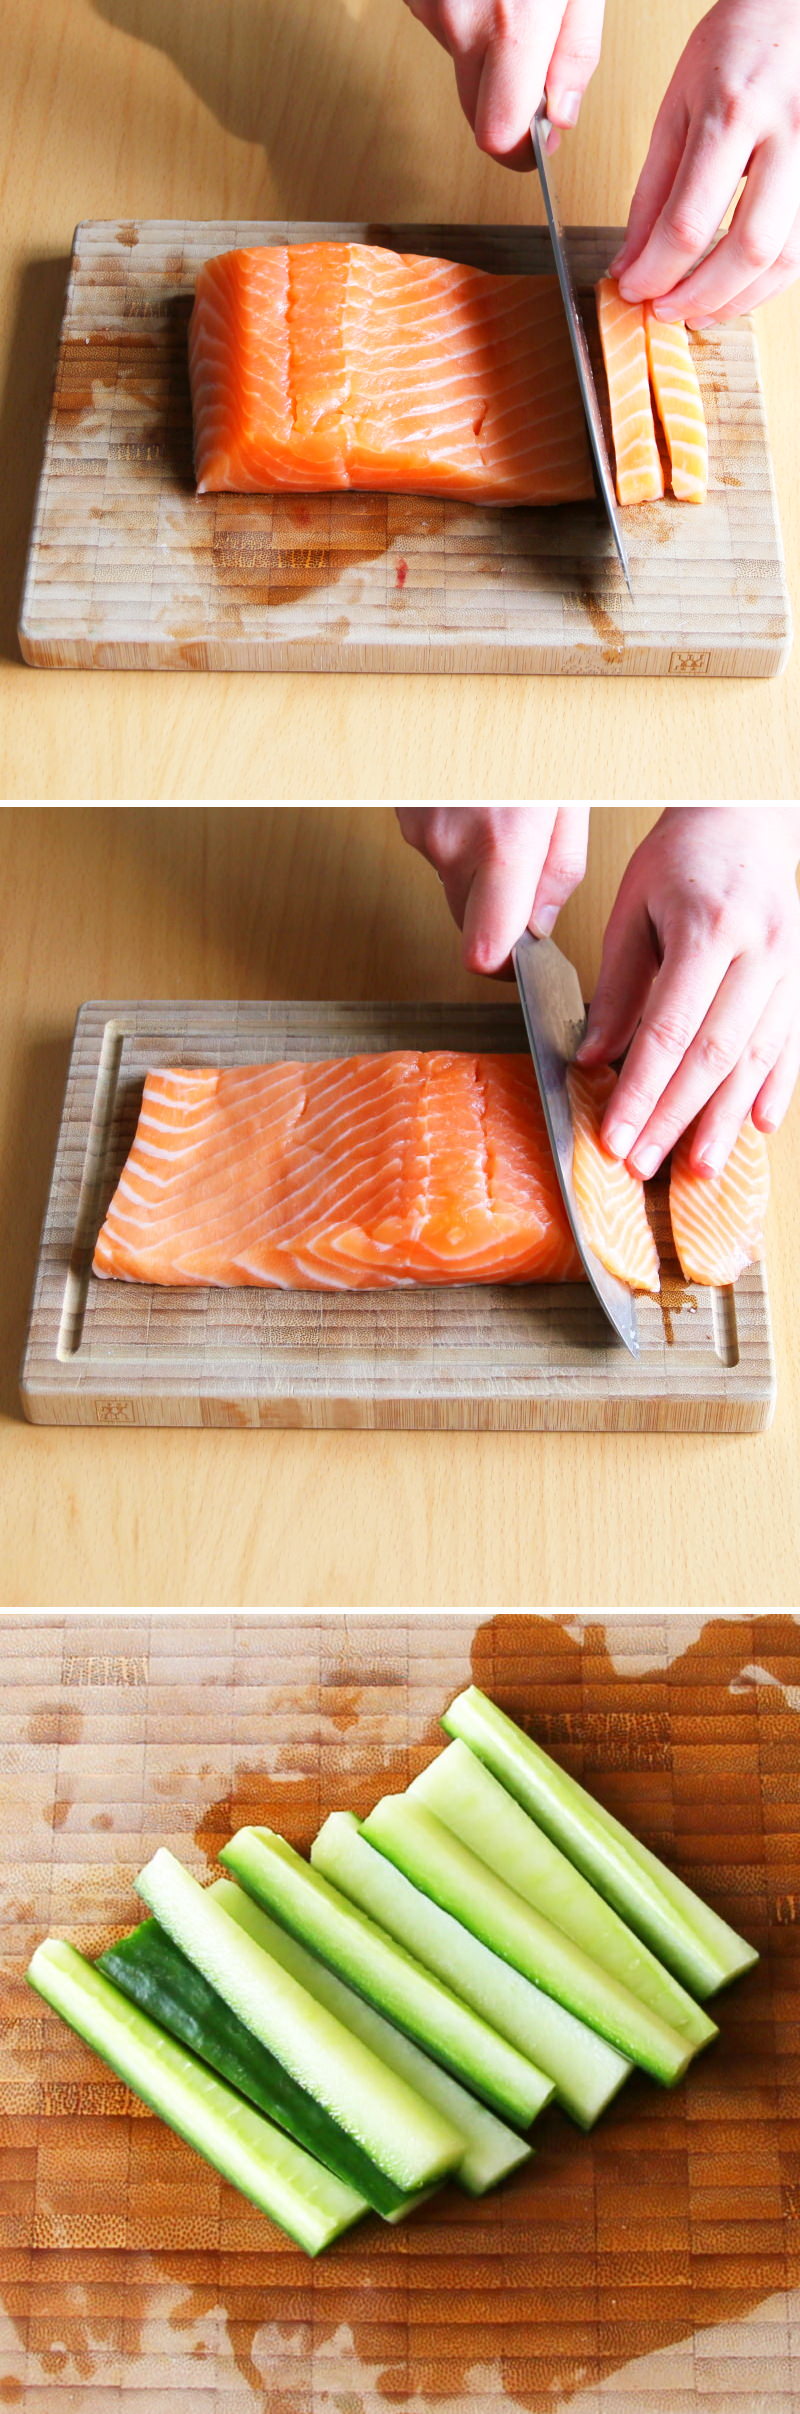
Whilst the rice is cooking, prepare the filling: To do this, carefully cut the salmon into fine strips (approx. 1 x 1 x 10 cm) using a sharp knife. To do this, (1) either hold the knife at an angle (45°) to the fish fillet and first cut the fillet into 1 cm-wide slices. Then cut each slice lengthways into 1 cm-wide and (depending on the fillet) 10 cm-long strips. Or (2) if the fillet is very flat, simply cut off 1 cm-wide strips.
Wash the cucumber and pat it dry. Cut it in half lengthways, then quarter each half and remove the seeds with a knife.
Step 4
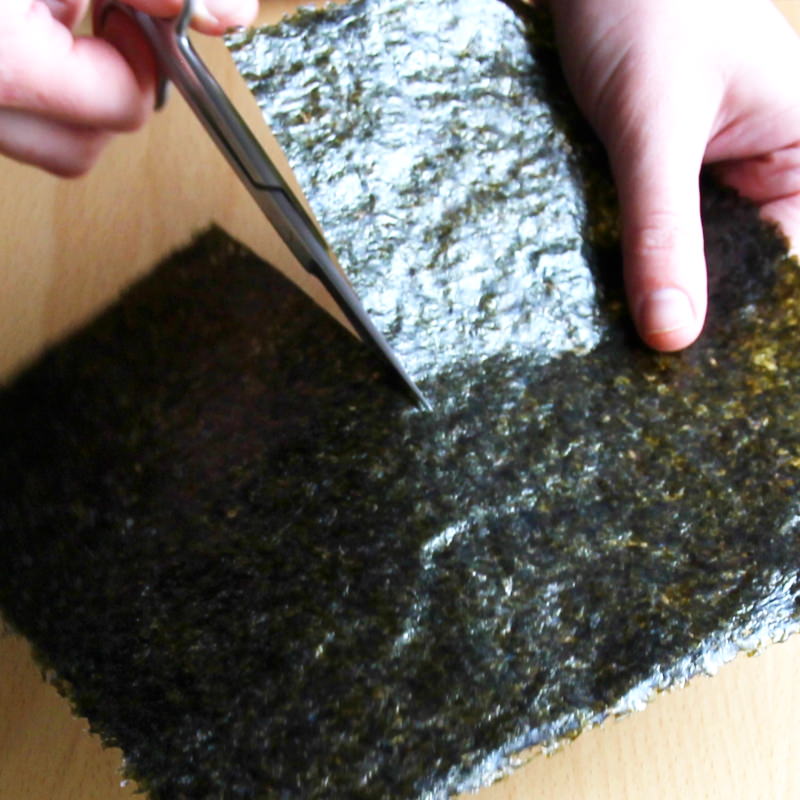
Place the nori sheets on top of one another and cut them in half with a pair of scissors.
Step 5
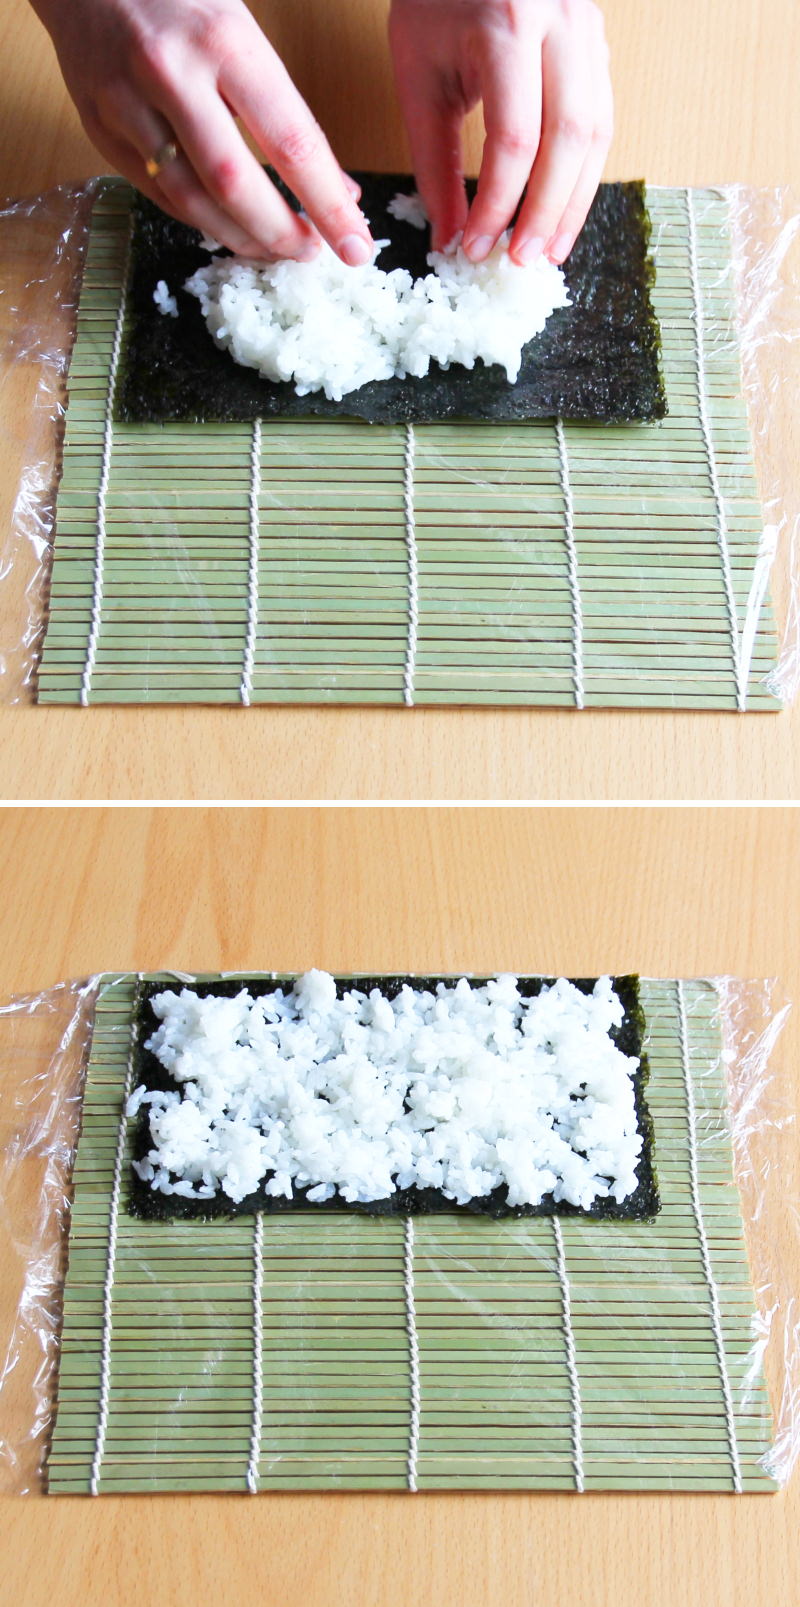
The seasoned Sushi rice should now be fully cooked and cooled. To roll the uramaki, place the foil-wrapped bamboo mat on the work surface with the green side facing upwards. Place a halved nori sheet on the bamboo mat with the smooth side facing downwards.
Moisten your hands in the vinegar and water bowl provided and place 100 g of Sushi rice in the centre of the Nori. Spread the rice thoroughly, bit by bit, across the entire Nori right up to the edges (dip your hands in the water every now and then) – the rice should be packed down so tightly that the Nori is no longer visible.
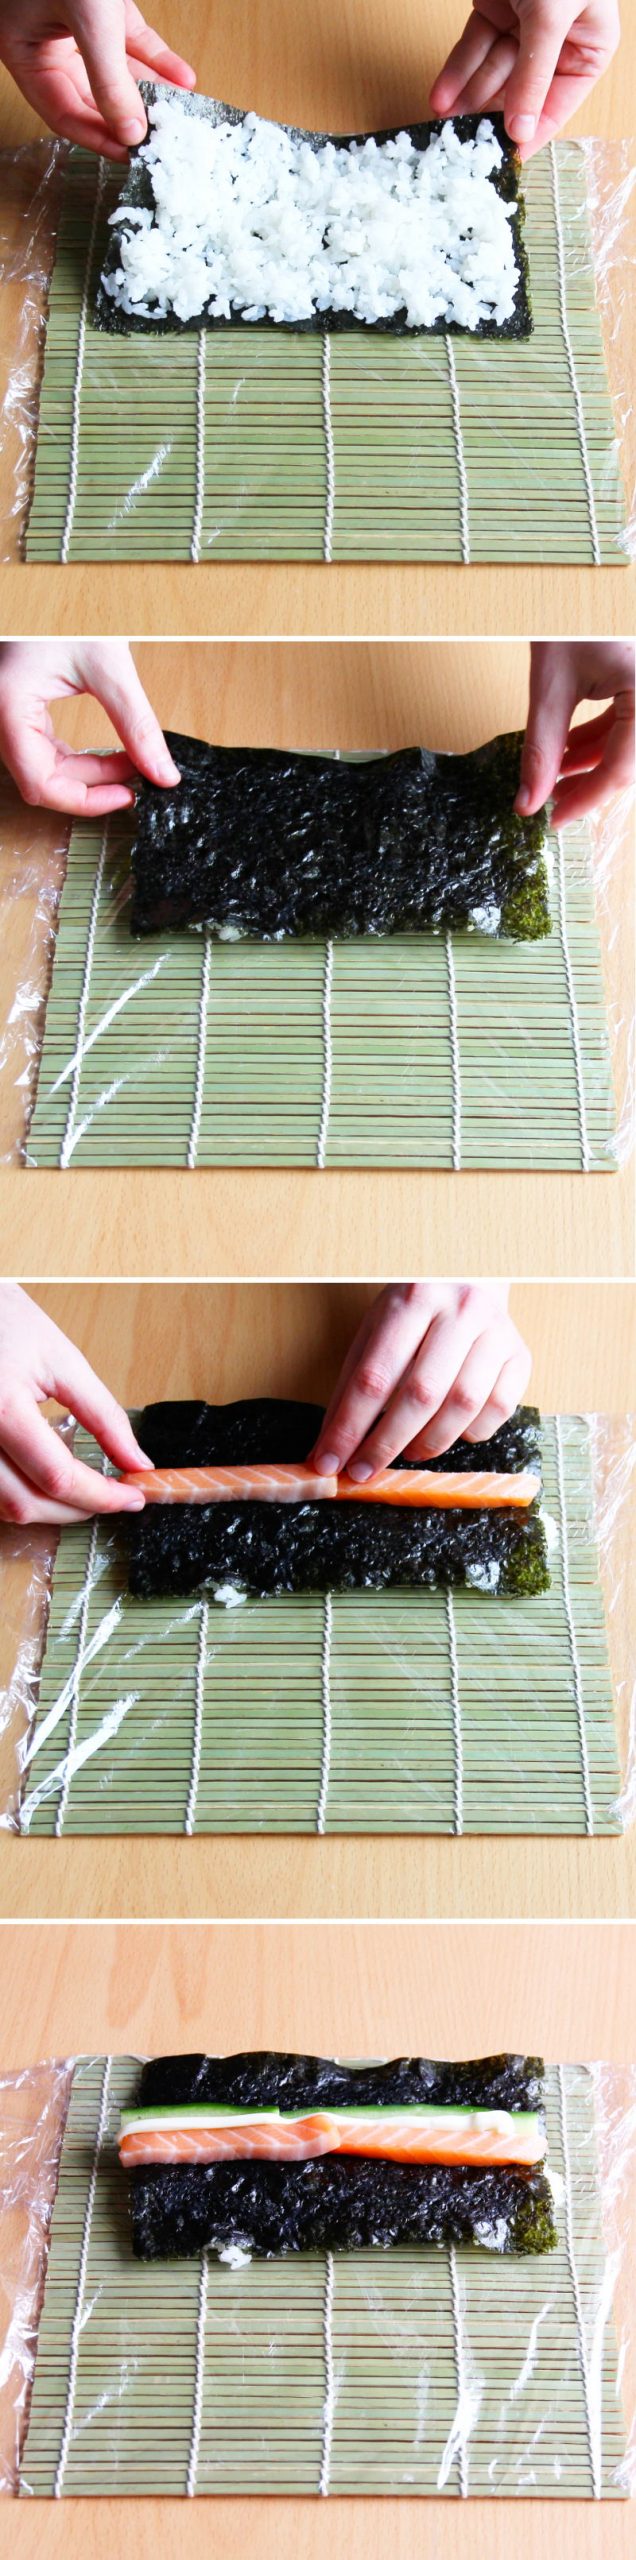
Step 6
Lift the nori sheet filled with rice and turn it over, so that the rice is now on the bamboo mat. It is best to position it so that the nori ends at the bottom edge of the bamboo mat.
One after the other, spread 1/6 of the salmon, 1/6 of the cucumber and about 1 tbsp mayonnaise centrally on the Nori.
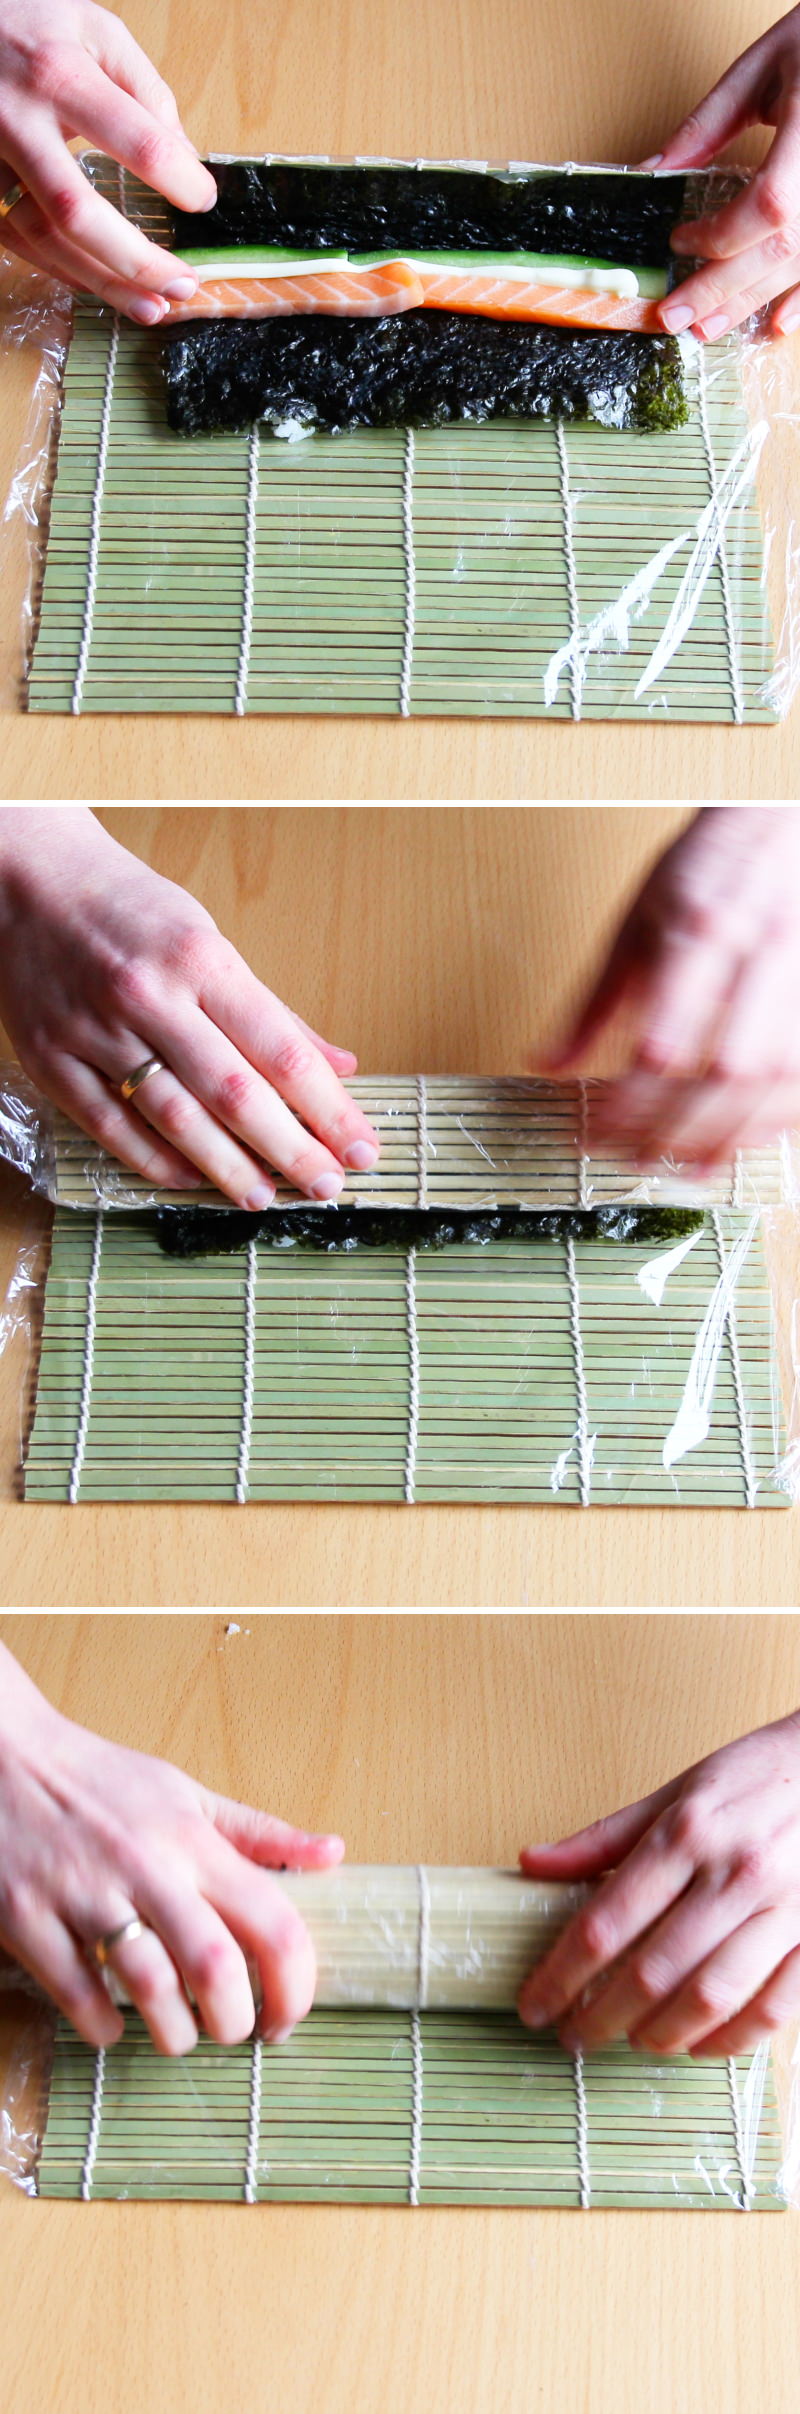
Step 7
Now shape the uramaki Sushi roll: Lift the bottom edge of the bamboo mat and the Nori using your thumb and index finger. Hold the filling in place with your other fingers. Lift the bottom edge of the Sushi mat right up to the top edge of the Nori and press down gently. Lift the mat slightly again and roll the Sushi roll completely into the mat, shaping it into a nice round roll.
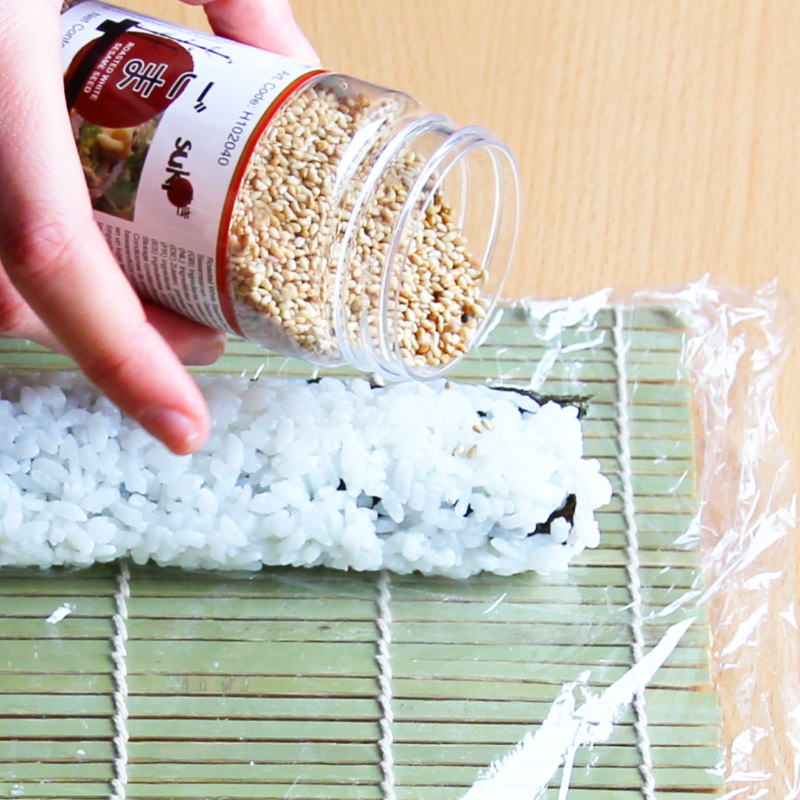
Step 8
Unroll the mat and sprinkle the finished Sushi roll thoroughly all over with sesame seeds – if necessary, roll it up in the bamboo mat again so that the sesame seeds stick well to the rice.
Set the finished Uramaki Sushi roll aside and shape five more Uramaki in the same way.
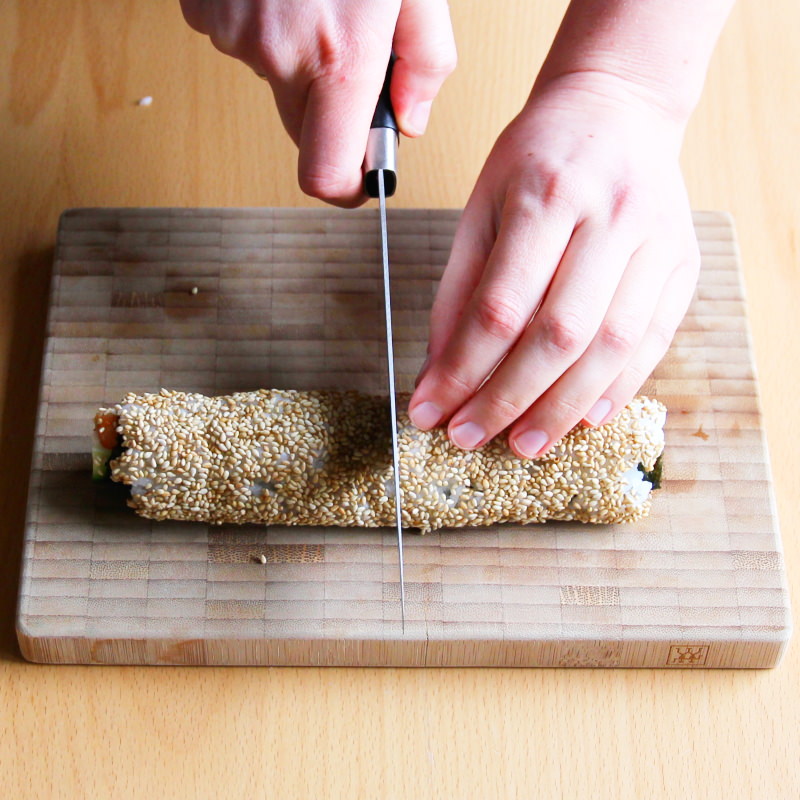
Step 9
Dip a large, very sharp knife in a little vinegar water. Cut each of the Uramaki Sushi rolls in half first and then cut each half into 3 slices.
Step 10
Now serve the uramaki with wasabi, sushi ginger and soya sauce. Ready – Itadakimasu!

For even more recipes for your next Sushi party:
No post found!