Sprache:
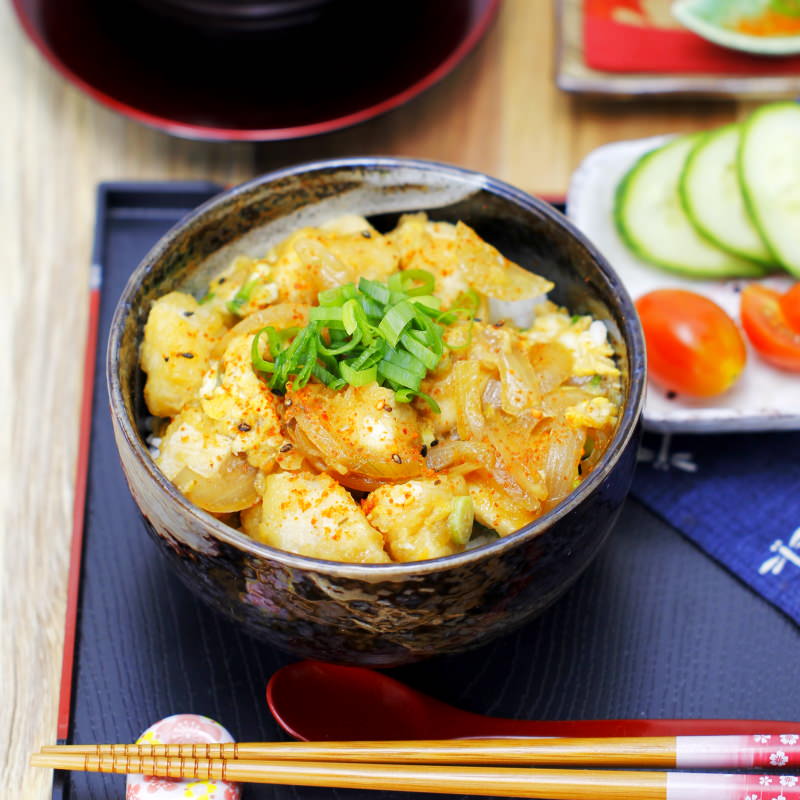
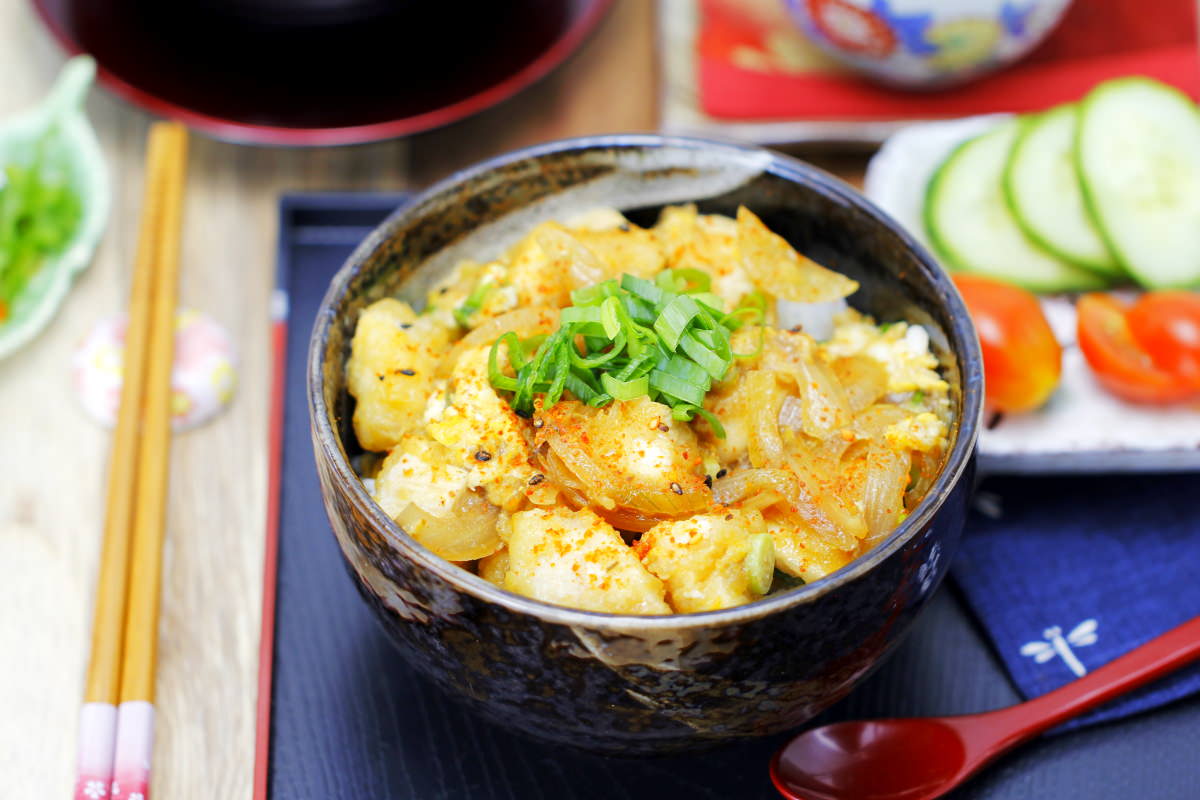
An Oyakodon is just the right choice if you want to prepare a quick yet flavourful rice dish. For this typical Japanese rice bowl, you only need a few ingredients and everything is cooked in just one pan – ideal!
The chicken remains super tender and juicy, and the delicious broth perfectly combines the topping with the freshly cooked rice. A must-have for your everyday Japanese cooking!
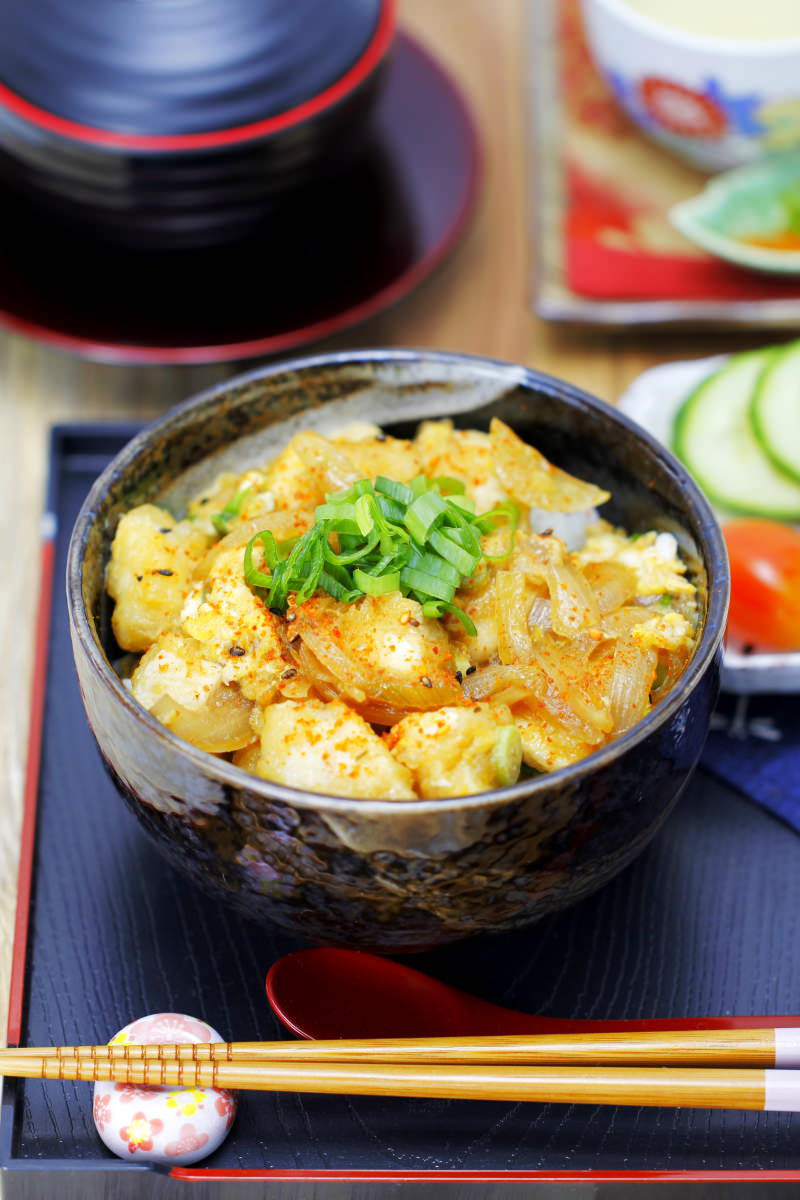
The name of this popular Donburi dish comes from its two main ingredients, chicken and egg. In fact, the word Oyakodon means parent (oya) and child (ko) in a bowl (don). Oyakodon is truly a classic of Japanese home cooking – I love to prepare this dish for dinner, as it’s wonderfully satisfying without being heavy on the stomach.
In this one-pot recipe, tender pieces of chicken, onions and eggs are cooked in an Umami-rich sauce and then poured over a bowl of fluffy, steamed rice.
Simple, delicious and guaranteed to succeed! With the right preparation, the very best homemade oyakodon will be on your dining table in 30 minutes.
Tip
This dish is also ideal for cooking with children or teenagers. It’s easy to prepare and everyone will love the result!

Please note that before you start cooking, one of the most important ingredients – the homemade brodo Dashi made from Kombu and Shiitake – should already be ready! You can find the brodo Dashi recipe here.</ a> The stock is then seasoned with a balanced mixture of soy sauce, Mirin and sugar, so that it tastes sweet and salty.
Ideally, all the preparations for the Japanese rice should also be done in advance. It’s best to cook the rice at the same time on the hob or in a rice cooker, so that everything is ready at the same time after 30 minutes.
It doesn’t matter if the rice is ready after just 20 minutes or even sooner – rice stays warm in the pot (but off the hob) for quite a long time 😉. You can find my recipes for Japanese rice here:
No post found!
And then you’re ready to start preparing the oyakodon! I wish you every success and hope you enjoy cooking – if you have any questions or suggestions, please feel free to use the comments section below the recipe 😊. Let’s get started:
Oyakodon
serves 2 | 30 minutes | 720 kcal
🖨️ Print PDF 📌 Save pinOyakodon is just the thing if you want to whip up a quick yet flavourful rice dish. You only need a few ingredients for this typical Japanese rice bowl, and everything is cooked in just one pan – ideal! The chicken stays super tender and juicy, and the delicious broth perfectly combines the topping with the freshly cooked rice. A must-have for your everyday Japanese cooking!
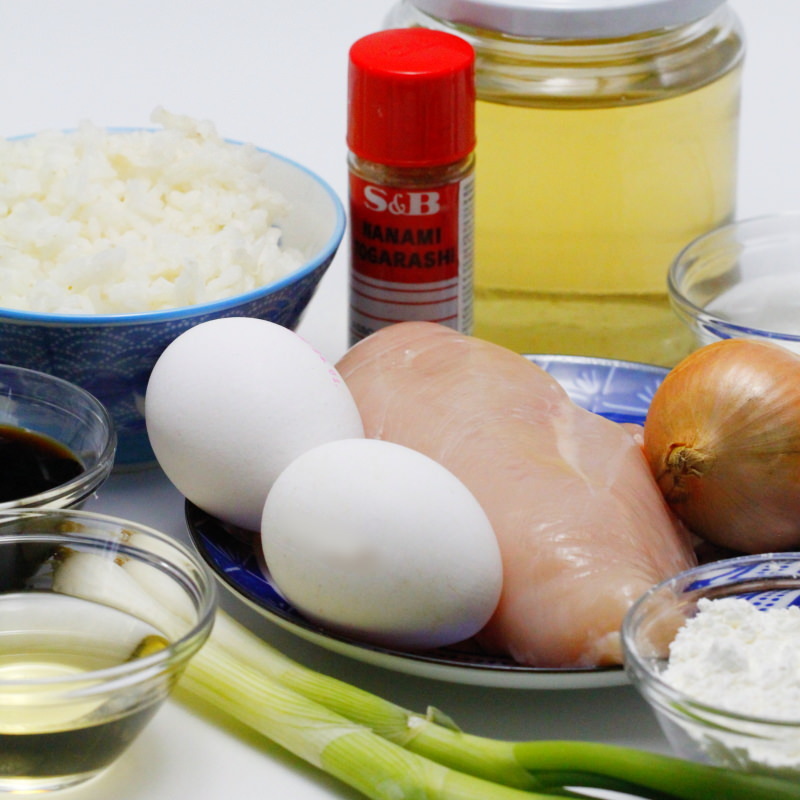
Ingredients (serves 2)
2 portions of rice (see the recipe in a saucepan or in a rice cooker) *
200 g chicken (e.g. inner fillet or breast fillet)
2 tbsp </ strong>Sake (im Shop ansehen)*
2 eggs
1 onion
2 </ strong>spring onions
50 g katakuriko (potato starch) (im Shop ansehen)*
2 tbsp oil (e.g. rapeseed oil)
150 ml Dashi broth (im Shop ansehen) (to the recipe)
4 tbsp Shoyu (im Shop ansehen) *
2 tbsp Mirin (im Shop ansehen)*
1 tbsp sugar
1 tsp Shichimi Togarashi (im Shop ansehen)*
Preparation (30 minutes)
Step 1
Prepare the ingredients for Oyakodon and cook the rice (see the recipe here in a rice cooker or in a pan). In addition, the brodo Dashi made from Kombu and Shiitake should now be ready (click here for the recipe).
Step 2
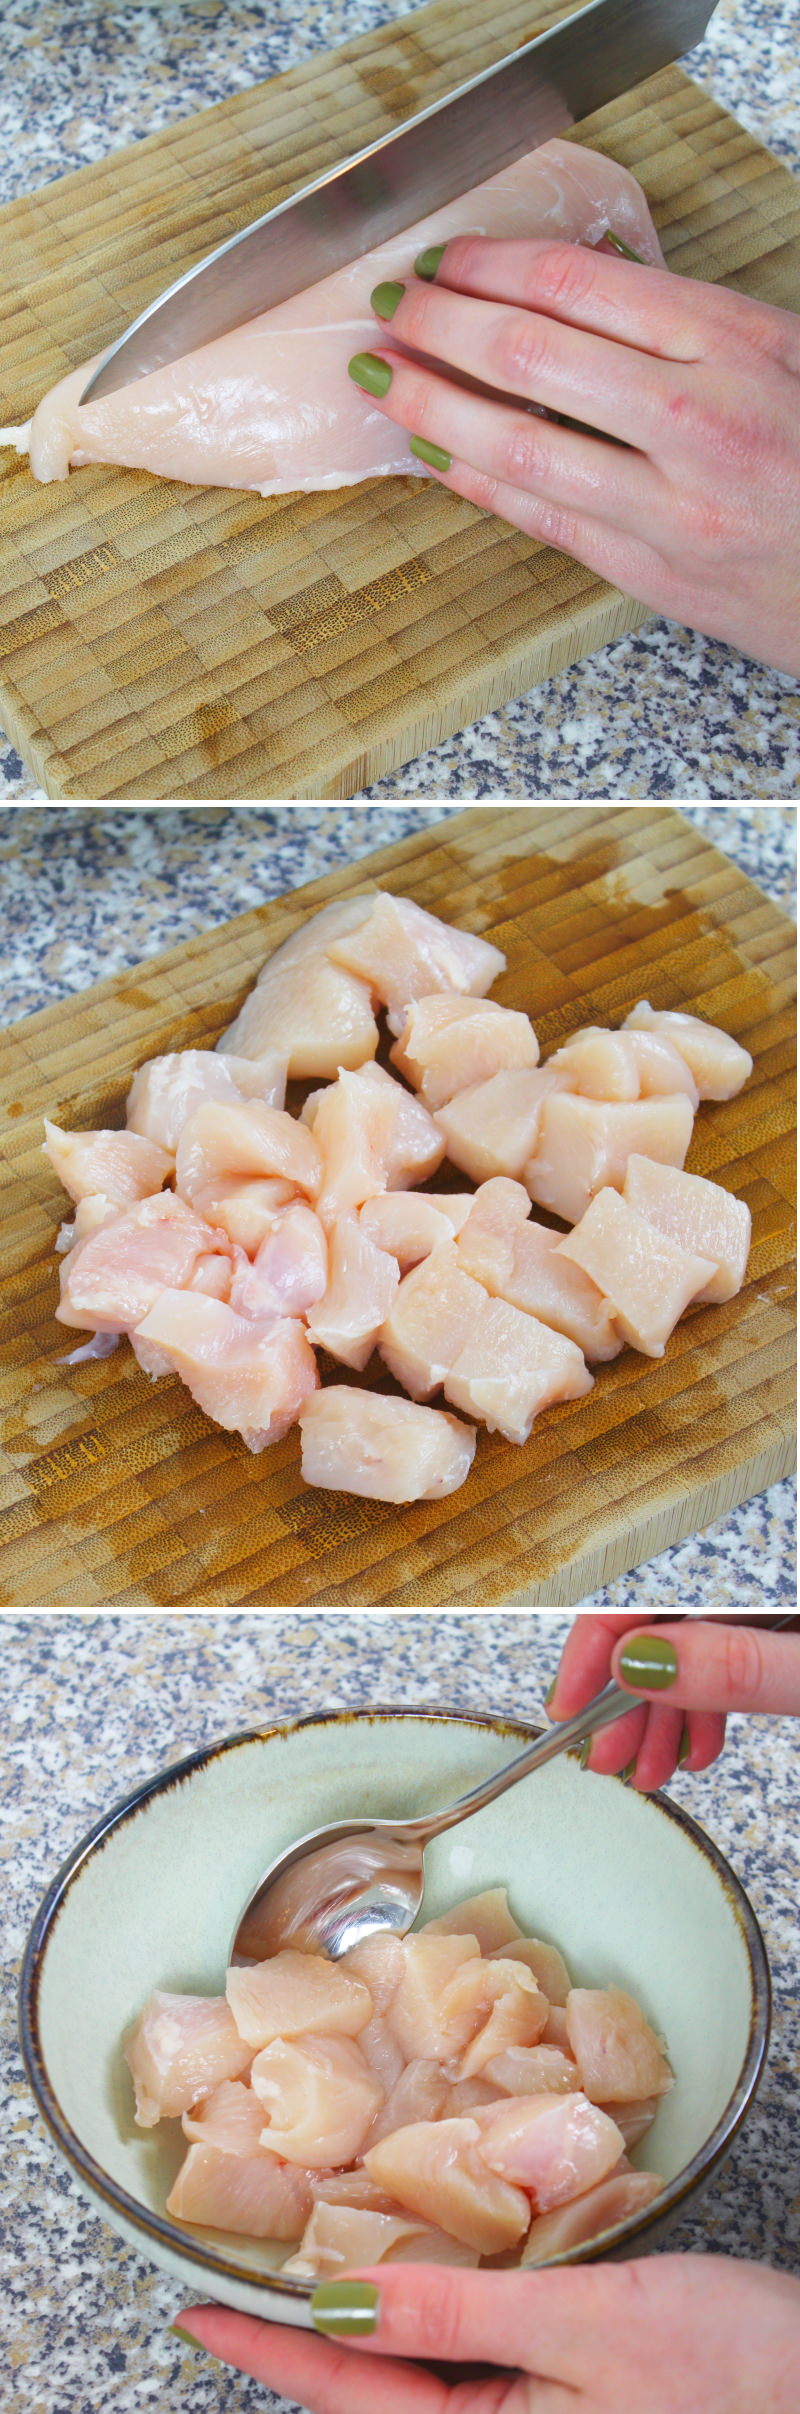
Wash the chicken fillets under running water and pat dry. Then cut into bite-sized pieces. Place the chicken in a bowl, pour the Sake over it, stir briefly, then set aside for 10 minutes to marinate.
Step 3
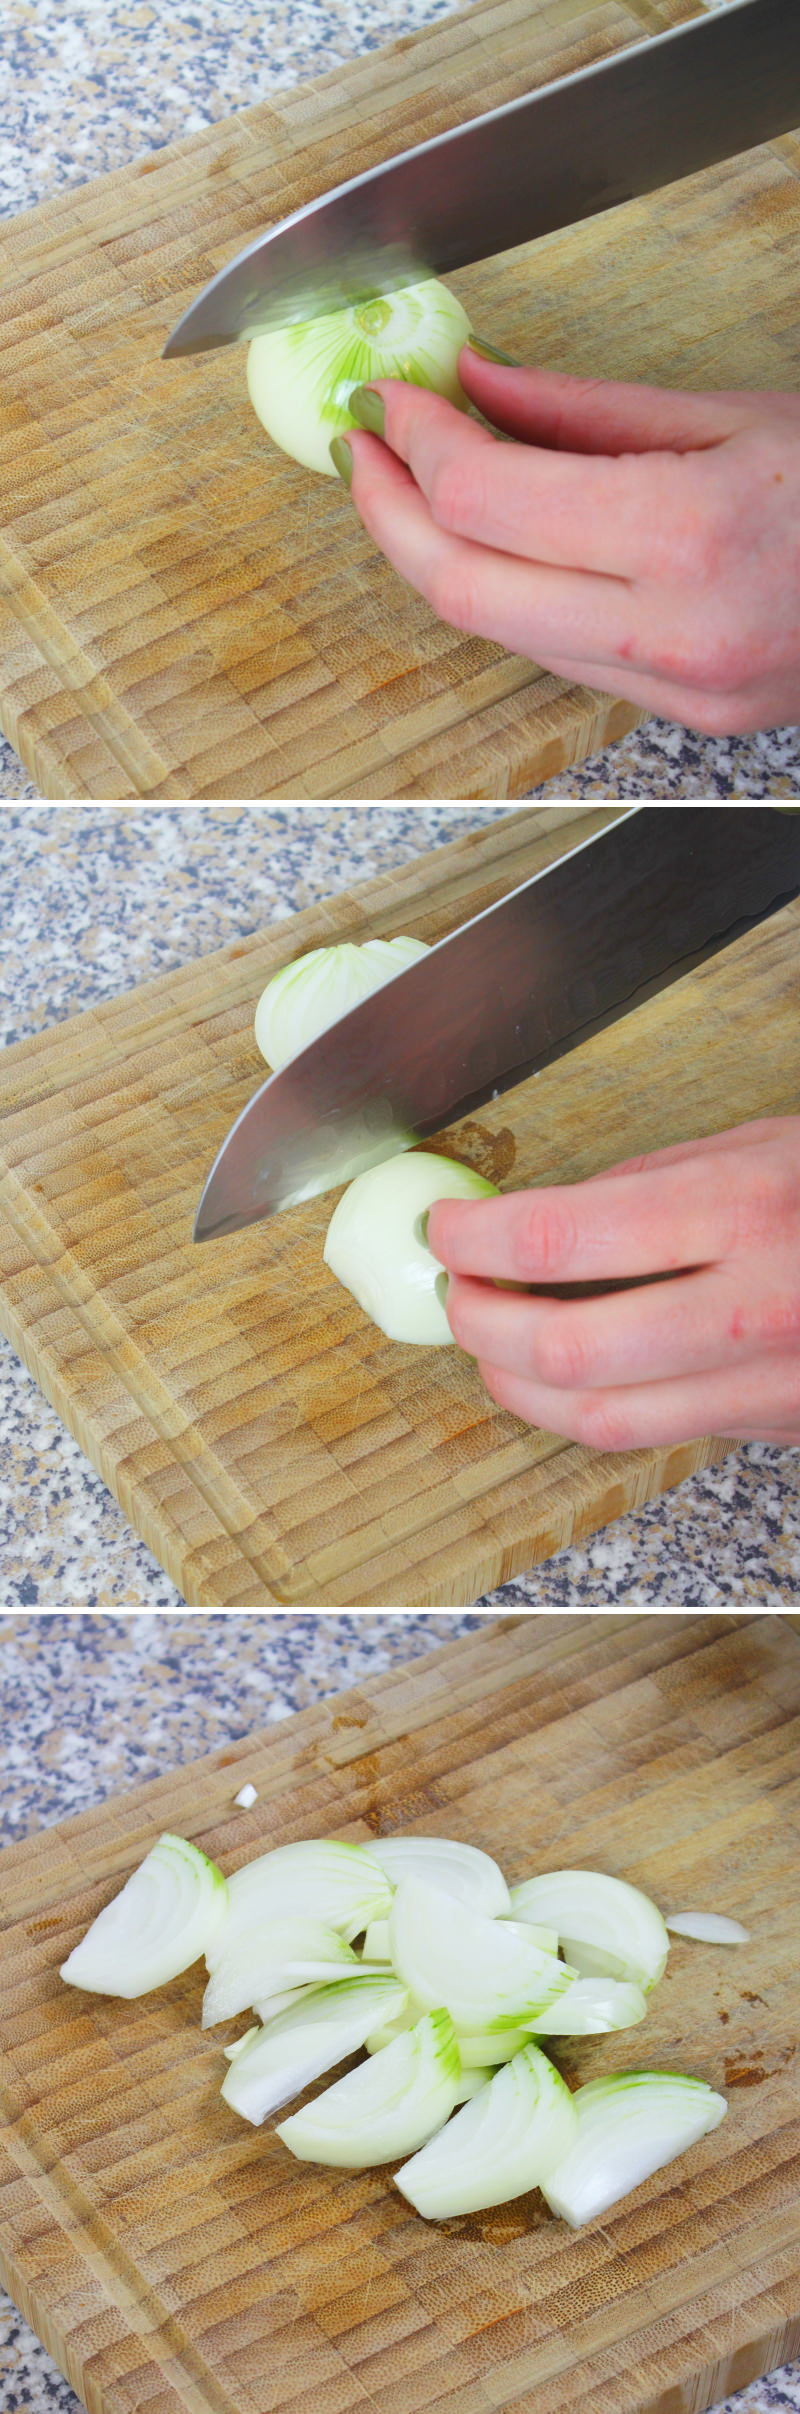
In the meantime, prepare the remaining ingredients: Peel the onion , then halve it and cut each half into thin strips.
Step 4
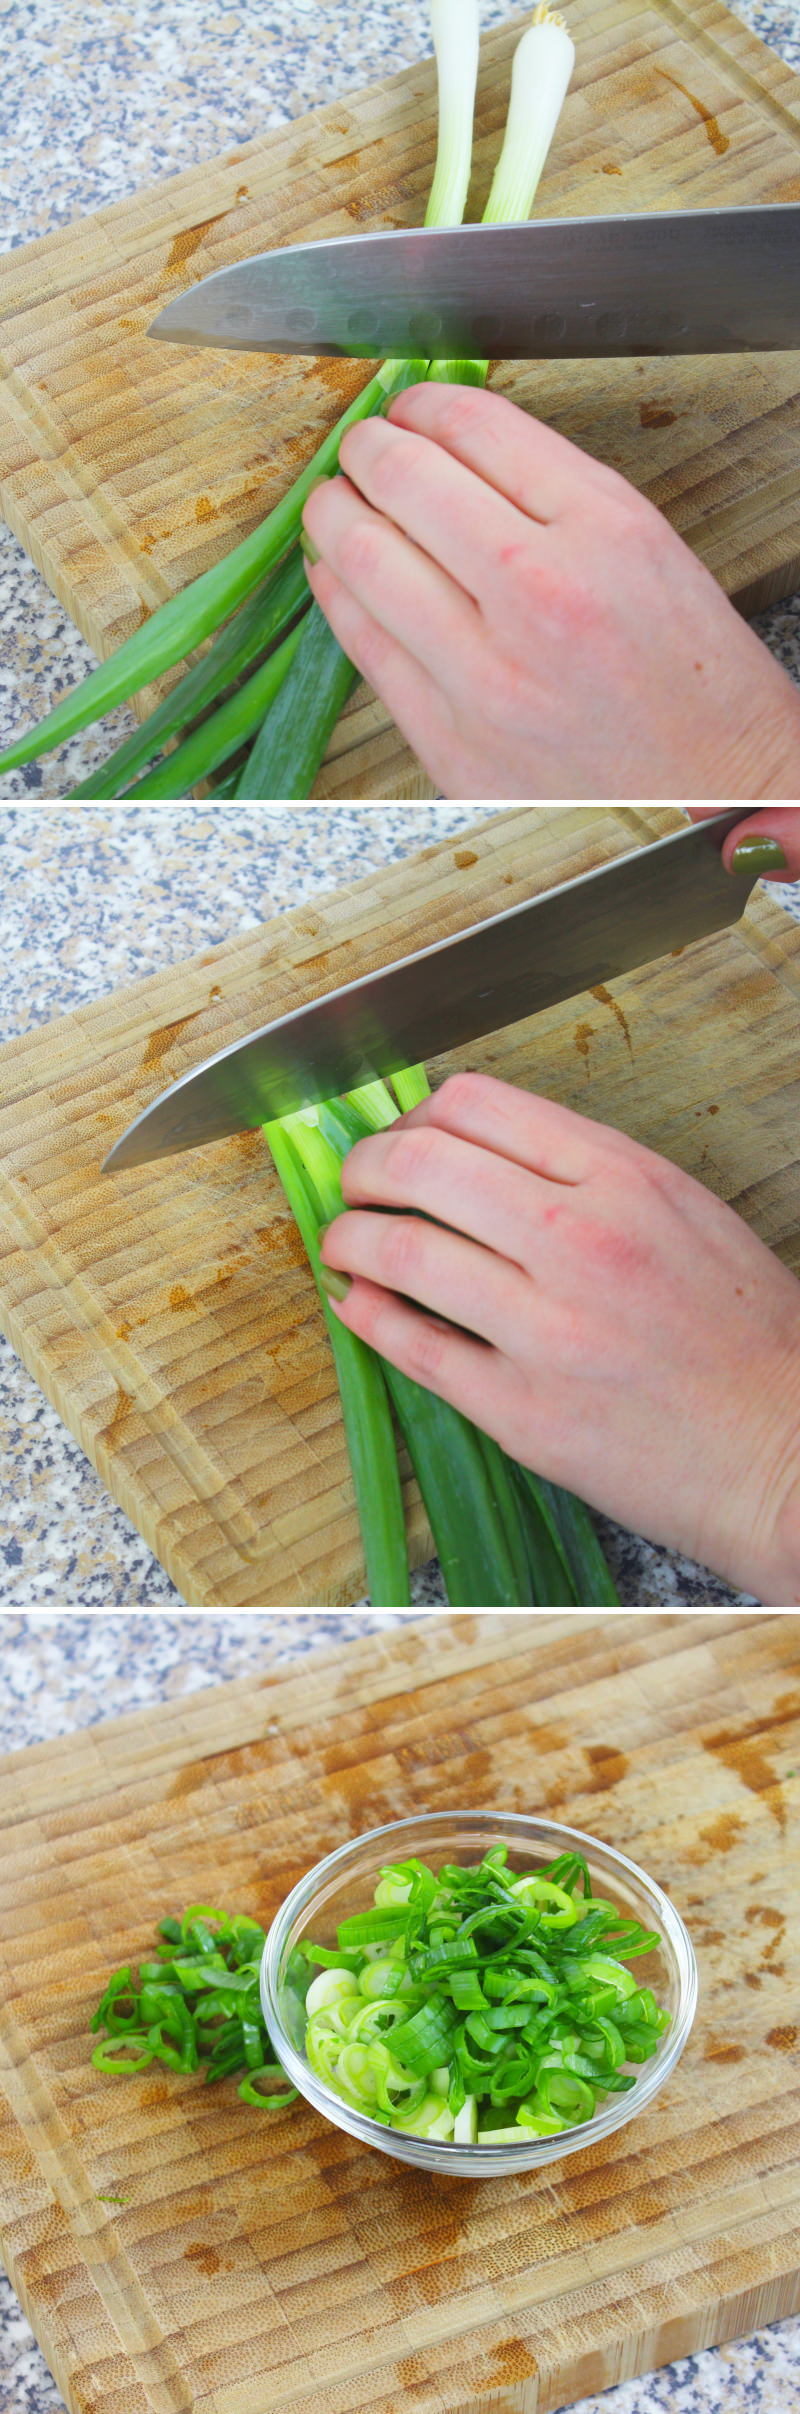
Additionally, wash the spring onion, pat it dry with a cloth, and slice it into thin rings.
Step 5
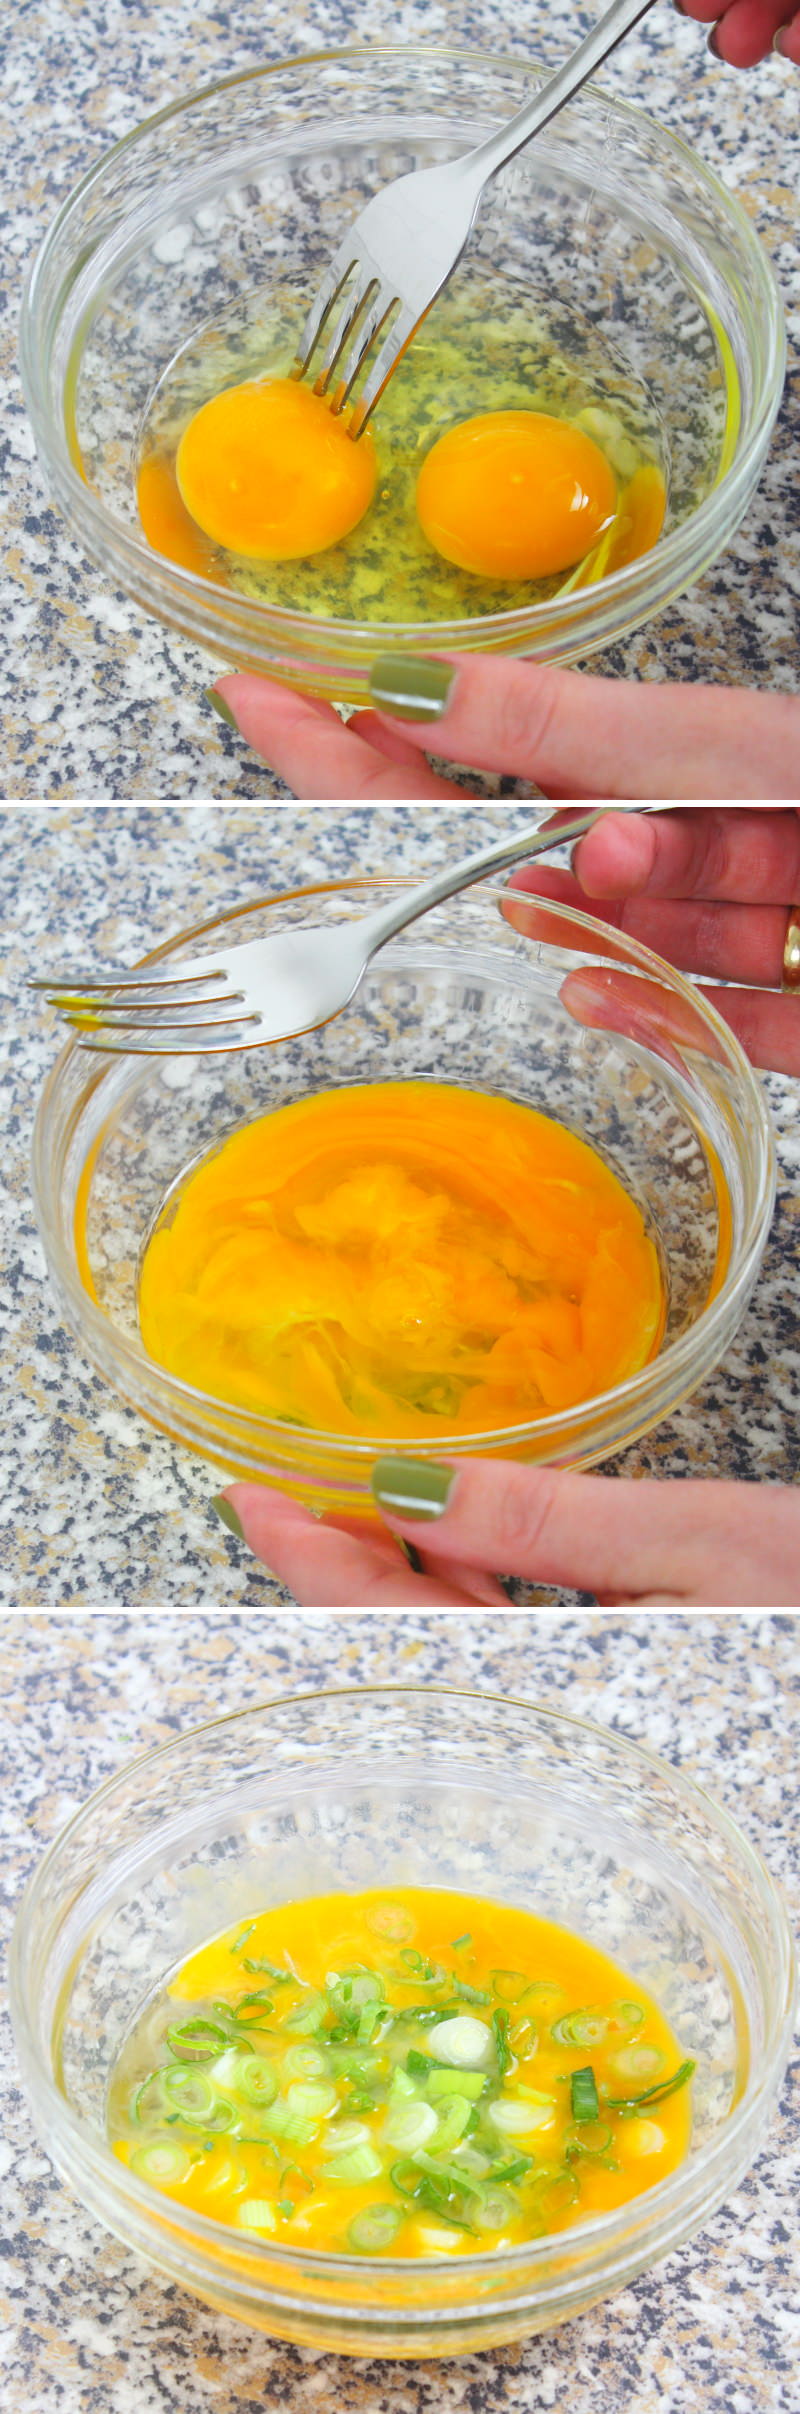
Crack the eggs into a bowl and whisk very briefly with a fork. Then add about half of the spring onion rings and stir.
Step 6
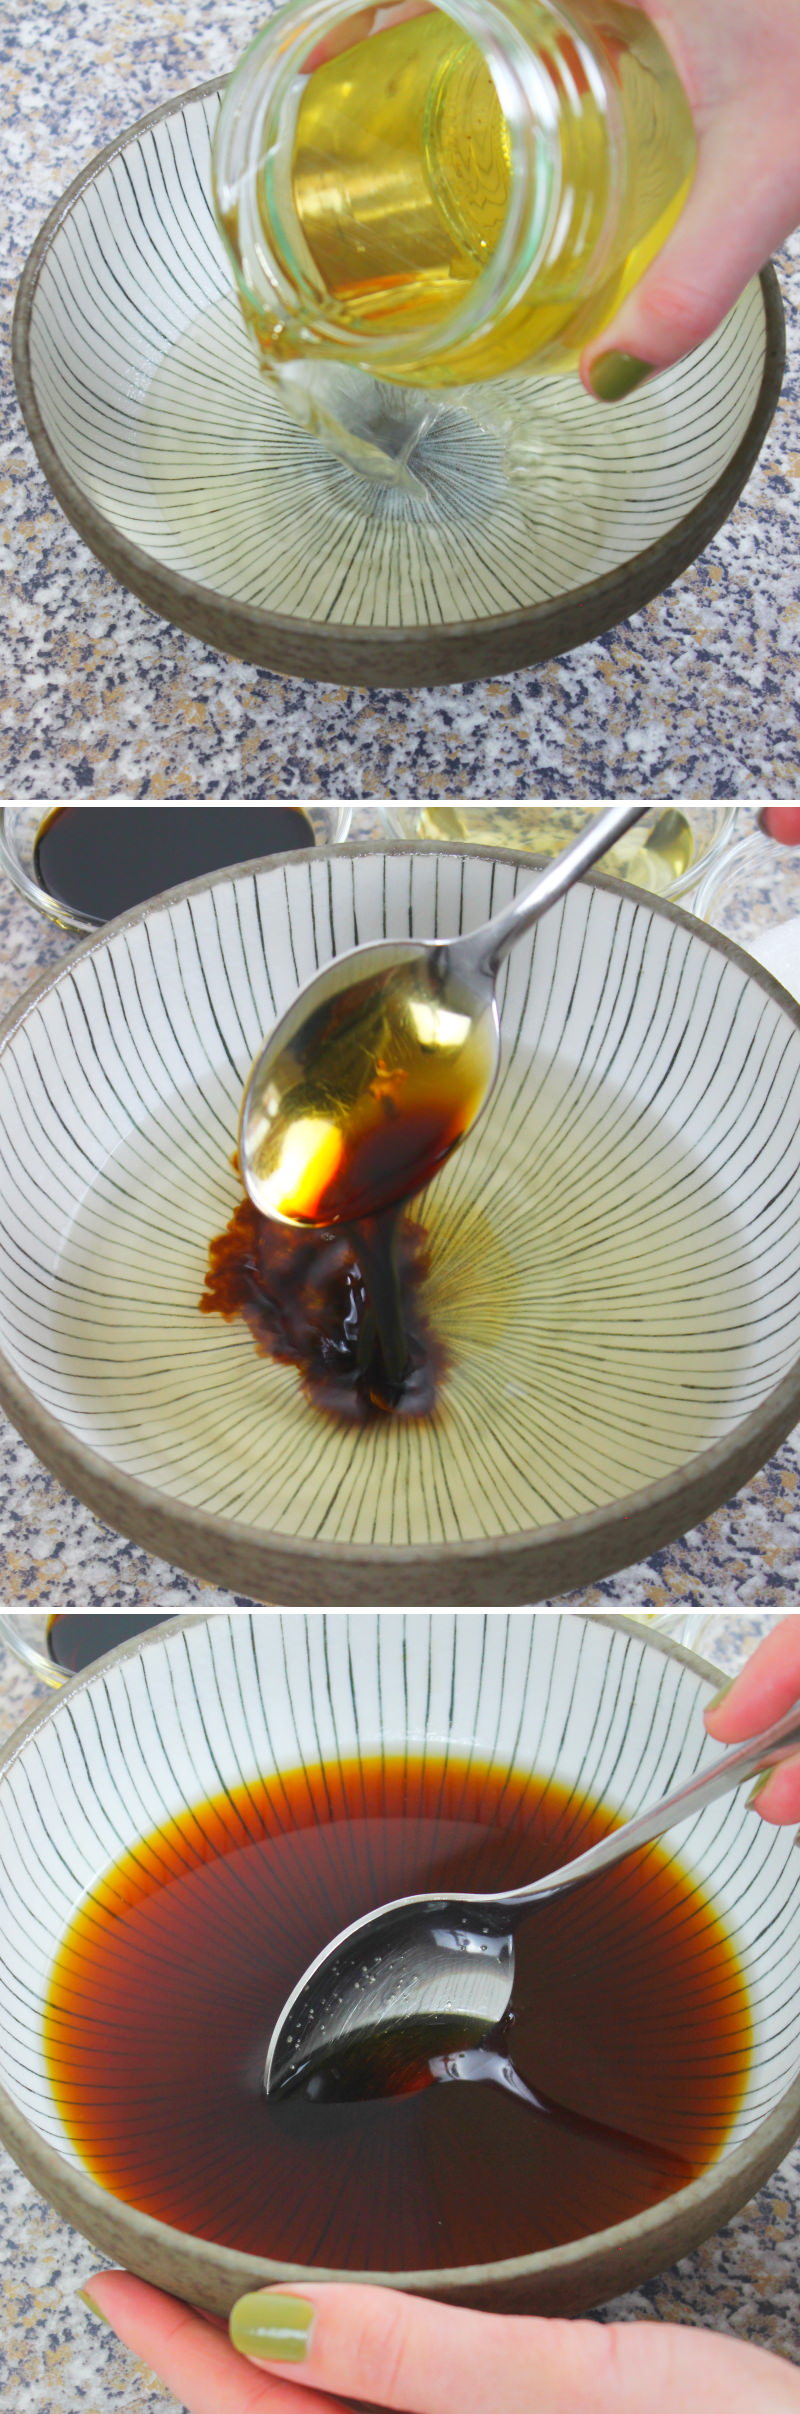
Now, for the sauce, mix the brodo Dashi with soya sauce, Mirin and sugar in another bowl until the sugar has dissolved.
Step 7
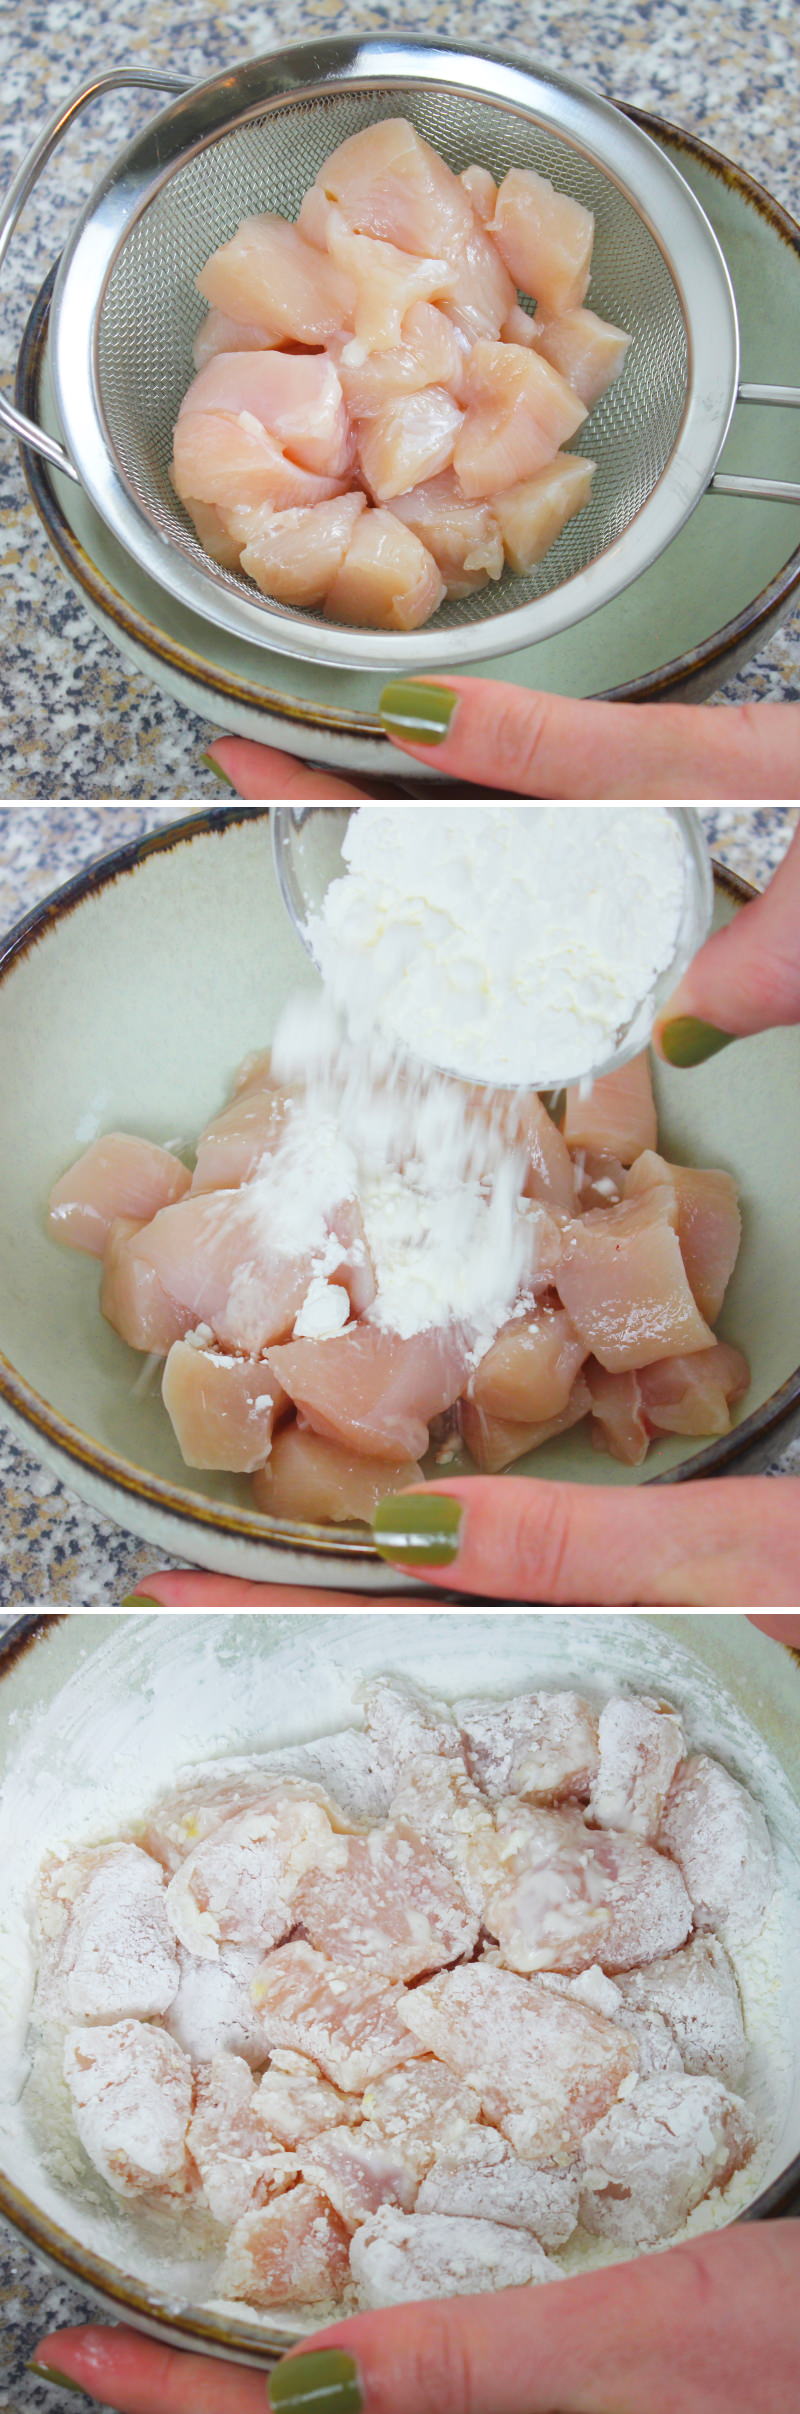
Next, drain the chicken through a sieve and return it to the bowl. Then sprinkle with the potato starch and fold in.
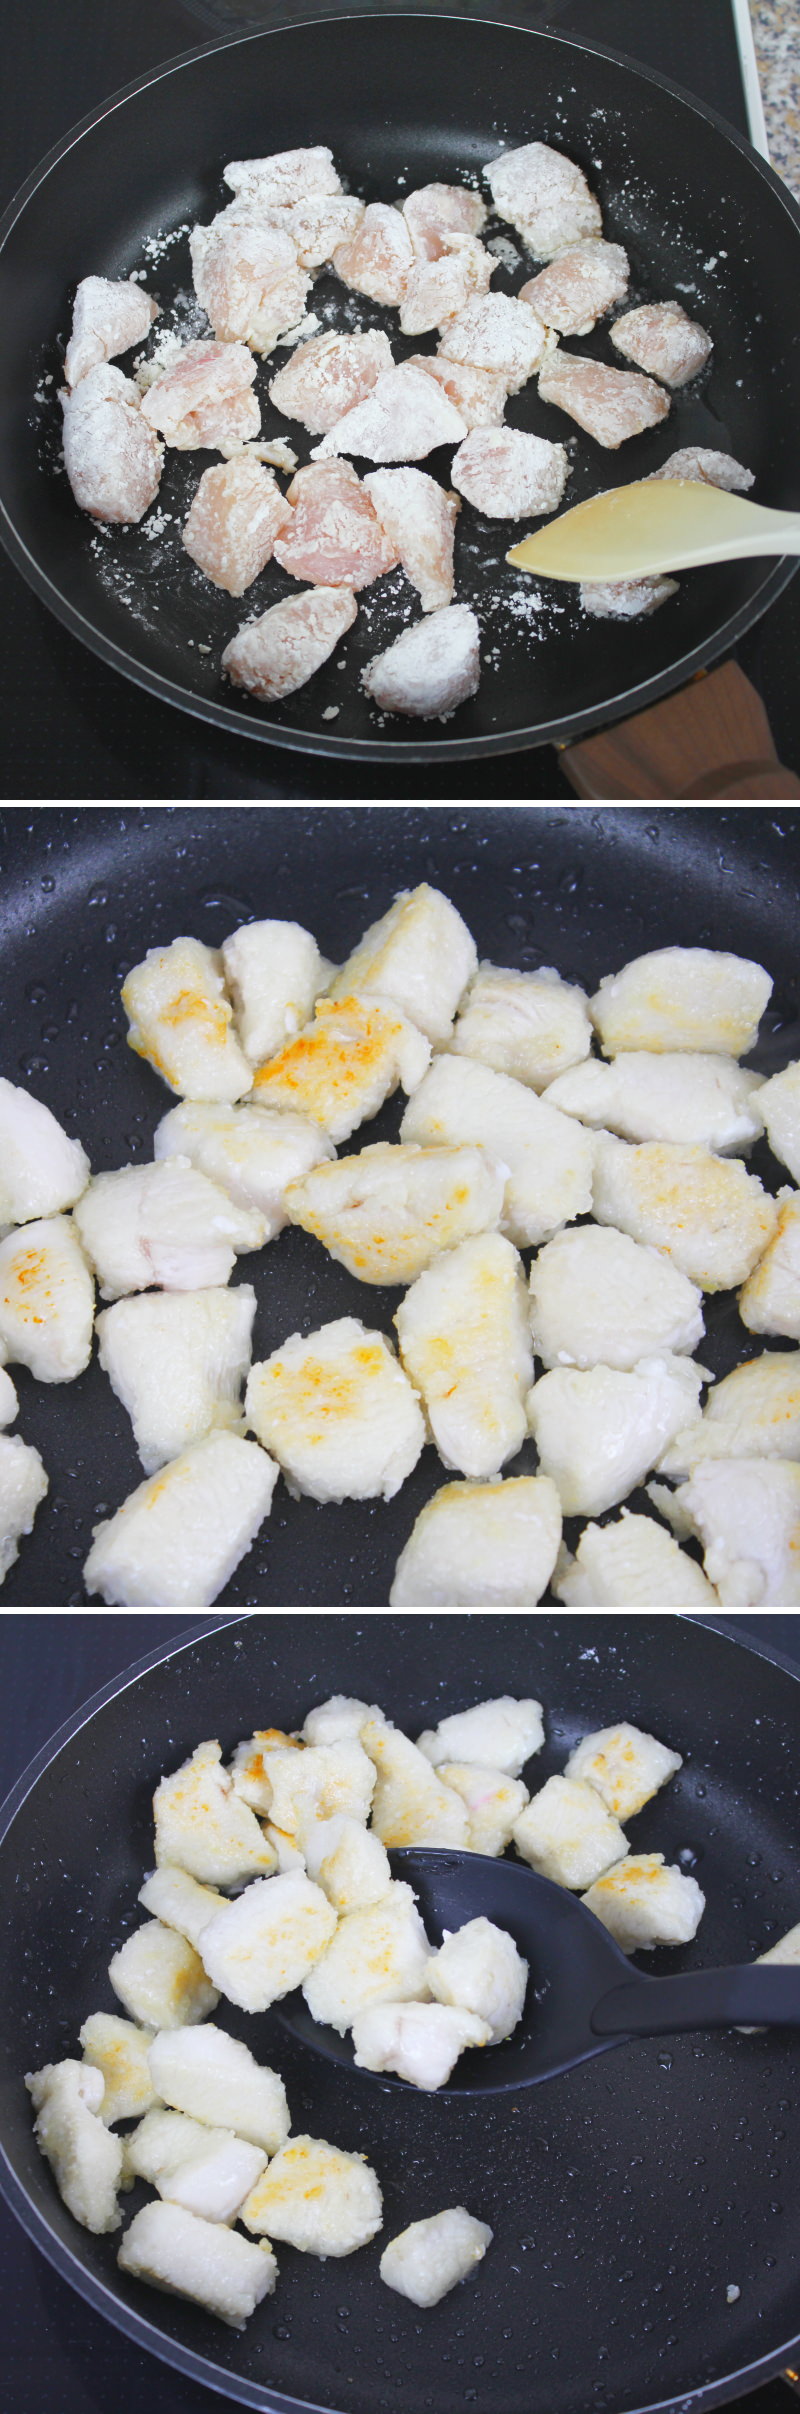
Step 8
Now, in a medium frying pan (please note: we will also need a lid for the pan later), heat the oil and sear the chicken pieces on all sides until they are lightly browned. This won’t take very long, about 3 to 4 minutes. Then remove them from the pan (DO NOT turn off the heat) and leave to rest on a plate.
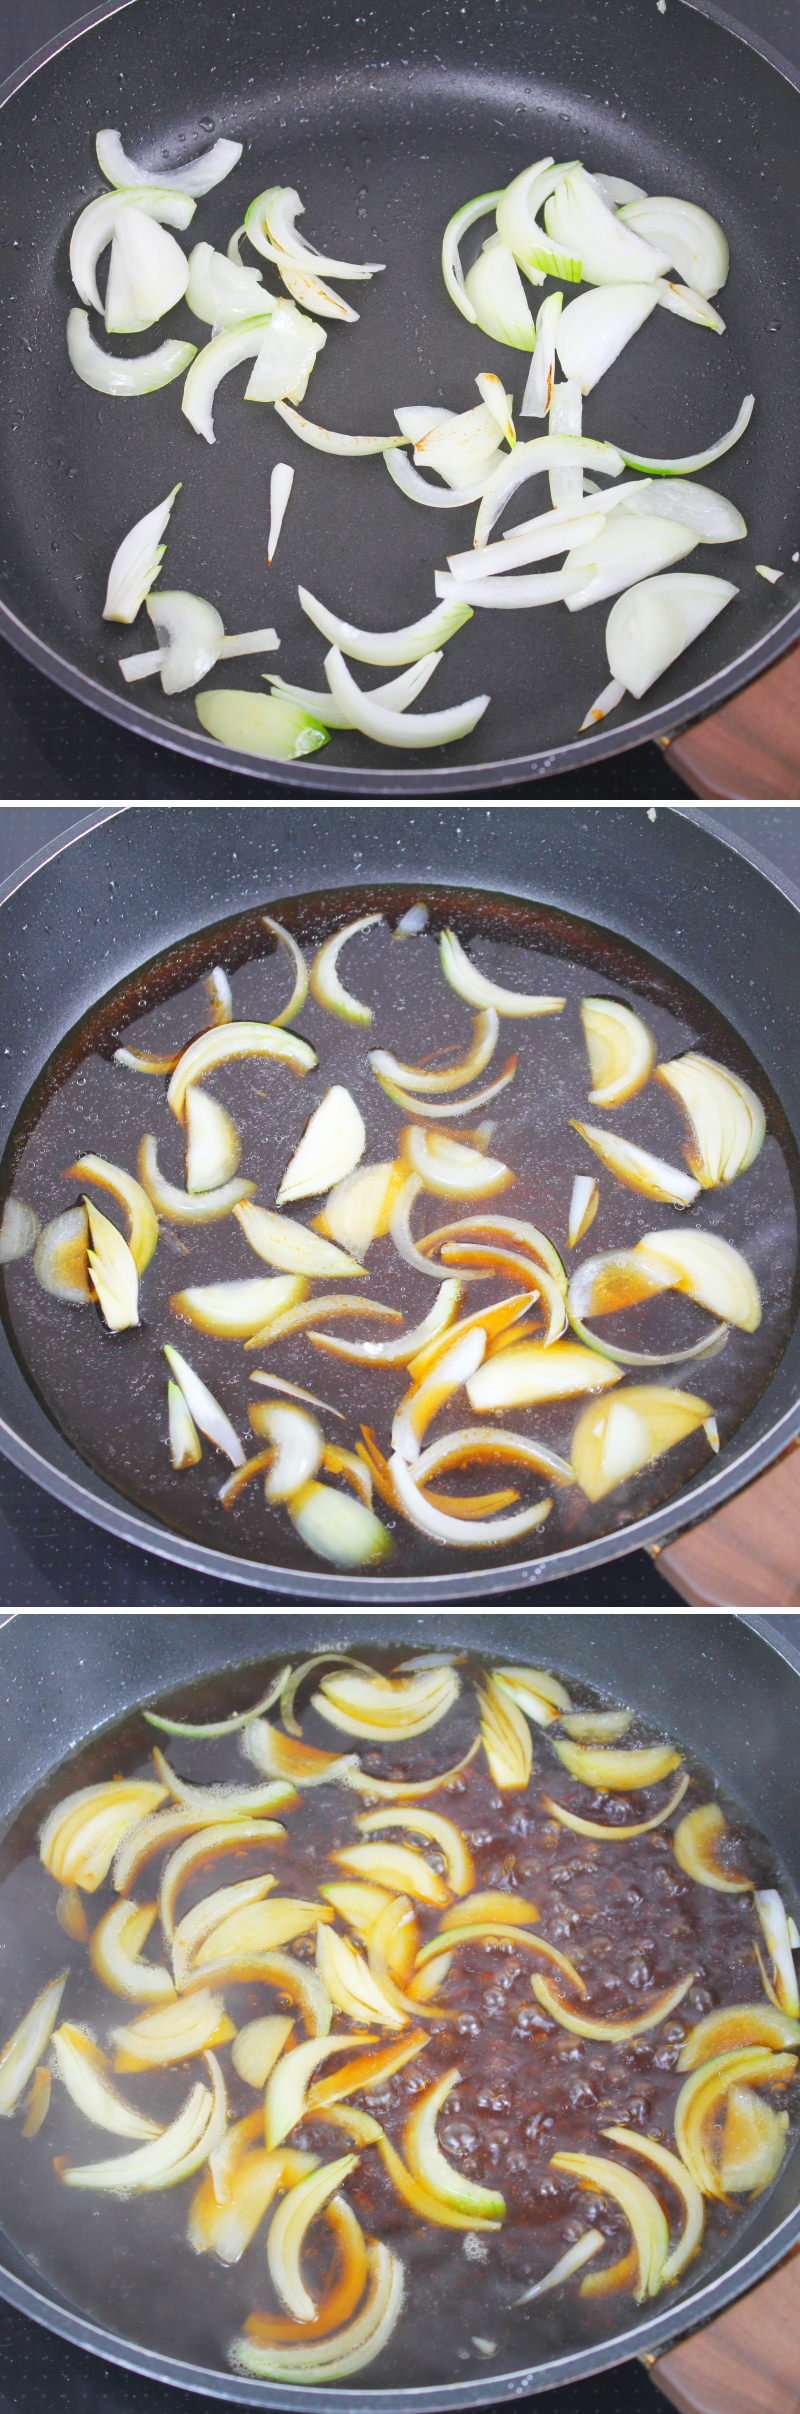
Step 9
Now briefly fry the onion strips in the hot pan, then pour the prepared sauce over them. Simmer everything until the onion is nice and soft.
Step 10
Now add the previously fried chicken pieces to the onions in the pan and mix well with the sauce.
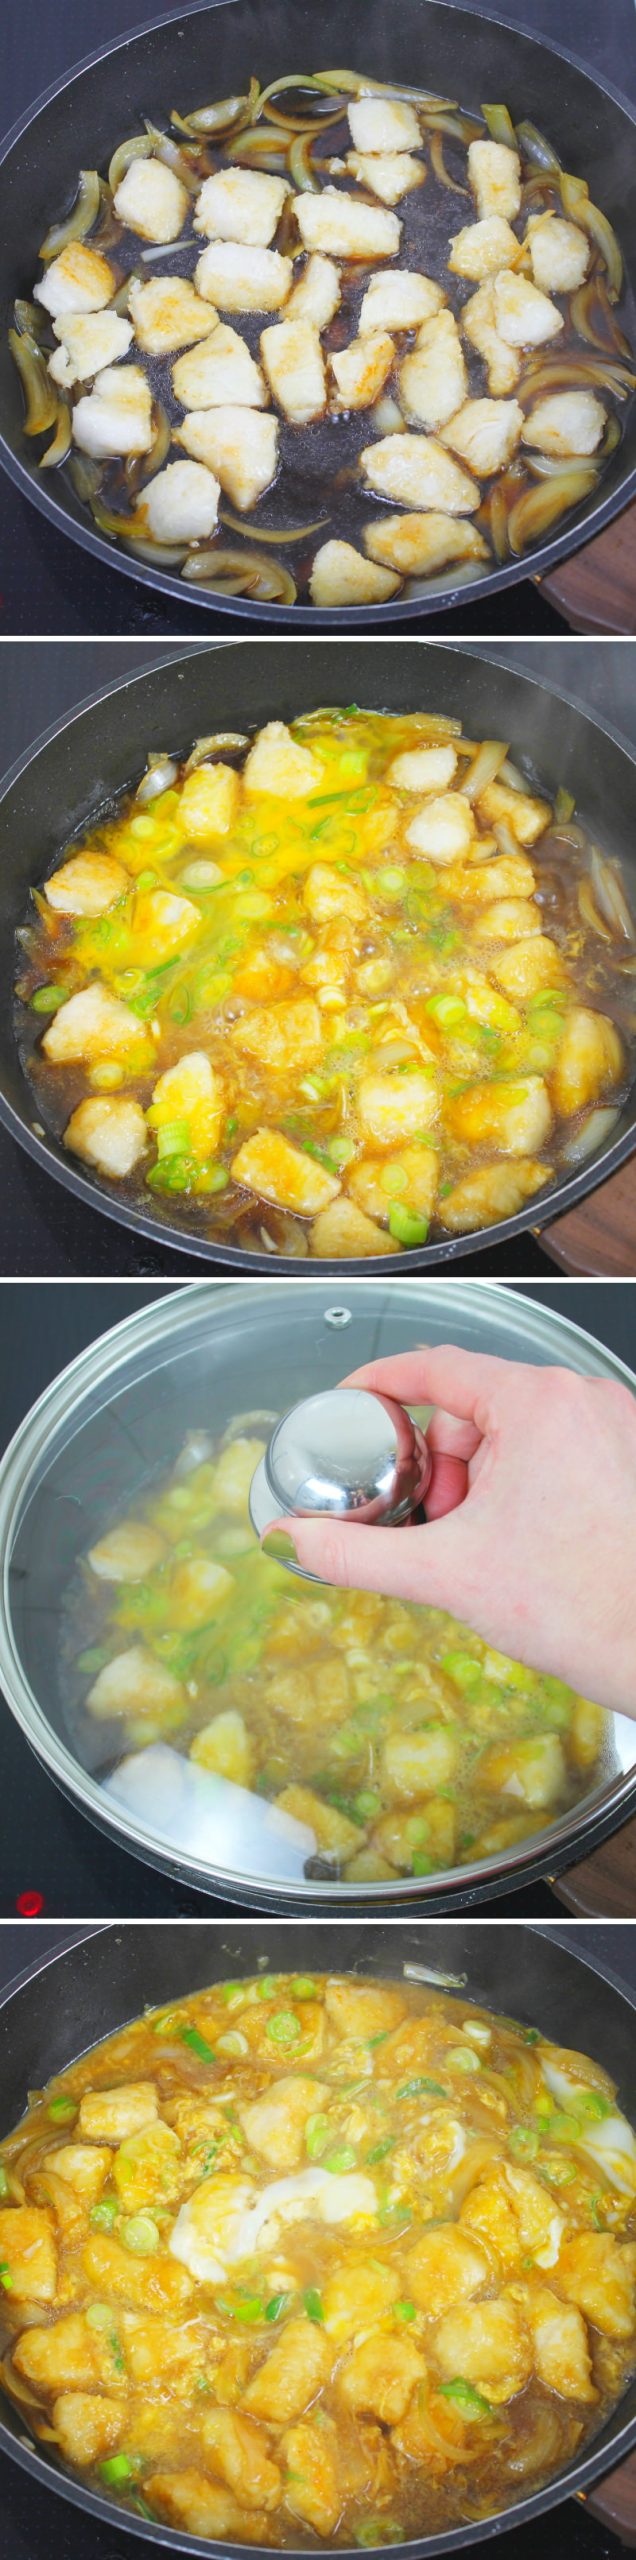
Then add the egg and spring onion mixture. Stir well, cover the pan and turn off the heat. Leave to cook until the egg has visibly set.
If necessary, give everything in the pan a stir now and then so that the egg sets to your liking (I prefer it slightly runny, but you can also cook it through completely).
Step 11
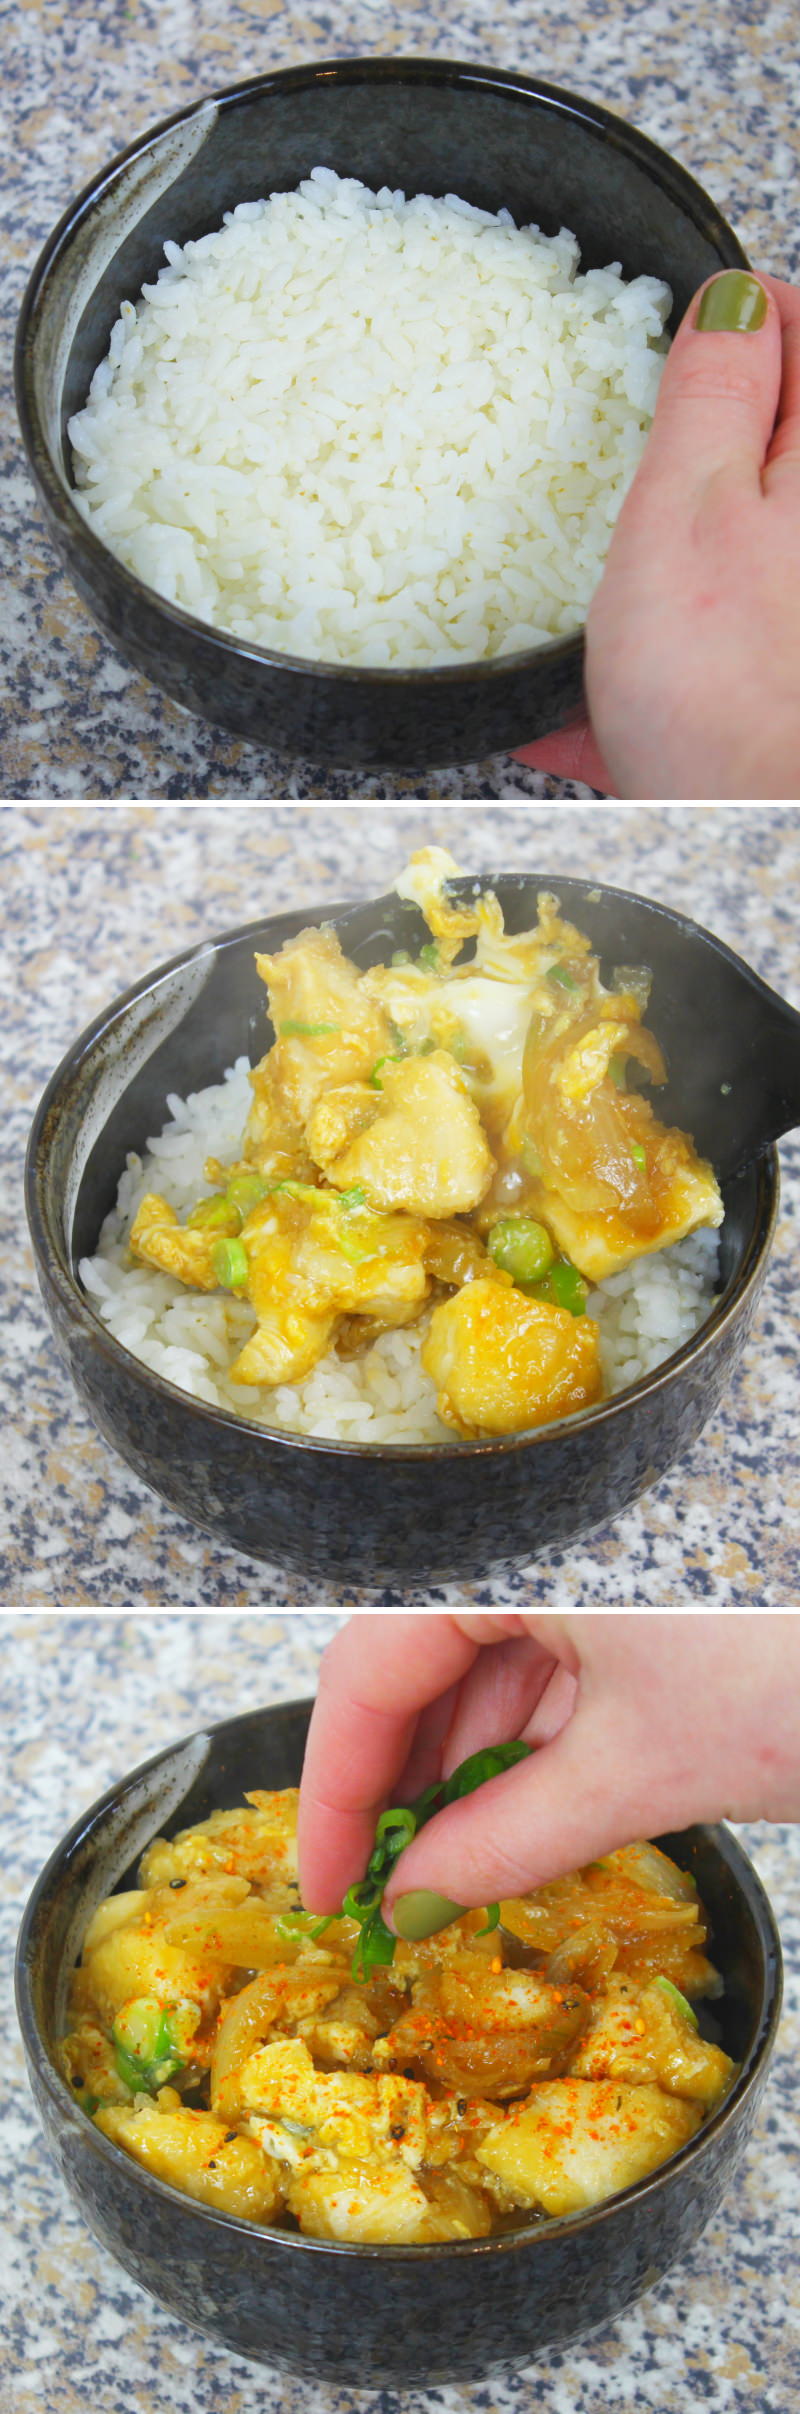
Now spoon the rice into bowls and top with the contents of the pan as a topping. Garnish everything with the remaining spring onions and a little shichimi togarashi.
Step 12
Ready – Itadakimasu!
Are you looking for even more wonderful rice recipes from Japan? Here are a few ideas:
No post found!
Have you tried the recipe? Let me know in the comments – I can’t wait to hear from you.