Sprache:
This recipe for Tsukudani Onigiri is a dish for lovers of vegan Japanese cuisine! And best of all – the key ingredient for this snack is leftover Kombu from making Japanese brodo Dashi! Once the rice is cooked, it takes less than 10 minutes to make these delicious rice balls 😊.
Have you ever wondered what to do with the leftover Kombu from making Japanese Dashi stock? It would be such a shame to simply throw the Kombu away… Why not turn it into delicious Tsukudani Onigiri instead!
TOP RECOMMENDATION
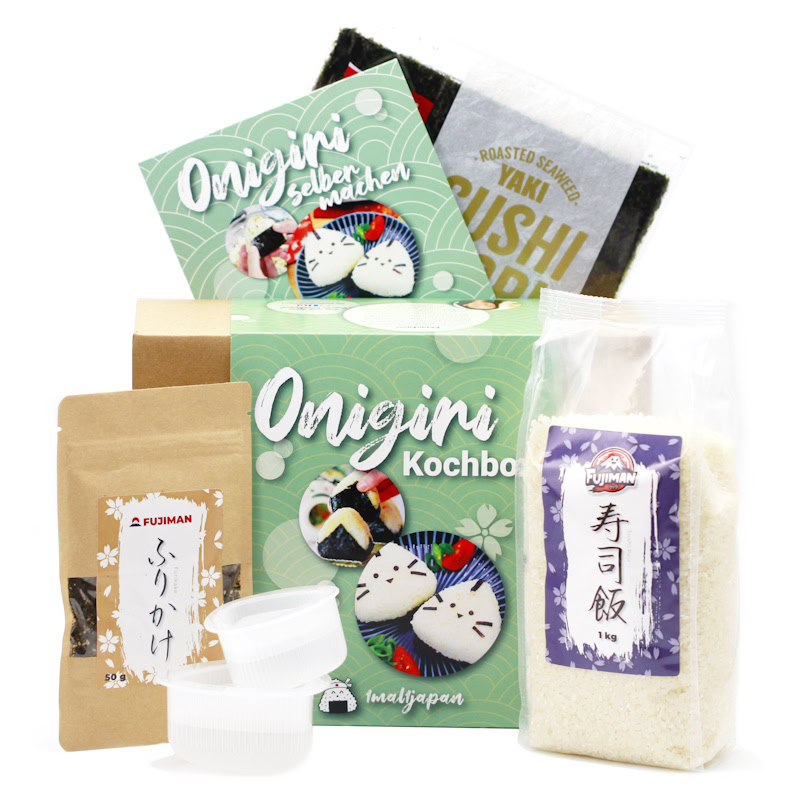
Onigiri Kochbox | Reisbällchen selber machen
5-tlg. DIY Set, inkl. 3 Rezeptideen für japanische Reisdreiecke | vegan, Geschenkidee für Anime Fan. Mit dem Onigiri Kochset gelingen dir japanische Reisdreiecke ganz einfach…
In stock
The Kombu that has already been used is simmered in a sweet and savoury sauce made from Sake, soy sauce and Mirin – almost like a Teriyaki sauce. We use this to create a delicious filling for tasty, freshly made rice balls.
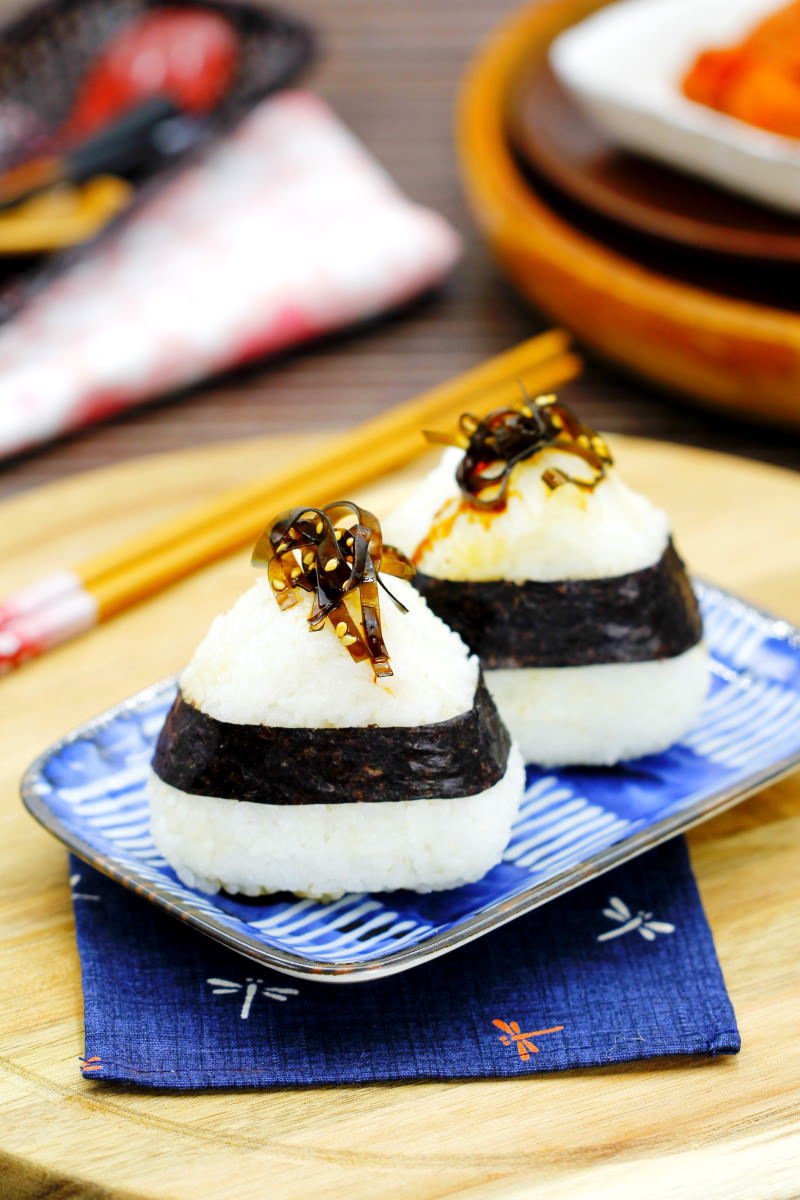
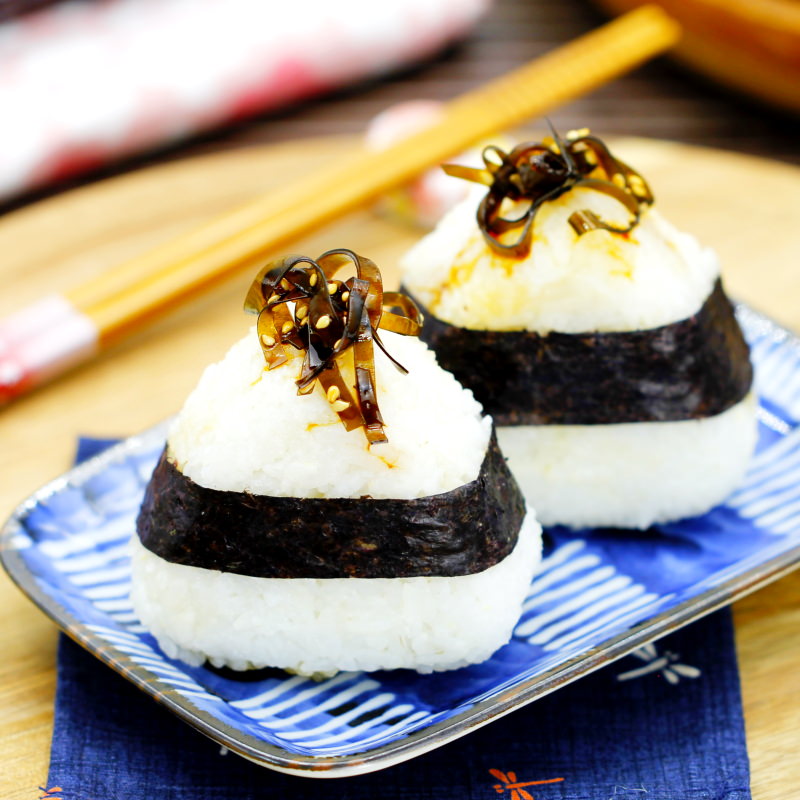
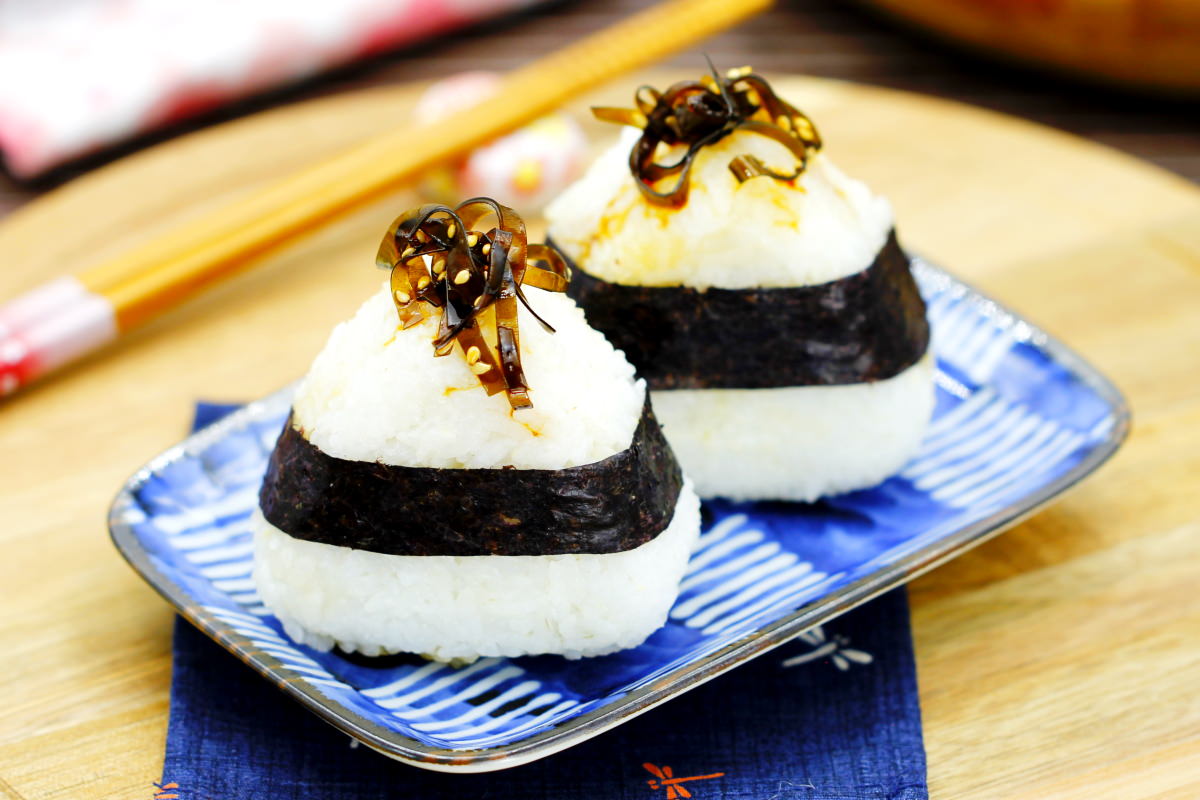
Tsukudani Onigiri with seasoned Kombu and crispy nori sheets are vegan! They’re great as a snack on the go or as an addition to your Bento Box.
The Japanese word Tsukudani (佃煮) refers to a cooking method in which, for example, seafood, meat, vegetables or seaweed are slowly simmered in a sweet and savoury sauce.
Kombu Tsukudani is a really clever way to use up pre-cooked Kombu that is left over, for example, from making ramen noodle soups or Miso soups.
Kombu Tsukudani has an intense Umami flavour. The perfect filling for delicious Japanese rice balls. Toasted sesame seeds add extra flavour and texture to this recipe.

Tip: Onigiri are best eaten fresh, as the rice dries out quickly after a while and the nori sheet becomes slightly soggy. Please do not store them in the fridge; instead, wrap them in cling film or pack them in a lunchbox.
Have fun trying out the Tsukudani Onigiri and enjoy your meal!
Tsukudani Onigiri
Serves 6 | 30 minutes | 210 kcal
🖨️ Print PDF 📌 Save pinThis recipe for Tsukudani Onigiri is a dish for lovers of vegan Japanese cuisine! And best of all – the key ingredient for this snack is leftover Kombu from making Japanese brodo Dashi! Once the rice is cooked, it takes less than 10 minutes to make these delicious rice balls 😊.
Ingredients (serves 6)
600 g cooked rice (see recipe):
✔ 300 g loose rice (im Shop ansehen)*
✔ 300 ml water (fresh, cold tap water)
✔ 1 pinch salt
50 g Kombu (left over from brodo Dashi preparation)
or 12 g dried (im Shop ansehen)*
200 ml water
2 tbsp Sake (im Shop ansehen)*
2 tbsp soy sauce (im Shop ansehen)*
1 tbsp Mirin (im Shop ansehen)*
1 tbsp sugar
1/2 tbsp sesame seeds (im Shop ansehen)*
1 sheet Nori sheets (im Shop ansehen)*
Useful utensils:
Onigiri mould – Rice mould set for rice triangles (im Shop ansehen)*
Japanese Santoku knife (im Shop ansehen)
Preparation (30 minutes)

Step 1
Prepare the ingredients for the Onigiri and get the rice (see the recipe here in a rice cooker or in a saucepan + leave to cool for 20 minutes).
Tip: If you’re using dried Kombu, soak it in water the night before and leave it to soak until ready to use (or make a brodo Dashi).
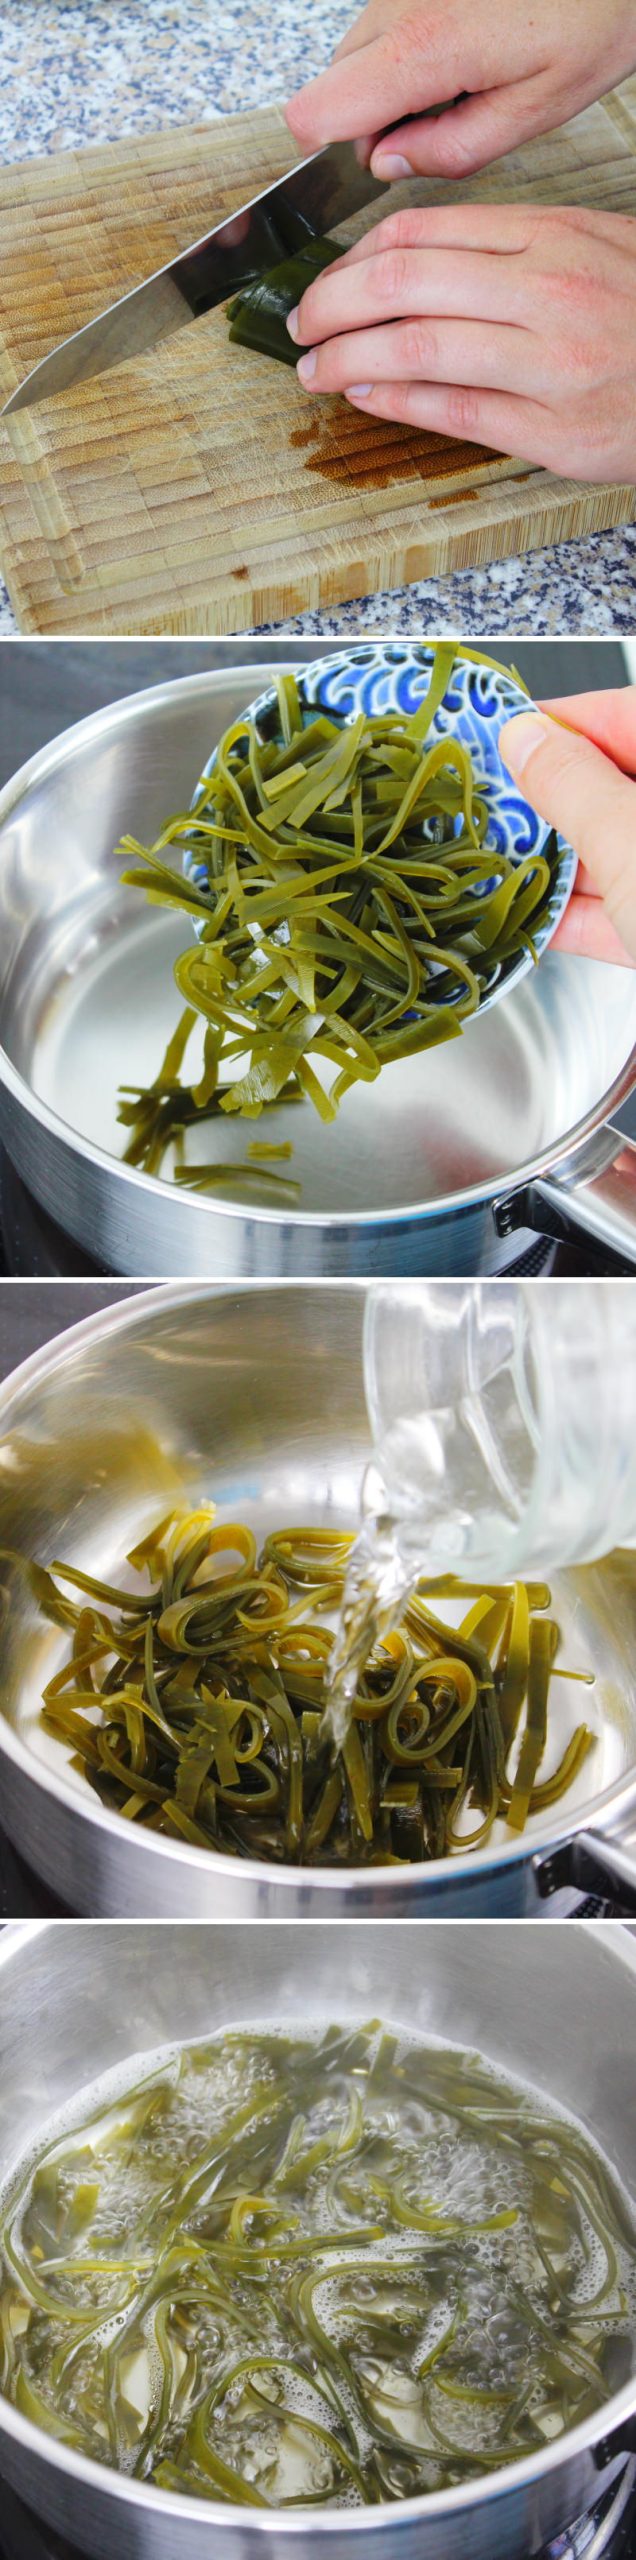
Step 2
Cut the soft, used Kombu into thin strips and bring to the boil in a small saucepan together with water and Sake .
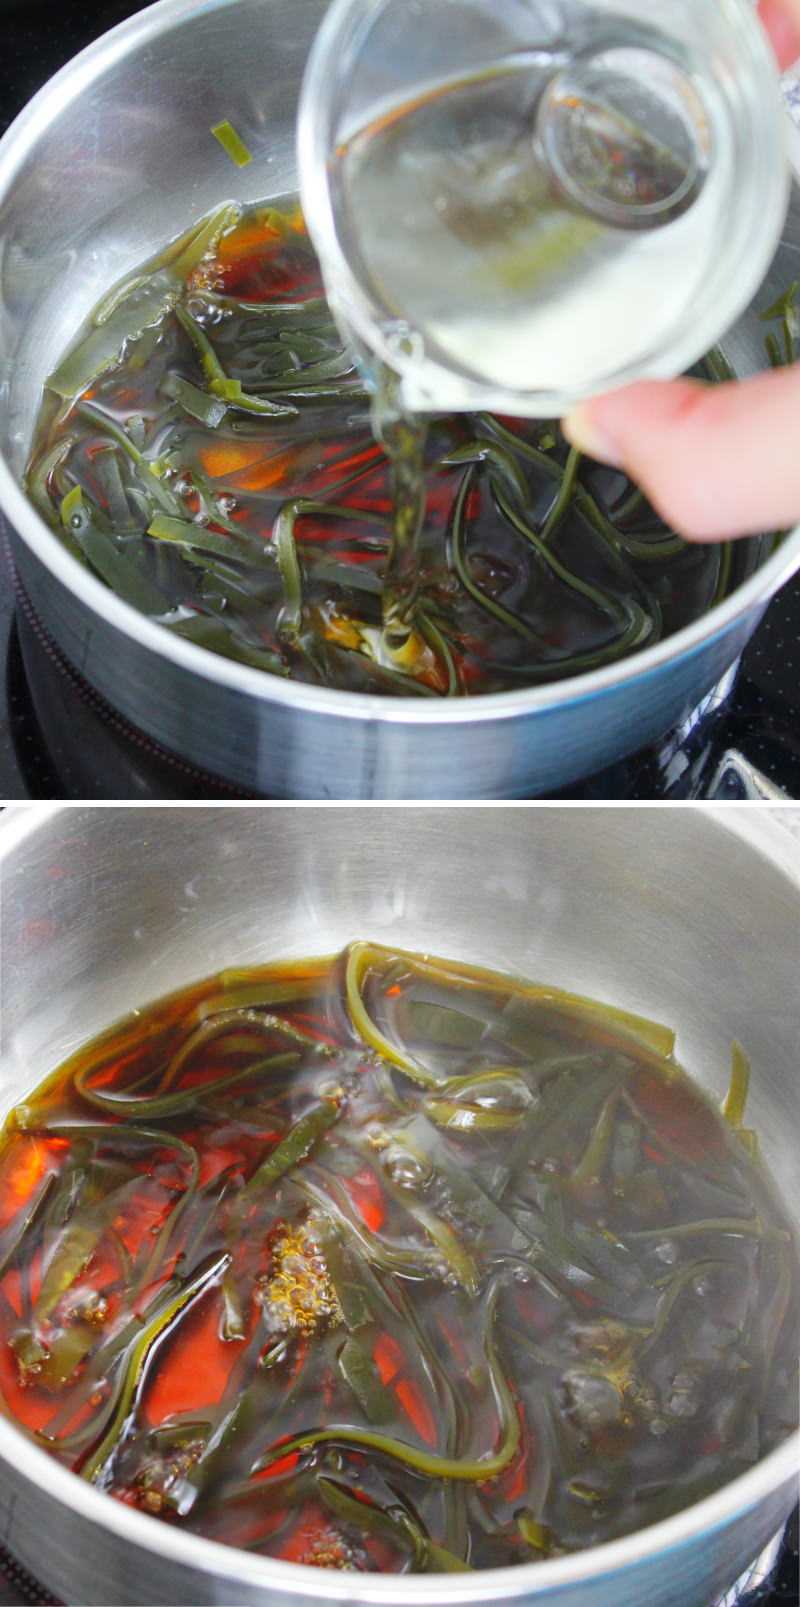
Step 3
Then reduce the heat so that the liquid simmers. After about 5 minutes, add soy sauce, Mirin and sugar .
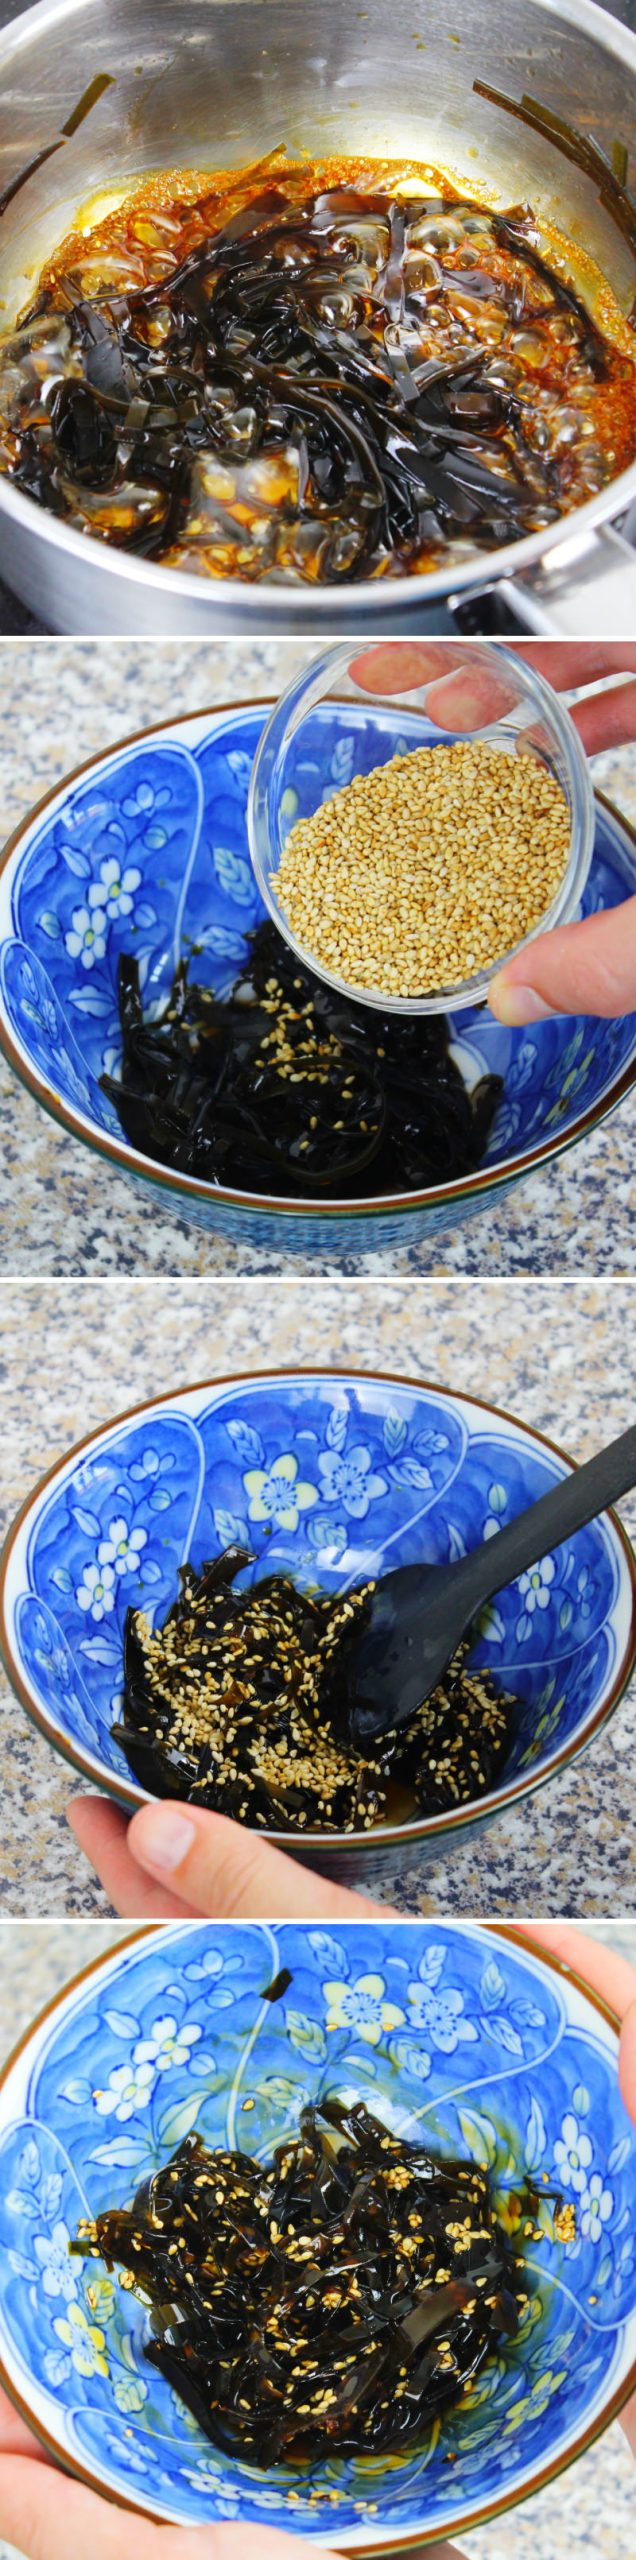
Passaggio 4
Simmer everything until the liquid has almost completely evaporated. Then transfer to a small bowl and mix with sesame seeds .
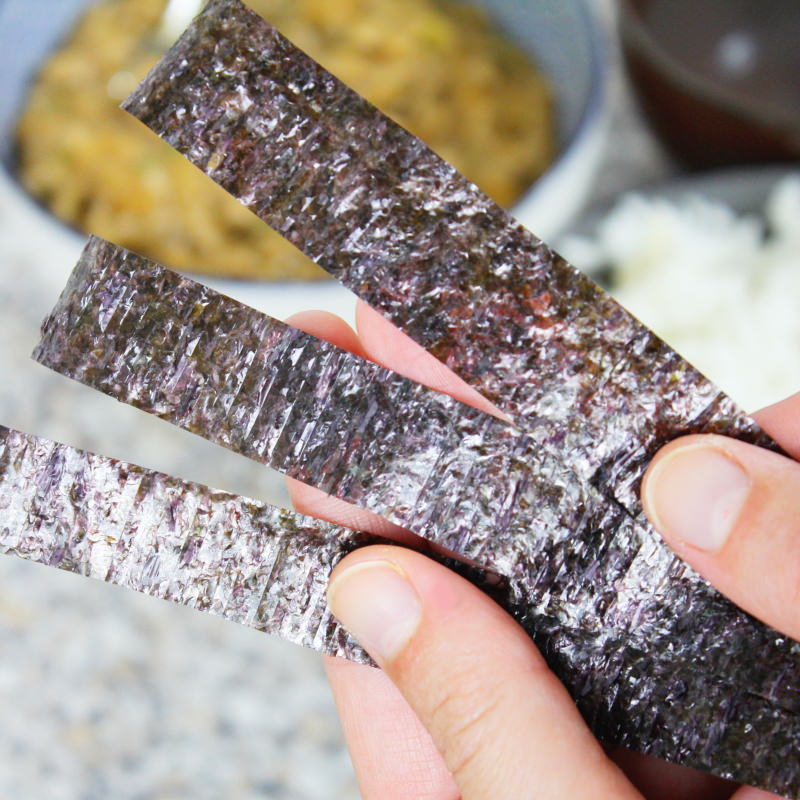
Step 5
Cut the Nori sheet into 3 cm wide strips using scissors.

Passaggio 6
Now take out the rice. Next, fill a small bowl with lightly salted water and set it aside. Dip the onigiri mould (large and small sides) into the water to shape the rice balls, then allow them to drain briefly.
Fill the large side of the onigiri mould halfway with about 50 g of the prepared rice and form a small hollow in the centre for the filling.
Place some of the filling into the hollow (but not too much, otherwise it will all spill out).
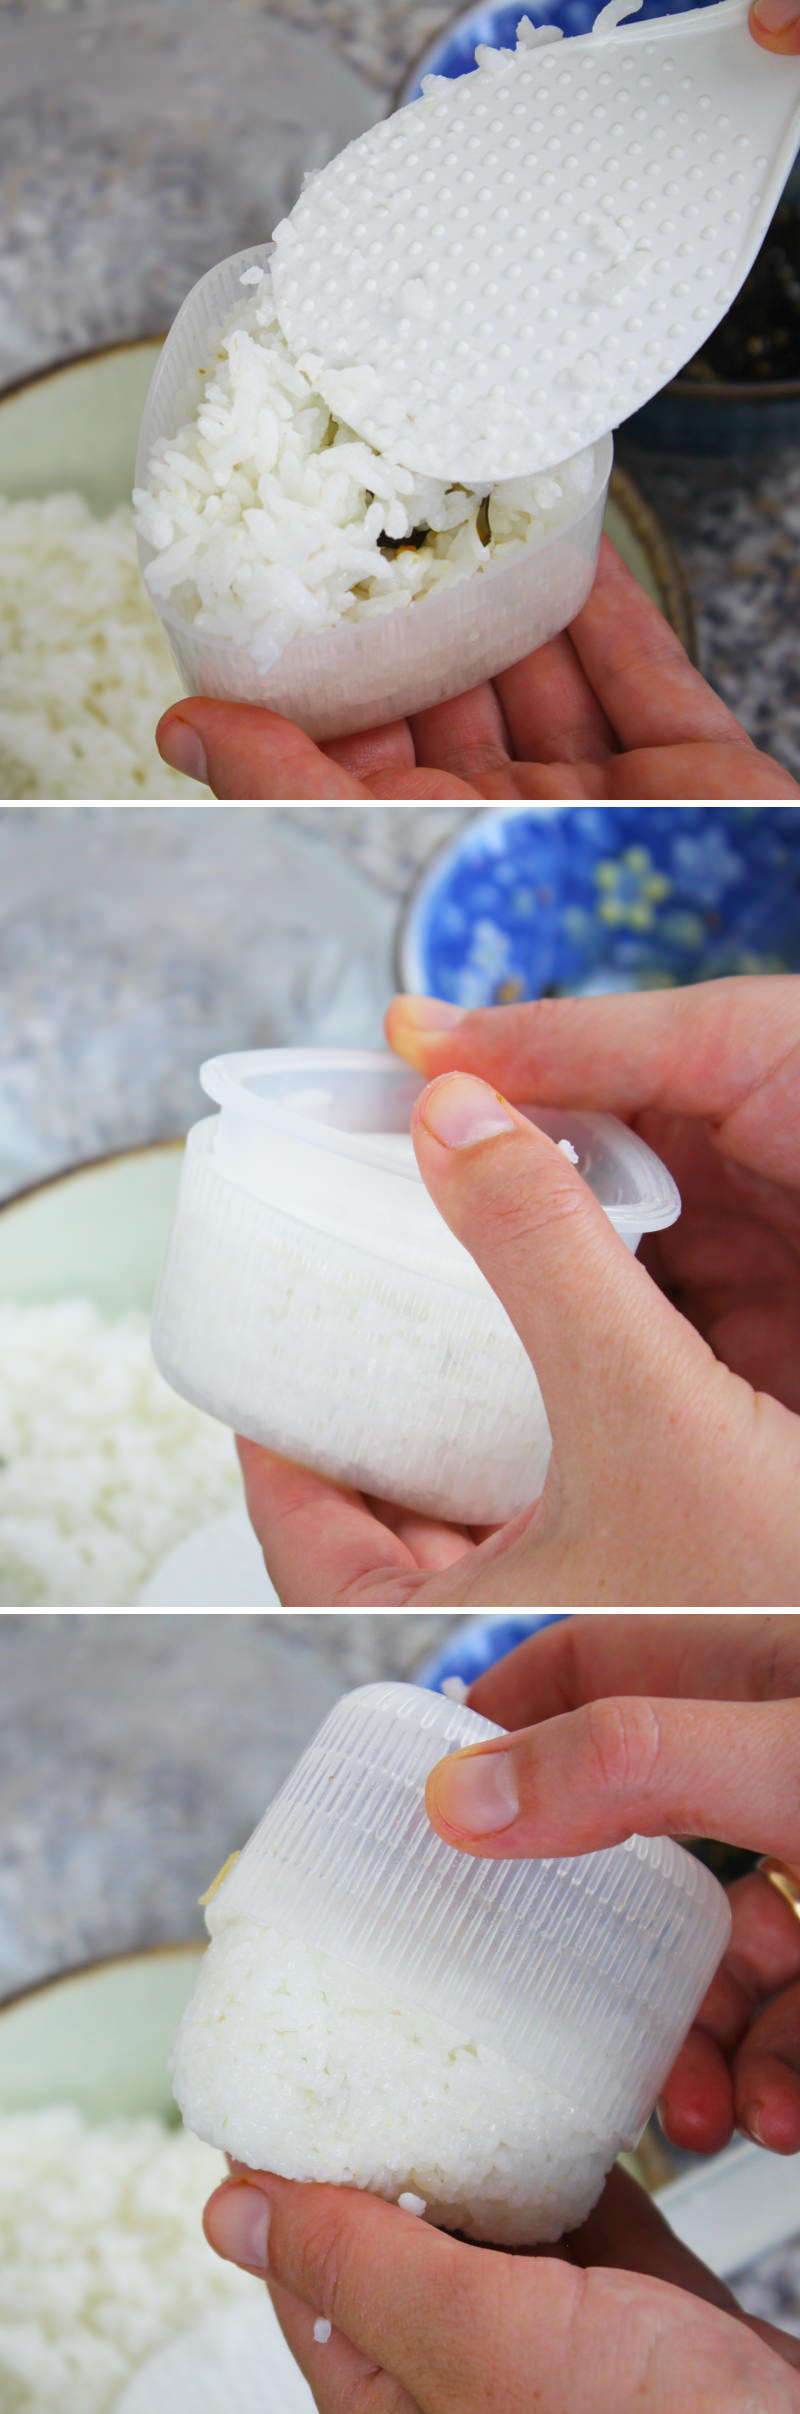
Step 7
Next, fill the mould with 50 g of rice (but do not fill it beyond the rim, otherwise everything will spill out from the sides) .
Now place the lid of the onigiri mould onto the rice and press both sides together with light pressure. Open the onigiri mould by removing the lid. On the back of the larger side of the mould, press the small triangle slightly inwards to remove the rice triangle from the mould.
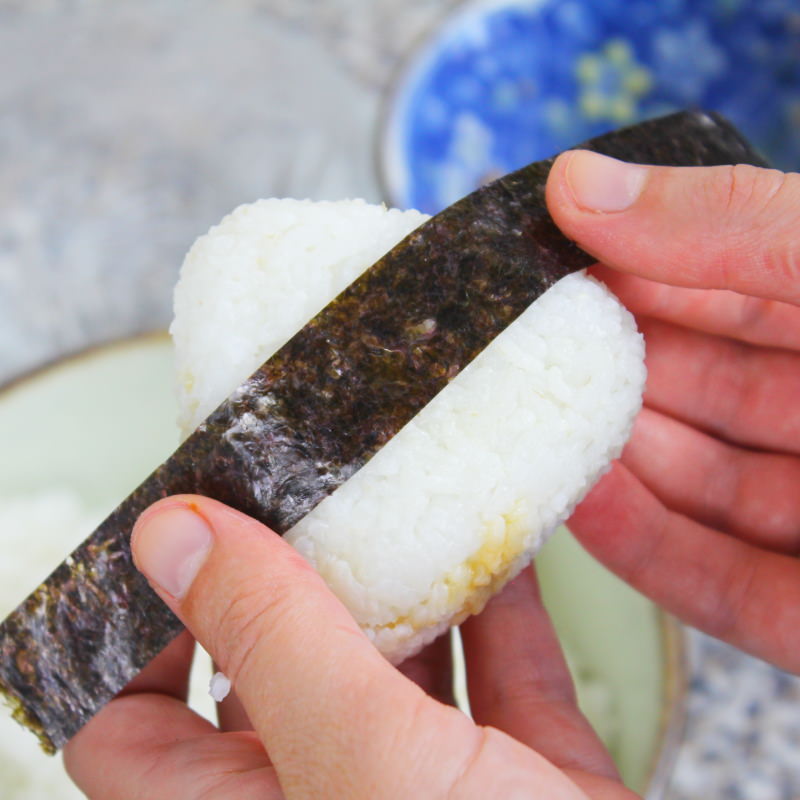
Step 8
Wrap the rice triangle in the cut-to-size Nori sheets .
Use the remaining ingredients to make 5 more Onigiri!
9. Step
Once the Onigiri are ready, they should be eaten as soon as possible. Onigiri are best when fresh, as the rice dries out quickly after a while and the nori sheet becomes slightly soggy. Done – Itadakimasu!
Are you looking for even more delicious Onigiri recipe ideas from Japan? Here you’ll find my most popular guides:
No post found!
Have you tried the recipe? Let me know in the comments – I can’t wait to hear from you!